Chocolate Cream Filled Fudge Cake
Chocolate Cream Filled Fudge Cake
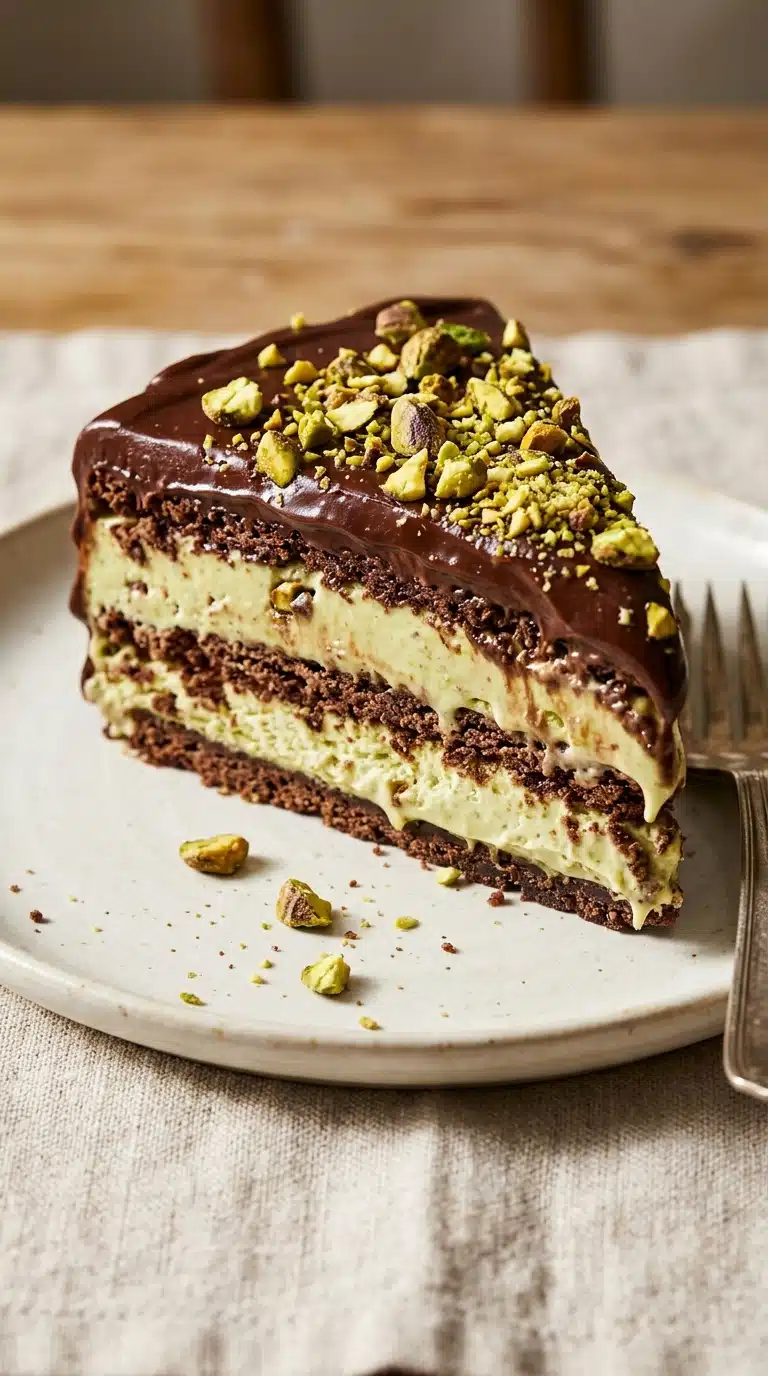
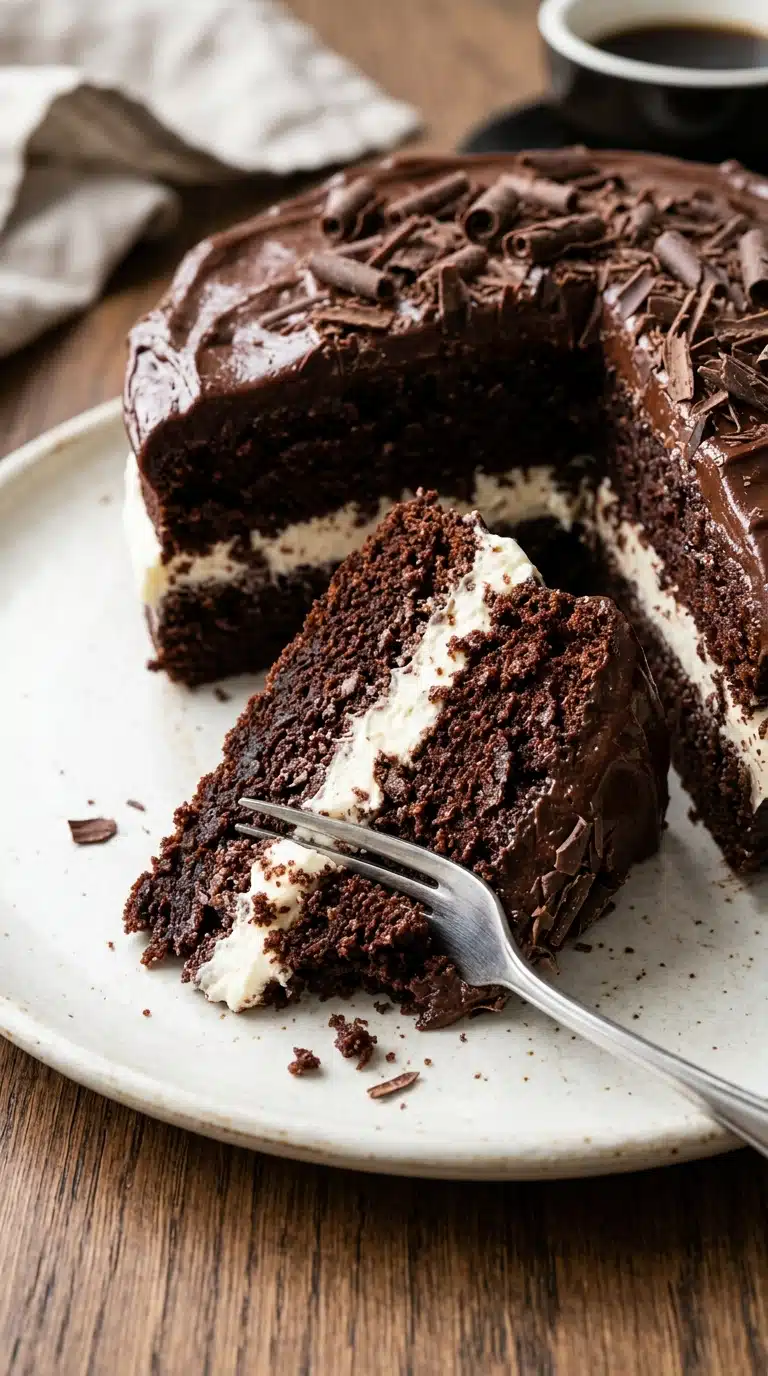
Chocolate Cream Filled Fudge Cake represents the pinnacle of indulgent dessert craftsmanship, combining rich cocoa layers with a luscious cream center. This magnificent creation brings together the deep intensity of dark chocolate and the silky smoothness of cream cheese filling. Every slice reveals a stunning contrast between the dense cake and the pale, fluffy interior. Trust me, you’re going to love this showstopper for your next celebration.
The Decadent Appeal of Chocolate Cream Filled Fudge Cake
There’s something magical about cutting into a towering chocolate cake and discovering a hidden layer of creamy goodness inside. The aroma of warm cocoa fills your kitchen as the layers bake to perfection, creating an inviting atmosphere that draws everyone near. This dessert balances richness with elegance, making it suitable for both casual family dinners and formal gatherings. The combination of textures creates a symphony in every bite, from the tender crumb to the velvety frosting.
A Historical Journey Through Chocolate Cake
Chocolate cake has evolved significantly since its introduction in the mid-19th century when cocoa powder became widely available to home bakers. The concept of filled cakes gained popularity during the Victorian era, when elaborate layer cakes became symbols of hospitality and celebration across Europe and America. Today, the chocolate cream filled fudge cake stands as a testament to this rich tradition, combining old-world techniques with modern tastes. You can learn more about the history of cocoa processing at Wikipedia.
Why This Chocolate Cream Filled Fudge Cake Belongs in Your Kitchen
Versatile: This cake transitions seamlessly from birthday celebrations to holiday feasts, adapting to any occasion with simple decoration changes.
Budget-Friendly: Using pantry staples like flour, sugar, and cocoa powder keeps costs reasonable while delivering bakery-quality results.
Quick and Easy: Despite its impressive appearance, the straightforward mixing method requires no special techniques or complicated procedures.
Customizable: You can adjust the filling thickness or frosting intensity to match your personal preference without compromising the structure.
Crowd-Pleasing: The combination of chocolate and cream cheese appeals to nearly every palate, making it a safe bet for mixed groups.
Make-Ahead Friendly: Both the cake layers and filling can be prepared a day in advance, allowing you to assemble when convenient.
Great for Leftovers: The moist crumb actually improves after a day in the refrigerator, maintaining its texture and flavor beautifully.
Expert Techniques and Essential Tools
For the creamiest filling, ensure your cream cheese and butter reach true room temperature before mixing to prevent lumps. When adding the hot coffee to the batter, pour slowly while stirring to maintain the smooth consistency without splashing. Chill your assembled cake briefly before the final frosting to seal in the crumbs and create a professional finish. Check out proper mixing techniques at Serious Eats.
Stand Mixer or Hand Mixer: Essential for achieving the fluffy texture in both the cream filling and fudge frosting without exhausting your arms.
Two 9-inch Round Cake Pans: These create the perfect layer thickness for optimal filling-to-cake ratio in every slice.
Parchment Paper: Prevents sticking and ensures your delicate chocolate layers release cleanly from the pans.
Wire Cooling Racks: Allow air circulation beneath the warm cakes, preventing soggy bottoms and promoting even cooling.
Offset Spatula: Provides the control needed for smooth frosting application and decorative swirls on the finished cake.
Your Complete Ingredient Guide
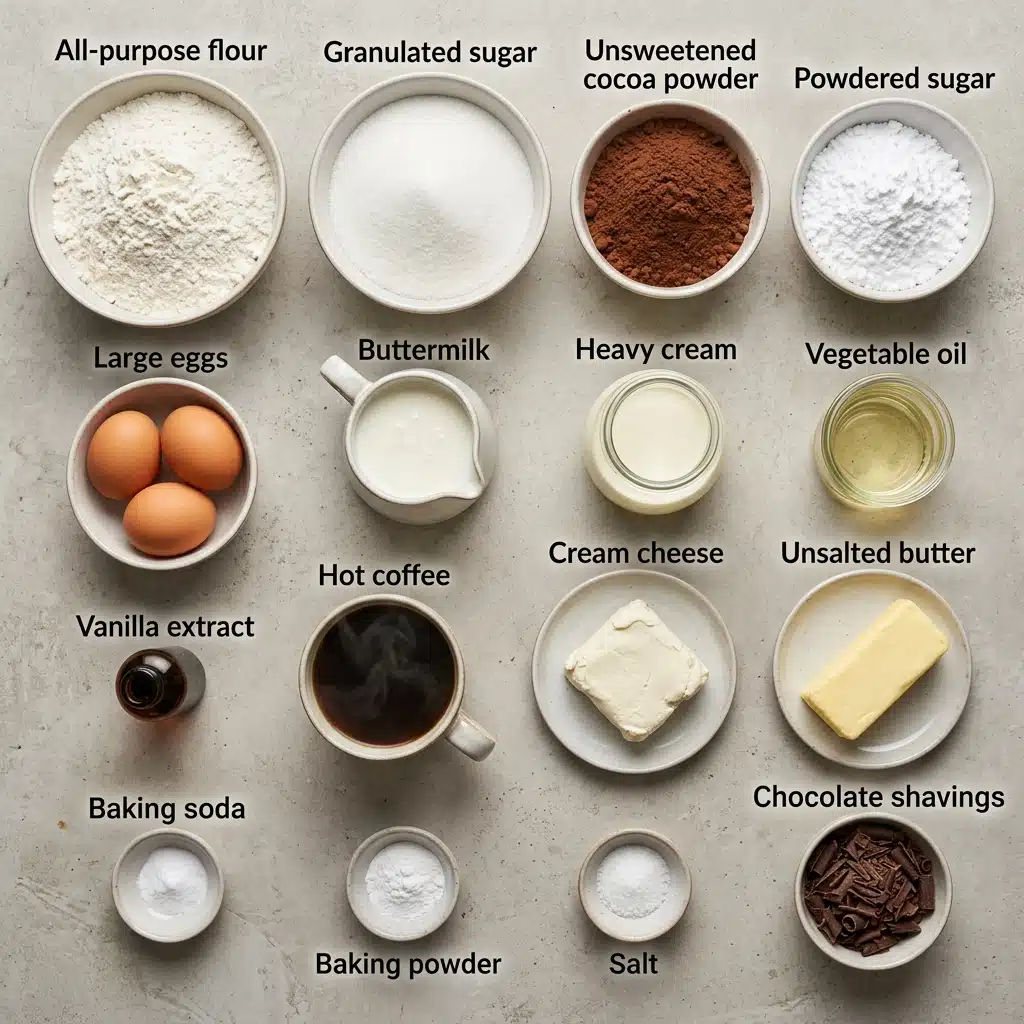
Before you begin creating this Chocolate Cream Filled Fudge Cake, gather these quality components that will transform into your masterpiece. Each ingredient plays a crucial role in creating the perfect balance of flavor and texture. For best results, measure everything accurately using standard measuring cups and spoons.
For the chocolate cake:
- All-purpose flour: 2 cups (240 g) – provides the structural foundation for the tender crumb.
- Granulated sugar: 2 cups (400 g) – sweetens the batter and helps create the fine texture.
- Unsweetened cocoa powder: 3/4 cup (65–75 g) – delivers intense chocolate flavor and rich color.
- Baking soda: 2 tsp – reacts with acidic buttermilk to create lift and tenderness.
- Baking powder: 1 tsp – provides additional leavening for the perfect rise.
- Salt: 1 tsp – enhances the chocolate flavor and balances sweetness.
- Large eggs: 2, at room temperature – bind the ingredients and add richness.
- Buttermilk: 1 cup (240 ml) – adds tang and moisture while activating the baking soda.
- Vegetable oil: 1/2 cup (120 ml) – ensures the cake stays moist longer than butter alone.
- Vanilla extract: 2 tsp – rounds out the chocolate flavor with aromatic depth.
- Hot coffee or hot water: 1 cup (240 ml) – blooms the cocoa powder for deeper flavor.
For the cream filling:
- Cream cheese: 8 oz (226 g), softened – creates the tangy, rich base for the filling.
- Unsalted butter: 1/2 cup (113 g), softened – adds silkiness and helps the filling set.
- Powdered sugar: 3 cups (360 g) – sweetens while maintaining the smooth texture.
- Vanilla extract: 2 tsp – complements the cream cheese with warm notes.
- Heavy cream: 2–3 tbsp – adjusts the consistency to perfectly spreadable.
- Salt: A pinch – cuts through the sweetness.
For the chocolate fudge frosting:
- Unsalted butter: 1 cup (226 g), softened – creates the creamy base for the fudge frosting.
- Unsweetened cocoa powder: 3/4 cup (65–75 g) – provides intense chocolate flavor.
- Powdered sugar: 4 cups (480 g) – structures and sweetens the frosting.
- Heavy cream: 1/2 cup (120 ml), plus more if needed – achieves the perfect spreading consistency.
- Vanilla extract: 2 tsp – adds complexity to the chocolate.
- Salt: 1/4 tsp – balances the sweetness.
For decoration:
- Chocolate shavings or chocolate sprinkles: For topping.
- Chocolate ganache: Optional for drizzling.
Smart Substitutions:
Buttermilk: Combine 1 cup milk with 1 tablespoon lemon juice or vinegar, let stand 5 minutes.
Hot coffee: Use decaffeinated coffee or strong brewed tea for a caffeine-free version.
Cream cheese: Neufchâtel cheese offers a lower-fat alternative with similar tang.
Spotlight Ingredients:
Cream Cheese: This tangy dairy product creates the signature filling texture that sets this cake apart from standard chocolate layer cakes, providing a cool contrast to the rich chocolate.
Unsweetened Cocoa Powder: The quality of your cocoa directly impacts the final flavor, so choose a Dutch-processed variety for deeper color and smoother taste.
Step-by-Step Assembly
Now comes the satisfying process of bringing these elements together into one spectacular dessert. Follow these steps carefully to ensure each layer bakes evenly and the fillings reach the perfect consistency. Remember that patience during cooling prevents sliding layers later.
Prepare the oven: Preheat the oven to 350°F (175°C). Grease and line two 9-inch round cake pans with parchment paper. This preparation step ensures your delicate chocolate layers will release cleanly without sticking to the pan surfaces.
Mix the dry ingredients: In a large bowl, whisk together the flour, sugar, cocoa powder, baking soda, baking powder, and salt. Combining these thoroughly distributes the leavening agents evenly so your cake rises uniformly without tunnels or dense spots.
Add the wet ingredients: Add the eggs, buttermilk, vegetable oil, and vanilla extract. Mix until combined. The batter will come together quickly into a thick, glossy mixture that promises a moist final crumb.
Add the hot liquid: Slowly stir in the hot coffee or hot water. The batter will be thin; this helps create a moist chocolate cake. Don’t worry if the consistency seems runny compared to other cake batters, as this liquidity ensures the final texture stays incredibly tender.
Bake the layers: Divide the batter evenly between the prepared pans. Bake for approximately 28–34 minutes, or until a toothpick inserted into the center comes out with a few moist crumbs. Start checking at 28 minutes to prevent overbaking, which would dry out your cake layers.
Cool completely: Let the cakes rest in their pans for 10 minutes, then transfer them to wire racks to cool completely. This resting period allows the structure to set while the pans are still warm, making removal easier without breakage.
Prepare the cream filling: Beat the softened cream cheese and butter until smooth and fluffy. Gradually add the powdered sugar, then mix in the vanilla, salt, and enough heavy cream to create a thick, spreadable filling. The mixture should hold peaks but spread easily without tearing the cake.
Make the fudge frosting: Beat the butter and cocoa powder until smooth. Gradually add the powdered sugar, alternating with the heavy cream. Add the vanilla and salt, then beat until creamy and fluffy. This alternating method prevents lumps and creates the silky texture that makes fudge frosting so irresistible.
Assemble the cake: Place one cake layer on a serving plate. Spread the cream filling evenly over the top, leaving a small border around the edge. This border prevents the filling from squishing out when you add the top layer.
Add the second layer: Place the second cake layer on top and press gently to secure it. Apply even pressure to ensure the layers adhere without shifting during the frosting process.
Frost the cake: Cover the top and sides with the chocolate fudge frosting. Use a spatula to create thick, decorative swirls. The swirls catch light beautifully and hide any imperfections in your crumb coat.
Decorate and chill: Add chocolate shavings or sprinkles. Drizzle with ganache if desired, then refrigerate for about 30 minutes to help the layers set. This chilling firms up the filling and frosting, making slicing clean and precise.
Slice and serve: Cut with a sharp knife to reveal the rich chocolate layers and creamy center. Serve slightly chilled or at room temperature. For clean cuts, wipe your knife blade between slices.
Timing, Nutrition and Troubleshooting
Even experienced bakers encounter challenges with layered cakes, but knowing what to watch for makes all the difference. Pay attention to temperature and timing to avoid common pitfalls that affect texture and presentation.
- Skipping the parchment: Always line your pans, as chocolate cakes are particularly tender and prone to sticking without this safeguard.
- Rushing the cooling: Attempting to frost warm layers will melt the cream filling and cause sliding; patience here is crucial.
- Overmixing the batter: Once you add the wet ingredients, mix just until combined to prevent a tough, rubbery crumb.
Preparation Time:
Prep Time: 45 minutes
Cook Time: 34 minutes
Total Time: 1 hour 19 minutes plus cooling
Nutrition Facts:
Servings: 12
Calories per serving: 580
Note: These are approximate values.
Creative Variations to Explore
Transform this classic into new creations by swapping elements while maintaining the structure. Each variation offers a different flavor profile while preserving the beloved cream-filled concept.
- Mocha Madness: Add 2 tablespoons instant espresso powder to the cake batter and coffee filling for an adult twist.
- Berry Bliss: Fold 1/2 cup raspberry preserves into the cream filling for a fruity contrast.
- Nutty Delight: Press chopped toasted almonds onto the frosting sides for crunch and visual interest.
- Peppermint Twist: Substitute peppermint extract for vanilla in the frosting and add crushed candy canes on top.
- Caramel Dream: Drizzle salted caramel sauce between the cake and filling layers before assembling.
FAQ’s
1. Can I make this cake ahead of time?
Yes, you can bake the cake layers up to two days in advance. Wrap them tightly in plastic wrap and store at room temperature. Prepare the filling and frosting the day of assembly for best texture.
2. Why is my cake dry?
Overbaking is the usual culprit. Check for doneness at the minimum time, looking for a few moist crumbs on the toothpick rather than a completely clean one.
3. Can I freeze this cake?
Freeze unfrosted cake layers wrapped well for up to three months. Thaw overnight in the refrigerator before filling and frosting.
4. Why did my filling slide out?
The cake layers were likely too warm or the filling too soft. Ensure complete cooling and consider chilling the filling briefly if your kitchen is warm.
5. Can I use natural cocoa instead of Dutch-process?
Yes, though the color will be lighter and the flavor less intense. The acid in natural cocoa also affects the rise slightly differently.
6. How do I prevent crumbs in my frosting?
Apply a thin crumb coat first, chill for 15 minutes, then apply the final layer of frosting. This seals in the crumbs effectively.
7. Can I make cupcakes instead?
Absolutely. Fill lined muffin tins two-thirds full and bake for 18-22 minutes. Core the centers and fill with the cream mixture.
8. Why did my cake sink in the middle?
Opening the oven door too early or underbaking can cause sinking. Wait until the minimum time passes before checking.
9. Is this recipe suitable for high altitude?
You may need to reduce sugar by 2 tablespoons and increase flour by 2 tablespoons if baking above 3,000 feet.
10. How should I store leftovers?
Keep refrigerated in an airtight container for up to five days. Bring to room temperature for 20 minutes before serving for best flavor.
Conclusion
Creating this Chocolate Cream Filled Fudge Cake brings pure joy to both the baker and those lucky enough to enjoy a slice. The combination of tender chocolate layers, tangy cream filling, and rich fudge frosting creates memories with every bite. Whether you’re celebrating a special milestone or simply craving something extraordinary, this cake delivers satisfaction that lasts long after the final crumb disappears. Gather your ingredients, preheat that oven, and prepare to fall in love with your new signature dessert.
PrintChocolate Cream Filled Fudge Cake
Chocolate Cream Filled Fudge Cake combines rich cocoa layers with a luscious cream cheese filling and chocolate fudge frosting for an indulgent dessert perfect for celebrations.
- Prep Time: 45 minutes
- Cook Time: 34 minutes
- Total Time: 1 hour 19 minutes plus cooling
- Yield: 12 servings
- Category: Dessert
- Method: Baking
- Cuisine: American
- Diet: Vegetarian
Ingredients
- For the chocolate cake
- 2 cups (240 g) all-purpose flour
- 2 cups (400 g) granulated sugar
- 3/4 cup (65–75 g) unsweetened cocoa powder
- 2 tsp baking soda
- 1 tsp baking powder
- 1 tsp salt
- 2 large eggs, at room temperature
- 1 cup (240 ml) buttermilk
- 1/2 cup (120 ml) vegetable oil
- 2 tsp vanilla extract
- 1 cup (240 ml) hot coffee or hot water
- For the cream filling
- 8 oz (226 g) cream cheese, softened
- 1/2 cup (113 g) unsalted butter, softened
- 3 cups (360 g) powdered sugar
- 2 tsp vanilla extract
- 2–3 tbsp heavy cream
- A pinch of salt
- For the chocolate fudge frosting
- 1 cup (226 g) unsalted butter, softened
- 3/4 cup (65–75 g) unsweetened cocoa powder
- 4 cups (480 g) powdered sugar
- 1/2 cup (120 ml) heavy cream, plus more if needed
- 2 tsp vanilla extract
- 1/4 tsp salt
- For decoration
- Chocolate shavings or chocolate sprinkles
- Chocolate ganache (optional)
Instructions
- Prepare the oven: Preheat the oven to 350°F (175°C). Grease and line two 9-inch round cake pans with parchment paper.
- Mix the dry ingredients: In a large bowl, whisk together the flour, sugar, cocoa powder, baking soda, baking powder, and salt.
- Add the wet ingredients: Add the eggs, buttermilk, vegetable oil, and vanilla extract. Mix until combined.
- Add the hot liquid: Slowly stir in the hot coffee or hot water. The batter will be thin; this helps create a moist chocolate cake.
- Bake the layers: Divide the batter evenly between the prepared pans. Bake for approximately 28–34 minutes, or until a toothpick inserted into the center comes out with a few moist crumbs.
- Cool completely: Let the cakes rest in their pans for 10 minutes, then transfer them to wire racks to cool completely.
- Prepare the cream filling: Beat the softened cream cheese and butter until smooth and fluffy. Gradually add the powdered sugar, then mix in the vanilla, salt, and enough heavy cream to create a thick, spreadable filling.
- Make the fudge frosting: Beat the butter and cocoa powder until smooth. Gradually add the powdered sugar, alternating with the heavy cream. Add the vanilla and salt, then beat until creamy and fluffy.
- Assemble the cake: Place one cake layer on a serving plate. Spread the cream filling evenly over the top, leaving a small border around the edge.
- Add the second layer: Place the second cake layer on top and press gently to secure it.
- Frost the cake: Cover the top and sides with the chocolate fudge frosting. Use a spatula to create thick, decorative swirls.
- Decorate and chill: Add chocolate shavings or sprinkles. Drizzle with ganache if desired, then refrigerate for about 30 minutes to help the layers set.
- Slice and serve: Cut with a sharp knife to reveal the rich chocolate layers and creamy center. Serve slightly chilled or at room temperature.
Notes
- Always line pans with parchment paper as chocolate cakes are tender and prone to sticking.
- Ensure cake layers cool completely before frosting to prevent melting the cream filling and causing layers to slide.
- Mix batter just until combined after adding wet ingredients to prevent a tough, rubbery crumb.
- Chill assembled cake briefly before final frosting to seal crumbs and create professional finish.
Nutrition
- Serving Size: 1 slice
- Calories: 580