Bloody Severed Witch Finger Shortbread
Bloody Severed Witch Finger Shortbread
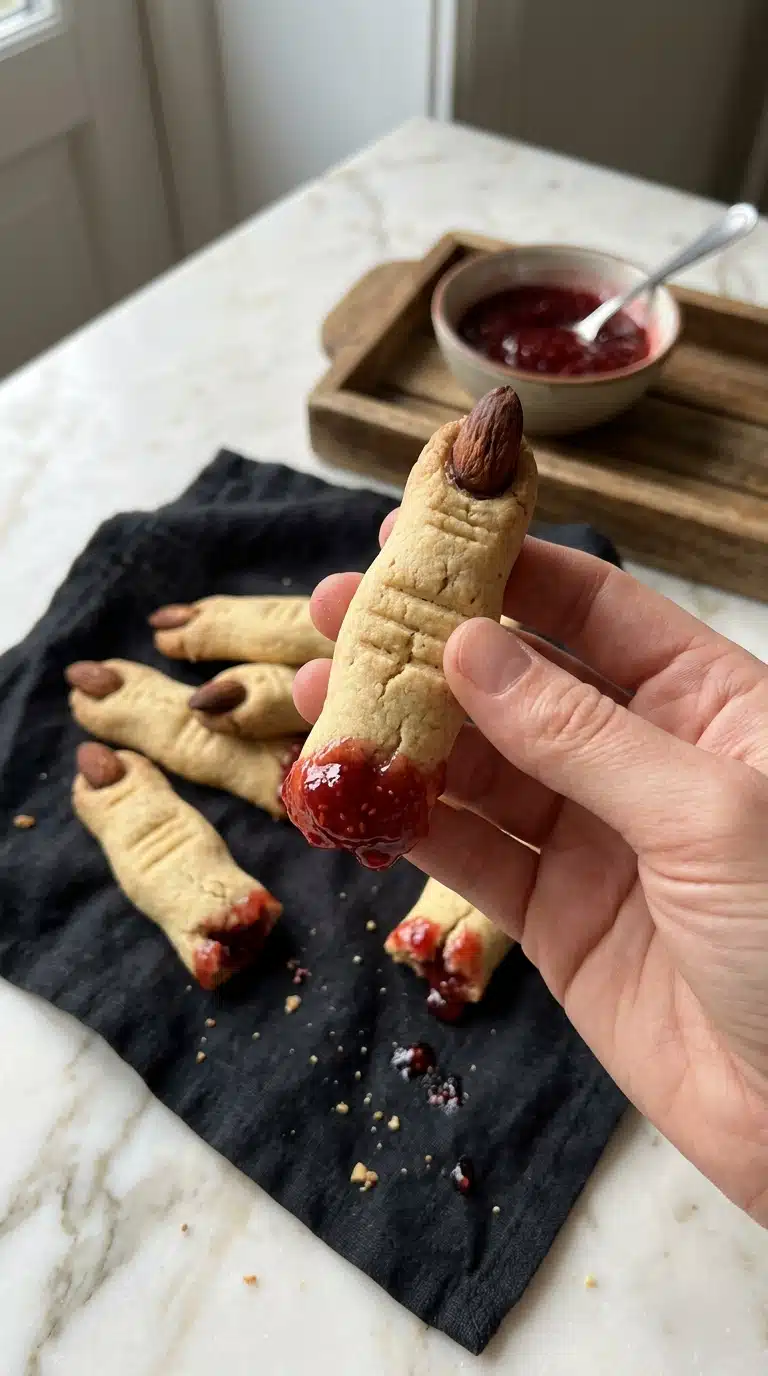
Bloody Severed Witch Finger Shortbread is the ultimate creepy treat for your next Halloween gathering. These buttery cookies look terrifyingly realistic with knobby knuckles, almond fingernails, and sticky jam blood. Trust me, you’re going to love this wickedly fun dessert.
The texture is crisp yet tender, melting on your tongue with sweet vanilla and almond notes. Every bite delivers classic shortbread richness without any complicated tricks. It’s worth every bite when you see your guests do a double take.
The Spooky Appeal of Bloody Severed Witch Finger Shortbread
There’s something delightfully mischievous about serving cookies that look like severed witch fingers. The pale golden dough wrinkles just like real knuckles, while glossy red jam drips from the stump. Kids gasp, adults laugh, and everyone reaches for a second finger.
A Haunted History Behind the Treat
Witch lore has haunted European folklore for centuries, and modern Halloween baking embraces those spooky symbols. Shortbread itself traces back to Scotland, where butter-rich biscuits were prized for their simplicity. Combining that heritage with creepy finger shapes creates a perfect fusion of old-world comfort and new-world fright night fun.
Why This Shortbread Belongs in Your Recipe Box
Versatile: These cookies fit every Halloween event, from classroom parties to haunted house buffets.
Budget-Friendly: You only need basic pantry staples like butter, flour, and sugar to pull off the magic.
Quick and Easy: The dough comes together in minutes and bakes in under twenty.
Customizable: You can make the fingers as slender or chunky as you like without changing the ingredient list.
Crowd-Pleasing: The creepy appearance thrills kids while the buttery flavor satisfies adults.
Make-Ahead Friendly: Bake them a day early and add the jam blood just before serving.
Great for Leftovers: Any uneaten fingers stay crisp in an airtight container for several days.
Expert Tips for Perfect Witch Fingers
Getting the details right makes these shortbread fingers truly horrifying. Here are a few insider secrets to nail the look and texture every single time.
Use room temperature butter so it creams smoothly with the powdered sugar without any lumps. For more on this foundational step, read about creaming butter and sugar.
Chill the dough for the full thirty minutes if your kitchen is warm, because soft dough loses its knuckle shape in the oven.
Score the knuckle wrinkles deeply enough to survive baking, but not so deep that the finger breaks.
Press the almond firmly into the dough so it adheres during baking and does not fall off when dipped in jam.
Essential Tools for This Creepy Project
You do not need fancy gadgets to create these spooky treats. A few reliable basics will carry you from butter to blood.
Large mixing bowl: This gives you plenty of room to cream the butter and sugar without spills.
Electric mixer: Beating air into the butter creates the light, creamy base that makes shortbread tender.
Baking sheet and parchment paper: The parchment prevents sticking and makes cleanup effortless after baking.
Butter knife: This simple tool scores perfect knuckle wrinkles without cutting through the dough.
Small saucepan or microwave-safe dish: Use this to warm the seedless raspberry or strawberry jam until it is runny enough for dipping.
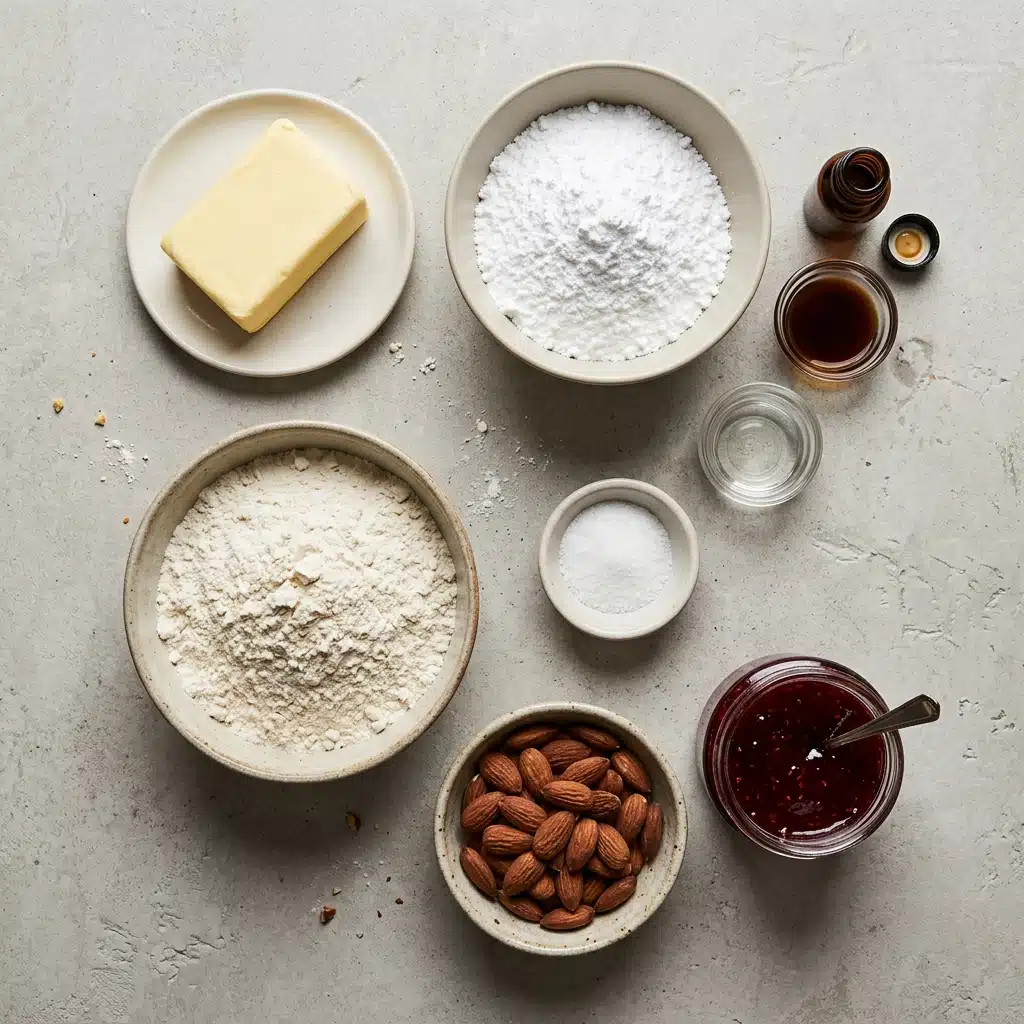
Everything You Need for Bloody Severed Witch Finger Shortbread
Gather your ingredients and prepare for a wonderfully gory baking session. Each component plays a specific role in creating both flavor and fright.
- Unsalted butter: 1 cup (225 g), softened to room temperature. It builds the rich, melt-in-your-mouth shortbread texture.
- Powdered sugar: ¾ cup (90 g). It sweetens gently and dissolves seamlessly into the butter for a smooth dough.
- Pure vanilla extract: 1 tsp. It adds warm, floral depth that balances the buttery base.
- Almond extract: ½ tsp. It reinforces the nutty aroma and ties the flavor to the whole almond fingernails.
- All-purpose flour: 2 ¼ cups (280 g). This provides the structure that holds the creepy finger shape during baking.
- Fine sea salt: ¼ tsp. It sharpens the sweetness and keeps the flavor profile from tasting flat.
- Whole unblanched almonds: 30–35. These become the gnarly fingernails perched atop each finger tip.
- Seedless raspberry or strawberry jam: ⅓ cup (80 ml). This creates the glossy, dripping blood effect at the severed base.
Simple Substitutions to Consider
This recipe keeps things simple, and the ingredient list already offers built-in flexibility. Here is how to swap within the given lineup.
Seedless raspberry or strawberry jam: Choose either flavor interchangeably, since both are already included in your ingredient list.
Whole unblanched almonds: If your almonds look too clean, press them gently into the dough so the skin side faces up for extra texture.
Spotlight on the Star Players
Two ingredients do the heavy lifting when it comes to the scare factor.
Whole unblanched almonds: These nuts transform from simple pantry items into creepy witch fingernails thanks to their natural shape and papery brown skin.
Seedless raspberry or strawberry jam: This sticky, ruby-red spread becomes the theatrical blood that convinces everyone these fingers were truly severed.
Step-by-Step: Bringing Bloody Severed Witch Finger Shortbread to Life
Follow these exact steps to conjure the perfect batch of creepy cookies. Each stage builds on the last, so take your time and enjoy the process.
- Cream the Base: In a large mixing bowl, beat the softened butter and powdered sugar together until smooth, light, and creamy. Take an extra minute here to whip plenty of air into the mixture, which gives the shortbread its delicate, sandy crumb.
- Add Flavor: Beat in the vanilla extract, almond extract, and salt until completely blended. The aroma will immediately fill your kitchen with sweet, nutty warmth that signals Halloween is near.
- Form the Dough: Gradually add the all-purpose flour, mixing just until a cohesive, smooth shortbread dough comes together. Cover and chill in the refrigerator for 20–30 minutes to make shaping easier. Do not skip the chill, because warm dough will smudge those precious knuckle wrinkles.
- Shape the Fingers: Line a baking sheet with parchment paper. Scoop small portions of dough (about 1 tablespoon each) and roll them into slender finger-like logs. Pinch in two spots to create knuckles, and score light horizontal slits with a butter knife for knuckle wrinkles. Make them slightly thinner than you want, since shortbread barely spreads.
- Attach Nails: Firmly press a whole almond into the tip of each finger to create the creepy fingernail bed. Push deep enough that the nut nestles securely, or it might loosen when you dip the baked cookies into jam.
- Bake: Preheat your oven to 350°F (175°C). Bake the shaped cookies for 14–16 minutes, until firm and lightly pale-golden around the edges. Let them cool completely on the tray. They will feel soft at first but firm up as they cool, so resist moving them too soon.
- Add the Blood: Warm the seedless raspberry jam slightly until runny. Dip the severed blunt base of each cooled cookie into the jam, letting thick, glossy red drops pool and drip down the sides. The contrast between the pale cookie and the vivid jam makes the final effect absolutely chilling.
What to Avoid When Making These Cookies
Even a simple shortbread can go sideways if you rush. Watch out for these common pitfalls and know how to fix them.
Do not use cold butter, or the dough will never become light and creamy no matter how long you beat it.
Avoid overmixing once the flour goes in, or you will develop gluten and lose that tender shortbread texture.
Do not shape the fingers too thick, or the centers may stay doughy while the edges overbrown.
Skip the cooling step before adding jam, and the heat will melt the blood into a thin glaze instead of thick drips.
Nutrition Facts for This Creepy Treat
Servings: 32
Calories per serving: 110
Note: These are approximate values.
Preparation Time Breakdown
Prep Time: 25 minutes
Cook Time: 15 minutes
Total Time: 50 minutes
Variations to Try This Halloween
You can switch up the look without touching the ingredient list.
Make some fingers shorter and squatter for a gnarled, broken effect.
Score extra wrinkles near the fingertip to suggest an aged, arthritic witch hand.
Dip only half the batch in jam blood and leave the rest plain for a less gruesome presentation.
Twist the dough slightly before baking to create a gnarled, crooked finger shape.
Cluster three fingers together on the tray so they bake touching, suggesting a whole hand fell apart.
FAQ’s
- Can I freeze the dough? Yes, you can wrap the dough tightly and freeze it for up to one month. Thaw overnight in the refrigerator before shaping your witch finger shortbread.
- Why did my cookies spread? If the butter was too soft or the dough was not chilled, the fingers may lose their shape. Always start with room temperature butter, then chill the formed dough as directed.
- Can I use a different nut for the nail? The recipe calls for whole unblanched almonds, and they provide the best visual effect. Other nuts may not mimic a fingernail shape.
- How do I store leftover cookies? Keep them in an airtight container at room temperature for up to five days. Add the jam blood just before serving for the freshest look.
- Can I double the recipe? Absolutely. Simply double every ingredient and bake in batches so the cookies do not crowd on the sheet.
- Why is my jam too thick to dip? Warm it gently for a few seconds until runny. If it overheats, let it cool slightly so it clings instead of sliding off.
- Can kids help make these? Yes, shaping the fingers and pressing in almonds are perfect tasks for little helpers.
- Do I need a stand mixer? No, an electric hand mixer or even a sturdy wooden spoon works fine for creaming the butter and sugar.
- Why shortbread instead of sugar cookie dough? Shortbread holds a firm shape and delivers a richer, more buttery flavor that pairs beautifully with the almond and vanilla extracts.
- Can I make these ahead? Bake the cookies up to two days in advance, then dip the ends in warm seedless raspberry or strawberry jam on the day you plan to serve them.
Conclusion
Bloody Severed Witch Finger Shortbread brings together buttery comfort and spooky spectacle in one unforgettable cookie. From the first creamy mix to the final jam-dipped severed end, every step feels like a delicious Halloween ritual. Bake a batch, watch your friends recoil and then reach for more, and know that this recipe will haunt your holiday playbook for years to come.
PrintBloody Severed Witch Finger Shortbread
Bloody Severed Witch Finger Shortbread is the ultimate creepy treat for your next Halloween gathering. These buttery cookies look terrifyingly realistic with knobby knuckles, almond fingernails, and sticky jam blood.
- Prep Time: 25 minutes
- Cook Time: 15 minutes
- Total Time: 50 minutes
- Yield: 32 cookies
- Category: Dessert
- Method: Baking
- Cuisine: Scottish
- Diet: Vegetarian
Ingredients
- 1 cup (225 g) unsalted butter, softened to room temperature
- ¾ cup (90 g) powdered sugar (confectioners’ sugar)
- 1 tsp pure vanilla extract
- ½ tsp almond extract
- 2 ¼ cups (280 g) all-purpose flour
- ¼ tsp fine sea salt
- 30–35 whole unblanched almonds (for the fingernails)
- ⅓ cup (80 ml) seedless raspberry or strawberry jam (for the bloody severed ends)
Instructions
- Cream the Base: In a large mixing bowl, beat the softened butter and powdered sugar together until smooth, light, and creamy.
- Add Flavor: Beat in the vanilla extract, almond extract, and salt until completely blended.
- Form the Dough: Gradually add the all-purpose flour, mixing just until a cohesive, smooth shortbread dough comes together. Cover and chill in the refrigerator for 20–30 minutes to make shaping easier.
- Shape the Fingers: Line a baking sheet with parchment paper. Scoop small portions of dough (about 1 tablespoon each) and roll them into slender finger-like logs. Pinch in two spots to create knuckles, and score light horizontal slits with a butter knife for knuckle wrinkles.
- Attach Nails: Firmly press a whole almond into the tip of each finger to create the creepy fingernail bed.
- Bake: Preheat your oven to 350°F (175°C). Bake the shaped cookies for 14–16 minutes, until firm and lightly pale-golden around the edges. Let them cool completely on the tray.
- Add the Blood: Warm the seedless raspberry jam slightly until runny. Dip the severed blunt base of each cooled cookie into the jam, letting thick, glossy red drops pool and drip down the sides.
Notes
- Use room temperature butter so it creams smoothly without lumps.
- Chill the dough for the full 30 minutes to prevent losing knuckle shape during baking.
- Score knuckle wrinkles deeply enough to survive baking, but not so deep that the finger breaks.
- Press the almond firmly into the dough so it adheres during baking.
- Do not use cold butter or the dough will never become light and creamy.
- Avoid overmixing once the flour is added to prevent tough shortbread.
- Do not shape fingers too thick or centers may stay doughy.
- Cool cookies completely before adding jam or heat will melt the blood into a thin glaze.
Nutrition
- Serving Size: 1 cookie
- Calories: 110