Homemade Crispy Potato Smiley Faces
Homemade Crispy Potato Smiley Faces
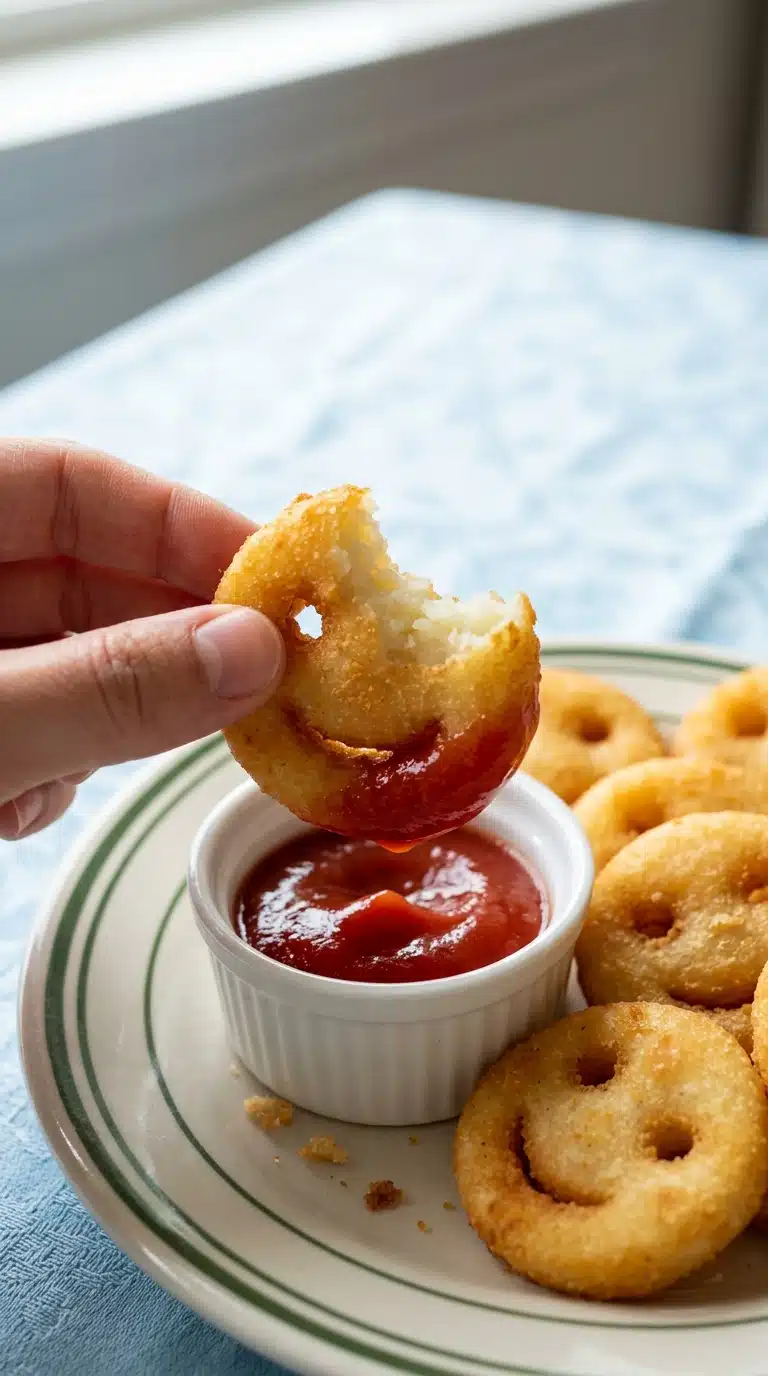
Homemade Crispy Potato Smiley Faces bring back the pure joy of childhood snacking with every golden, crunchy bite. These nostalgic treats transform humble boiled potatoes and simple pantry staples into edible expressions of happiness that crunch satisfyingly between your teeth. The exterior shatters delicately while the interior remains impossibly fluffy and tender. Trust me, you’re going to love this combination of comfort and whimsy that makes everyone at the table grin before they even take their first bite.
Why You’ll Love These Homemade Crispy Potato Smiley Faces
There’s something magical about food that smiles back at you, especially when it carries the aroma of freshly fried potatoes and warm bread. This recipe captures the essence of carefree afternoons and lunchbox surprises, elevating them with a homemade touch that frozen versions simply cannot match. The process feels like playful art, yet the results are seriously delicious.
Versatile: These smiley faces work beautifully as an after-school snack, a playful side dish for dinner, or the star attraction at a casual gathering.
Budget-Friendly: Made with just potatoes and basic pantry staples like bread and cornstarch, this recipe proves that delicious comfort food doesn’t require expensive ingredients.
Quick and Easy: From mixing bowl to finished plate in under thirty minutes, this is the kind of recipe that fits into real life without stress.
Customizable: Once you master the basic technique, you can adjust the seasonings or shapes to suit any mood or occasion.
Crowd-Pleasing: Watch adults and children alike light up when they see these cheerful faces heading toward the table.
Make-Ahead Friendly: Prepare the dough in advance and fry when ready, making entertaining or busy weeknights much smoother.
Great for Leftovers: While best fresh, these reheat beautifully in the oven, maintaining their crisp exterior for next-day enjoyment.
The Story Behind the Smile
Potato smiley faces emerged as a beloved frozen convenience food in the 1990s, capturing hearts with their cheerful appearance and crispy texture. However, the concept draws from much older European traditions of potato pancakes and bread-bound croquettes that stretch back centuries. Home cooks have long understood that combining starchy potatoes with absorbent bread creates the perfect texture for frying, a technique seen in Italian potato gnocchi and Irish potato farls. By shaping this mixture into smiling faces, we connect ancient culinary wisdom with modern playful presentation. This homemade version honors that heritage while bringing wholesome, preservative-free ingredients back to a classic comfort food.
Expert Secrets and Pitfalls to Avoid
Creating the perfect Homemade Crispy Potato Smiley Faces requires attention to texture and temperature, but the process is forgiving once you know the tricks. Success lies in achieving the right dough consistency and maintaining proper oil heat throughout frying.
Use warm potatoes: Working with potatoes that are still warm helps them bind with the bread without requiring additional liquid.
Don’t skip the kneading: Spending three to four minutes working the dough develops the starches properly, ensuring your smileys hold together during frying.
Maintain oil temperature: Keep your oil steady at around 350°F to prevent soggy results or burnt exteriors.
Work quickly when shaping: The dough dries out fast, so cut and shape your faces promptly before frying.
Avoid wet potatoes: If your boiled potatoes are waterlogged, let them steam dry for a few minutes before peeling to prevent gummy dough.
Don’t overcrowd the pan: Frying too many at once lowers the oil temperature, resulting in greasy rather than crispy smileys.
Fix sticky dough: If the mixture clings to your hands, dust them lightly with cornstarch rather than adding more bread.
Essential Kitchen Gear
You don’t need specialized equipment to create these cheerful snacks, but having the right tools makes the process smoother and safer. Gather these items before you begin to ensure a stress-free cooking experience.
Large Mixing Bowl: Provides ample space for kneading the potato mixture without spilling.
Rolling Pin: Essential for achieving the uniform half-inch thickness that ensures even cooking.
Circular Cookie Cutter or Glass: Creates perfect rounds; a three-inch diameter works best for classic smiley proportions.
Straw: A simple drinking straw punches clean, round eye holes effortlessly.
Spoon: The edge of a regular teaspoon carves those iconic smiling mouths with precision.
Heavy-Bottomed Pan: Distributes heat evenly for consistent frying results.
Slotted Spoon: Allows you to turn and remove the smileys while draining excess oil.
Paper Towels: Creates a resting place for freshly fried potatoes to drain without becoming soggy.
Your Shopping List
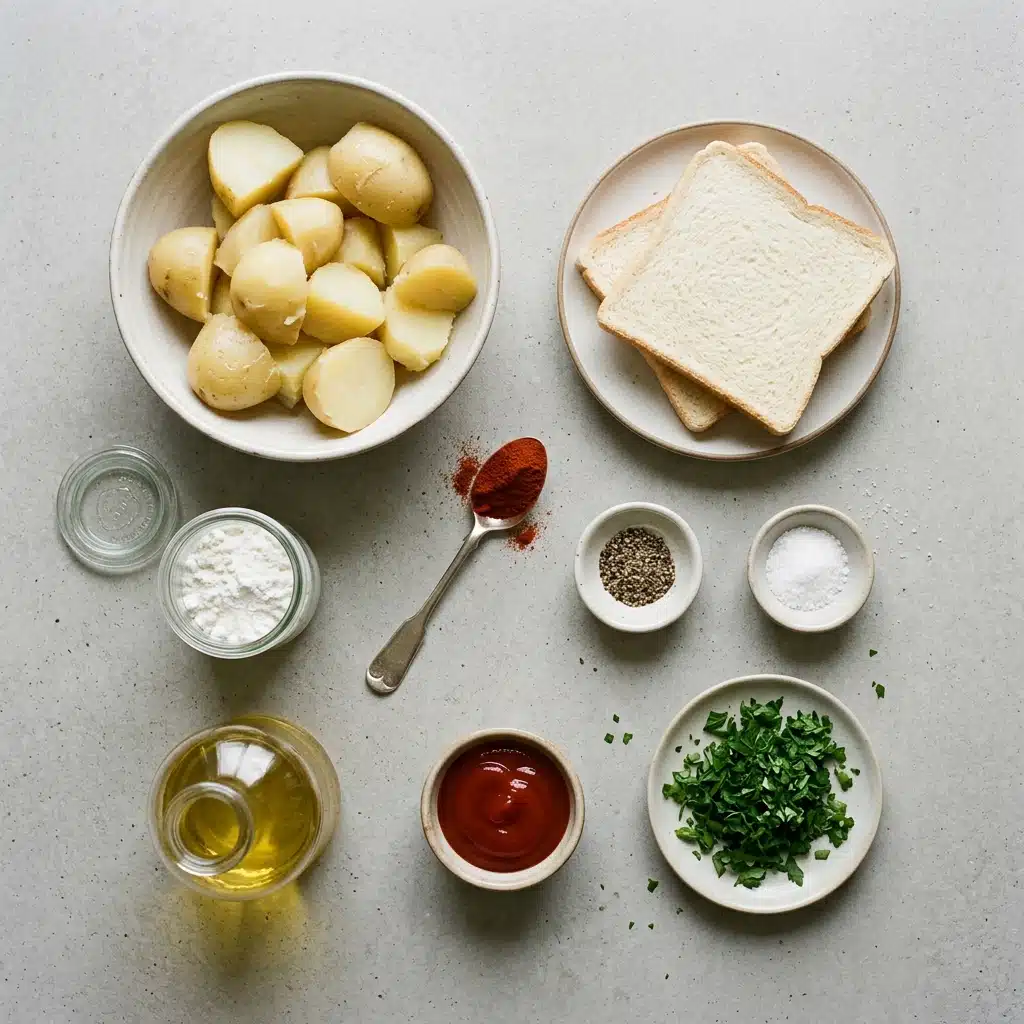
The beauty of Homemade Crispy Potato Smiley Faces lies in their simplicity, requiring only eight basic components that transform into something truly special. Each ingredient plays a crucial role in creating that signature texture and flavor that makes these irresistible.
Boiled and peeled potatoes: 500g (about 4 medium potatoes), starchy and fluffy, providing the creamy base that holds everything together.
Sliced white bread: 2 slices, crusts removed and diced into small cubes, acting as a binding agent to create that perfect tender interior.
Cornstarch: 2 tablespoons, for dusting and ensuring the dough doesn’t stick while helping the exterior turn shatteringly crisp.
Paprika: 1 teaspoon, lending a subtle smoky sweetness and beautiful golden-red color.
Black pepper: 1/2 teaspoon, freshly ground, adding a gentle kick that balances the potato’s earthiness.
Salt: 1 teaspoon, essential for bringing out the natural flavors of the potato.
Cooking oil for frying: 2 cups (or as needed), neutral in flavor with a high smoke point, to achieve that deep golden crunch.
Ketchup and fresh parsley: 1/4 cup ketchup for dipping and 2 tablespoons chopped fresh parsley for garnish, adding brightness and classic accompaniment.
Potatoes: You can use leftover mashed potatoes that have been chilled overnight, though the texture will be slightly softer.
White bread: Panko breadcrumbs soaked in a tablespoon of water work beautifully as a gluten-free alternative.
Cornstarch: Potato starch or tapioca starch can be substituted in equal measure for similar results.
Paprika: Smoked paprika or a pinch of cayenne pepper can replace regular paprika for different flavor profiles.
Potatoes: The foundation of this dish, choosing starchy varieties like Russet potatoes ensures a fluffy interior that crisps perfectly while maintaining structure.
White bread: Often overlooked, this humble ingredient absorbs excess moisture and creates the unique tender-chewy texture that sets homemade smileys apart from store-bought versions.
Step-by-Step to Golden Perfection
Now comes the fun part where simple ingredients transform into edible art. Follow these steps carefully, and you’ll achieve restaurant-quality results that taste even better than they look.
Prepare the Base: Peel the boiled potatoes and place them into a large mixing bowl. Make sure your potatoes are still warm but cool enough to handle, as this helps them mash smoothly without becoming gummy. Break them up slightly with a fork to create an even texture before adding other ingredients.
Combine Ingredients: Cut white bread into small cubes and add them directly into the bowl with the potatoes. Add the cornstarch, paprika, black pepper, and salt. Toss everything gently with your hands first to distribute the seasonings evenly before you begin kneading, ensuring no pockets of plain potato remain.
Knead the Dough: Knead the mixture thoroughly by hand until it forms a smooth, pliable dough. Press and fold the mixture for about three to four minutes until it feels cohesive and slightly springy, similar to playdough, which indicates the starches have properly activated.
Roll and Cut: Lightly dust a wooden board with starch, roll out the dough to an even thickness using a rolling pin, and stamp out circular discs. Aim for about half-inch thickness to ensure the centers cook through while the exterior achieves that signature crunch.
Shape the Faces: Use a straw to punch out two round eye holes, and press the edge of a spoon down to carve a smiling mouth into each disc. Work gently but quickly to prevent the dough from drying out, and dust the straw occasionally if it starts to stick to the potato mixture.
Fry: Gently slide the smiley faces into a pan of hot oil. Fry until they turn puffed, deep golden-brown, and crispy on all sides. Maintain a steady oil temperature around 350°F, turning them occasionally with a slotted spoon to ensure even coloring and prevent burning.
Drain and Serve: Remove from the oil and drain on a paper towel-lined plate. Serve immediately alongside a dish of ketchup and garnish with fresh parsley. The contrast between the hot, crispy potato and the cool, tangy ketchup creates the perfect bite every time.
Timing and Nutrition Details
Understanding the time commitment and nutritional profile helps you plan the perfect meal or snack occasion. These smileys offer a satisfying treat that fits reasonably into a balanced diet when enjoyed mindfully.
Prep Time: 20 minutes
Cook Time: 10 minutes
Total Time: 30 minutes
Servings: 4 servings
Calories per serving: 280
Note: These are approximate values based on standard ingredients and absorption of frying oil.
Fun Variations to Try
Once you master the classic Homemade Crispy Potato Smiley Faces, the possibilities for customization are endless. Experiment with these creative twists to keep the recipe fresh and exciting for any palate.
Cheesy Herb Smileys: Fold 1/4 cup of grated sharp cheddar and 1 teaspoon of dried oregano into the dough before shaping for an Italian-inspired flavor profile.
Spicy Southwest: Replace the paprika with cumin and chili powder, then serve with salsa instead of ketchup for a zesty kick that wakes up your taste buds.
Sweet Potato Blend: Substitute half the white potatoes with mashed sweet potatoes and add a pinch of cinnamon for a slightly sweet autumn variation.
Everything Bagel Style: Sprinkle the finished smileys with everything bagel seasoning immediately after frying while they’re still tacky from the oil.
Mini Party Bites: Use a smaller cutter to create bite-sized smileys perfect for dipping at gatherings and game day celebrations.
FAQ’s
Can I bake these instead of frying?
While baking is possible, they won’t achieve the same level of crispiness that makes Homemade Crispy Potato Smiley Faces so addictive. If you must bake, brush generously with oil and bake at 425°F for 20 minutes, flipping halfway through.
How do I prevent the smileys from falling apart in the oil?
Ensure your dough is kneaded thoroughly until smooth and not too wet. If the mixture feels sticky, add a touch more cornstarch. Also, make sure your oil is hot enough before frying, as cold oil causes the coating to separate.
Can I freeze Homemade Crispy Potato Smiley Faces?
Yes, freeze them on a baking sheet until solid, then transfer to a freezer bag. Fry directly from frozen, adding an extra minute or two to the cooking time without thawing first.
What type of potatoes work best?
Starchy potatoes like Russets or Yukon Golds create the fluffiest interior. Avoid waxy potatoes which can become dense and gummy when mashed and fried.
Why add bread to the mixture?
The bread acts as a binder and absorbs excess moisture, creating that distinctive tender interior texture while helping the exterior crisp up beautifully. Learn more about binding techniques to understand the science.
Can I make the dough ahead of time?
You can prepare the dough up to 24 hours in advance. Wrap it tightly in plastic wrap and store in the refrigerator. Let it sit at room temperature for 10 minutes before rolling to make it workable again.
How thick should I roll the dough?
Aim for approximately half an inch thick. Too thin and they’ll burn or crack, too thick and the centers won’t cook through before the exterior browns.
What oil is best for frying?
Use a neutral oil with a high smoke point like vegetable, canola, or peanut oil. Avoid olive oil which can impart bitter flavors at high frying temperatures.
Can I use a different shape?
Absolutely, though the classic smiley face is traditional. Try hearts, stars, or simple circles if you’re short on time or don’t have a straw handy for the eyes.
How do I reheat leftovers?
Reheat in a 375°F oven or air fryer for 5-7 minutes until crispy again. Avoid microwaving which will make them soggy and rubbery.
Conclusion
Homemade Crispy Potato Smiley Faces represent everything wonderful about cooking from scratch, the ability to transform simple ingredients into moments of pure joy. As you bite through the golden crust into the fluffy interior, you’ll appreciate how a little extra effort creates results that frozen versions simply cannot match. Whether you’re making these for children, adults, or simply treating yourself to a nostalgic indulgence, this recipe delivers smiles in every sense of the word. Gather your potatoes, warm up that oil, and get ready to create some edible happiness that brings people together around the table.
PrintHomemade Crispy Potato Smiley Faces
Homemade Crispy Potato Smiley Faces bring back the pure joy of childhood snacking with every golden, crunchy bite. These nostalgic treats transform humble boiled potatoes and simple pantry staples into edible expressions of happiness that crunch satisfyingly between your teeth.
- Prep Time: 20 minutes
- Cook Time: 10 minutes
- Total Time: 30 minutes
- Yield: 4 servings
- Category: Snack
- Method: Frying
- Cuisine: American
- Diet: Vegetarian
Ingredients
- Boiled and peeled potatoes Sliced white bread (crusts removed and diced into small cubes) Cornstarch Paprika Black pepper Salt Cooking oil for frying Ketchup and fresh parsley (for serving)
Instructions
- Prepare the Base: Peel the boiled potatoes and place them into a large mixing bowl. Combine Ingredients: Cut white bread into small cubes and add them directly into the bowl with the potatoes. Add the cornstarch
- paprika
- black pepper
- and salt. Knead the Dough: Knead the mixture thoroughly by hand until it forms a smooth
- pliable dough. Roll and Cut: Lightly dust a wooden board with starch
- roll out the dough to an even thickness using a rolling pin
- and stamp out circular discs. Shape the Faces: Use a straw to punch out two round eye holes
- and press the edge of a spoon down to carve a smiling mouth into each disc. Fry: Gently slide the smiley faces into a pan of hot oil. Fry until they turn puffed
- deep golden-brown
- and crispy on all sides. Drain and Serve: Remove from the oil and drain on a paper towel-lined plate. Serve immediately alongside a dish of ketchup and garnish with fresh parsley.
Notes
- Use warm potatoes: Working with potatoes that are still warm helps them bind with the bread without requiring additional liquid.
- Don’t skip the kneading: Spending three to four minutes working the dough develops the starches properly, ensuring your smileys hold together during frying.
- Maintain oil temperature: Keep your oil steady at around 350°F to prevent soggy results or burnt exteriors.
- Work quickly when shaping: The dough dries out fast, so cut and shape your faces promptly before frying.
- Avoid wet potatoes: If your boiled potatoes are waterlogged, let them steam dry for a few minutes before peeling to prevent gummy dough.
- Don’t overcrowd the pan: Frying too many at once lowers the oil temperature, resulting in greasy rather than crispy smileys.
- Fix sticky dough: If the mixture clings to your hands, dust them lightly with cornstarch rather than adding more bread.
Nutrition
- Serving Size: 1 serving
- Calories: 280