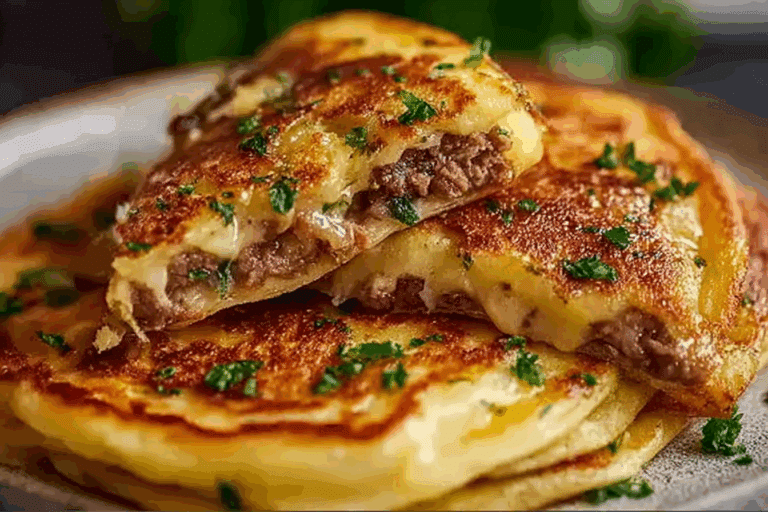
Garlic Butter Cheeseburger Roll-Ups
Garlic Butter Cheeseburger Roll-Ups
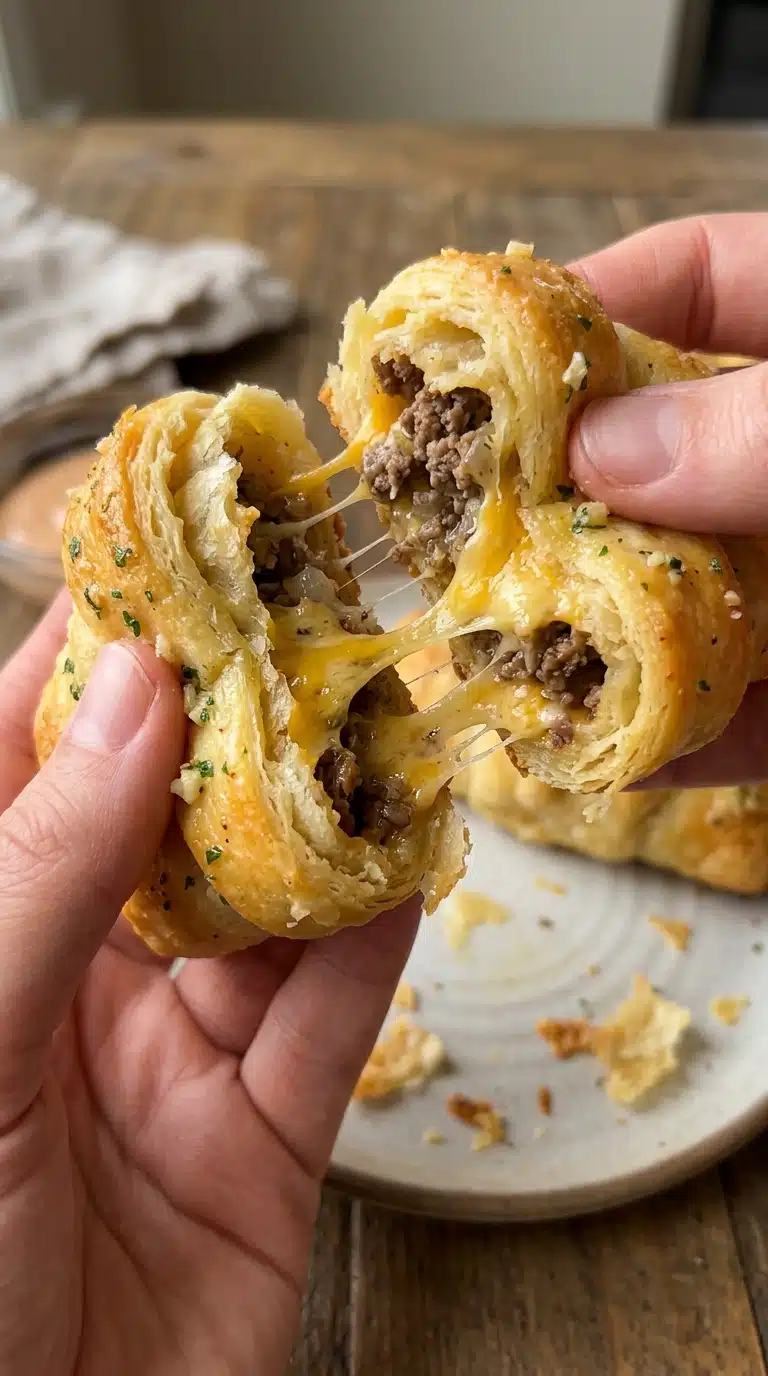
Garlic Butter Cheeseburger Roll-Ups transform your favorite burger flavors into crispy, handheld bites that disappear fast at any gathering. These savory spirals combine seasoned beef and melty cheese wrapped in golden tortillas. The aroma of garlic butter baking in the oven will draw everyone to the kitchen before you even call them to dinner. Trust me, you’re going to love this twist on classic comfort food.
Why Garlic Butter Cheeseburger Roll-Ups Are Irresistible
There’s something magical about taking a classic cheeseburger and reimagining it as a crispy, rollable feast. The combination of savory beef, sharp cheddar, and aromatic garlic butter creates a flavor profile that hits every craving. Each bite delivers that perfect contrast between the crunchy tortilla exterior and the gooey, meaty center. This one’s a total game-changer for busy weeknights or casual entertaining.
From Diner Classic to Party Favorite
The cheeseburger has been an American icon since the early 1920s, evolving from simple sandwich shops to gourmet kitchens across the country. These roll-ups take that nostalgic diner experience and transform it into a shareable, finger-friendly format perfect for modern entertaining. By wrapping the familiar flavors in a tortilla and baking them with garlic butter, we create a hybrid that honors tradition while embracing convenience. You can read more about the history of this beloved dish on Wikipedia.
The Ultimate Weeknight Win
This recipe checks every box for busy home cooks looking for maximum flavor with minimal fuss. The ingredient list is short and sweet, yet the results taste like you spent hours in the kitchen.
Versatile: These roll-ups work equally well as a hearty appetizer, game-day snack, or main course with a side salad.
Budget-Friendly: Using simple ground beef and flour tortillas keeps costs low while feeding a crowd.
Quick and Easy: From start to finish, you’ll have these on the table in under thirty minutes.
Customizable: Swap cheeses or add spices to match your family’s preferences.
Crowd-Pleasing: Kids and adults alike gravitate toward these handheld treasures.
Make-Ahead Friendly: Assemble them hours ahead and bake when ready.
Great for Leftovers: They reheat beautifully for lunch the next day.
Chef’s Secrets for Success
After making countless batches of these savory spirals, I’ve discovered a few tricks that elevate them from good to absolutely unforgettable. These small details make a significant difference in texture and flavor.
Let your cooked ground beef cool for about five minutes before mixing with cheese. This prevents premature melting and keeps the mixture easier to handle. When rolling, resist the urge to overfill the tortillas, as this causes blowouts during baking. For extra-crispy bottoms, consider using a light-colored baking sheet rather than a dark one, which can cause uneven browning. Finally, grate your own cheese rather than using pre-shredded bags, as the anti-caking agents in packaged cheese can inhibit that gorgeous melt.
Tools You’ll Need
You won’t need any fancy gadgets to create these Garlic Butter Cheeseburger Roll-Ups, but having the right basics makes the process seamless. Gather these essentials before you begin.
Medium mixing bowl: Perfect for folding together your beef and cheese filling without making a mess.
Pastry brush: Essential for evenly distributing that fragrant garlic butter over every roll-up.
Parchment paper: Lines your baking sheet for easy cleanup and prevents sticking.
Sharp knife or pizza cutter: Helpful for portioning the beef mixture evenly among the tortillas.
Small bowl: Needed for whisking together the melted butter, garlic, and parsley.
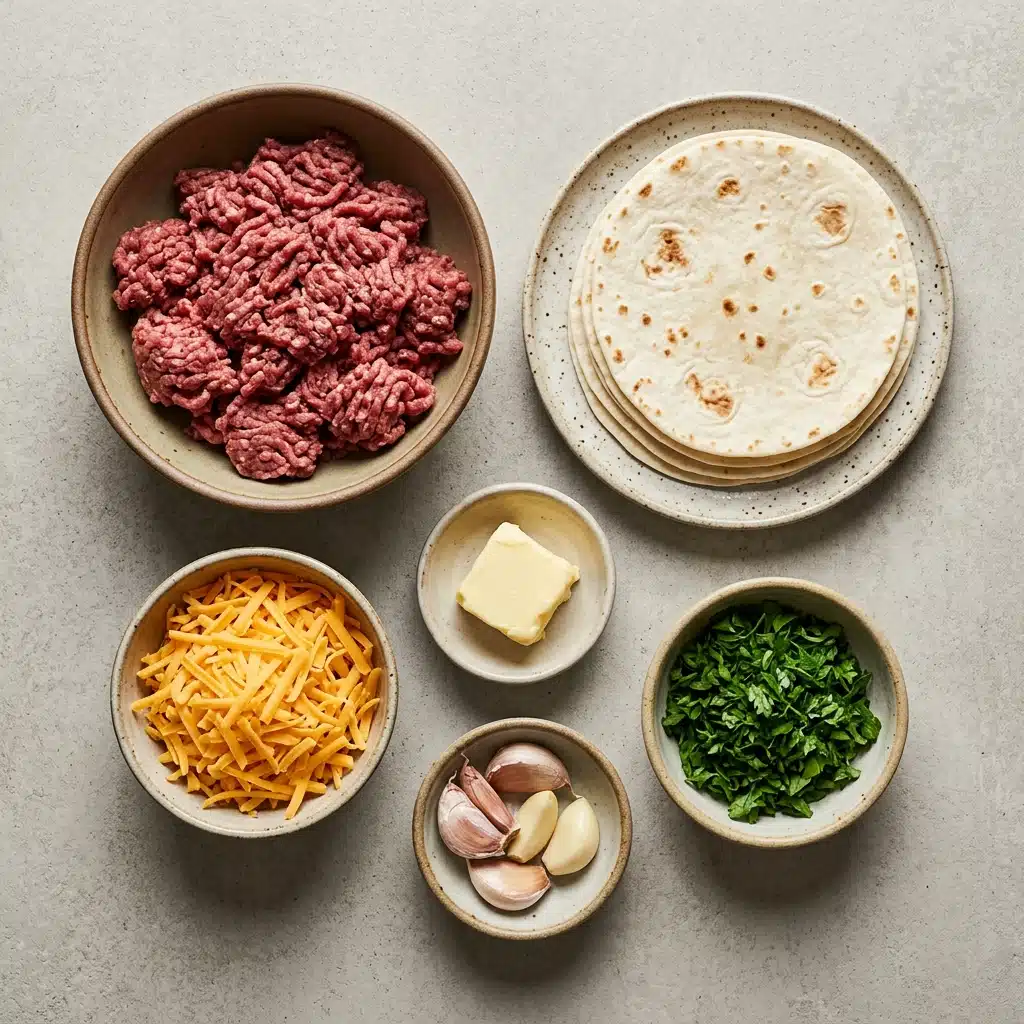
Gathering Your Garlic Butter Cheeseburger Roll-Ups Ingredients
Quality ingredients shine in this simple recipe, so choose fresh garlic and good-quality cheddar for the best results. Each component plays a crucial role in creating that perfect cheeseburger experience in every bite.
Lean ground beef: 1 lb (450g), cooked, seasoned with salt, black pepper, garlic powder, onion powder, and drained. This forms the savory heart of the filling.
Small soft flour tortillas: 8–10 pieces, street taco or fajita size. These create the perfect handheld wrapper that crisps beautifully in the oven.
Shredded cheddar cheese: 1.5 cups (or a mix of cheddar and mozzarella for an extra cheese pull). This provides that essential melty, gooey texture.
Unsalted butter: 4 tbsp, melted. This creates the rich base for your garlic coating.
Garlic: 2 cloves, finely minced or grated. Fresh garlic delivers the aromatic punch that makes these irresistible.
Fresh parsley: 1 tbsp, finely chopped. This adds a bright, herbaceous note and beautiful color contrast.
Extra shredded cheese: For topping, ensuring every bite has maximum cheesiness.
Extra chopped parsley: For garnishing, providing that fresh finishing touch.
Smart Swaps for Every Kitchen
Don’t hesitate to adapt this recipe based on what you have available or dietary preferences. These substitutions work beautifully while maintaining the spirit of the dish.
Lean ground beef: You can substitute with ground turkey, chicken, or plant-based crumbles for a lighter option.
Cheddar cheese: Use mozzarella, Monterey Jack, or a dairy-free shredded blend if preferred.
Flour tortillas: Corn tortillas work for a gluten-free version, though they will be more delicate to roll.
Fresh garlic: In a pinch, 1/2 teaspoon of garlic powder can substitute for the fresh cloves.
Fresh parsley: Dried parsley works for the butter mixture, though fresh is best for garnish.
Spotlight on Stars
Cheddar Cheese: This sharp, tangy cheese brings that classic cheeseburger flavor while melting into perfect strings. When combined with mozzarella, it creates the ultimate cheese pull that makes these roll-ups so Instagram-worthy.
Fresh Garlic: Minced finely and blended with butter, garlic creates an aromatic coating that permeates the tortillas as they bake. This ingredient transforms simple roll-ups into something truly restaurant-worthy.
Rolling Your Garlic Butter Cheeseburger Roll-Ups to Perfection
Now comes the fun part, assembling these beauties. Follow these steps exactly for consistently delicious results every time.
Combine filling: In a medium bowl, fold together the seasoned cooked ground beef and shredded cheddar cheese. Ensure the beef has cooled slightly so it doesn’t prematurely melt the cheese before baking. This step creates the hearty core that makes these Garlic Butter Cheeseburger Roll-Ups so satisfying.
Roll the tortillas: Lay each flour tortilla flat on a clean surface, place a portion of the beef and cheese mixture down the center, and roll up tightly into cylinders. Work with room temperature tortillas to prevent cracking as you roll. A tight cylinder ensures the filling stays secure and the roll-ups hold their shape during baking.
Arrange on tray: Place the roll-ups seam-side down in a single layer on a parchment-lined baking sheet. Positioning them seam-side down prevents them from unfurling in the oven. The parchment paper ensures easy cleanup and prevents sticking.
Brush garlic butter: In a small bowl, stir together the melted butter, minced garlic, and chopped parsley. Generously brush the tops of the roll-ups with the garlic butter, then sprinkle a bit of extra shredded cheese on top. This aromatic mixture creates the signature golden crust and infuses every bite with rich flavor. Don’t skimp on the garlic butter, as it transforms the tortillas into crispy, flavorful shells.
Bake: Bake at 400°F (200°C) for 12–15 minutes until the tortillas are crispy and golden brown, and the cheese is fully melted and bubbling. Keep an eye on them during the final minutes to catch that perfect moment when the cheese bubbles vigorously. The high heat ensures the tortillas crisp while the interior becomes gooey and hot.
Garnish & serve: Sprinkle with freshly chopped parsley and serve immediately while hot and stretchy. The fresh herbs add a bright color contrast and cut through the richness. Serve these Garlic Butter Cheeseburger Roll-Ups straight from the oven for the most impressive cheese pull.
Common Pitfalls to Avoid
Even simple recipes have potential stumbling blocks, but forewarned is forearmed. Watch out for these common issues to ensure your roll-ups turn out perfectly every time.
Overfilling the tortillas causes them to burst open during baking, leaving you with a messy tray rather than neat cylinders. Use about two tablespoons of filling per tortilla for the best results.
Skipping the seam-side-down placement allows the roll-ups to open up like flowers in the oven, spilling their precious filling everywhere.
Using cold tortillas straight from the refrigerator makes them brittle and prone to cracking when rolled. Let them sit at room temperature for ten minutes first.
Forgetting to drain the cooked beef leads to soggy bottoms and greasy roll-ups that never crisp properly. Take the extra minute to drain thoroughly.
Nutrition at a Glance
Servings: 8
Calories per serving: Approximately 285
Note: These are approximate values based on the specific ingredients listed above.
Timing Your Kitchen Session
Prep Time: 15 minutes
Cook Time: 15 minutes
Total Time: 30 minutes
Flavor Twists to Explore
Once you’ve mastered the classic version, try these variations to keep things exciting. Each brings a new dimension to the basic concept.
Spicy Kick: Add diced jalapeños to the beef mixture and use pepper jack cheese instead of cheddar for a fiery version.
Mushroom Swiss: Sauté sliced mushrooms with the beef and swap the cheddar for Swiss cheese, finishing with a sprinkle of thyme in the garlic butter.
Breakfast for Dinner: Substitute cooked breakfast sausage for the beef and add scrambled eggs to the filling for a morning-inspired twist.
Italian Style: Mix Italian seasoning into the beef and use mozzarella and Parmesan, serving with marinara for dipping.
FAQ’s
How do I store leftover Garlic Butter Cheeseburger Roll-Ups?
Place cooled roll-ups in an airtight container and refrigerate for up to three days. Reheat in a 350°F oven for 8-10 minutes to restore crispiness, or use an air fryer for 3-4 minutes.
Can I freeze these before baking?
Yes, assemble the roll-ups and place them on a baking sheet in the freezer until solid, then transfer to a freezer bag. Bake from frozen at 400°F for 18-20 minutes, adding extra time as needed.
Why are my tortillas cracking when I roll them?
Cold tortillas are usually the culprit. Always let them come to room temperature first, or wrap them in a damp paper towel and microwave for 20 seconds to make them pliable.
Can I use corn tortillas instead of flour?
While possible, corn tortillas are more fragile and may crack. If using corn, warm them thoroughly and don’t roll too tightly. They will also crisp differently than flour tortillas.
Is there a way to make these ahead for a party?
Assemble them completely, cover tightly with plastic wrap, and refrigerate for up to 8 hours. Brush with garlic butter just before baking to ensure the freshest flavor.
What dipping sauces work best?
Classic ketchup and mustard are always winners, but ranch dressing, garlic aioli, or sriracha mayo complement the flavors beautifully. Check out dipping sauce ideas for more inspiration.
Can I add vegetables to the filling?
Finely diced onions, bell peppers, or mushrooms can be added to the beef mixture. Just sauté them first to remove excess moisture that could make the roll-ups soggy.
Why didn’t my cheese get stretchy?
Pre-shredded cheese often contains cellulose that prevents melting. For that perfect cheese pull, always grate your own cheese from a block.
Can I make these in an air fryer?
Absolutely. Arrange in a single layer in the basket and cook at 380°F for 8-10 minutes, checking halfway through. They’ll get even crispier than in the oven.
What size tortillas work best?
Street taco size (about 6 inches) or small fajita size work perfectly. Larger burrito-sized tortillas require too much filling and don’t crisp as nicely.
Conclusion
Garlic Butter Cheeseburger Roll-Ups bring together everything we love about comfort food in a format that’s fun to eat and easy to prepare. The combination of seasoned beef, melted cheese, and aromatic garlic butter creates a dish that feels indulgent yet comes together in minutes. Whether you’re feeding hungry kids after school or hosting friends for game day, these crispy, savory spirals are guaranteed to disappear fast. Make a batch tonight and discover why this simple recipe deserves a permanent spot in your rotation.
PrintGarlic Butter Cheeseburger Roll-Ups
Garlic Butter Cheeseburger Roll-Ups transform your favorite burger flavors into crispy, handheld bites that disappear fast at any gathering. These savory spirals combine seasoned beef and melty cheese wrapped in golden tortillas.
- Prep Time: 15 minutes
- Cook Time: 15 minutes
- Total Time: 30 minutes
- Yield: 8 servings
- Category: Appetizer, Snack, Main Course
- Method: Baking
- Cuisine: American
Ingredients
- 1 lb (450g) lean ground beef
- cooked
- seasoned (salt, black pepper, garlic powder, onion powder)
- and drained 8–10 small soft flour tortillas (street taco or fajita size) 1.5 cups shredded cheddar cheese (or a mix of cheddar and mozzarella for an extra cheese pull) 4 tbsp unsalted butter
- melted 2 cloves garlic
- finely minced or grated 1 tbsp fresh parsley
- finely chopped Extra shredded cheese & chopped parsley for topping
Instructions
- Combine filling: In a medium bowl
- fold together the seasoned cooked ground beef and shredded cheddar cheese. Roll the tortillas: Lay each flour tortilla flat on a clean surface
- place a portion of the beef and cheese mixture down the center
- and roll up tightly into cylinders. Arrange on tray: Place the roll-ups seam-side down in a single layer on a parchment-lined baking sheet. Brush garlic butter: In a small bowl
- stir together the melted butter
- minced garlic
- and chopped parsley. Generously brush the tops of the roll-ups with the garlic butter
- then sprinkle a bit of extra shredded cheese on top. Bake: Bake at 400°F (200°C) for 12–15 minutes until the tortillas are crispy and golden brown
- and the cheese is fully melted and bubbling. Garnish & serve: Sprinkle with freshly chopped parsley and serve immediately while hot and stretchy.
Notes
- Let cooked ground beef cool for about five minutes before mixing with cheese to prevent premature melting.
- Resist overfilling tortillas; use about two tablespoons of filling per tortilla to avoid blowouts during baking.
- Place roll-ups seam-side down to prevent unfurling in the oven.
- Use room temperature tortillas to prevent cracking; let cold tortillas sit out for ten minutes before rolling.
- Drain cooked beef thoroughly to avoid soggy bottoms and greasy roll-ups.
- For extra-crispy bottoms, use a light-colored baking sheet rather than a dark one.
- Grate your own cheese rather than using pre-shredded bags for better melting.
Nutrition
- Serving Size: 1 roll-up
- Calories: 285