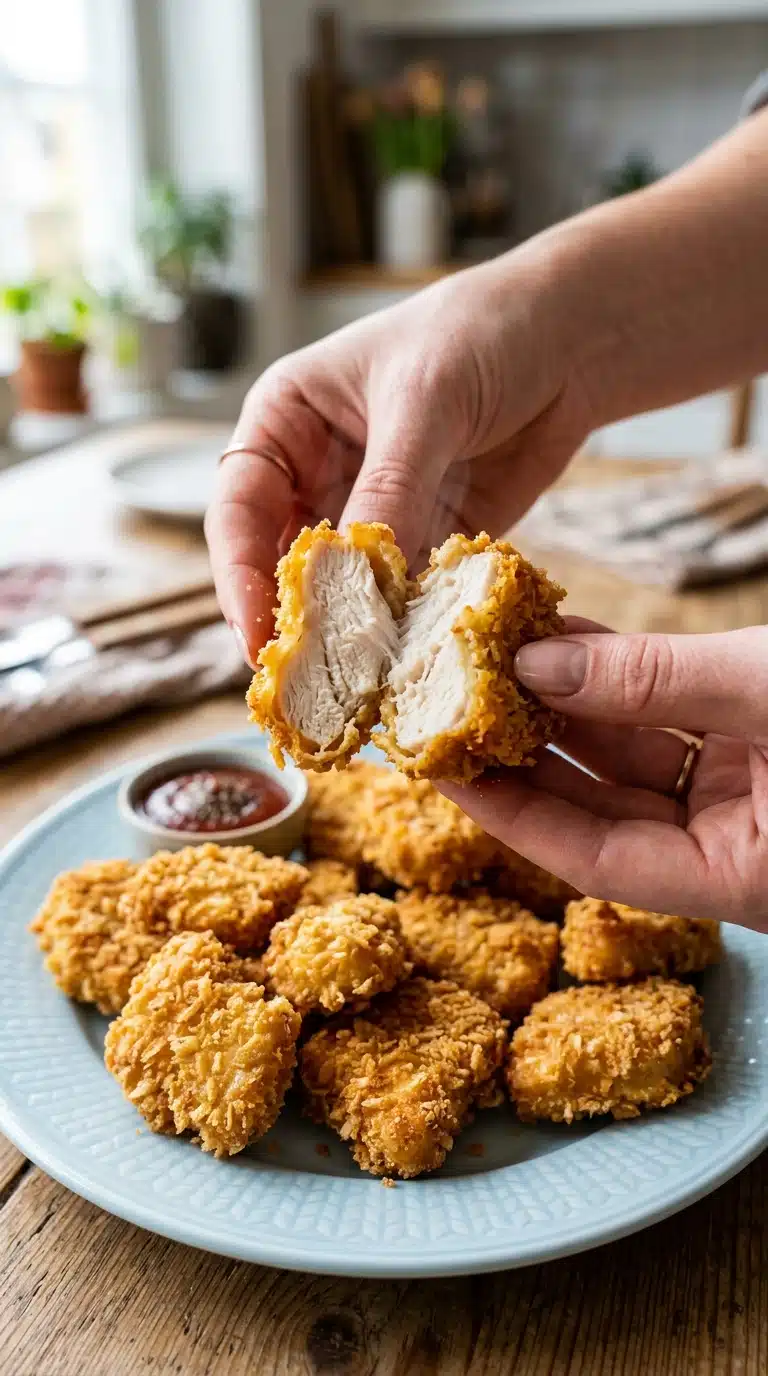
Crispy Homemade Chicken Nuggets
Crispy Homemade Chicken Nuggets
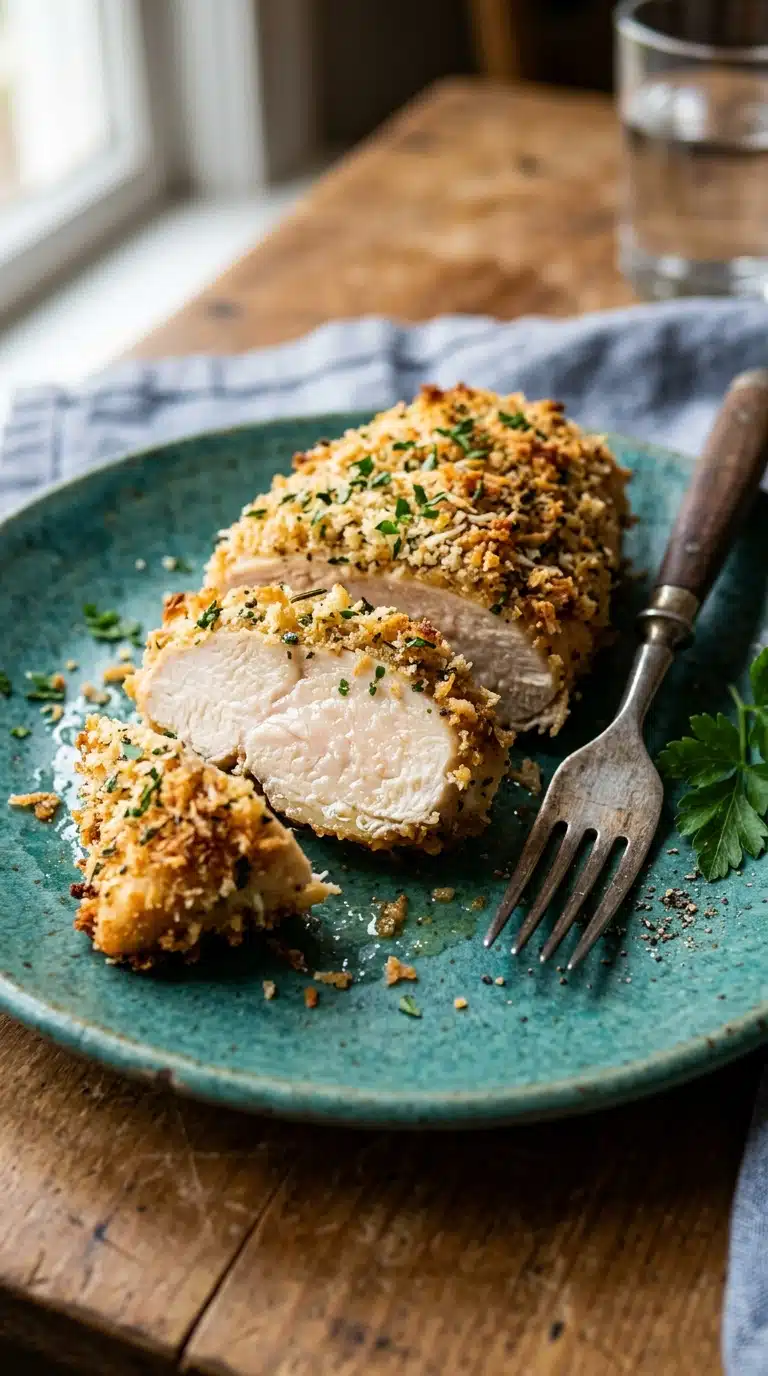
Crispy Homemade Chicken Nuggets bring the nostalgic comfort of childhood favorites right into your kitchen with a satisfying crunch that rivals any drive-thru. There’s something magical about biting into a perfectly golden exterior that gives way to tender, flavorful chicken inside. Trust me, you’re going to love this.
The Irresistible Appeal of Crispy Homemade Chicken Nuggets
These aren’t your average frozen nuggets. When you make them from scratch, you control every element from the seasoning to the crunch factor. The aroma of garlic and paprika wafting through your kitchen creates an anticipation that store-bought versions simply cannot match. Each bite delivers a shattering crispness followed by juicy, savory meat that makes it worth every minute of preparation.
Why This Recipe Works Every Time
This method delivers restaurant-quality results using simple techniques that never fail. The combination of fresh aromatics and proper binding creates nuggets that hold their shape while frying to golden perfection.
Versatile: Serve these Crispy Homemade Chicken Nuggets with honey mustard, ketchup, or tucked into a wrap for endless meal possibilities.
Budget-Friendly: Using just one pound of chicken breast feeds four people for a fraction of restaurant prices.
Quick and Easy: From processor to plate in under thirty minutes, this recipe fits busy weeknights perfectly.
Customizable: Adjust the paprika or add your favorite dried herbs to create your signature flavor profile.
Crowd-Pleasing: Kids and adults alike gravitate toward these golden bites, making dinner time peaceful and enjoyable.
Make-Ahead Friendly: Form the nuggets earlier in the day and refrigerate until frying time for stress-free entertaining.
Great for Leftovers: These reheat beautifully in the oven, maintaining their crisp texture for tomorrow’s lunch.
Pro Tips for the Crispiest Results
After years of perfecting homemade nuggets, I’ve learned a few secrets that make all the difference. Keep your oil at a steady medium heat to prevent burning before the interior cooks through. Don’t overcrowd the pan, as this lowers the oil temperature and creates soggy results. Press the breadcrumbs gently but firmly into the meat mixture to ensure they adhere during frying using proper coating techniques.
Essential Kitchen Equipment
You don’t need fancy gadgets to succeed here, just a few reliable tools. A food processor is crucial for achieving that fine, cohesive texture that defines restaurant-quality nuggets. Use a heavy-bottomed frying pan for even heat distribution and consistent browning.
Food Processor: This appliance minces the chicken and aromatics together, creating the perfect paste-like consistency that binds without becoming tough.
Heavy-Bottomed Frying Pan: Cast iron or stainless steel maintains steady oil temperature, preventing the dreaded burnt coating with raw centers.
Wide Shallow Bowls: You’ll need space for mixing the seasoned meat and for holding the breadcrumbs during the coating process.
What You’ll Need
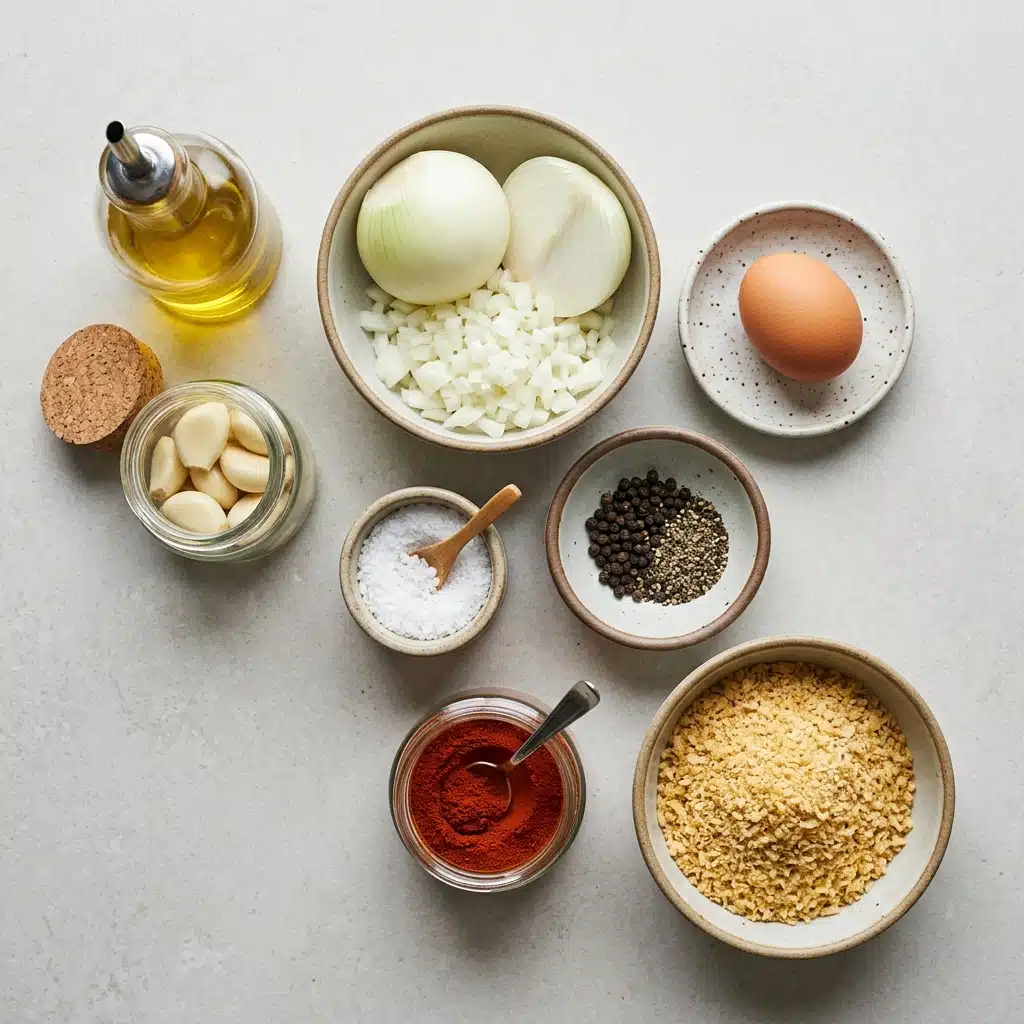
Quality ingredients make all the difference in these simple nuggets. Each component plays a specific role in creating the final texture and flavor profile that makes Crispy Homemade Chicken Nuggets so addictive.
Chicken Breast: 500 g (approx. 1.1 lbs), diced. Provides the lean protein base that becomes tender when minced and cooked quickly.
White Onion: 1/2 piece, chopped. Adds moisture and a subtle sweetness that permeates every bite.
Garlic Cloves: 2 pieces. Deliver aromatic depth and savory complexity to the meat mixture.
Egg: 1 whole. Acts as the binding agent that holds the nuggets together during frying.
Salt: 1 tsp. Enhances all the natural flavors and seasons the meat from within.
Black Pepper: 1/2 tsp. Adds gentle heat and aromatic bite that balances the richness.
Paprika: 1 tsp. Provides subtle smokiness and that appealing golden-orange hue.
Panko or Crunchy Breadcrumbs: 100 g (approx. 1 cup). Creates the shattering exterior crust that defines these nuggets.
Vegetable or Neutral Oil: For shallow frying. Transfers heat evenly and creates the crispy texture without adding competing flavors.
Spotlight Ingredients
Panko: These Japanese breadcrumbs create an airier, crunchier coating than standard breadcrumbs due to their flaky, irregular shape.
Fresh Garlic: Using real cloves instead of powder provides a brighter, more complex flavor that permeates the meat.
Smart Substitutions
Panko: Regular breadcrumbs work in a pinch, though they create a less airy crunch.
Paprika: Smoked paprika adds depth, or try mild chili powder for extra warmth.
Step-by-Step to Crispy Perfection
Follow these exact steps for guaranteed golden perfection every time you make Crispy Homemade Chicken Nuggets.
Blend the base: Place diced chicken breasts, chopped onion, and garlic cloves into a food processor. Blend until finely minced and thoroughly combined. This creates the smooth texture that holds together during frying.
Season the mixture: Transfer the minced chicken mixture to a bowl. Add the egg, salt, black pepper, and paprika. Mix well by hand until a cohesive, slightly sticky paste forms. The hand mixing prevents overworking the meat while ensuring even seasoning distribution.
Shape and bread: Portion the meat mixture by hand into nugget shapes. Coat each piece thoroughly in breadcrumbs, pressing lightly so the coating adheres evenly. Work gently to maintain the tender texture.
Fry until golden: Heat a shallow layer of oil in a frying pan over medium heat. Fry the nuggets for 3 to 4 minutes per side until deeply golden, crisp, and fully cooked through. Watch for that deep amber color as your cue to flip.
Drain and serve: Remove the nuggets and drain on paper towels. Serve immediately while hot and crispy. This final step ensures excess oil disappears while the coating remains shatteringly crisp.
Common Pitfalls to Avoid
Even simple recipes have potential stumbling blocks that affect your results. Keep these warnings in mind as you cook these Crispy Homemade Chicken Nuggets.
Oil too hot: If the oil smokes, the exterior will burn before the chicken cooks through. Maintain medium heat for steady browning.
Skipping the drain: Serving directly from pan to plate results in greasy nuggets. The paper towel step is essential for that dry, crisp finish.
Over-processing: Blending the chicken too long creates a rubbery texture. Stop when finely minced but not pasty.
Nutrition and Preparation Details
Understanding the timing and nutritional profile helps you plan your meal perfectly. These Crispy Homemade Chicken Nuggets offer a lighter alternative to deep-fried restaurant versions.
Servings: 4 / Calories per serving: 320 / Note: These are approximate values.
Prep Time: 15 minutes / Cook Time: 8 minutes / Total Time: 23 minutes
Frequently Asked Questions
1. Can I bake these instead of frying?
While frying creates the signature crispness, you could bake them at 400°F for 20 minutes, though the texture will differ significantly from the traditional method.
2. How do I know when the oil is ready?
Test with a breadcrumb; it should sizzle immediately but not burn. Alternatively, a wooden spoon handle should create gentle bubbles when inserted.
3. Can I freeze these nuggets?
Yes, freeze uncooked breaded nuggets on a baking sheet, then transfer to bags. Fry from frozen, adding extra cooking time.
4. Why are my nuggets falling apart?
This usually means the mixture wasn’t blended enough or the egg didn’t bind properly. Ensure you blend until thoroughly combined.
5. Can I use chicken thigh instead of breast?
The recipe specifies breast meat, which has a different texture and fat content. Thighs would create a richer, denser nugget.
6. How long do leftovers last?
Store in an airtight container in the refrigerator for up to three days. Reheat in a hot oven to restore crispness.
7. Is there a gluten-free option?
Substitute the panko with crushed gluten-free cereal or certified gluten-free breadcrumbs for similar results.
8. Why use panko instead of regular breadcrumbs?
Panko creates a lighter, crunchier coating due to its flaky texture, though regular breadcrumbs will work if that’s what you have.
9. Can I make these ahead for a party?
Shape and bread the nuggets up to four hours ahead, refrigerate uncovered, then fry just before serving for maximum crunch.
10. What’s the best way to reheat them?
Avoid the microwave, which creates rubbery meat and soggy coating. Use a 375°F oven for 8-10 minutes until hot and crispy.
Conclusion
There’s nothing quite like the satisfaction of biting into a Crispy Homemade Chicken Nugget you crafted yourself. The combination of fresh ingredients and simple technique creates a meal that feels both comforting and accomplished. Whether you’re feeding picky kids or indulging your own comfort food cravings, this recipe delivers every single time. Make them tonight and discover why homemade always wins.
PrintCrispy Homemade Chicken Nuggets
Crispy Homemade Chicken Nuggets bring the nostalgic comfort of childhood favorites right into your kitchen with a satisfying crunch that rivals any drive-thru.
- Prep Time: 15 minutes
- Cook Time: 8 minutes
- Total Time: 23 minutes
- Yield: 4 servings
- Category: Main Course
- Method: Pan-Fry
- Cuisine: American
Ingredients
- Chicken: 500 g (approx. 1.1 lbs) chicken breast
- diced Aromatics: 1/2 white onion (chopped)
- 2 garlic cloves Seasoning & Binding: 1 whole egg
- 1 tsp salt
- 1/2 tsp black pepper
- 1 tsp paprika Breading: 100 g (approx. 1 cup) panko or crunchy breadcrumbs Cooking: Vegetable or neutral oil for shallow frying
Instructions
- Blend the base: Place diced chicken breasts
- chopped onion
- and garlic cloves into a food processor. Blend until finely minced and thoroughly combined. Season the mixture: Transfer the minced chicken mixture to a bowl. Add the egg
- salt
- black pepper
- and paprika. Mix well by hand until a cohesive
- slightly sticky paste forms. Shape and bread: Portion the meat mixture by hand into nugget shapes. Coat each piece thoroughly in breadcrumbs
- pressing lightly so the coating adheres evenly. Fry until golden: Heat a shallow layer of oil in a frying pan over medium heat. Fry the nuggets for 3 to 4 minutes per side until deeply golden
- crisp
- and fully cooked through. Drain and serve: Remove the nuggets and drain on paper towels. Serve immediately while hot and crispy.
Notes
- Keep your oil at a steady medium heat to prevent burning before the interior cooks through.
- Don’t overcrowd the pan, as this lowers the oil temperature and creates soggy results.
- Press the breadcrumbs gently but firmly into the meat mixture to ensure they adhere during frying.
- If the oil smokes, the exterior will burn before the chicken cooks through. Maintain medium heat for steady browning.
- Don’t skip the paper towel drain; serving directly from the pan results in greasy nuggets.
- Stop blending when finely minced but not pasty to avoid a rubbery texture.
Nutrition
- Serving Size: 1 serving
- Calories: 320