Sea Salt Pecan Pralines
Sea Salt Pecan Pralines
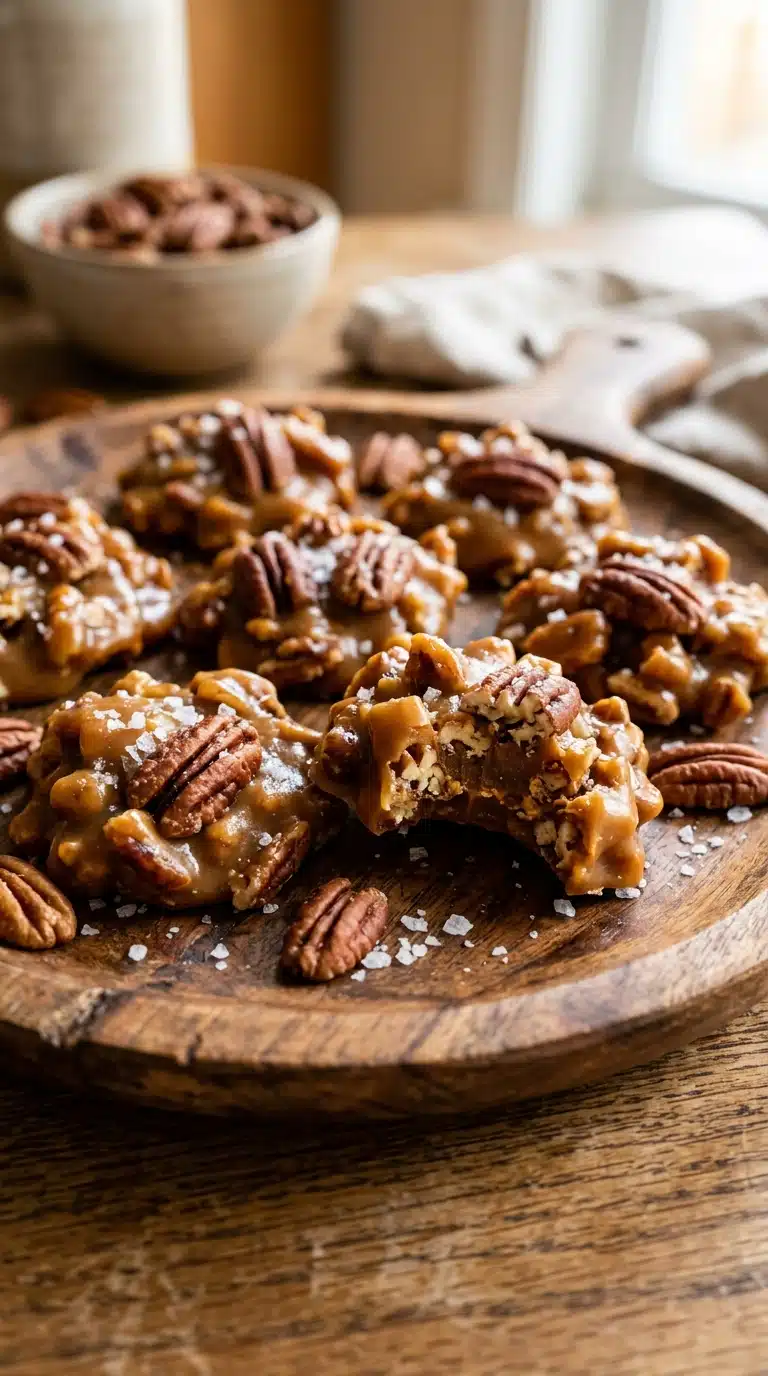
Sea Salt Pecan Pralines offer a delightful marriage of toasted nuts and buttery caramel that will transport your taste buds straight to candy heaven. The aroma of pecans warming in the oven creates an irresistible anticipation that fills the entire kitchen with nutty sweetness. Trust me, you’re going to love this classic confection with its modern salty twist.
The Enduring Appeal and Southern Heritage of Sea Salt Pecan Pralines
These candies represent the perfect balance between sweet and salty sensations. The glossy caramel coating shatters gently between your teeth, revealing clusters of crunchy toasted pecans inside. Each bite delivers a buttery richness that melts across your palate, followed by the delicate crunch of flaky sea salt that brightens every flavor.
The tradition of pralines stretches back to French settlers in Louisiana, where chefs adapted European candy techniques to feature native pecans instead of almonds. This distinctly American creation has graced Southern tables for centuries, evolving from simple sugar and nut combinations to the complex caramel versions we cherish today. You can learn more about the history of these treats through resources like praline history.
Why This Recipe Belongs in Your Kitchen
Home candy making often intimidates even experienced bakers, but this particular method rewards patience with professional results. The ingredients are straightforward pantry staples, yet they transform into something truly special through careful temperature control and proper technique.
Versatile: These pralines make elegant gifts, party favors, or afternoon treats. You can package them in small boxes or serve them on dessert platters with equal success.
Budget-Friendly: Pecans and basic sugars create a luxurious candy without requiring expensive chocolate or exotic ingredients. This is gourmet flavor on a home cook budget.
Quick and Easy: From start to finish, these come together in under an hour. The process requires attention but no advanced candy-making degrees or specialized training.
Customizable: Adjust the salt level or add warm spices if desired. You control the finish and flavor intensity to match your personal preferences.
Crowd-Pleasing: The combination of caramel and pecans appeals to children and adults alike. Everyone reaches for seconds when these appear.
Make-Ahead Friendly: Prepare these two days before your event and store them in an airtight container. They stay fresh and delicious without last-minute stress.
Great for Leftovers: Though they rarely last long, any extra pralines can be crumbled over ice cream or yogurt. Waste is never an issue with these gems.
Pro Secrets for Perfect Pralines Every Time
Success with caramel candies depends on understanding how sugar behaves under heat. A few insider tricks separate grainy, failed attempts from glossy, professional results that snap cleanly between your fingers.
Keep a small bowl of ice water nearby to test your caramel stage if you lack a thermometer. Drop a tiny amount of the hot syrup into the water, and it should form a soft, pliable ball that flattens when pressed. This tactile check ensures you hit the precise temperature window needed for proper setting.
Watch the weather forecast before beginning, as humidity can prevent pralines from hardening properly. Dry days yield the best results, so save candy making for clear afternoons when possible.
Use a heavy-bottomed saucepan to prevent scorching, and resist the urge to stir vigorously once the mixture boils. Excessive agitation can cause sugar crystallization, resulting in grainy textures rather than smooth, creamy candies.
Essential Tools for Candy Success
Proper equipment eliminates frustration and ensures safety when working with molten sugar. Gather these items before you begin, as timing becomes critical during the final stages.
Heavy-bottomed saucepan: This prevents hot spots and scorching while ensuring even heat distribution for your caramel. Thin pots create uneven cooking and ruined batches.
Wooden spoon: Essential for the final beating stage, wood insulates against heat and prevents unwanted crystallization that metal spoons might encourage.
Parchment paper: Creates a non-stick surface for cooling your praline clusters without requiring excess grease or oil.
Baking sheet: Provides a flat, stable surface for forming and cooling the candies evenly.
Gathering Your Sea Salt Pecan Pralines Ingredients
Quality matters when working with so few components, so choose fresh pecans and real butter for the best flavor profile. Each ingredient plays a specific role in creating the perfect texture and taste experience that defines these treats.
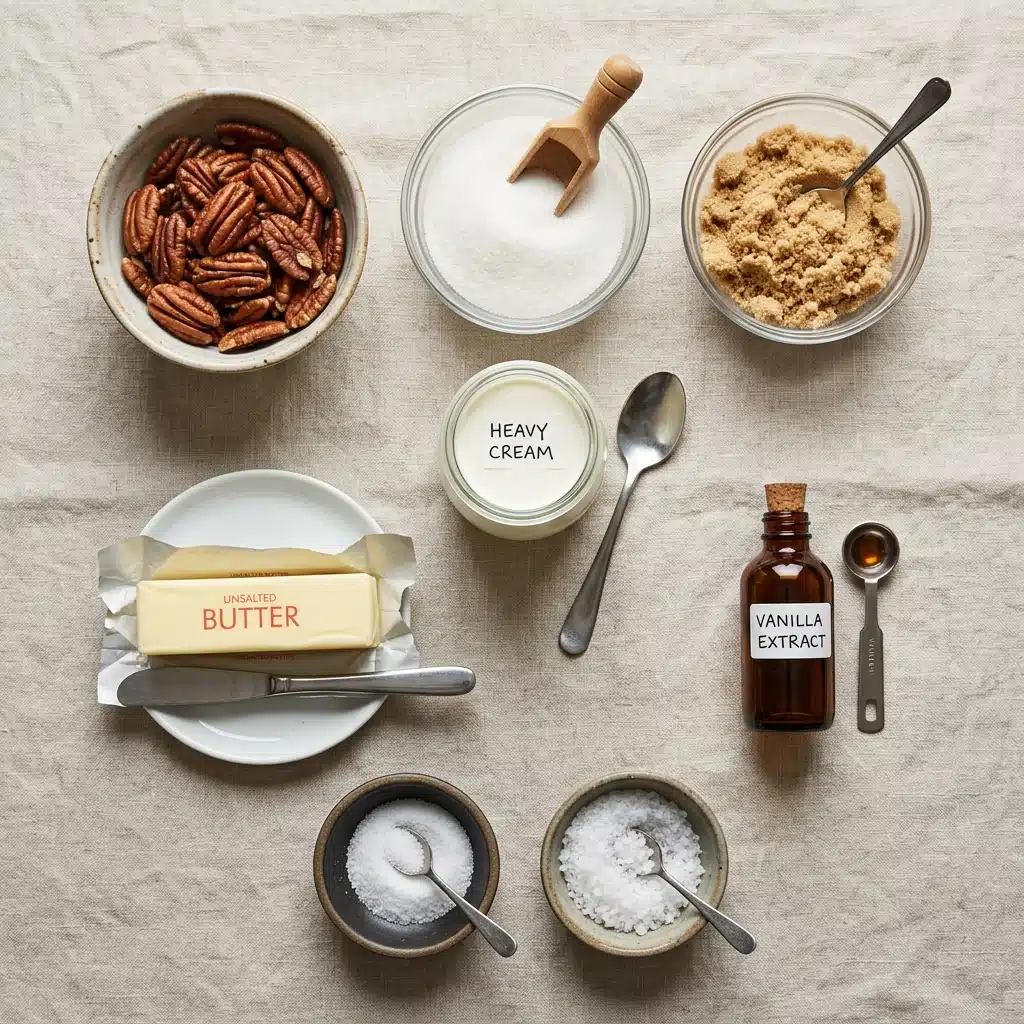
- Pecan halves: 2 cups, toasted to enhance their buttery flavor and provide the signature crunch.
- Granulated sugar: 1 cup, creates the sweet crystalline structure and helps achieve the proper candy texture.
- Light brown sugar: 1 cup packed, adds depth and molasses notes that complement the pecans beautifully.
- Heavy cream: ½ cup, provides richness and creates the creamy, fudgy texture distinctive to pralines.
- Unsalted butter: 4 tablespoons, adds silkiness and allows precise control over the final salt level.
- Vanilla extract: 1 teaspoon, rounds out the flavors with warm aromatic complexity.
- Fine sea salt: ¼ teaspoon, enhances the sweetness and balances the overall flavor profile.
- Flaky sea salt: For finishing, adds textural contrast and visual appeal while providing bursts of salinity.
Smart Swaps and Spotlight Ingredients
Granulated sugar: You can use organic cane sugar as a direct replacement without adjusting measurements.
Light brown sugar: Dark brown sugar works beautifully for a deeper molasses flavor and slightly more robust taste.
Heavy cream: Half-and-half can substitute in a pinch, though it results in slightly less rich pralines with a lighter mouthfeel.
Flaky sea salt: Coarse kosher salt works if you crush it slightly between your fingers first.
Pecan halves: These nuts provide the signature crunch and buttery flavor that defines classic pralines, offering more texture than chopped pieces would.
Heavy cream: This dairy component creates the luscious mouthfeel and helps the caramel set properly without becoming too hard or too soft.
Crafting Your Sea Salt Pecan Pralines Step by Step
Working with hot caramel requires confidence and preparedness, so read through the entire process before beginning. Understanding the sequence helps you move smoothly from cooking to scooping without hesitation that could ruin the batch. For detailed guidance on sugar stages, consult candy temperature guides.
Toast the pecan halves until fragrant and lightly golden, then let them cool slightly. Spread them on a baking sheet in a single layer and watch carefully to prevent burning or bitter flavors.
In a heavy-bottomed saucepan, combine the granulated sugar, brown sugar, heavy cream, butter, and fine sea salt. Stir gently to combine before applying heat to ensure even melting.
Cook over medium heat, stirring until the sugars dissolve and the butter melts completely. The mixture will transform into a smooth, golden liquid that looks like sweet liquid gold.
Continue cooking until the caramel mixture reaches the soft-ball stage, stirring occasionally. This happens at 235 to 240 degrees Fahrenheit on a candy thermometer.
Remove from the heat and stir in the vanilla extract and toasted pecans. Work quickly but thoroughly to ensure every nut receives a coating of caramel.
Beat the mixture briefly with a wooden spoon until it thickens slightly and begins to lose some of its glossy appearance. This aerates the candy for the perfect creamy texture.
Quickly scoop spoonfuls onto a parchment-lined baking sheet, forming rustic praline clusters. Space them about two inches apart to prevent merging into one giant sheet.
Immediately sprinkle a few flakes of sea salt over each praline. The residual heat helps the salt adhere while adding that crucial flavor contrast.
Let the pralines cool completely until firm and set. This takes about thirty minutes at room temperature, though larger clusters may need slightly longer.
Serve and enjoy the glossy caramel coating with crunchy toasted pecans and a delicate salty finish. Store any extras in an airtight container between layers of parchment paper.
Troubleshooting Common Praline Problems
Even experienced candy makers encounter occasional setbacks, but most issues have simple solutions. Understanding what went wrong helps you succeed on your next attempt.
Grainy texture: This occurs when sugar crystals form on the pan sides and re-enter the mixture. Wash down the sides with a wet pastry brush during cooking, or avoid stirring once the boiling begins.
Pralines won’t set: Humidity or undercooking usually causes softness. If they remain sticky after two hours, you can try reheating gently to the proper temperature.
Burnt flavor: The heat was too high or the pot too thin. Always use medium heat and heavy cookware when making caramel candies.
Nutrition Facts and Preparation Details
Servings: 12 pralines / Calories per serving: 240 / Note: These are approximate values based on standard ingredient calculations.
Prep Time: 10 minutes / Cook Time: 20 minutes / Total Time: 30 minutes plus cooling time.
Variations to Try:
Chocolate Drizzle: Add melted dark chocolate stripes over the cooled pralines for an elegant finish.
Spiced Version: Add ½ teaspoon ground cinnamon to the sugar mixture before cooking for warmth.
Maple Twist: Replace the brown sugar with maple sugar for an autumnal flavor variation.
FAQ’s
How long do these pralines last?
Store them in an airtight container at room temperature for up to one week. Avoid refrigeration, which can cause stickiness.
Can I freeze pralines?
Freezing is not recommended, as it changes the texture of the caramel and can cause separation upon thawing.
Why didn’t my pralines set properly?
You likely didn’t reach the soft-ball stage during cooking. Use a candy thermometer next time to ensure accuracy.
Can I use salted butter instead of unsalted?
Yes, but omit the fine sea salt in the recipe to prevent over-salting.
Are these pralines gluten-free?
Yes, all ingredients are naturally gluten-free, making them suitable for those with celiac disease.
Can I double the recipe?
Yes, but use a larger pot to prevent dangerous boiling over, and allow slightly longer cooking time.
What exactly is the soft-ball stage?
It is 235 to 240 degrees Fahrenheit, where a drop of candy forms a soft ball when dropped into cold water.
Why did my sugar crystallize?
Stirring too vigorously or scraping the pan sides introduces sugar crystals that spread rapidly through the batch.
Can I use walnuts instead of pecans?
Yes, though the flavor profile changes significantly and becomes more bitter than buttery.
Do I absolutely need a candy thermometer?
While experienced cooks can use the water test method, a thermometer is highly recommended for consistent results.
Conclusion
Sea Salt Pecan Pralines represent the joy of homemade candy at its finest, combining simple ingredients through careful technique to create something truly memorable. The interplay of sweet caramel, toasted nuts, and flaky salt creates a complex treat that rivals any confectionery shop offering. Share these with friends and family, and watch as smiles spread across faces with each crunchy, creamy bite.
PrintSea Salt Pecan Pralines
A delightful marriage of toasted pecans and buttery caramel with a modern salty twist, creating a classic Southern confection.
- Prep Time: 10 minutes
- Cook Time: 20 minutes
- Total Time: 30 minutes plus cooling time
- Yield: 12 pralines
- Category: Candy
- Method: Stovetop
- Cuisine: Southern
- Diet: Gluten Free
Ingredients
- 2 cups pecan halves
- 1 cup granulated sugar
- 1 cup light brown sugar, packed
- ½ cup heavy cream
- 4 tablespoons unsalted butter
- 1 teaspoon vanilla extract
- ¼ teaspoon fine sea salt
- Flaky sea salt, for finishing
Instructions
- Toast the pecan halves until fragrant and lightly golden, then let them cool slightly.
- In a heavy-bottomed saucepan, combine the granulated sugar, brown sugar, heavy cream, butter, and fine sea salt.
- Cook over medium heat, stirring until the sugars dissolve and the butter melts.
- Continue cooking until the caramel mixture reaches the soft-ball stage, stirring occasionally.
- Remove from the heat and stir in the vanilla extract and toasted pecans.
- Beat the mixture briefly with a wooden spoon until it thickens slightly and begins to lose some of its glossy appearance.
- Quickly scoop spoonfuls onto a parchment-lined baking sheet, forming rustic praline clusters.
- Immediately sprinkle a few flakes of sea salt over each praline.
- Let the pralines cool completely until firm and set.
- Serve and enjoy the glossy caramel coating with crunchy toasted pecans and a delicate salty finish.
Notes
- Keep a small bowl of ice water nearby to test caramel stage if you lack a thermometer.
- Watch the weather forecast, as humidity can prevent pralines from hardening.
- Use a heavy-bottomed saucepan to prevent scorching and avoid vigorous stirring once boiling begins.
- Wash down pan sides with a wet pastry brush during cooking to avoid grainy texture.
Nutrition
- Serving Size: 1 praline
- Calories: 240