Crispy Panko Shrimp
Crispy Panko Shrimp
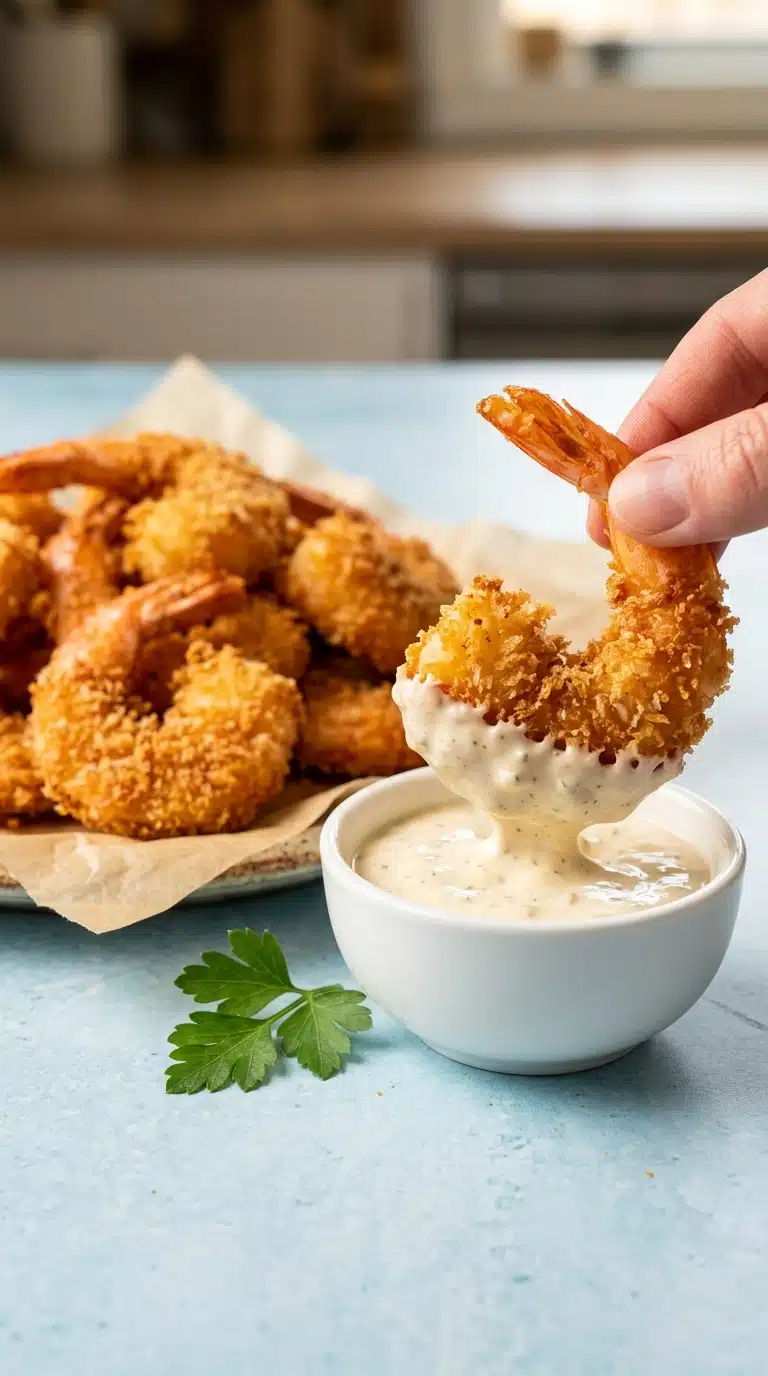
Crispy Panko Shrimp delivers that irresistible shatter of golden flakes giving way to sweet, tender seafood in every single bite. The first time you hear that crunch echo through your kitchen, you will understand why this dish has earned a permanent spot in weeknight rotations and party spreads alike. Trust me, you’re going to love this combination of simplicity and sheer texture.
The Irresistible Appeal and Coastal Heritage of Crispy Panko Shrimp
There is something almost magical about the contrast between crackling panko and delicate shrimp. Each bite offers a symphony of crispness followed by a burst of mild, sweet ocean flavor that keeps you reaching for the next piece.
This style of breading owes its signature crunch to Japanese panko, a breadcrumb with a lineage rooted in traditional bakeries across Japan. Unlike fine Western crumbs, panko is made from crustless bread that is processed into airy, jagged slivers designed to absorb less oil and create more height. The technique of pairing this coating with shrimp has traveled far beyond Tokyo, finding a beloved home in coastal kitchens and casual dining menus throughout the world. You can learn more about the unique texture of Japanese panko breadcrumbs and why they fry up so beautifully.
Crispy Panko Shrimp: A Reliable Favorite
This recipe is a total game-changer because it turns a handful of pantry staples into restaurant-quality fare without any fuss. Once you try Crispy Panko Shrimp at home, restaurant versions might never measure up, and you will find yourself returning to this method again and again.
Versatile: Serve these golden shrimp over a salad, tucked into tacos, or alongside steamed rice for a meal that adapts to your mood.
Budget-Friendly: Jumbo shrimp and a simple flour-egg-panko coating deliver big flavor without a big grocery bill.
Quick and Easy: From prep to plate, you are looking at under thirty minutes, which makes this ideal for busy evenings.
Customizable: Stick with classic salt, pepper, and garlic powder, or let your favorite dipping sauce steer the flavor profile.
Crowd-Pleasing: The dramatic crunch and mild seafood flavor win over picky eaters and adventurous foodies alike.
Make-Ahead Friendly: You can season the shrimp and arrange your breading station an hour before frying to streamline the process.
Great for Leftovers: Though best served immediately, any extras can be enjoyed cold on a greens-packed lunch bowl the next day.
Pro Secrets for the Crunchiest Crispy Panko Shrimp
A few small habits separate good fried shrimp from the truly unforgettable Crispy Panko Shrimp you are about to make. Keep these insider tips in mind every time you bread and fry.
Dry thoroughly: Pat the shrimp completely dry with paper towels before seasoning so the flour adheres evenly and the coating stays crisp rather than gummy.
Monitor your heat: Use a thermometer to keep the oil between 175°C and 180°C so the panko puffs instantly without soaking up grease. Read more about why temperature matters when you fry seafood at home.
Fry in small batches: Overcrowding drops the oil temperature and leads to pale, soggy results instead of that coveted deep golden shell.
Tap off excess flour: After the first dredge, gently shake each shrimp so only a thin layer remains. This prevents clumpy patches under the breadcrumbs.
Drain with care: Transfer cooked shrimp to a wire rack or paper towel-lined plate in a single layer so steam escapes and the crust stays shatteringly crisp.
Essential Tools for Crispy Panko Shrimp Success
You do not need a professional kitchen to pull off this dish. With the right setup, Crispy Panko Shrimp comes together faster than takeout, and a few standard pieces of equipment make the breading and frying process smooth and safe.
Paper towels: These are essential for blotting moisture from the shrimp before seasoning and for lining the draining plate afterward.
Three shallow bowls: Wide, low dishes create an efficient breading station that keeps your flour, beaten eggs, and panko organized and within reach.
Heavy skillet or pot: A deep, sturdy pan holds the 2 to 3 inches of neutral oil and maintains steady heat throughout frying.
Thermometer: Keeping the oil at 350°F ensures the panko turns deep golden brown and ultra-crisp instead of greasy.
Wire rack or paper towel-lined plate: Either option gives the hot shrimp a place to rest without trapping steam against the delicate crust.
Gathering Your Crispy Panko Shrimp Ingredients
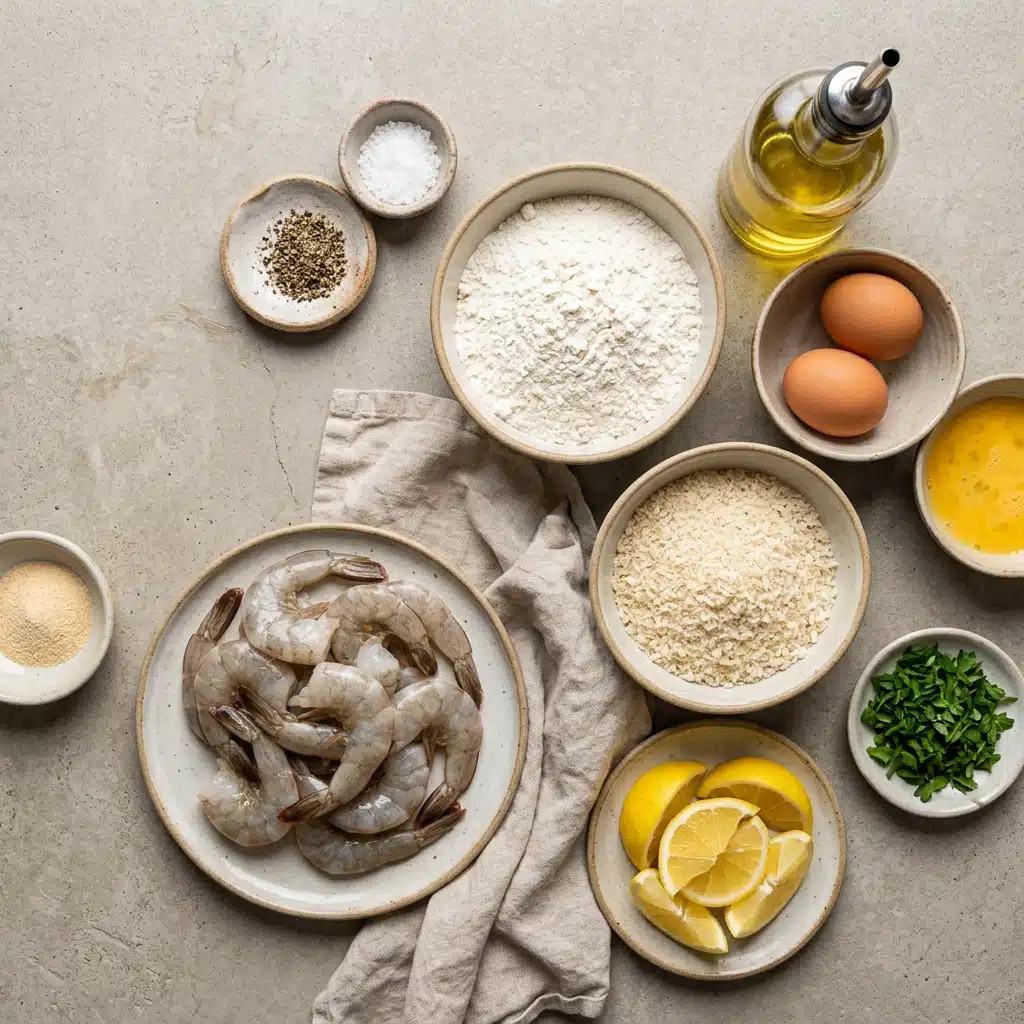
Quality matters when the ingredient list is short and sweet. Each component plays a specific role in building that flawless crunch and clean seafood flavor.
Shrimp: 12 to 15 large raw jumbo shrimp, peeled, deveined, with tails left on. These provide the sweet, mild protein that cooks in minutes.
Flour: 1/2 cup (approx. 70g) all-purpose flour. This creates the first dry layer that helps the egg wash grip the shrimp.
Eggs: 2 large eggs, lightly beaten. The egg wash acts as edible glue that binds the panko to the flour-coated shrimp.
Breadcrumbs: 1 to 1.5 cups Japanese panko breadcrumbs. These light, airy flakes deliver the signature shattering crunch and beautiful golden color.
Seasoning: Salt, black pepper, and garlic powder to taste. This trio enhances the natural sweetness of the shrimp without overwhelming it.
Frying Oil: Vegetable, canola, or neutral oil for deep or shallow frying. A neutral, high-smoke-point oil ensures even browning and clean flavor.
Garnish & Serving: Fresh lemon wedges, chopped parsley, and your favorite dipping sauce such as spicy mayo or sweet chili. These bright, fresh accents cut through the richness and invite you to dig in.
Substitutions and Star Ingredients for Crispy Panko Shrimp
Even a simple recipe benefits from knowing where you have wiggle room when making Crispy Panko Shrimp. Here are a few ways to adapt without straying from the core method.
Shrimp: If your shrimp vary slightly in size, simply adjust the frying time by thirty seconds up or down to ensure even cooking throughout.
Flour: All-purpose flour is ideal, but measuring by weight at 70g will give you the most accurate coating consistency every time.
Eggs: Lightly beaten eggs are key. If one egg is larger than the other, beat them extra vigorously to create a uniform wash.
Panko breadcrumbs: Use anywhere from 1 to 1.5 cups depending on how thickly you prefer the coating layered over the shrimp.
Frying oil: Vegetable, canola, or any neutral oil you already have in your pantry will work perfectly for this method.
Dipping sauce: Swap sweet chili for spicy mayo, or vice versa, to change the final flavor profile without adding new pantry items.
Now for the spotlight:
Panko breadcrumbs: These Japanese-style breadcrumbs are the soul of Crispy Panko Shrimp, creating an airy, jagged texture that shatters with every bite and stays crisp longer than standard fine crumbs.
Shrimp: Sweet, mild, and quick-cooking, jumbo shrimp provide the perfect canvas for the crunchy coating and pick up the garlic powder and black pepper beautifully.
Step-by-Step Crispy Panko Shrimp Mastery
The journey from raw shrimp to golden perfection is straightforward, and each step builds the next for Crispy Panko Shrimp. Follow the process closely and you will be rewarded with a plate of restaurant-worthy crunch.
Prepare the Shrimp: Pat the peeled and deveined shrimp thoroughly dry with paper towels. Lightly season them with salt, black pepper, and garlic powder. Removing as much moisture as possible is essential so the coating sticks and fries up crisp rather than soggy.
Set Up the Breading Station: Arrange three separate shallow bowls in a row: Bowl 1: All-purpose flour Bowl 2: Beaten eggs Bowl 3: Panko breadcrumbs. Keeping this assembly line organized prevents sticky fingers and keeps the dredging process moving swiftly.
Dredge the Shrimp: Holding each shrimp by its tail: Coat it completely in the flour and gently tap off any excess. Submerge it into the beaten egg until fully coated. Press it firmly into the panko breadcrumbs so the flakes adhere evenly to all sides. A firm press ensures the panko forms a solid, even blanket that will puff beautifully in the hot oil.
Fry to Golden Perfection: Heat 2–3 inches of oil in a skillet or pot to 350°F / 175°C–180°C. Fry the shrimp in small batches for 2 to 3 minutes, flipping once, until puffed, deep golden brown, and ultra-crisp. Watch for that deep color and audible sizzle, which signal that the crust has set and the shrimp within is perfectly cooked.
Drain & Serve: Transfer to a paper towel-lined plate or wire rack to drain. Serve immediately with fresh lemon wedges and dipping sauce. Enjoying them right away guarantees the maximum contrast between the hot, crackling exterior and the tender, juicy seafood inside.
What to Avoid with Crispy Panko Shrimp
A few common missteps can stand between you and the crunch you crave in Crispy Panko Shrimp. Here is how to sidestep them with confidence.
Skipping the dry: Wet shrimp make the flour clump and the coating slide off during frying. Always blot with paper towels first.
Overcrowding the pan: Too many shrimp at once drops the oil temperature and leads to pale, oily results instead of a golden shell.
Neglecting the oil temp: Without 350°F heat, the panko will soak up oil instead of turning crisp and airy.
Letting them steam: Piling hot shrimp on top of each other traps moisture and softens the crust. Use a wire rack or a single layer on a paper towel-lined plate.
Servings: 3 to 4
Calories per serving: Approximately 340
Note: These are approximate values.
Prep Time: 15 minutes
Cook Time: 6 to 8 minutes
Total Time: About 25 minutes
For fun twists that still honor the core recipe, try these variations.
Herb-Crusted: Mix chopped parsley into the panko breadcrumbs before coating for a flecked, herbaceous crust.
Lemony Brightness: Whisk a teaspoon of fresh lemon juice into the beaten eggs before dredging for a subtle citrus note.
Garlic Lovers: Increase the garlic powder in the seasoning step for an extra savory punch that complements the sweet shrimp.
Sauce Swap: Serve half the batch with spicy mayo and half with sweet chili so everyone gets their favorite dip.
FAQ’s
Can I use frozen shrimp for Crispy Panko Shrimp?
Yes, but ensure they are fully thawed, peeled, and deveined first. Pat them completely dry with paper towels before seasoning so the coating adheres properly and fries evenly.
What is the best oil for frying Crispy Panko Shrimp?
The recipe calls for vegetable, canola, or any neutral oil with a high smoke point. These keep the flavor clean and let the sweet shrimp and crisp panko take center stage.
How do I know when the oil is ready?
The steps specify heating the oil to 350°F. If you do not have a thermometer, drop a single panko flake into the pot. It should sizzle and turn golden within a few seconds.
Can I bake Crispy Panko Shrimp instead of frying?
This recipe is designed for frying in 2 to 3 inches of oil to achieve the ultra-crisp panko crust. Baking is not included in the provided steps.
Why did my breading fall off?
The shrimp were likely too wet or the excess flour was not tapped off. Follow the dredge steps closely, pressing firmly into the panko so the flakes adhere evenly to all sides.
Can I prepare these ahead of time?
You can set up the breading station and season the shrimp in advance. However, fry and serve immediately for the deepest crunch and best texture.
Which dipping sauce should I choose?
The ingredients suggest spicy mayo or sweet chili sauce. Pick whichever you prefer, or serve with fresh lemon wedges and chopped parsley for a lighter touch.
How many shrimp does this recipe make?
The ingredient list calls for 12 to 15 large raw jumbo shrimp. Depending on appetites, this serves about 3 to 4 people as an appetizer or 2 as a main course.
Do I need to flip the shrimp while frying?
Yes, the steps say to flip the shrimp once during the 2 to 3 minute frying window. This ensures even puffing and a deep golden brown color on all sides.
Why must I fry in small batches?
Frying in small batches keeps the oil temperature stable at 350°F. Overcrowding causes the temperature to drop, which leads to greasy rather than crisp Crispy Panko Shrimp.
Conclusion
Crispy Panko Shrimp proves that a short ingredient list and a simple method can produce extraordinary results. The shatter of golden panko, the sweet pop of perfectly cooked shrimp, and the bright squeeze of lemon come together in a dish that feels special yet totally achievable. Whether you are hosting friends or treating yourself to a midweek upgrade, this recipe is worth every bite. Grab your bowls, heat that oil, and get ready for crunch time.
PrintCrispy Panko Shrimp
Crispy Panko Shrimp delivers an irresistible shatter of golden flakes giving way to sweet, tender seafood in every bite. This quick weeknight dish combines Japanese panko breadcrumbs with jumbo shrimp for a restaurant-quality crunch.
- Prep Time: 15 minutes
- Cook Time: 6 to 8 minutes
- Total Time: About 25 minutes
- Yield: 3 to 4 servings
- Category: Appetizer
- Method: Frying
- Cuisine: Japanese
Ingredients
- Shrimp: 12 to 15 large raw jumbo shrimp (peeled, deveined, tail left on) Flour: 1/2 cup (approx. 70g) all-purpose flour Eggs: 2 large eggs
- lightly beaten Breadcrumbs: 1 to 1.5 cups Japanese panko breadcrumbs Seasoning: Salt
- black pepper
- and garlic powder (to taste)Frying Oil: Vegetable
- canola
- or neutral oil for deep/shallow frying Garnish & Serving: Fresh lemon wedges
- chopped parsley
- and your favorite dipping sauce (such as spicy mayo or sweet chili)
Instructions
- Prepare the Shrimp: Pat the peeled and deveined shrimp thoroughly dry with paper towels. Lightly season them with salt
- black pepper
- and garlic powder. Set Up the Breading Station: Arrange three separate shallow bowls in a row: Bowl 1: All-purpose flour Bowl 2: Beaten eggs Bowl 3: Panko breadcrumbs Dredge the Shrimp: Holding each shrimp by its tail: Coat it completely in the flour and gently tap off any excess. Submerge it into the beaten egg until fully coated. Press it firmly into the panko breadcrumbs so the flakes adhere evenly to all sides. Fry to Golden Perfection: Heat 2–3 inches of oil in a skillet or pot to 350°F / 175°C–180°C. Fry the shrimp in small batches for 2 to 3 minutes
- flipping once
- until puffed
- deep golden brown
- and ultra-crisp. Drain & Serve: Transfer to a paper towel-lined plate or wire rack to drain. Serve immediately with fresh lemon wedges and dipping sauce.
Notes
- Pat shrimp completely dry before seasoning so flour adheres evenly and coating stays crisp.
- Maintain oil temperature at 350°F (175°C–180°C) to prevent greasy results.
- Fry in small batches to avoid overcrowding and temperature drops.
- Tap off excess flour after dredging to prevent clumpy patches.
- Drain on a wire rack or paper towel-lined plate in a single layer to keep crust crisp.
Nutrition
- Serving Size: 3-4 shrimp
- Calories: Approximately 340