Crispy Honey BBQ Chicken Tenders
Crispy Honey BBQ Chicken Tenders
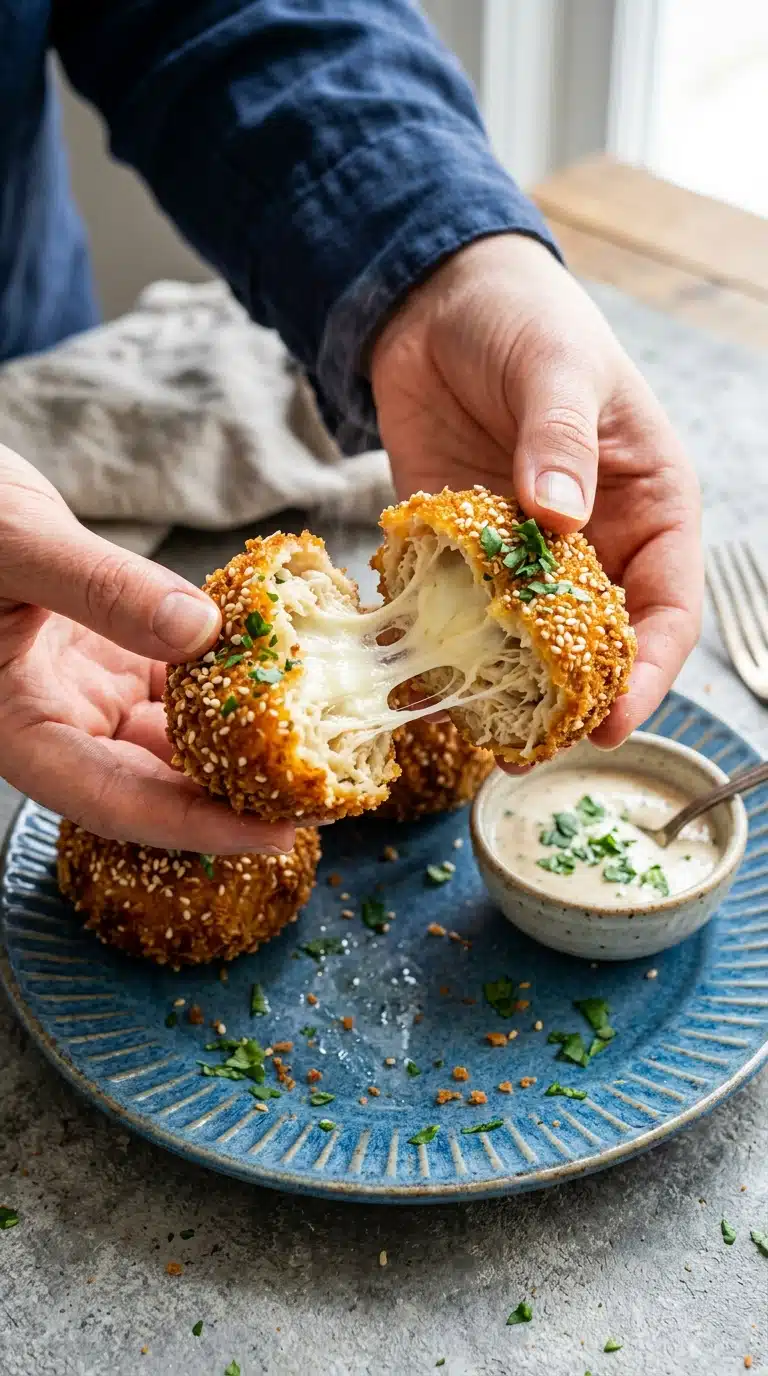
Crispy Honey BBQ Chicken Tenders are about to become your new weeknight obsession. These golden, crunchy strips of chicken get tossed in a sticky-sweet glaze that clings to every ridge of their panko coating. The result is a beautiful contradiction: shatteringly crisp exterior giving way to juicy, tender meat inside, all wrapped in that irresistible honey-kissed barbecue flavor.
Why These Tenders Will Steal Your Heart
There is something deeply satisfying about biting into a perfectly fried-then-baked tender. The sound alone, that audible crackle, triggers pure comfort. These Crispy Honey BBQ Chicken Tenders deliver that experience without the mess of deep-frying. Trust me, you’re going to love this.
The magic happens in layers. Flour creates a base for the egg to grip. Egg gives the panko something to hold onto. And panko, those airy Japanese breadcrumbs, puff up in the oven’s dry heat into a fortress of crunch that refuses to go soggy, even under a blanket of glossy sauce.
A Little History on the Tenderest Cut
Chicken tenders, also known as chicken tenderloins, sit just beneath the breast along the breastbone. This small muscle does little work, which explains its signature softness. The term “tender” appeared in American cookbooks by the 1970s, though the cut itself was often discarded or ground into filler before then.
Barbecue sauce meets honey in a marriage of Southern smoke and universal sweetness. The combination likely emerged from competition barbecue circuits in the 1980s, where pitmasters began glazing ribs and chicken with honey-laced sauces to create that coveted lacquered finish. Today, it is a flavor profile beloved from fast-casual chains to home kitchens.
The Reliable Appeal of Crispy Honey BBQ Chicken Tenders
Versatile: Serve these over rice, stuffed in sandwiches, or piled high on a platter for game day. They adapt to any occasion without complaint.
Budget-Friendly: Chicken tenders cost less than breast meat, and the coating stretches a pound and a half into generous portions for four hungry people.
Quick and Easy: From raw chicken to finished dinner in under forty minutes, with no standing at the stove or monitoring hot oil.
Customizable: Adjust the sauce sweetness, add heat with cayenne, or keep it plain for picky eaters. The base recipe welcomes improvisation.
Crowd-Pleasing: Children devour them. Adults sneak extras. There are never leftovers when these hit the table.
Make-Ahead Friendly: Bread the tenders hours ahead and refrigerate until baking time.
Great for Leftovers: Though best fresh, cold tenders straight from the fridge make excellent next-day snacking.
Insider Secrets for Tenderness Guaranteed
A few small choices separate good tenders from unforgettable ones.
First, do not skip the rack. Elevating the chicken allows hot air to circulate underneath, crisping the bottom without flipping constantly or risking sogginess. The parchment-lined tray catches any stray crumbs for easy cleanup.
Press the panko firmly onto each tender. A gentle but insistent push creates that thick, even coating that shatters so satisfyingly. Loose breadcrumbs fall off and burn on the tray.
Flip once, and only once. Disturbing the crust too early causes it to detach. Wait until the halfway mark, when the underside has set and released naturally from the rack.
For the sauce, low heat preserves the honey’s delicate floral notes. A vigorous boil scorches the sugars and turns the glaze bitter. Patience rewards you with a pourable, glossy finish.
Essential Tools for Success
You need little to achieve greatness here.
Wire cooling rack: This sits inside your baking sheet and elevates the tenders, mimicking a convection environment. The difference between rack and no-rack is the difference between crisp and limp.
Parchment paper: Catches drips and prevents scrubbing baked-on sauce later. It is worth the minimal cost.
Instant-read thermometer: The only reliable way to confirm your Crispy Honey BBQ Chicken Tenders reach safe internal temperature without overcooking. Learn more about safe chicken temperatures.
Small saucepan: For gently warming your glaze. A heavy-bottomed one prevents scorching.
Gathering Your Ingredients
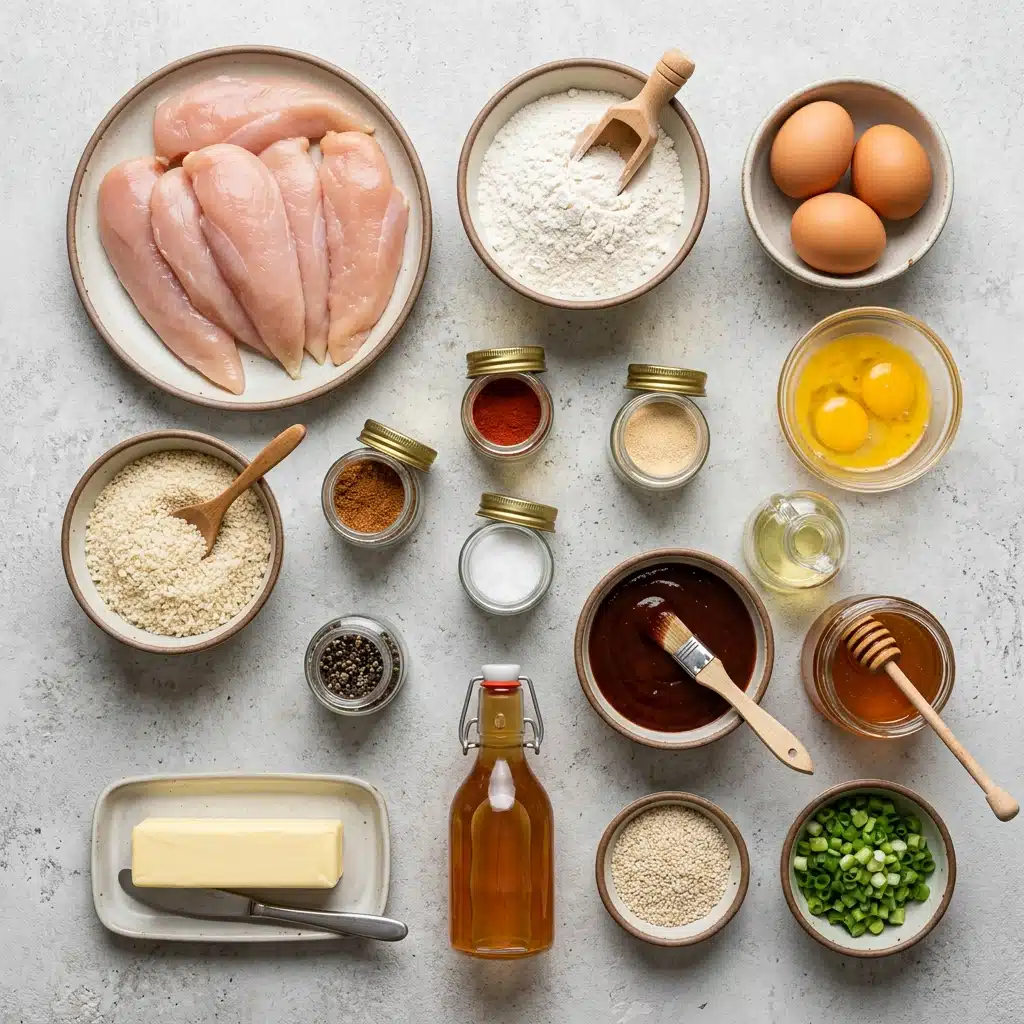
Quality ingredients treated simply yield extraordinary results. Each component here serves a specific purpose, building texture and flavor in deliberate layers.
Chicken tenders: 1½ pounds (680 g). The star protein, naturally tender and quick-cooking.
All-purpose flour: ½ cup. Creates the first layer of coating, giving egg something to adhere to.
Eggs: 2, beaten. The binding agent that glues panko to chicken. Learn about the science of breading.
Panko breadcrumbs: 1½ cups. Japanese-style breadcrumbs with larger, airier flakes that crisp beautifully in dry heat.
Paprika: 1 teaspoon. Adds subtle smokiness and appealing golden-red color to the coating.
Garlic powder: 1 teaspoon. Provides savory depth without the moisture of fresh garlic, which would soften the crust.
Salt: ½ teaspoon. Essential seasoning that enhances every other flavor.
Black pepper: ¼ teaspoon. Gentle heat and aromatic complexity.
Cooking spray or oil: 2 tablespoons. Promotes browning and helps the panko toast to golden perfection.
BBQ sauce: ⅓ cup. The tangy, smoky foundation of your glaze.
Honey: 3 tablespoons. Natural sweetness that balances the sauce’s acidity and creates gorgeous sheen.
Butter: 1 tablespoon. Adds richness and helps the glaze cling to the crispy coating.
Apple cider vinegar: 1 teaspoon. Bright acidity that cuts through sweetness and wakes up the palate.
Smart Substitutions
Panko breadcrumbs: Regular breadcrumbs work in a pinch, though the texture will be denser. Crushed cornflakes offer similar crunch with a slight sweetness.
Apple cider vinegar: White wine vinegar or rice vinegar substitute nicely. Lemon juice provides brightness but alters the flavor profile.
Chicken tenders: Breast meat cut into strips works, though cooking time increases slightly. Pound thicker pieces for even cooking.
Spotlight on Panko and Honey
Panko breadcrumbs: These Japanese imports differ from Western breadcrumbs in their processing. Bread is cooked by electrical current rather than baked, creating a crustless loaf that is then shredded into flaky, sliver-shaped crumbs. The result is maximum surface area and minimal density, which translates to extraordinary crunch that stays crisp longer than traditional alternatives.
Honey: Not all honey tastes alike. Clover honey is mild and universally pleasing. Wildflower honey brings complex floral notes. Buckwheat honey would overpower here. Choose a light, pourable variety that blends smoothly into your warmed sauce.
Bringing Crispy Honey BBQ Chicken Tenders to Life
The journey from raw ingredients to finished dish moves quickly. Stay organized and enjoy the process.
Preheat the oven to 425°F (220°C). Line a tray with parchment and place a rack on top. The high heat is crucial for crisping panko before the chicken overcooks. The rack elevation prevents steam from softening the underside.
Season the panko with paprika, garlic powder, salt, and pepper. Toss thoroughly so every flake carries flavor. This step ensures seasoning reaches every bite, not just the surface.
Dredge each tender in flour, dip in egg, then press firmly into the panko. Shake off excess flour before the egg wash to prevent gummy spots. Let excess egg drip away too. Pressing firmly embeds the crumbs into the sticky egg layer.
Place on the rack and spray generously with oil on both sides. Do not be timid here. Oil conducts heat and promotes the Maillard reaction that creates golden color and toasty flavor.
Bake 18 to 20 minutes, flipping once, until golden and cooked through (165°F / 74°C). Halfway through, gently turn each tender. The crust should release easily when properly set. Check temperature in the thickest tender to confirm doneness.
While baking, warm the BBQ sauce, honey, butter, and vinegar in a small pan for 2 to 3 minutes until glossy. Stir constantly over low heat. The mixture should become fluid and shiny, not bubbling aggressively. Remove from heat as soon as the butter melts completely.
Toss the tenders in the sauce (or drizzle on top) and garnish with sesame seeds and green onion. Serve right away so they stay crunchy. This is the moment of truth. Work quickly, as the glaze will eventually soften even the sturdiest crust. Serve immediately for maximum textural contrast.
Common Pitfalls and How to Dodge Them
Even simple recipes have traps for the unwary.
Soggy coating: Usually caused by insufficient oil or overcrowding the rack. Leave space between tenders for air circulation.
Burnt panko before chicken cooks: Your oven runs hot, or the rack is too close to the element. Move to a lower position or reduce temperature slightly, extending time as needed.
Glaze too thick to coat: Over-reduction concentrates sugars until the sauce becomes sticky candy. Add a splash of water and rewarm gently.
Chicken dries out: Overbaking is the culprit. Trust your thermometer, not the clock. Pull at 165°F and rest briefly.
Coating falls off: The egg layer was too thin, or flipping happened too early. Press firmly during breading, and flip only when the crust feels set.
Nutrition at a Glance
Servings: 4
Calories per serving: approximately 420
Note: These are approximate values calculated from standard nutritional databases and will vary based on specific brands used.
Timing Your Kitchen Session
Prep Time: 15 minutes
Cook Time: 20 minutes
Total Time: 35 minutes
Delicious Variations to Explore
Spicy Honey Tenders: Add ½ teaspoon cayenne to the panko and a dash of hot sauce to the glaze.
Sesame Ginger Tenders: Replace paprika with ground ginger, and swap apple cider vinegar for rice vinegar. Finish with toasted sesame seeds.
Ranch-Dusted Tenders: Omit the BBQ glaze. Toss hot tenders in powdered ranch seasoning mixed with a touch of cornstarch.
Lemon Pepper Tenders: Add lemon zest to the panko and finish with fresh lemon juice instead of the honey BBQ sauce.
FAQ’s
Can I use chicken breast instead of tenders?
Yes, though you must cut the breast into strips of similar thickness to ensure even cooking. Pound thicker sections gently. Expect slightly longer bake time.
Why is my coating not crispy?
Insufficient oil application and overcrowding are the usual suspects. Ensure generous spraying and space between pieces. A hot oven is essential.
Can I make these in an air fryer?
Absolutely. Cook at 400°F for 12 to 14 minutes, flipping halfway. Reduce quantity per batch to maintain air circulation.
How do I store leftovers?
Refrigerate in a single layer, uncovered, for up to two hours before covering to preserve some crispness. Reheat in a hot oven or air fryer, never microwave.
Can I freeze breaded raw tenders?
Yes, freeze in a single layer on a tray, then transfer to bags. Bake from frozen, adding 5 to 7 minutes to the cooking time.
Is there a way to make these gluten-free?
Substitute gluten-free all-purpose flour blend and gluten-free panko. Both are widely available and perform well.
Why add vinegar to the glaze?
The small amount of acid balances sweetness and adds dimension. Without it, the sauce tastes flat and one-dimensional.
Can I prepare the sauce ahead?
The sauce keeps refrigerated for one week. Rewarm gently before using, adding a teaspoon of water if thickened.
What sides pair best?
Creamy coleslaw cuts through the richness. Corn on the cob echoes the barbecue theme. A simple green salad provides refreshing contrast.
Why flip only once?
Each flip risks dislodging the delicate crust. The single flip at midpoint allows both sides to set undisturbed.
Conclusion
Crispy Honey BBQ Chicken Tenders prove that extraordinary flavor does not require complicated technique or expensive ingredients. A proper breading sequence, a hot oven, and a simple stovetop glaze transform humble chicken into something that disappears from plates in moments. Make them once, and you will find reasons to make them again. This one’s a total game-changer, and it’s worth every bite.
PrintCrispy Honey BBQ Chicken Tenders
Golden, crunchy chicken tenders tossed in a sticky-sweet honey BBQ glaze, with a shatteringly crisp panko exterior and juicy tender meat inside.
- Prep Time: 15 minutes
- Cook Time: 20 minutes
- Total Time: 35 minutes
- Yield: 4 servings
- Category: Main Course
- Method: Baking
- Cuisine: American
Ingredients
- Tenders
- 1½ lb (680 g) chicken tenders
- ½ cup all-purpose flour
- 2 eggs, beaten
- 1½ cups panko breadcrumbs
- 1 tsp paprika
- 1 tsp garlic powder
- ½ tsp salt and ¼ tsp black pepper
- Cooking spray or 2 tbsp oil
- Honey BBQ sauce
- ⅓ cup BBQ sauce
- 3 tbsp honey
- 1 tbsp butter
- 1 tsp apple cider vinegar
Instructions
- Preheat the oven to 425°F (220°C). Line a tray with parchment and place a rack on top.
- Season the panko with paprika, garlic powder, salt, and pepper.
- Dredge each tender in flour, dip in egg, then press firmly into the panko.
- Place on the rack and spray generously with oil on both sides.
- Bake 18 to 20 minutes, flipping once, until golden and cooked through (165°F / 74°C).
- While baking, warm the BBQ sauce, honey, butter, and vinegar in a small pan for 2 to 3 minutes until glossy.
- Toss the tenders in the sauce (or drizzle on top) and garnish with sesame seeds and green onion. Serve right away so they stay crunchy.
Notes
- Do not skip the rack; elevating the chicken allows hot air to circulate underneath for a crisp bottom.
- Press panko firmly onto each tender to create a thick, even coating that adheres.
- Flip the tenders once and only once to prevent the crust from detaching.
- Warm the glaze over low heat to preserve the honey’s delicate notes and avoid scorching.
- Use an instant-read thermometer and remove chicken from the oven at 165°F (74°C).
- Toss with glaze and serve immediately for maximum textural contrast.
Nutrition
- Serving Size: 1 serving
- Calories: approximately 420