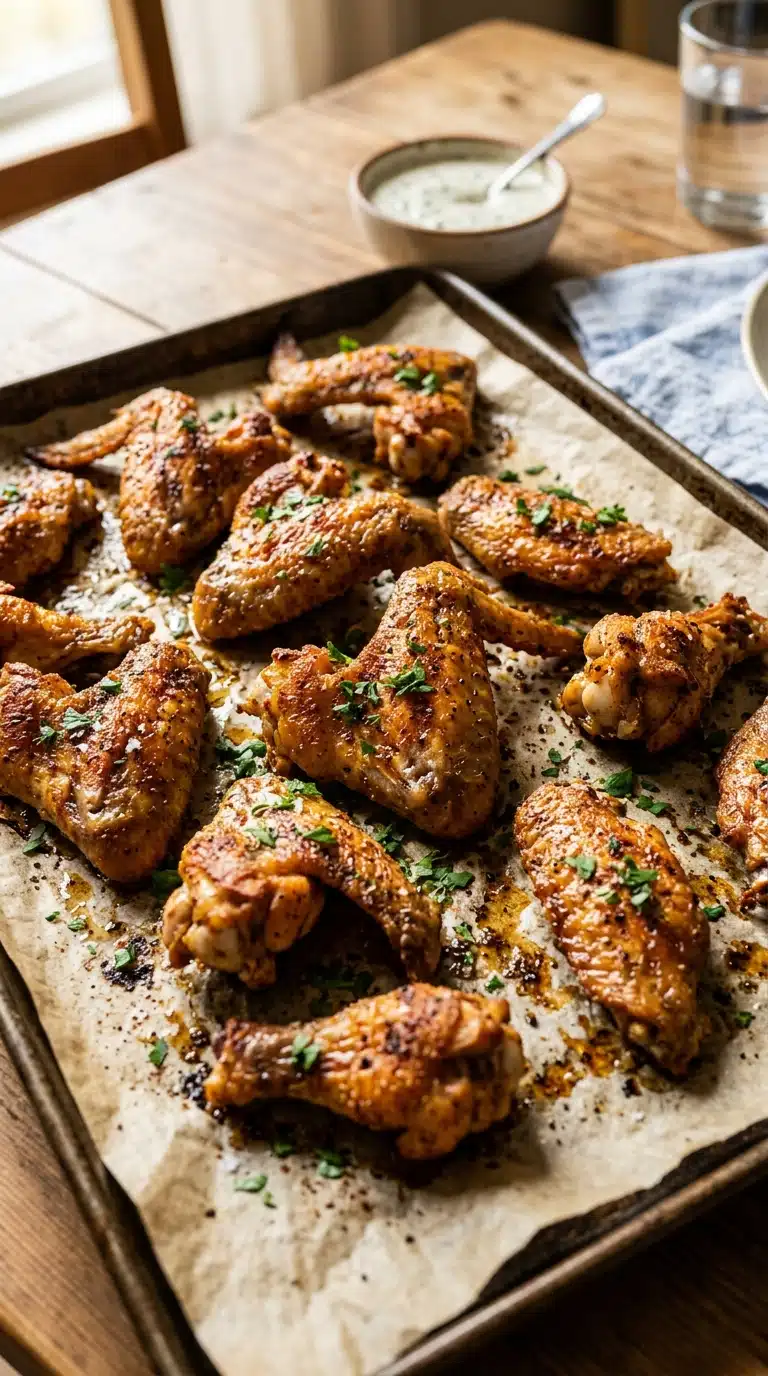
Crispy Baked Garlic Butter Chicken Wings
Crispy Baked Garlic Butter Chicken Wings
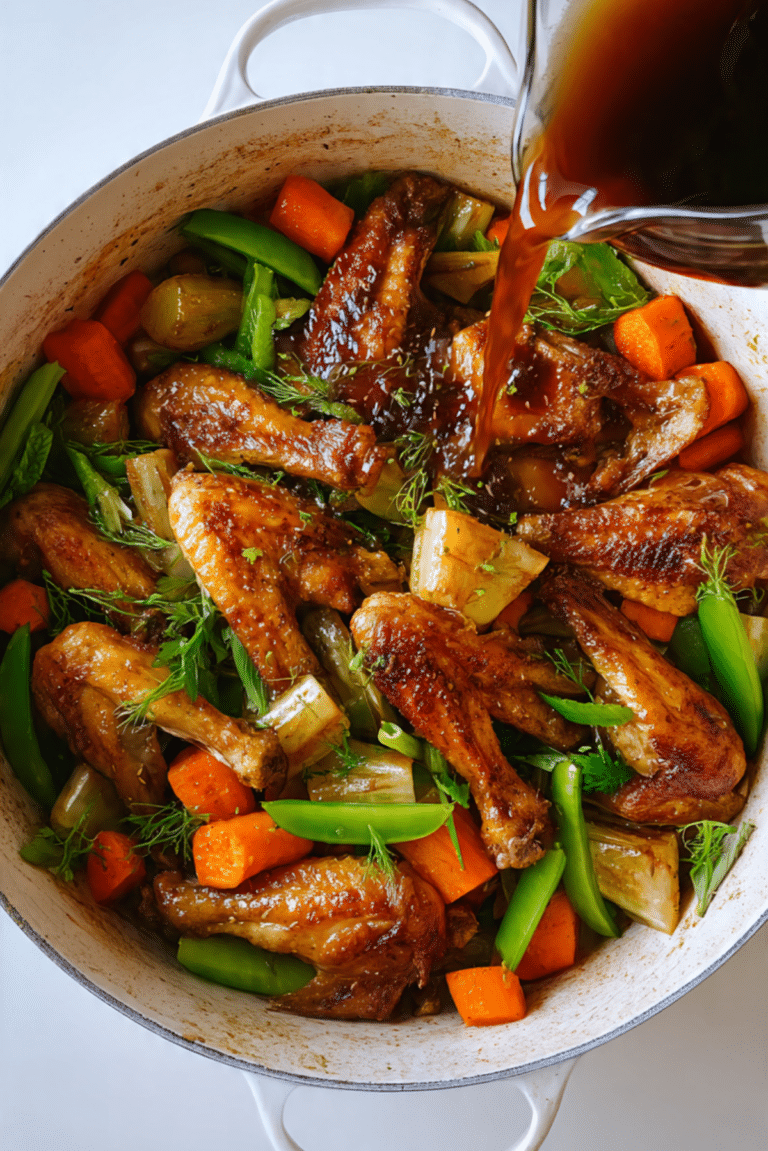
Crispy Baked Garlic Butter Chicken Wings deliver the ultimate combination of shatteringly crisp skin and rich, aromatic garlic butter that clings to every ridge. The first bite releases a satisfying crunch followed by tender, juicy meat beneath a blanket of savory parmesan and fresh herbs. Trust me, you’re going to love this game-changing approach to wings that skips the fryer but never sacrifices texture.
The Crispy Appeal and Heritage of Crispy Baked Garlic Butter Chicken Wings
There is something deeply satisfying about the contrast between a crackling exterior and succulent meat that makes these wings utterly irresistible. The method draws inspiration from classic Buffalo wings born in upstate New York, yet embraces modern oven techniques that render fat slowly for maximum crispness without the mess of deep frying. This evolution represents how home cooks have adapted bar food favorites for healthier, more accessible weeknight cooking while preserving that essential finger-licking experience. The history of the chicken wing as a culinary icon spans decades of American food culture, transforming from discarded cuts to prized appetizers.
Why Crispy Baked Garlic Butter Chicken Wings Deserve a Spot in Your Recipe Box
This recipe earns its place in your permanent collection through sheer reliability and crowd-pleasing magic. Every batch emerges from the oven with that coveted golden crunch that makes everyone reach for seconds.
Versatile: These wings shine as game day appetizers, weeknight dinners, or party platters that suit virtually any occasion without missing a beat.
Budget-Friendly: Chicken wings remain one of the most economical cuts of meat, feeding a crowd for far less than takeout while tasting infinitely better than restaurant versions.
Quick and Easy: The active preparation requires only fifteen minutes of your time, letting the oven do the heavy lifting while you prepare the simple garlic butter finish.
Customizable: You control the exact level of garlic intensity and can adjust the paprika heat to suit sensitive palates or spice lovers equally well.
Crowd-Pleasing: The universal appeal of butter, garlic, and crispy chicken ensures both children and adults will devour these wings straight from the platter.
Make-Ahead Friendly: You can dry and season the wings up to twenty-four hours in advance, allowing the baking powder to work its magic on the skin overnight.
Great for Leftovers: While best fresh, these wings reheat beautifully in a hot oven, maintaining their crisp texture better than fried alternatives.
Pro Tips and Essential Kitchen Tools for Crispy Baked Garlic Butter Chicken Wings
Mastering these wings requires understanding the science behind the crunch. The low and slow followed by high heat method creates the perfect texture through careful fat rendering.
Use a wire rack: Elevating the wings allows hot air to circulate completely around each piece, preventing the bottom from steaming against the pan.
Do not rush the drying: Spend a full five minutes patting with paper towels; this step directly correlates to final crispiness.
Room temperature butter: Ensure your butter is soft before melting for the sauce, as it combines more smoothly with the garlic and lemon.
Rest before tossing: Let the wings cool for just two minutes after the high heat blast so they can handle the butter coating without losing their crunch.
Essential tools include a sturdy baking sheet, an oven-safe wire rack, large mixing bowls, quality paper towels, and a small saucepan for the garlic butter.
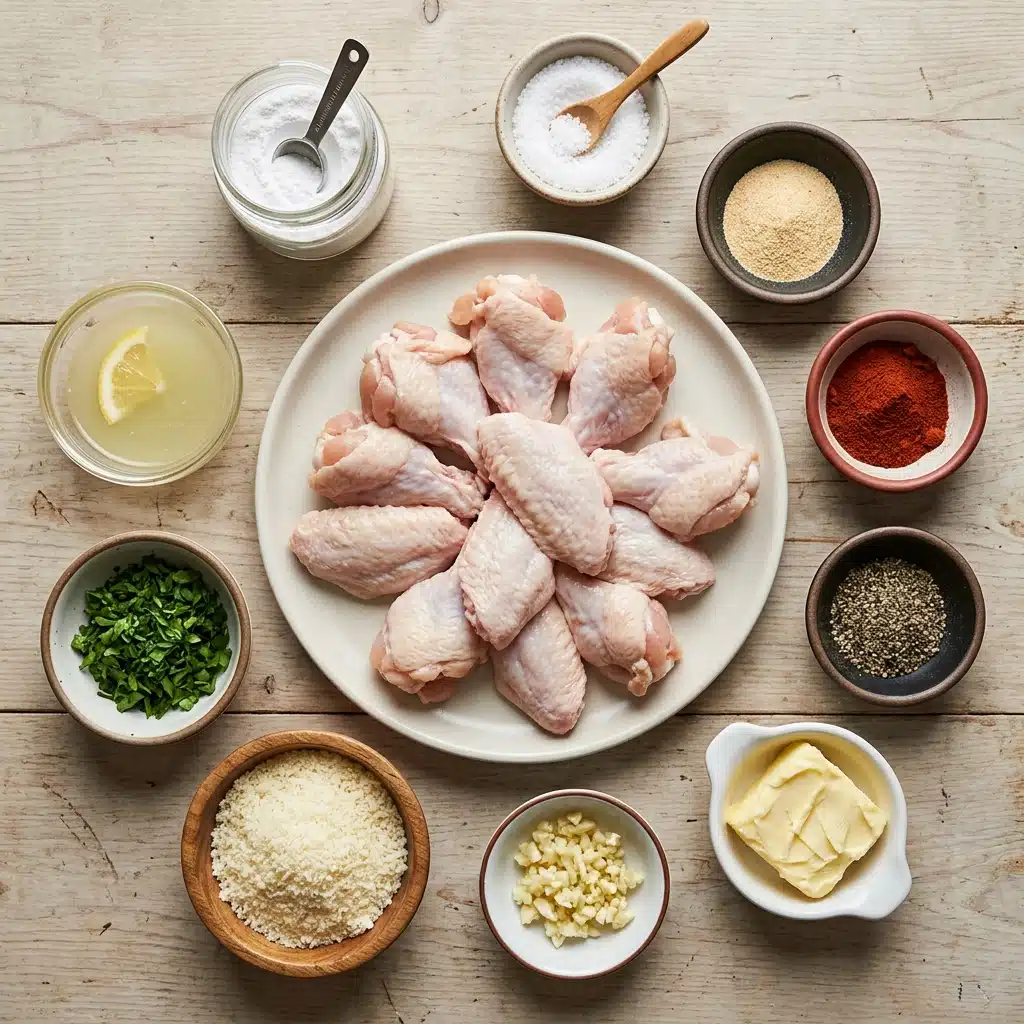
Gathering Your Ingredients for Crispy Baked Garlic Butter Chicken Wings
Quality matters when working with such a focused ingredient list. Each component plays a specific role in creating the final texture and flavor profile.
1. Chicken Wings: 2 lb (900 g) chicken wings, split into drumettes and flats provide the perfect ratio of skin to meat for optimal crisping and eating enjoyment.
2. Aluminum-Free Baking Powder: 1 tbsp aluminum-free baking powder raises the pH of the skin dramatically, accelerating the Maillard reaction that creates golden, crackling results without any metallic aftertaste.
3. Salt: 1 tsp salt draws moisture from the skin initially while seasoning the meat deeply throughout the cooking process.
4. Garlic Powder: 1 tsp garlic powder provides foundational allium flavor that permeates the meat during the long bake.
5. Paprika: ½ tsp paprika contributes subtle smoke and beautiful color to the finished wings.
6. Black Pepper: ½ tsp black pepper adds gentle heat and aromatic complexity.
7. Butter: 4 tbsp butter creates the luxurious coating that carries the garlic flavor and helps the parmesan adhere.
8. Garlic: 4 cloves garlic, minced, provide the signature pungent aroma when briefly cooked in butter.
9. Parmesan: ¼ cup grated parmesan adds umami depth and a salty, nutty finish that complements the garlic perfectly.
10. Parsley: 1 tbsp chopped parsley brings fresh color and herbaceous brightness that cuts through the richness.
11. Lemon Juice: A squeeze of lemon juice provides essential acidity that balances the fat and brightens every bite.
Smart Substitutions, Spotlight Ingredients, and Tasty Variations
While this specific combination creates magic, understanding your options helps you adapt when necessary.
Baking Powder: You may use cornstarch in a pinch, though the results will be slightly less crisp and take longer to achieve.
Butter: Ghee or clarified butter works beautifully for those avoiding milk solids, though the flavor will be slightly nuttier.
Baking Powder: This unassuming white powder is the true secret weapon here. By creating microscopic bubbles on the skin surface and raising the pH, it ensures the wings emerge from the oven with a texture indistinguishable from fried versions.
Butter: The fat carries fat-soluble flavors and creates that satisfying mouthfeel that makes these wings feel indulgent rather than austere.
Variations to try: Increase the paprika to one full teaspoon for a smoky Spanish-inspired profile, or double the garlic for true garlic lovers. You might also reserve extra parmesan for sprinkling at the table for added texture, or serve with extra lemon wedges on the side for those who prefer more acidity.
The Step-by-Step Method for Perfect Crispy Baked Garlic Butter Chicken Wings
Follow these precise steps to achieve wing perfection every single time.
Preheat the oven to 250°F (120°C). Line a tray with foil and set a rack on top. This low starting temperature gently renders the fat beneath the skin without drying out the meat, while the rack ensures hot air circulates underneath for even crisping.
Pat the wings completely dry. This is the key to crispy skin. Moisture is the enemy of crunch, so take your time with paper towels here. Every drop of water you remove now translates to shatteringly crisp skin later.
Toss with baking powder, salt, garlic powder, paprika, and pepper until evenly coated. The baking powder raises the pH level of the skin, helping it brown and crisp beautifully. Make sure every nook and cranny gets coated for consistent flavor.
Arrange on the rack in a single layer and bake for 30 minutes. Give each wing space to breathe; overcrowding creates steam and soggy spots. This initial low bake gently melts the fat beneath the skin.
Raise the oven to 425°F (220°C) and bake 40 to 45 minutes more, flipping once, until deep golden and crispy. The high heat blast transforms the rendered skin into golden perfection. Flipping ensures both sides get equally crunchy and caramelized.
Melt the butter in a pan, add the garlic, and cook for 30 to 60 seconds until fragrant. Stir in the lemon juice. Watch the garlic closely as it can burn quickly and turn bitter. The lemon juice cuts through the richness and brightens every bite.
Toss the hot wings in the garlic butter, then finish with parmesan and parsley. The residual heat helps the cheese melt slightly and cling to every ridge. Serve immediately while the contrast between hot wing and fragrant coating is at its peak.
Critical Pitfalls to Avoid When Making Crispy Baked Garlic Butter Chicken Wings
Even simple recipes have traps for the unwary. Steer clear of these common errors to ensure success.
Skipping the drying step leads to rubbery skin. Pat thoroughly with paper towels until the surface feels tacky rather than wet.
Crowding the pan creates steam. Always use a rack and give each wing at least an inch of space on all sides.
Burning the garlic makes the sauce bitter. Keep the heat medium-low and remove the pan from heat as soon as the garlic smells fragrant.
Tossing while the wings are too hot causes soggy coating. Allow exactly two minutes of cooling time so the butter adheres without melting the crisp texture away.
Nutrition Facts and Preparation Timeline
Servings: 4 / Calories per serving: approximately 450 / Note: These are approximate values.
Prep Time: 15 minutes / Cook Time: 75 minutes / Total Time: 90 minutes
FAQ’s
1. Can I use frozen wings for this recipe?
You must thaw them completely first. Frozen wings release too much moisture during baking, which prevents the skin from crisping properly regardless of baking powder.
2. Why aluminum-free baking powder specifically?
Aluminum-free varieties prevent any potential metallic aftertaste that can occur when baking powder reacts with high heat and meat proteins over extended cooking times.
3. Can I make these ahead for a party?
Bake them completely, then reheat on a rack at 400°F for 8 to 10 minutes until hot and crisp again. Toss with the garlic butter just before serving.
4. Is the wire rack absolutely necessary?
While you can bake directly on foil, the rack elevates the wings allowing rendered fat to drip away, which is crucial for achieving truly crispy skin all around.
5. Can I double the recipe?
Yes, but use two baking sheets and rotate them between oven racks halfway through cooking. Do not crowd all the wings onto one sheet.
6. How do I store leftovers?
Refrigerate in an airtight container for up to three days. Reheat on a rack at 375°F for 10 minutes to restore crispness.
7. Can I use whole wings instead of split?
Split wings cook more evenly and crisp better due to increased surface area. If using whole wings, add 10 minutes to the high heat cooking time.
8. Why start at such a low temperature?
The 250°F start gently renders the subcutaneous fat without shocking the meat, ensuring tender results before the high heat blast creates the crust.
9. Can I prepare the garlic butter sauce ahead?
You can melt the butter and garlic ahead, but add the lemon juice and toss with wings only when ready to serve for the brightest flavor.
10. What if I do not have a rack?
Create elevation by rolling foil into small logs and placing them on the baking sheet to lift the wings above the rendered fat.
Conclusion
Crispy Baked Garlic Butter Chicken Wings prove that oven baking can rival any deep fryer when you understand the technique. The combination of slow rendering and high heat finishing creates something truly special, especially when coated in that fragrant garlic butter. Gather your ingredients, trust the process, and prepare for the crunchiest wings you have ever pulled from your oven. This one’s a total game-changer, and it’s worth every bite.
PrintCrispy Baked Garlic Butter Chicken Wings
Crispy Baked Garlic Butter Chicken Wings deliver shatteringly crisp skin and rich garlic butter with savory parmesan and fresh herbs, skipping the fryer without sacrificing texture.
- Prep Time: 15 minutes
- Cook Time: 75 minutes
- Total Time: 90 minutes
- Yield: 4 servings
- Category: Appetizer
- Method: Baking
- Cuisine: American
Ingredients
- Wings
- 2 lb (900 g) chicken wings, split into drumettes and flats
- 1 tbsp aluminum-free baking powder
- 1 tsp salt
- 1 tsp garlic powder
- ½ tsp paprika
- ½ tsp black pepper
- Garlic butter sauce
- 4 tbsp butter
- 4 cloves garlic, minced
- ¼ cup grated parmesan
- 1 tbsp chopped parsley
- Squeeze of lemon juice
Instructions
- Preheat the oven to 250°F (120°C). Line a tray with foil and set a rack on top.
- Pat the wings completely dry. This is the key to crispy skin.
- Toss with baking powder, salt, garlic powder, paprika, and pepper until evenly coated.
- Arrange on the rack in a single layer and bake for 30 minutes.
- Raise the oven to 425°F (220°C) and bake 40 to 45 minutes more, flipping once, until deep golden and crispy.
- Melt the butter in a pan, add the garlic, and cook for 30 to 60 seconds until fragrant. Stir in the lemon juice.
- Toss the hot wings in the garlic butter, then finish with parmesan and parsley.
Notes
- Use a wire rack to allow hot air to circulate completely around each piece and prevent the bottom from steaming against the pan.
- Do not rush the drying step; spend a full five minutes patting with paper towels for maximum crispiness.
- Ensure butter is at room temperature before melting so it combines more smoothly with the garlic and lemon.
- Let wings rest for two minutes after the high heat blast before tossing to preserve their crunch.
- Skipping the drying step leads to rubbery skin; pat thoroughly until the surface feels tacky rather than wet.
- Avoid crowding the pan; give each wing at least an inch of space on all sides to prevent steam.
- Burning the garlic makes the sauce bitter; keep heat medium-low and remove from heat as soon as fragrant.
- Tossing while wings are too hot causes soggy coating; allow exactly two minutes of cooling time.
Nutrition
- Serving Size: 1 serving
- Calories: approximately 450