Chocolate Chip Peanut Butter Brookie Cups
Chocolate Chip Peanut Butter Brookie Cups
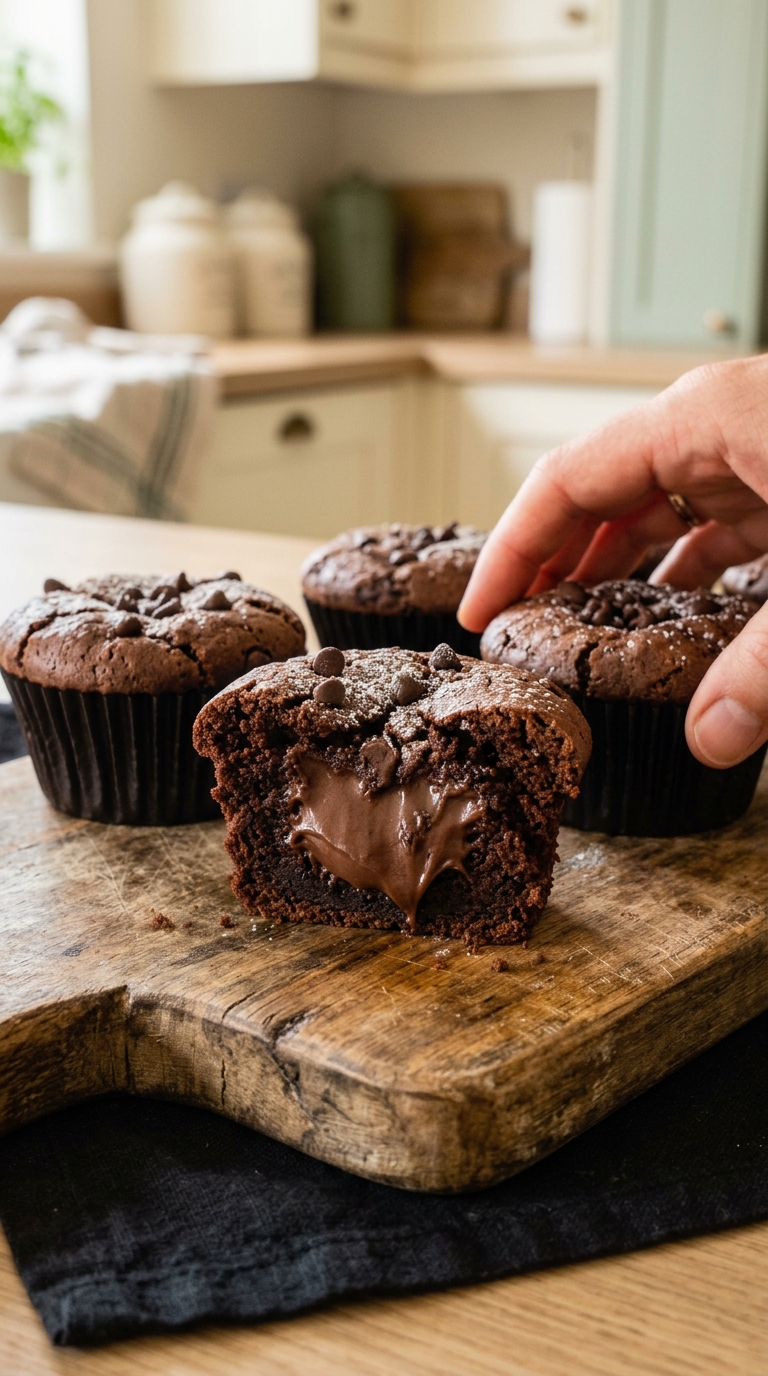
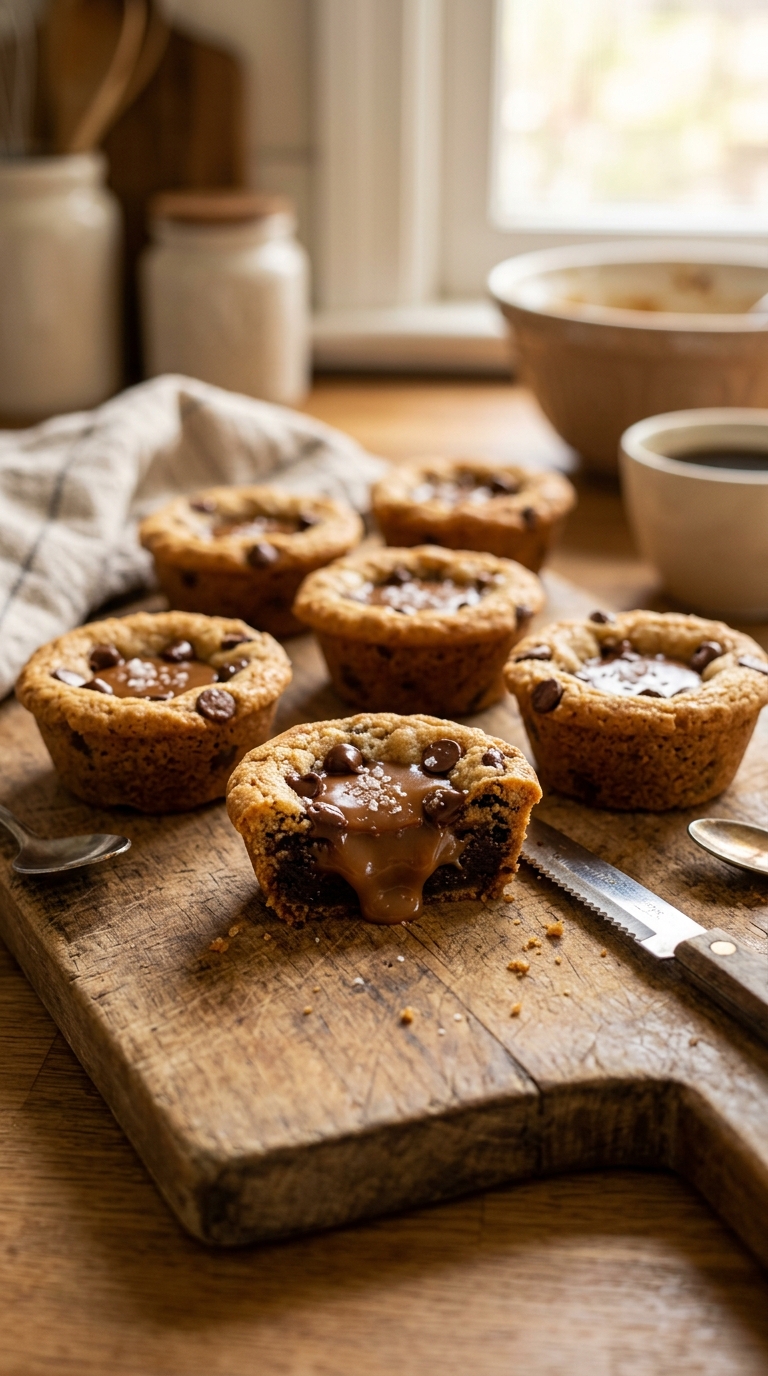
Chocolate Chip Peanut Butter Brookie Cups are the ultimate dessert mashup when you cannot choose between a fudgy brownie and a soft peanut butter cookie. Each cup hides a dense chocolate base beneath a tender cookie top. One bite reveals melty chips and nutty richness that keeps you reaching for more.
Chocolate Chip Peanut Butter Brookie Cups Are a Total Game-Changer
There is something magical about breaking through a golden cookie crust to find a rich brownie underneath. The aroma of warm peanut butter and vanilla fills the kitchen instantly. Trust me, you’re going to love this contrast of chewy and fudgy textures.
The Story Behind Brookies and Peanut Butter Classics
The brookie trend took off as home bakers started layering brownie batter and cookie dough into one dessert. Peanut butter has been a beloved baking staple for generations. You can read more about the history of the brownie and how it inspires modern treats.
Why Chocolate Chip Peanut Butter Brookie Cups Work Every Time
This recipe is appealing because it pairs a reliable box mix with a quick scratch cookie layer. You get bakery-level results without complicated techniques.
Versatile: These cups charm at birthdays, bake sales, and quiet nights alike.
Budget-Friendly: A box mix and pantry staples keep the cost pleasantly low.
Quick and Easy: No fancy skills are needed to layer and bake these treats.
Customizable: You can reverse the chip placement using only the ingredients already on hand.
Crowd-Pleasing: Kids and adults reach for these the moment they hit the table.
Make-Ahead Friendly: Bake early and serve later at room temperature.
Great for Leftovers: They stay soft and flavorful for several days.
Pro Tips, Essential Tools, and What to Avoid
Success comes down to timing, tools, and a gentle touch. Follow these pointers to avoid common pitfalls.
- Use a true family-size box brownie mix so the batter volume matches the cookie layer.
- Let your butter soften naturally at room temperature for the creamiest dough.
- Remove the brownie layer when it just begins to set to avoid overbaking.
- Drop the cookie dough gently onto the warm base so it rests on top rather than sinking in.
- Allow the cups to cool completely in the pan so they hold their shape when lifted out.
Muffin/cupcake pan: This shapes the brookie cups into perfect individual portions.
Mixing bowls: You need separate bowls to keep the brownie batter and cookie dough organized.
Hand mixer or stand mixer: Creaming butter and peanut butter by hand is possible, but a mixer saves time and delivers fluffier dough.
Rubber spatula: Essential for folding in mini chocolate chips without overworking the dough.
Cookie scoop or spoons: Helps portion the cookie dough evenly across all cups.
Be careful to sidestep these simple mistakes.
- Do not overmix the cookie dough after adding the flour, or the tops will turn tough.
- Avoid filling the muffin cups too high with brownie batter, because the cookie layer needs room to bake.
- Never skip the partial bake; placing raw cookie dough onto raw brownie batter changes the texture entirely.
- Do not remove the cups from the pan while warm, since they need time to firm up.
Everything You Need for Chocolate Chip Peanut Butter Brookie Cups
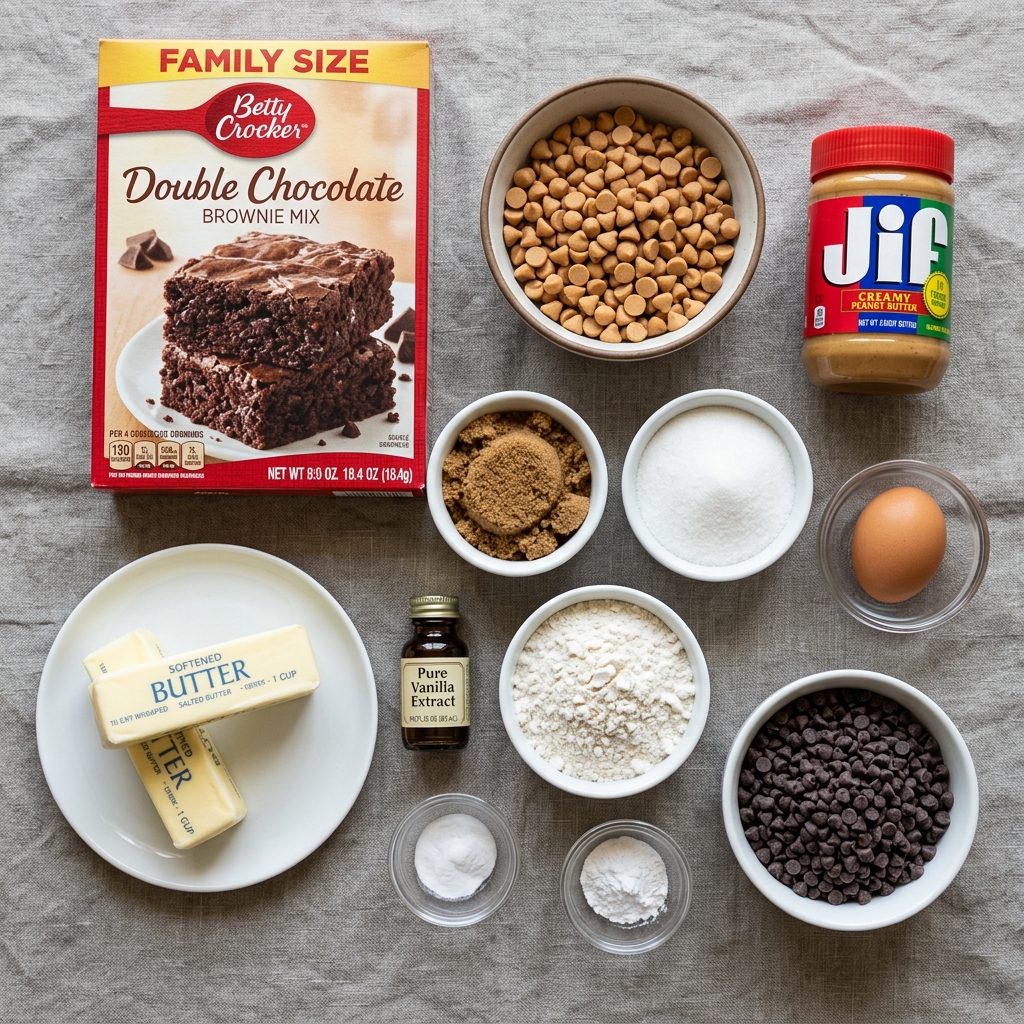
Gather these exact components before you start. Each one plays a specific role in creating the perfect brookie cup.
- Family-size box brownie mix: This forms the decadent chocolate base and provides the bulk of the brownie layer.
- Ingredients required by the brownie mix package: These bind and moisten the boxed mix according to the manufacturer’s formula.
- Peanut butter chips: One cup of these morsels melts into creamy pockets that infuse the brownie layer with nutty sweetness.
- Salted butter: A half cup, softened, adds richness and structure to the peanut butter cookie dough.
- Creamy peanut butter: A half cup delivers unmistakable peanut flavor and a lush, smooth texture.
- Granulated sugar: A half cup sweetens the cookie layer and helps create lightly crisp edges.
- Packed brown sugar: A half cup adds moisture and a subtle caramel note to the cookie dough.
- Large egg: One egg binds the cookie ingredients together and adds tenderness.
- Vanilla extract: One teaspoon rounds out the sweetness with warm, floral depth.
- All-purpose flour: One and one-quarter cups provide the structure for the soft cookie tops.
- Baking soda: A half teaspoon helps the cookie layer rise just enough.
- Baking powder: A half teaspoon gives additional lift for a tender, cake-like crumb.
- Mini chocolate chips: Three quarters of a cup distribute tiny bursts of melted chocolate throughout the cookie layer.
Substitutions and Star Ingredients
Because this recipe relies on a precise balance, any swap should stay within the ingredient list already provided.
Peanut butter chips: Swap with mini chocolate chips if you prefer a double-chocolate brownie base.
Mini chocolate chips: Swap with peanut butter chips for an all peanut-butter cookie layer.
Family-size box brownie mix: Use only the family size listed to ensure proper cup volume and bake time.
Peanut butter chips: These small morsels are the secret weapon in the brownie layer, melting into smooth, nutty ribbons that complement the dark chocolate base.
Mini chocolate chips: Their petite size ensures even distribution throughout the cookie dough so every bite carries delicate chocolate flavor without overwhelming the peanut butter.
Building Your Brookie Cups Step by Step
Follow these exact steps and you will have gorgeous layered cups ready to impress.
Prepare the brownie batter according to the package directions and stir in the peanut butter chips. Follow the box instructions precisely for a fudgy base. Fold in the chips so they melt into nutty pockets.
Spread the brownie batter into a prepared muffin/cupcake pan. Grease or line the wells to prevent sticking. Fill each cup about halfway to leave room on top.
Bake the brownie layer briefly until it begins to set. The surface should look matte and slightly puffed. This partial bake creates the perfect foundation for the cookie dough.
Meanwhile, cream the softened butter and peanut butter until smooth. A mixer whips the fats into a fluffy cloud. This step delivers a tender, bakery-style crumb.
Add the granulated sugar and brown sugar and mix until combined. The blend of sugars gives complex sweetness and chewy edges. Beat until no sugar streaks remain.
Mix in the egg and vanilla until fluffy. The egg binds the dough while vanilla adds warm depth. Mix until the color lightens slightly.
Add the flour, baking soda, and baking powder, mixing just until incorporated. Over-mixing activates too much gluten and toughens the tops. Stop when the flour disappears.
Fold in the mini chocolate chips. Use a spatula to distribute them evenly. Tiny chips melt quickly for delicate chocolate ribbons in every bite.
Portion the cookie dough over the partially baked brownie layer and gently press it into place. A scoop keeps things neat and uniform. Press lightly so the dough rests on top.
Return the cups to the oven and bake until the cookie tops are golden and the centers remain soft. Watch closely because the tops brown quickly. A soft center means extra gooeyness later.
Let them cool in the pan before removing. Residual heat finishes cooking both layers gently. Rush this step and your Chocolate Chip Peanut Butter Brookie Cups might crumble.
Cut one open to reveal the fudgy brownie and peanut-butter cookie layers. That cross-section is pure dessert theater. Trust me, you’re going to love this moment.
For more cookie science, check out these helpful chocolate chip cookie tips.
Nutrition and Timing
These treats are indulgent, and it’s worth every bite.
Servings: 24 cups
Calories per serving: approximately 290
Note: These are approximate values.
Prep Time: 20 minutes
Cook Time: 25 minutes
Total Time: 45 minutes
Variations to Try
You can switch things up without adding a single new ingredient to your shopping list.
Reverse the Chips: Stir mini chocolate chips into the brownie batter and fold peanut butter chips into the cookie dough for a flavor twist.
Marbled Brookie Cups: Before the second bake, drag a toothpick through both layers to create a swirling marbled effect.
Mini Muffin Bites: Divide the batters among mini muffin cups and reduce the bake times for poppable party treats.
Taller Cookie Tops: Use a little more cookie dough per cup and slightly less brownie batter if you prefer a higher cookie-to-brownie ratio.
FAQ’s
Can I use a different size brownie mix?
You should stick with the family-size box called for in this recipe. A smaller box will not yield enough batter to fill the pan properly.
Do I need to chill the cookie dough?
The provided steps do not require chilling. Simply prepare the dough while the brownie layer partially bakes.
Can I use crunchy peanut butter instead of creamy?
The ingredient list specifies creamy peanut butter. Crunchy will change the texture and is not included in the original components.
Why must I partially bake the brownie layer first?
This sets the base just enough to support the cookie dough. Adding raw dough to raw batter would create uneven texture and timing.
Can I swap the chip placements?
Yes. Because both peanut butter chips and mini chocolate chips are already in the recipe, you can exchange them between layers.
How do I know when the brookie cups are fully baked?
Look for golden cookie tops with centers that still feel slightly soft. They will continue to set as they cool.
Can I bake these in a regular muffin tin?
Absolutely. A standard muffin or cupcake pan works perfectly for shaping these treats.
Why mini chocolate chips instead of regular size?
Mini chips disperse more evenly throughout the cookie dough and melt into delicate chocolate streaks rather than large chunks.
How long should they cool before removal?
Let them cool completely in the pan. This allows the fudgy brownie layer to firm up so the cups lift out cleanly.
Can I freeze these brookie cups?
Yes. Once fully cooled, place them in an airtight container and freeze for up to two months. Thaw at room temperature before serving.
Conclusion
Chocolate Chip Peanut Butter Brookie Cups bring together everything we adore about brownies and cookies in one neat, handheld treat. The process is simple, the ingredients are straightforward, and the result is absolutely unforgettable. Bake a batch for your next gathering and watch them disappear.
PrintChocolate Chip Peanut Butter Brookie Cups
The ultimate dessert mashup combining a fudgy brownie base with a soft peanut butter cookie top, hiding melty chips and nutty richness in every bite.
- Prep Time: 20 minutes
- Cook Time: 25 minutes
- Total Time: 45 minutes
- Yield: 24 cups
- Category: Dessert
- Method: Baking
Ingredients
- Brownie layer
- 1 family-size box brownie mix
- Ingredients required by the brownie mix package
- 1 cup peanut butter chips
- Peanut butter chocolate-chip cookie layer
- ½ cup salted butter, softened
- ½ cup creamy peanut butter
- ½ cup granulated sugar
- ½ cup packed brown sugar
- 1 large egg
- 1 teaspoon vanilla extract
- 1¼ cups all-purpose flour
- ½ teaspoon baking soda
- ½ teaspoon baking powder
- ¾ cup mini chocolate chips
Instructions
- Prepare the brownie batter according to the package directions and stir in the peanut butter chips.
- Spread the brownie batter into a prepared muffin/cupcake pan.
- Bake the brownie layer briefly until it begins to set.
- Meanwhile, cream the softened butter and peanut butter until smooth.
- Add the granulated sugar and brown sugar and mix until combined.
- Mix in the egg and vanilla until fluffy.
- Add the flour, baking soda, and baking powder, mixing just until incorporated.
- Fold in the mini chocolate chips.
- Portion the cookie dough over the partially baked brownie layer and gently press it into place.
- Return the cups to the oven and bake until the cookie tops are golden and the centers remain soft.
- Let them cool in the pan before removing.
- Cut one open to reveal the fudgy brownie and peanut-butter cookie layers.
Notes
- Use a true family-size box brownie mix so the batter volume matches the cookie layer.
- Let butter soften naturally at room temperature for the creamiest dough.
- Remove the brownie layer when it just begins to set to avoid overbaking.
- Drop the cookie dough gently onto the warm base so it rests on top rather than sinking in.
- Allow cups to cool completely in the pan so they hold their shape when lifted out.
- Do not overmix the cookie dough after adding flour or the tops will turn tough.
- Avoid filling muffin cups too high with brownie batter because the cookie layer needs room to bake.
- Never skip the partial bake; placing raw cookie dough onto raw brownie batter changes the texture entirely.
- Do not remove the cups from the pan while warm since they need time to firm up.
Nutrition
- Serving Size: 1 cup
- Calories: approximately 290