Stuffed Double Chocolate Brookie Cups
Stuffed Double Chocolate Brookie Cups
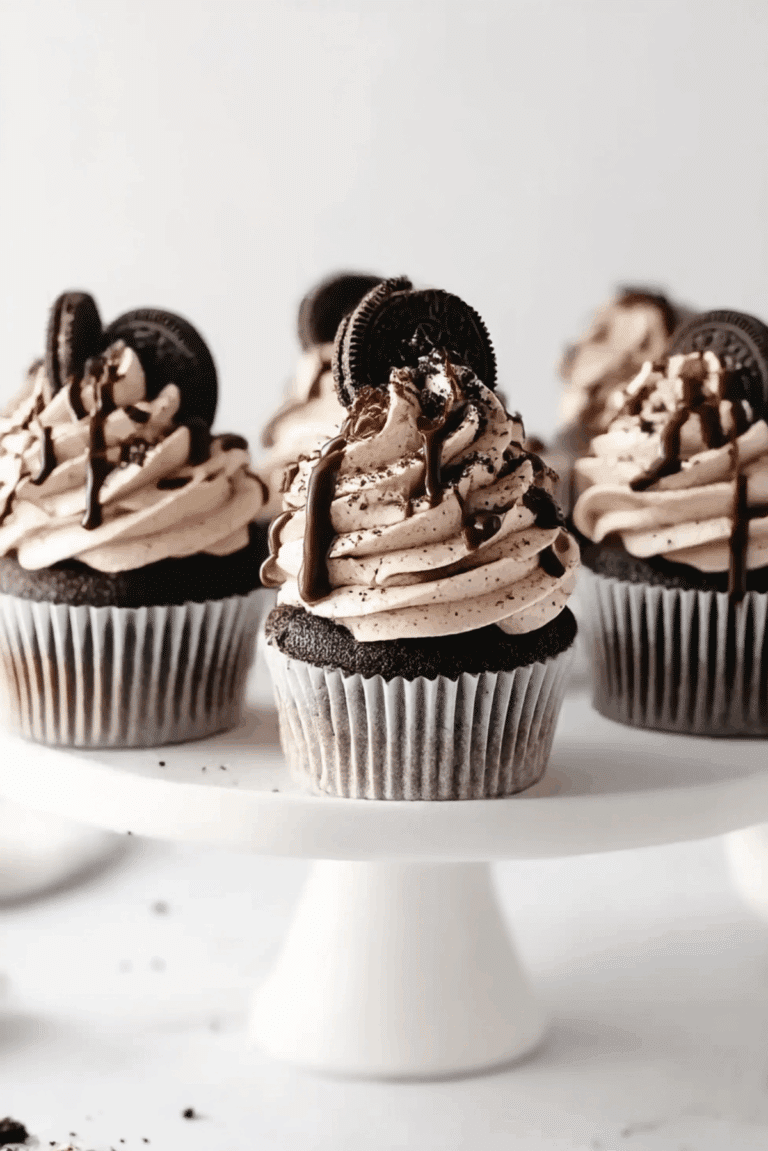
Stuffed Double Chocolate Brookie Cups represent the ultimate dessert hybrid for anyone who cannot choose between a fudgy brownie and a chewy cookie. These decadent treats feature a rich chocolate cookie shell that cradles a molten chocolate center, creating a texture party in every single bite. The aroma of warm cocoa and vanilla will fill your kitchen with pure comfort. Trust me, you’re going to love this indulgent creation that looks bakery fancy but comes together in your own oven.
Why You’ll Fall for These Decadent Brookie Cups
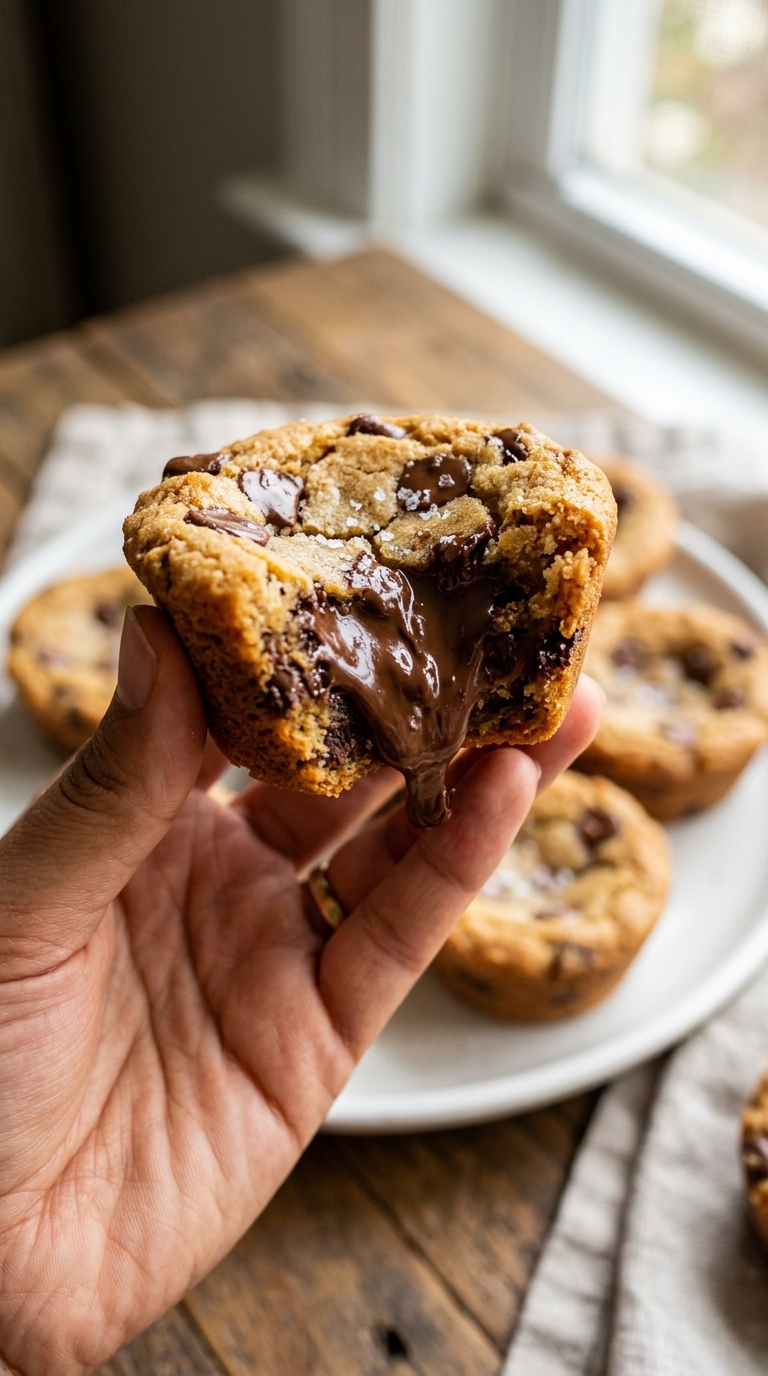
The magic of these brookie cups lies in their dual personality. You get the crisp edges of a perfect chocolate cookie combined with the dense, fudgy interior of a classic brownie. Each cup hides a surprise center that flows like liquid silk when you break it open.
This dessert has roots in the brookie trend that took American bakeries by storm in the early 2000s, when bakers first started layering brownie batter and cookie dough. The innovation of stuffing them into individual cups creates perfect portion control while maximizing the gooey factor. It’s a total game changer for chocolate lovers everywhere.
What Makes Stuffed Double Chocolate Brookie Cups So Special
These little cups of joy check every box on your dessert wish list. They deliver intense chocolate flavor without requiring complicated techniques or obscure ingredients. The recipe strikes that perfect balance between sophisticated enough for dinner parties and simple enough for weeknight cravings.
Versatile: Serve them warm with ice cream for a plated dessert, or pack them cooled for picnic treats and lunchbox surprises.
Budget-Friendly: The ingredients are pantry staples you likely already own, making this an affordable luxury that feels gourmet without the price tag.
Quick and Easy: From mixing bowl to oven takes mere minutes, with no chilling time required for the dough.
Customizable: Swap the chocolate types or add nuts to make them your own signature treat.
Crowd-Pleasing: Everyone from picky kids to discerning adults will reach for seconds.
Make-Ahead Friendly: Prepare the shells and filling ahead, then bake fresh when guests arrive.
Great for Leftovers: They stay moist for days and reheat beautifully for that fresh from the oven experience.
Expert Advice: Tips, Tools and Pitfalls to Avoid
Success with these brookie cups comes down to a few professional techniques that ensure that perfect gooey center every time. Room temperature ingredients blend more smoothly than cold ones. Do not overbake these treats, as they continue cooking in the hot pan after removal. Use a light touch when sealing the edges to prevent the filling from leaking during baking.
Mixing Bowls: You need one large bowl for wet ingredients and a medium one for dry to ensure even distribution of the cocoa and leavening.
Silicone Spatula: This flexible tool folds the dough without overworking the gluten, keeping your cups tender rather than tough.
Muffin Tin: A standard twelve cup tin creates the perfect vessel shape, though you can use a silicone mold for easier removal.
Oven Thermometer: Chocolate desserts are sensitive to temperature, so verify your oven runs true to prevent burnt edges or raw centers.
Avoid common mistakes by measuring flour with the spoon and level method rather than scooping directly from the bag. Never skip the cooling time in the pan, as the cups are fragile when hot and need those minutes to set their structure. If your filling seems too thin, let it cool slightly longer so it does not soak into the dough during assembly.
Gathering Your Chocolate Treasures
Quality ingredients make all the difference in these intense chocolate treats. Each component plays a specific role in creating that perfect texture contrast between shell and center. Gather everything before you begin to ensure smooth sailing through the assembly process.
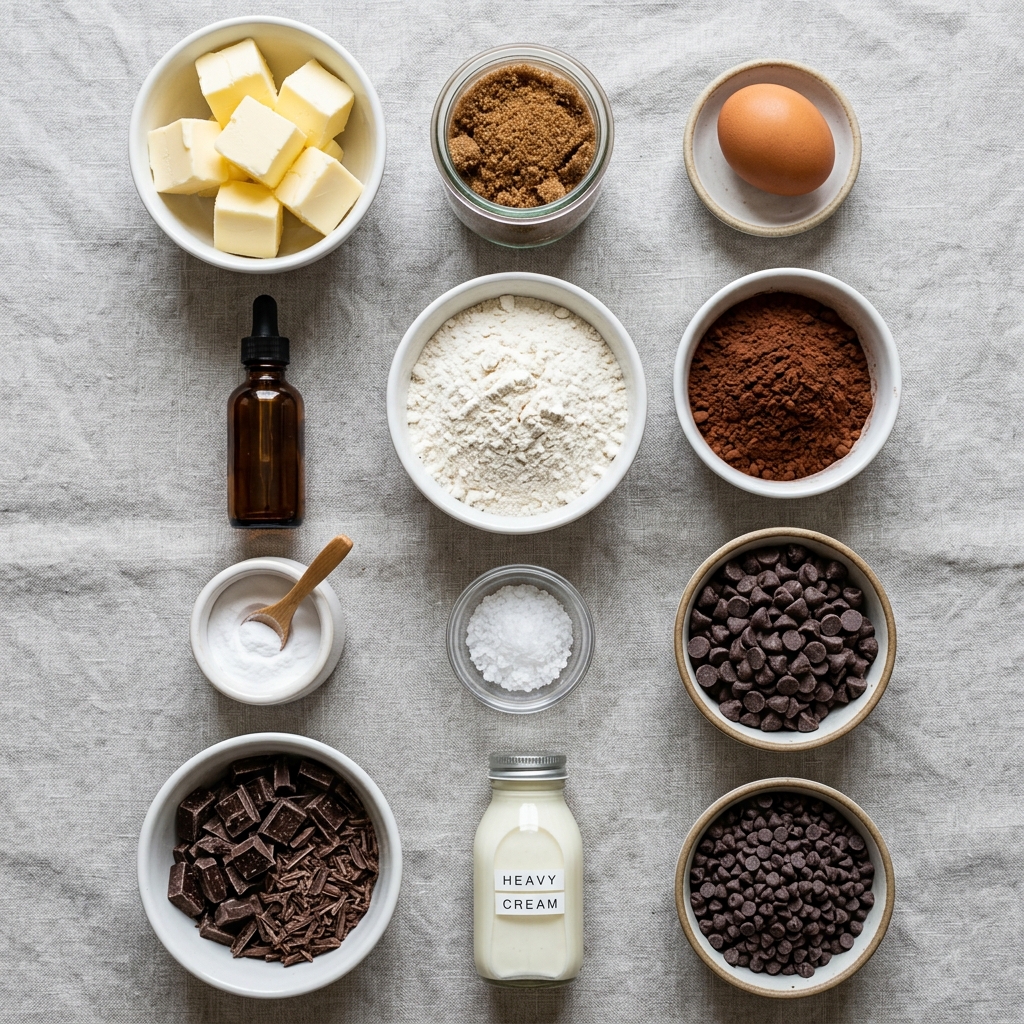
- Unsalted butter: ½ cup (113 g) melted provides the rich fat base that creates the chewy texture and carries the vanilla flavor throughout the dough.
- Brown sugar: ¾ cup (150 g) adds moisture and that subtle caramel note that balances the bitter cocoa perfectly.
- Large egg: 1 piece binds the dough together while adding structure and richness to the final cookie shell.
- Vanilla extract: 1 teaspoon enhances the chocolate depth with warm aromatic undertones that make the flavor pop.
- All-purpose flour: 1 cup (125 g) provides the gluten structure needed to hold the cup shape while staying tender.
- Unsweetened cocoa powder: ½ cup (45 g) delivers the intense chocolate flavor that defines these brookie cups as truly decadent.
- Baking soda: ½ teaspoon acts as the leavening agent to give just enough rise without puffing away the dense texture.
- Salt: ¼ teaspoon heightens all the sweet flavors and balances the richness of the chocolate.
- Semi-sweet chocolate chips: ½ cup (85 g) create little pockets of melted chocolate throughout the cookie shell.
- Semi-sweet or dark chocolate: ½ cup (90 g) chopped forms the luxurious molten center that makes these stuffed cups special.
- Heavy cream: 2 tablespoons (30 ml) thins the center chocolate to that perfect flowing consistency.
- Unsalted butter: 1 tablespoon (14 g) adds shine and richness to the stuffed chocolate center.
- Melted dark chocolate: 2 tablespoons for finishing adds a professional glossy top and extra chocolate intensity.
- Mini chocolate chips: For garnish, these add texture and visual appeal to the finished dessert.
Smart Substitutions and Spotlight Ingredients
Substitutions: You may swap the brown sugar for coconut sugar, though the moisture level will change slightly. Coconut oil works in place of butter for the dough, but the flavor will be different. For a dairy free version, use full fat coconut milk instead of heavy cream in the filling.
Spotlight on Cocoa: The unsweetened cocoa powder provides the backbone of flavor here, so choose a high quality Dutch processed variety for the smoothest taste and deepest color.
Crafting Your Stuffed Double Chocolate Brookie Cups
Now comes the fun part where simple ingredients transform into bakery worthy treats. Work methodically through each step to ensure those perfect molten centers remain intact. The process moves quickly once you start, so have your muffin tin ready and your filling prepared.
- Preheat the oven to 350°F (175°C) and lightly grease a muffin tin. This temperature ensures the outside sets while the inside stays fudgy, and the grease prevents sticking so your cups release cleanly.
- Prepare the chocolate filling by combining the chopped chocolate, heavy cream, and butter. Melt gently until smooth and glossy, then set aside to cool slightly. You can use a double boiler or microwave in short bursts, stirring frequently to prevent scorching the delicate chocolate.
- In a large bowl, whisk the melted butter and brown sugar until glossy and well combined. This step dissolves the sugar slightly and incorporates air for that perfect crackly top texture.
- Add the egg and vanilla extract and whisk until smooth. Make sure the mixture looks uniform without streaks of egg white to ensure even baking throughout each cup.
- In a separate bowl, combine the flour, cocoa powder, baking soda, and salt. Whisking these dry ingredients together prevents pockets of baking soda or salt in the final dough.
- Add the dry ingredients to the wet mixture and fold with a silicone spatula until a thick chocolate cookie dough forms. Stop as soon as you see no more flour streaks to avoid developing tough gluten.
- Fold in the chocolate chips. Distribute them evenly so every bite contains those little bursts of melted chocolate throughout the cookie shell.
- Press portions of the cookie dough into the muffin cups, covering the bottom and sides to create thick cookie shells. Use your fingers to push the dough up the sides, ensuring an even thickness so the cups bake uniformly.
- Spoon a small amount of the chocolate filling into the center of each cookie cup. Do not overfill, as the heat will cause the filling to expand slightly during baking.
- Cover the filling with a thin layer of the remaining chocolate dough, sealing the edges completely. Pinch the edges gently to ensure no filling escapes during the baking process.
- Bake for about 15–18 minutes, until the edges are set while the centers remain soft and fudgy. The tops should look slightly underdone when you remove them, as they will continue cooking from residual heat.
- Let the brookie cups cool in the pan for several minutes before carefully removing them. This resting period allows the structure to firm up so they do not crumble when lifted from the tin.
- Drizzle the tops with melted dark chocolate and sprinkle with mini chocolate chips. This finishing touch adds texture and makes them look like they came from a high end chocolatier.
- For the ultimate reveal, pull one brookie cup apart while still slightly warm so the chocolate center stretches and looks irresistibly gooey. This is the moment that will have everyone reaching for their phones to capture the chocolate pull.
Nutrition Facts and Timing
These treats are definitely indulgent, but worth every calorie for special occasions. Each component contributes to the rich nutritional profile of these chocolate packed cups.
Servings: 12 brookie cups / Calories per serving: approximately 280 / Note: These are approximate values.
Prep Time: 20 minutes / Cook Time: 15-18 minutes / Total Time: About 40 minutes.
Variations to Try
Once you master the basic Stuffed Double Chocolate Brookie Cups, the customization options are endless. Try stirring espresso powder into the dough to amplify the chocolate flavor without adding coffee taste. Fold chopped toasted pecans into the batter for a crunchy textural contrast against the smooth filling.
You could also use white chocolate chips in the dough and fill with dark chocolate for a striking visual contrast. For a minty twist, add peppermint extract to the filling and top with crushed candy canes instead of mini chips. Another delicious option involves stuffing the centers with caramel sauce mixed with the chocolate for a turtle inspired treat.
FAQ’s
What exactly is a brookie?
A brookie is a dessert hybrid that combines the best elements of brownies and cookies into one treat. These cups take that concept further by creating individual portions with a stuffed center.
Can I make the dough ahead of time?
Yes, you can prepare the cookie dough up to three days in advance and store it covered in the refrigerator. Let it sit at room temperature for fifteen minutes before pressing into the muffin tin so it remains pliable.
Why did my chocolate filling disappear during baking?
This happens when the edges are not sealed completely or if the filling was too hot when added. Make sure to pinch the dough edges firmly and let the filling cool until thick but still pourable.
Can I freeze these brookie cups?
Absolutely. Freeze them unfilled, then thaw and fill with fresh ganache before serving. Alternatively, freeze baked cups for up to one month and reheat in a low oven until warm.
What if I do not have heavy cream for the filling?
You can use full fat coconut milk or evaporated milk as a substitute, though the richness level will vary slightly. Avoid low fat milk as it will not create the same luxurious texture.
How do I know when they are perfectly baked?
The edges should look set and slightly pulled away from the tin sides, but the centers should still look soft and slightly underbaked. They will firm up as they cool.
Can I use a mini muffin tin instead?
Yes, but reduce the baking time to about 10-12 minutes and use smaller portions of dough and filling. Watch them carefully as smaller sizes bake faster.
Why is my dough crumbly and hard to press?
This usually indicates too much flour was measured. Next time, spoon the flour into your measuring cup and level with a knife rather than scooping directly from the bag.
Can I stuff these with something other than chocolate?
Certainly. Peanut butter, Nutella, or caramel sauce all work beautifully as alternative fillings. Just ensure they are thick enough not to leak during baking.
How long do these stay fresh?
Store them in an airtight container at room temperature for up to three days, or refrigerate for up to five days. Warm them briefly in the microwave before serving to reactivate the gooey center.
Conclusion
Stuffed Double Chocolate Brookie Cups bring together everything we love about chocolate desserts in one perfect handheld package. The combination of chewy cookie exterior and molten chocolate center creates a memory making dessert that will become your new signature recipe. Whether you serve them at birthday parties or enjoy them warm on a quiet evening, these treats deliver pure chocolate bliss. Gather your ingredients and prepare to impress everyone with this simple yet stunning creation.
PrintStuffed Double Chocolate Brookie Cups
Stuffed Double Chocolate Brookie Cups represent the ultimate dessert hybrid for anyone who cannot choose between a fudgy brownie and a chewy cookie. These decadent treats feature a rich chocolate cookie shell that cradles a molten chocolate center, creating a texture party in every single bite.
- Prep Time: 20 minutes
- Cook Time: 15-18 minutes
- Total Time: About 40 minutes
- Yield: 12 brookie cups
- Category: Dessert
- Method: Baking
- Cuisine: American
Ingredients
- Chocolate Brookie Cups
- ½ cup (113 g) unsalted butter, melted
- ¾ cup (150 g) brown sugar
- 1 large egg
- 1 teaspoon vanilla extract
- 1 cup (125 g) all-purpose flour
- ½ cup (45 g) unsweetened cocoa powder
- ½ teaspoon baking soda
- ¼ teaspoon salt
- ½ cup (85 g) semi-sweet chocolate chips
- Stuffed Chocolate Center
- ½ cup (90 g) semi-sweet or dark chocolate, chopped
- 2 tablespoons (30 ml) heavy cream
- 1 tablespoon (14 g) unsalted butter
- For Finishing
- 2 tablespoons melted dark chocolate
- Mini chocolate chips, for garnish
Instructions
- Preheat the oven to 350°F (175°C) and lightly grease a muffin tin.
- Prepare the chocolate filling by combining the chopped chocolate, heavy cream, and butter. Melt gently until smooth and glossy, then set aside to cool slightly.
- In a large bowl, whisk the melted butter and brown sugar until glossy and well combined.
- Add the egg and vanilla extract and whisk until smooth.
- In a separate bowl, combine the flour, cocoa powder, baking soda, and salt.
- Add the dry ingredients to the wet mixture and fold with a silicone spatula until a thick chocolate cookie dough forms.
- Fold in the chocolate chips.
- Press portions of the cookie dough into the muffin cups, covering the bottom and sides to create thick cookie shells.
- Spoon a small amount of the chocolate filling into the center of each cookie cup.
- Cover the filling with a thin layer of the remaining chocolate dough, sealing the edges completely.
- Bake for about 15–18 minutes, until the edges are set while the centers remain soft and fudgy.
- Let the brookie cups cool in the pan for several minutes before carefully removing them.
- Drizzle the tops with melted dark chocolate and sprinkle with mini chocolate chips.
- For the ultimate reveal, pull one brookie cup apart while still slightly warm so the chocolate center stretches and looks irresistibly gooey.
Notes
- Room temperature ingredients blend more smoothly than cold ones.
- Do not overbake these treats, as they continue cooking in the hot pan after removal.
- Use a light touch when sealing the edges to prevent the filling from leaking during baking.
- Measure flour with the spoon and level method rather than scooping directly from the bag.
- Never skip the cooling time in the pan, as the cups are fragile when hot.
- If your filling seems too thin, let it cool slightly longer so it does not soak into the dough during assembly.
Nutrition
- Serving Size: 1 brookie cup
- Calories: 280