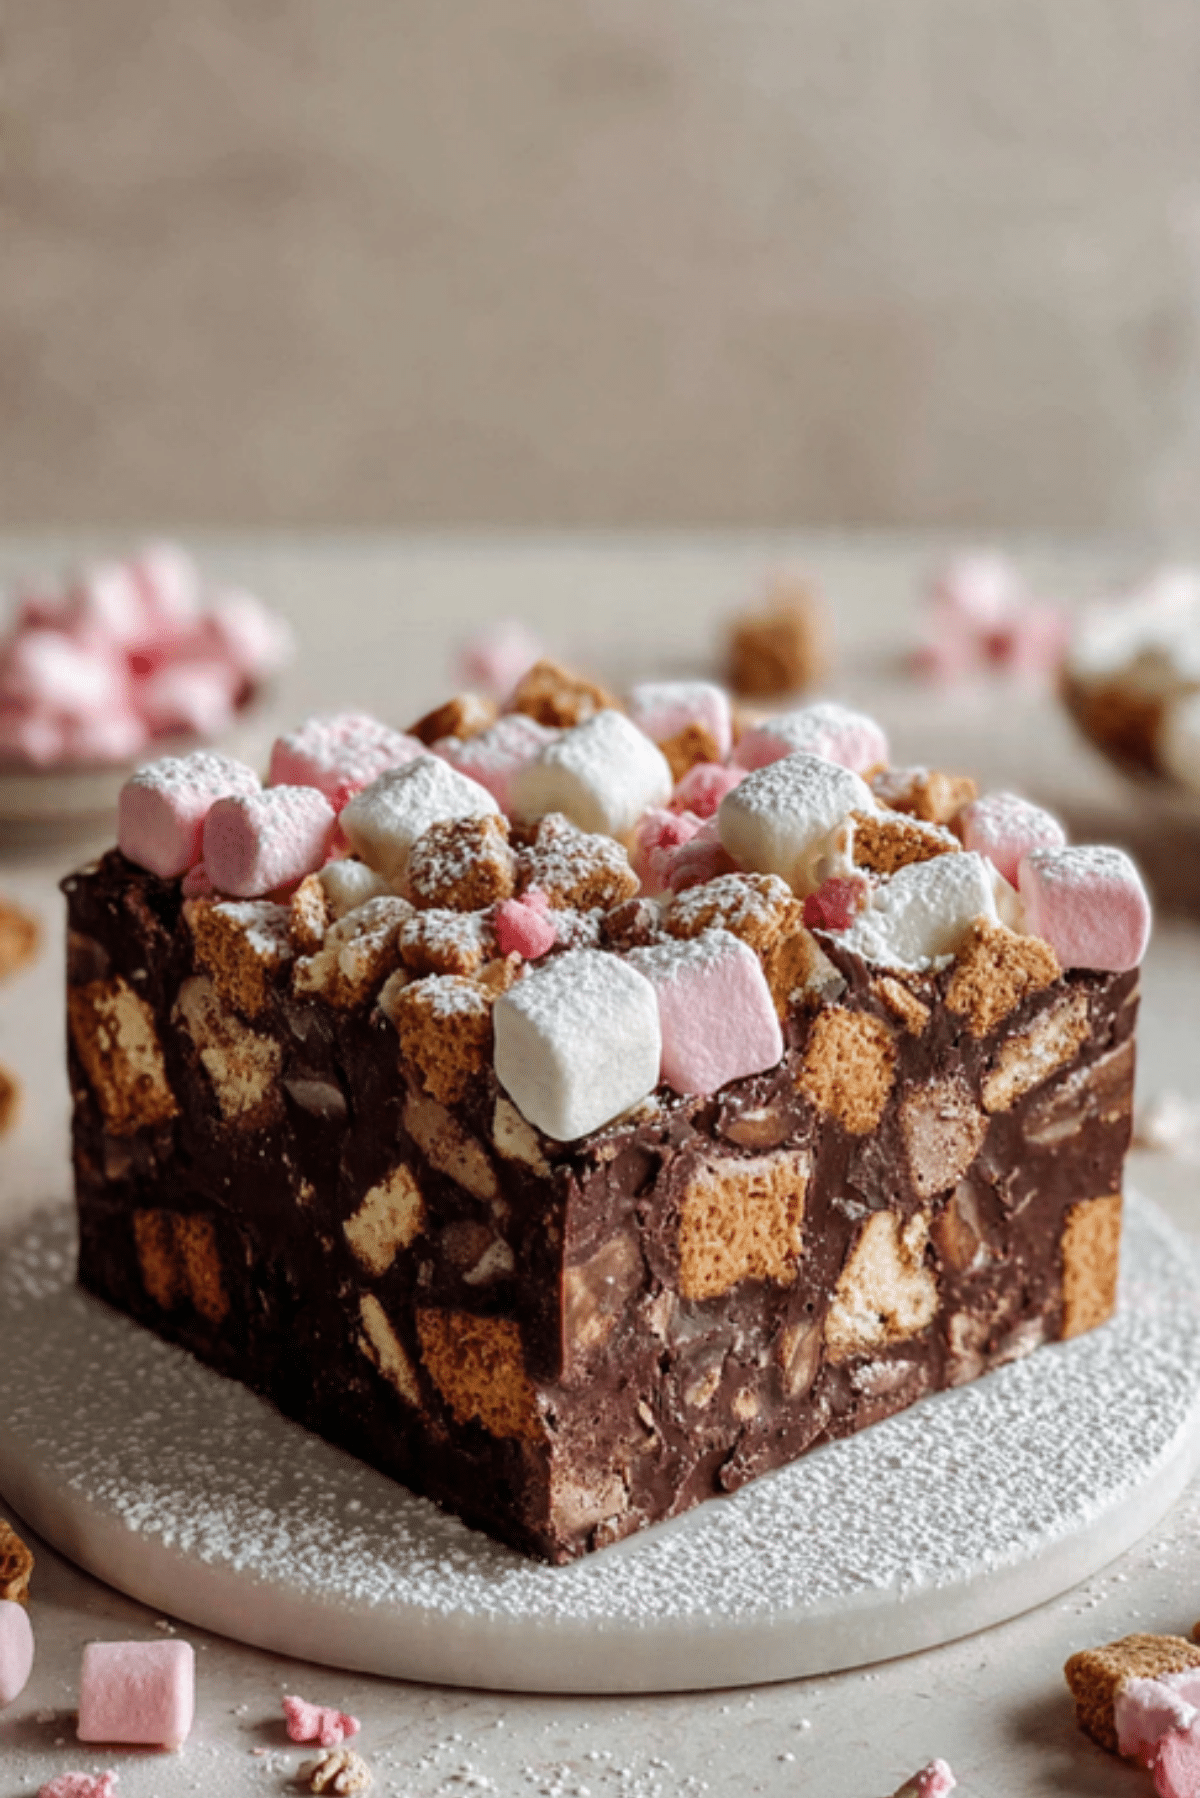
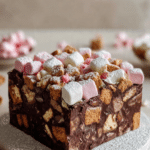
Rocky Road
There is something undeniably nostalgic and joyful about a thick, chunky slab of homemade chocolate bark, and this recipe delivers exactly that. It is a brilliant mashup of textures where every mouthful offers a different surprise, from the snap of the chocolate to the pillowy softness of a marshmallow. Trust me, you’re going to love this recipe for its simplicity and the sheer satisfaction of biting into such a rugged, decadent treat.
The Ultimate Crunchy and Chewy Chocolate Treat
When you need a quick fix for a chocolate craving or a last minute gift that looks impressive, this is the answer to your prayers. It is the kind of dessert that doesn’t require any fancy techniques or even an oven, making it a perfect project for a rainy afternoon. This one’s a total game-changer because it allows you to be as generous as you like with the fillings, creating a customized chocolate experience that beats anything you could buy at the store.
A Global Favorite with a Rugged History
The name for this confection dates back to the mid nineteenth century, originally created as a way to sell sweets that had become slightly damaged during the long sea voyages from Europe to Australia. Confectioners would mix the broken bits with chocolate and nuts to hide the imperfections, calling it “Rocky Road” to describe the difficult journey the ingredients had taken. Today, it has evolved into a beloved global staple that symbolizes pure, unadulterated indulgence.
Why This Simple Chocolate Bark is a Crowd Favorite
The beauty of this recipe lies in its lack of rules and its incredibly forgiving nature, making it a staple in many family kitchens. It is a sturdy treat that travels well and stays fresh for a long time, which is why it is often the first thing to disappear at any bake sale.
Versatile: You can use milk, dark, or even white chocolate as your base depending on how sweet you want the final result to be.
Budget-Friendly: Most of the ingredients are affordable snacks that you might already have tucked away in your pantry.
Quick and Easy: The entire process takes less than twenty minutes of active work before it goes into the fridge to set.
Customizable: From dried cranberries to salty pretzels, the list of potential add-ins is limited only by your imagination.
Crowd-Pleasing: With its combination of chocolate and candy, it is an absolute hit with children and adults alike at any celebration.
Make-Ahead Friendly: This treat keeps perfectly for up to two weeks, so you can prepare it well before you actually need to serve it.
Great for Leftovers: Any small crumbs or broken pieces can be stirred into a bowl of popcorn for a sweet and salty movie night snack.
Secrets for the Perfect Chocolate Snap
The secret to a great batch is all in how you melt your chocolate to ensure it stays glossy and firm at room temperature. Let me tell you, it’s worth every bite if you melt the chocolate slowly and stir in a small amount of butter or syrup to give it a smooth, professional sheen. Also, ensure your mix-ins are at room temperature so they don’t cause the chocolate to seize up before you have a chance to spread it into the pan.
Essential Tools for Your Kitchen
- Square Baking Tin: A standard eight-inch tin is ideal for getting the perfect thickness that is satisfying to bite into.
- Heat-Proof Glass Bowl: Essential for melting your chocolate over a pot of simmering water without burning it.
- Parchment Paper: This allows you to lift the entire block out of the tin easily so you can cut it into clean, sharp squares.
- Large Mixing Spoon: You will need a sturdy spoon to fold the heavy biscuits and marshmallows into the thick melted chocolate.
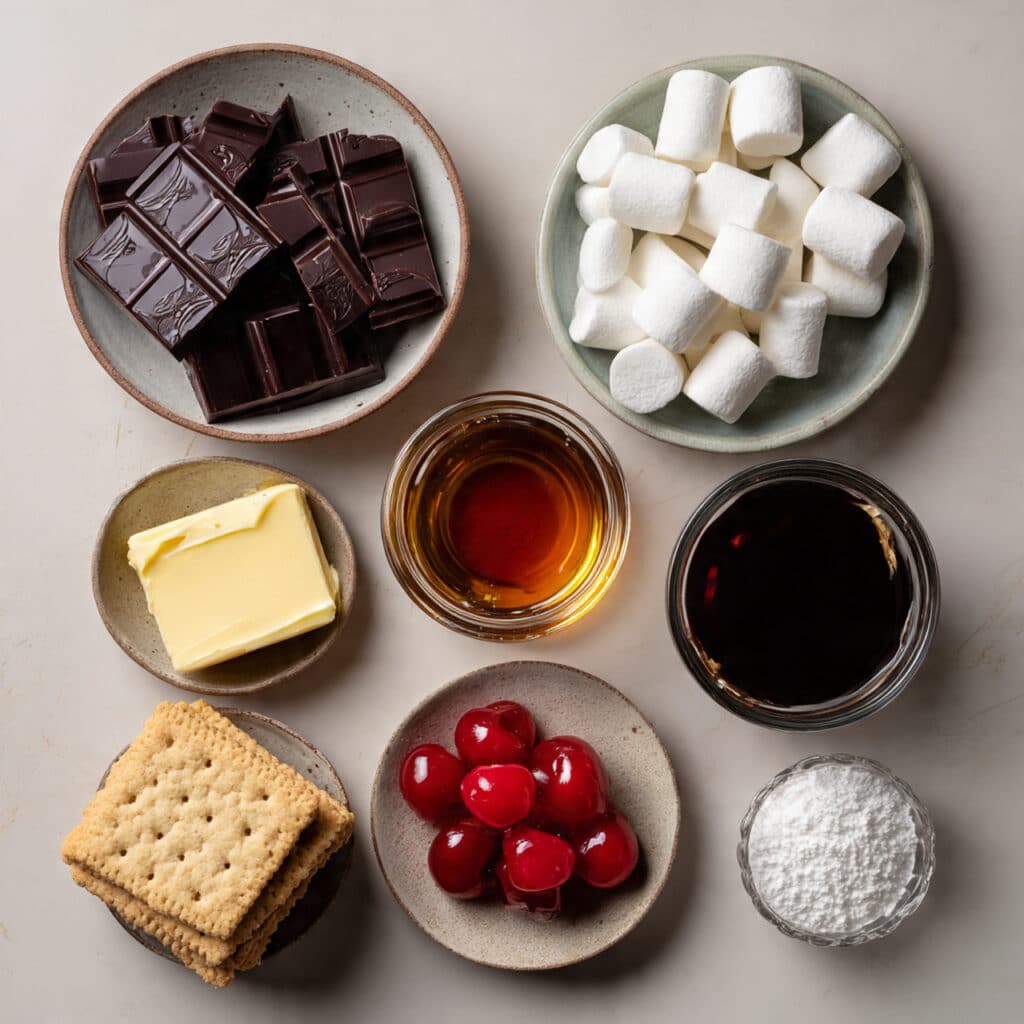
Ingredients You Will Need For This Recipe
The success of this dish is found in the contrast between the rich chocolate and the varied textures of the fillings.
- Dark Chocolate: 14 ounces. This provides a deep, rich base that isn’t too sickly sweet once the candy is added.
- Unsalted Butter: 0.5 cups. Adding butter makes the chocolate easier to slice and gives it a luxurious, melt-in-the-mouth quality.
- Golden Syrup: 2 tablespoons. A small amount of syrup adds a beautiful gloss and a subtle caramel undertone to the mix.
- Digestive Biscuits: 7 ounces. These provide a satisfying crunch and a neutral, malty flavor that balances the sugar.
- Mini Marshmallows: 1.5 cups. These offer the signature soft, chewy texture that makes this treat so iconic.
- Glace Cherries: 0.5 cups. Adding cherries provides a pop of color and a tart, fruity chewiness to every other bite.
- Powdered Sugar: 1 tablespoon. A light dusting on top adds a finished, professional look to the dark chocolate.
Flexible Ingredient Substitutions
If you want to change things up or use what you have on hand, these substitutions work beautifully in this recipe.
Digestive Biscuits: Graham crackers or shortbread cookies provide a similar crunch and work just as well.
Mini Marshmallows: You can chop up larger marshmallows, though the mini ones are much easier to distribute evenly.
Golden Syrup: Honey or light corn syrup can be used as a substitute to provide that same glossy finish and sweetness.
Key Ingredients Spotlight
Dark Chocolate: Choosing a high-quality chocolate with at least fifty percent cocoa solids ensures a rich flavor that isn’t overpowered by the sugar.
Mini Marshmallows: These are the essential “soft” component of the road, providing a wonderful contrast to the hard chocolate and crunchy biscuits.
Step by Step Guide to a Rugged Masterpiece
Follow these instructions to create a batch of chocolate bark that looks as good as it tastes.
- Preheat Your Equipment: There is no baking involved, so simply line your baking tin with parchment paper, leaving a little overhang on the sides.
- Combine Ingredients: Place the chocolate, butter, and golden syrup in a heat-proof bowl over a pan of gently simmering water.
- Prepare Your Cooking Vessel: Make sure the bottom of the bowl does not touch the water, as this can cause the chocolate to overheat and grain.
- Assemble the Dish: Once the chocolate is smooth, fold in the broken biscuit pieces, marshmallows, and cherries until everything is coated.
- Cook to Perfection: Pour the mixture into the prepared tin and press it down firmly with the back of a spoon to remove any air pockets.
- Finishing Touches: Place the tin in the refrigerator for at least two hours until the block is completely firm and cold to the touch.
- Serve and Enjoy: Dust the top with powdered sugar, lift out of the tin, and use a sharp knife to cut into chunky, irregular squares.
Focusing on Texture and Flavor Development
The magic of this recipe is the way the biscuits stay crunchy while the marshmallows soften slightly into the surrounding chocolate. Because we use a mix of dark chocolate and golden syrup, the flavor profile is rich and slightly toasted, which keeps it from feeling like just a pile of candy.
Helpful Cooking Tips and Tricks
- Put your biscuits in a plastic bag and bash them with a rolling pin for a mix of fine crumbs and larger, chunky pieces.
- Let the chocolate cool for five minutes before adding the marshmallows so they don’t melt into the mixture.
- Use a hot, dry knife for the cleanest cuts through the thick chocolate and biscuits.
What to Avoid for Best Results
- Wet Ingredients: Ensure your fruit and biscuits are completely dry, as water will cause the chocolate to seize and turn lumpy.
- Overheating Chocolate: Slow and steady is the way to go; rushing the melting process will result in a dull, chalky finish.
- Skipping the Syrup: The syrup is what gives the chocolate that professional “bend” and prevents it from being too brittle to slice.
Nutrition Facts
Servings: 16
Calories per serving: 285
Note: These are approximate values.
Preparation Time
Prep Time: 15 minutes
Cook Time: 5 minutes
Total Time: 140 minutes
Make-Ahead and Storage Tips
This is the ultimate make-ahead snack because it only gets better as it sits. Store your squares in an airtight container in a cool, dry place for up to a week, or in the fridge for up to two weeks. If it is a particularly warm day, keeping it in the refrigerator is essential to prevent the chocolate from softening.
How to Serve and Pair
Serve these chunky squares on a large wooden platter for a rustic, communal feel at any party. They pair exceptionally well with a cold glass of milk or a hot chocolate for the ultimate cocoa-themed indulgence.
Creative Leftover Transformations
If you have leftover pieces, you can chop them up even smaller and use them as a decadent topping for a sundae. You can also melt the leftovers down very gently and use the mixture as a thick, chunky spread for toasted brioche.
Additional Tips for Flavor and Freshness
To keep the biscuits as crunchy as possible, make sure the chocolate mixture is not piping hot when you fold them in. A little patience at this stage ensures that your textures remain distinct and satisfying rather than becoming a soft mush.
Make It a Showstopper
For a truly professional look, reserve a handful of the marshmallows and cherries to press into the top of the mixture after you have poured it into the tin. This ensures that the beautiful colors and shapes are visible on the surface, making it look much more appetizing.
Variations to Try
- Nutty Road: Add half a cup of roasted peanuts or almonds for an extra layer of salty crunch.
- Fruity Twist: Swap the cherries for dried apricots or raisins for a different kind of sweetness.
- White Chocolate Drizzle: Once the block is set, drizzle some melted white chocolate over the top for a beautiful contrast.
FAQ’s
- Can I make this without the golden syrup?
Yes, but the chocolate will be more brittle and prone to cracking when you try to slice it. - Why did my marshmallows melt?
The chocolate was likely too hot when you stirred them in, so let it cool for a few minutes next time. - Can I use milk chocolate instead?
Absolutely, though the final result will be much sweeter, so you might want to reduce the syrup slightly. - How do I store this in the summer?
In hot weather, it is best to keep it in the fridge so the chocolate doesn’t melt in your hands. - Is this recipe gluten-free?
It can be if you use gluten-free biscuits, as the other ingredients are naturally gluten-free. - Can I add nuts to this?
Yes, peanuts, walnuts, or hazelnuts are all fantastic additions to the classic recipe. - How long does it take to set?
At least two hours in the fridge, but leaving it for four hours ensures a very firm set. - Can I freeze Rocky Road?
Yes, it freezes very well for up to three months if wrapped tightly in plastic and foil. - What can I use instead of digestive biscuits?
Any plain, crunchy cookie like graham crackers or vanilla wafers will work perfectly. - Do I have to use cherries?
No, they are optional, but they add a lovely color and tartness that balances the chocolate.
Conclusion
Rocky Road is a timeless classic that brings out the child in everyone, offering a delightful mix of crunch, chew, and rich chocolate. It is simple to make and even easier to eat, making it the perfect addition to any dessert rotation. Let me tell you, it’s worth every bite, and I know it will be a huge hit the next time you share it with your favorite people!
PrintRocky Road
A classic, no-bake chocolate treat loaded with crunchy biscuits, fluffy marshmallows, and sweet cherries for the ultimate texture combination.
Ingredients
- 14 ounces Dark Chocolate
- 0.5 cups Unsalted Butter
- 2 tablespoons Golden Syrup
- 7 ounces Digestive Biscuits
- 1.5 cups Mini Marshmallows
- 0.5 cups Glace Cherries
- 1 tablespoon Powdered Sugar
Instructions
- Line an 8-inch square tin with parchment paper.
- In a heat-proof bowl over a pan of simmering water, melt the chocolate, butter, and golden syrup until smooth.
- Remove from heat and let cool for about 5 minutes.
- Place the biscuits in a bag and crush them into a mix of small and large pieces.
- Fold the crushed biscuits, mini marshmallows, and cherries into the chocolate mixture until well coated.
- Press the mixture into the tin and smooth the top.
- Refrigerate for at least 2 hours or until completely firm, then dust with powdered sugar and slice.
Notes
- Wait for the chocolate to cool slightly before adding marshmallows to prevent melting.
- Use a hot knife for clean cuts through the firm chocolate.
- Feel free to add nuts or dried fruit for extra variety.