Peanut Butter Brookie Cups
Peanut Butter Brookie Cups
Peanut Butter Brookie Cups are the ultimate dessert hybrid that delivers two classic treats in one irresistible bite. Imagine a fudgy brownie base hugging a creamy peanut butter center, all crowned with a soft, chewy chocolate chip cookie top. The aroma of warm chocolate and toasted nuts will fill your kitchen and draw everyone to the oven. Trust me, you’re going to love this combination of textures and flavors.
Why Peanut Butter Brookie Cups Are Pure Bliss
There is something magical about biting through a crisp cookie shell into a dense, chocolaty brownie and discovering a silky peanut butter core. Each layer offers a distinct texture, from the tender crumb of the cookie to the gooey richness of the brownie. It is a textural symphony that keeps you reaching for another cup.
Brookies themselves are a relatively modern American invention, born from the trend of merging beloved desserts into one show-stopping treat. They reflect our collective love for both fudgy brownies and classic chocolate chip cookies. Peanut Butter Brookie Cups take that concept one step further by adding a luscious peanut butter center that makes every bite feel indulgent and complete.
Why This Recipe Works Every Time
This peanut butter brookie cup recipe looks fancy, yet the process is surprisingly straightforward. The two batters share familiar pantry staples, and the assembly is far simpler than frosting a layer cake. You get bakery-style results without any complicated techniques.
Versatile: Serve these warm with a glass of milk, or tuck one into a lunchbox for an afternoon surprise.
Budget-Friendly: The ingredient list relies on everyday staples like butter, sugar, and flour rather than specialty items.
Quick and Easy: From prep to finish, you can have a dozen impressive cups ready in under an hour.
Customizable: You can adjust chip ratios or peanut butter sweetness to match your mood.
Crowd-Pleasing: Kids adore the hidden center, and adults appreciate the rich cocoa depth.
Make-Ahead Friendly: The peanut butter filling can be chilled hours ahead, streamlining your workflow.
Great for Leftovers: Stored properly, these cups stay moist and flavorful for several days.
Pro Tips and Essential Tools
A few insider tricks will elevate your peanut butter brookie cups from good to unforgettable. Keep your butter temperatures distinct, melted for the brownies and softened for the cookies, so each batter develops its proper texture. Chill the peanut butter portions until firm, which makes assembly far neater and prevents the center from melting into the batters.
- Do not overmix the cookie dough once the flour is added, or the tops will turn tough instead of tender.
- Use a light hand when pressing brownie batter into the cups to avoid creating a dense, rubbery base.
- Check for doneness at the 18-minute mark to preserve that coveted soft center.
- Let them rest in the pan for at least ten minutes so the structure sets before you try to lift them out.
You do not need fancy gadgets to pull this off. Muffin Pan: A standard 12-cup pan shapes these treats into perfect individual portions. Mixing Bowls: Two medium bowls let you prepare the brownie and cookie batters simultaneously without cross-mixing flavors. Whisk and Spatula: A sturdy whisk aerates the eggs and cocoa, while a flexible spatula folds in chips without overworking the dough. Cookie Scoop or Spoons: Portioning tools help you divide the thick batters evenly among the cups.
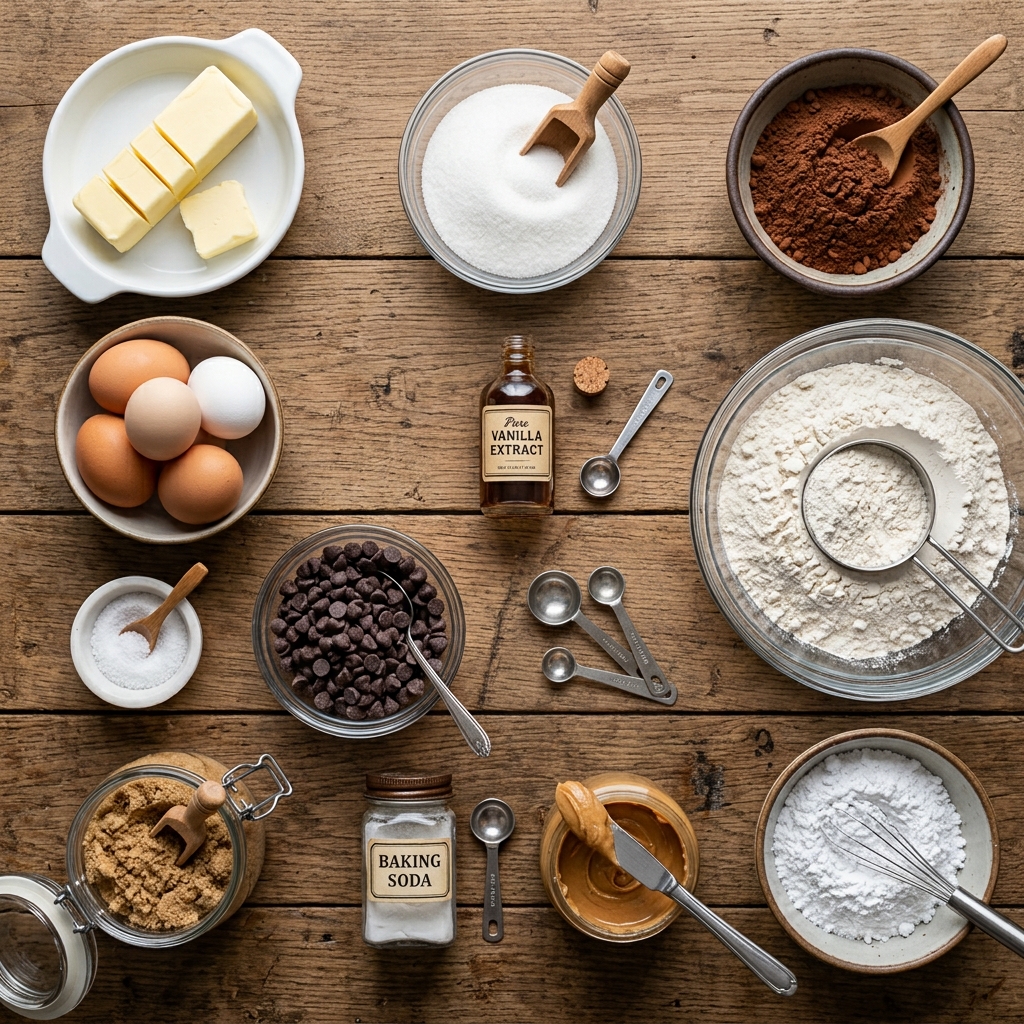
Ingredients for Peanut Butter Brookie Cups
Every layer of this dessert plays a specific role in building flavor and texture. From the deep cocoa notes in the brownie base to the buttery sweetness of the cookie cap, quality pantry staples shine here. Gather everything before you begin so the peanut butter brookie cup assembly moves smoothly.
- Unsalted Butter: ½ cup, melted, creating the rich, fudgy foundation for the brownie layer.
- Granulated Sugar: ¾ cup, sweetening the brownie batter and helping form a delicate crust.
- Unsweetened Cocoa Powder: ½ cup, delivering intense chocolate flavor and that signature dark color.
- Large Eggs: 2, binding the brownie batter and providing structure and richness.
- Vanilla Extract: 1 teaspoon, rounding out the chocolate notes with warm, floral depth.
- All-Purpose Flour: ½ cup, giving the brownies just enough body without making them cakey.
- Salt: ¼ teaspoon, heightening the chocolate sweetness and balancing the overall profile.
- Semi-Sweet Chocolate Chips: ½ cup, melting into pockets of gooey richness throughout the brownie base.
- Unsalted Butter: ½ cup, softened, creaming with sugar to create the light, tender cookie topping.
- Brown Sugar: ½ cup, adding moisture and a subtle caramel undertone to the cookie dough.
- Granulated Sugar: ¼ cup, helping the cookie layer spread slightly and crisp at the edges.
- Large Egg: 1, binding the cookie dough and adding richness to the final layer.
- Vanilla Extract: 1 teaspoon, echoing the brownie’s warmth and tying the two layers together.
- All-Purpose Flour: 1¼ cups, providing the structure needed for a classic chewy cookie cap.
- Baking Soda: ½ teaspoon, leavening the cookie dough so it rises into a perfect dome.
- Salt: ¼ teaspoon, keeping the cookie layer from tasting overly sweet.
- Chocolate Chips: ¾ cup, studding the cookie layer with melty chocolate in every bite.
- Creamy Peanut Butter: ¾ cup, forming the luscious, nutty center that makes these cups unforgettable.
- Powdered Sugar: 2 tablespoons, slightly sweetening and firming the peanut butter filling.
- Vanilla Extract: 1 teaspoon, adding aromatic depth to the creamy peanut butter center.
Smart Substitutions and Star Players
If you need to adapt, all-purpose flour can be replaced with a 1-to-1 gluten-free baking blend designed for cookies and cakes. Creamy peanut butter works best here because its smooth texture creates a cohesive, velvety center that contrasts with the chunky cookie and dense brownie. Unsweetened cocoa powder is the unsung hero of the brownie layer, providing pure chocolate intensity without extra sugar, which keeps these brookie cups richly balanced.
How to Make Peanut Butter Brookie Cups
The process moves quickly once your ingredients are laid out, so read through the steps before preheating. You will build three distinct components and then layer them into a harmonious, handheld dessert.
- Preheat the oven to 350°F (175°C). Grease a 12-cup muffin pan or line it with paper liners. Taking a moment to grease every corner ensures the finished cups release cleanly without sticking.
- Make the peanut butter filling by mixing the peanut butter, powdered sugar, and vanilla until smooth. Divide into 12 small portions and chill while preparing the dough. Chilling firms the filling so it stays perfectly centered during baking rather than melting into the surrounding batters.
- Make the brownie batter. Whisk together the melted butter, sugar, cocoa powder, eggs, and vanilla. Stir in the flour and salt, then fold in the chocolate chips. The batter will be thick and glossy, promising a dense, fudgy base.
- Make the cookie dough. Cream the softened butter with the brown sugar and granulated sugar until smooth. Mix in the egg and vanilla. The mixture should look pale and fluffy, which means air is incorporated for a tender cookie top.
- Add the flour, baking soda, and salt. Mix until just combined, then fold in the chocolate chips. Stop mixing as soon as you no longer see dry streaks to keep the cookie layer soft and chewy.
- Assemble the brookie cups. Press a small amount of brownie batter into each muffin cup, add a peanut butter portion to the center, then cover with cookie dough. Do not overfill. Leaving a little room at the top prevents overflow and gives the cookie layer space to bake into a perfect dome.
- Bake for 18–22 minutes, until the edges are golden and the centers are still slightly soft. The centers will continue to set as they cool, so pulling them when slightly underdone guarantees that gooey texture everyone loves.
- Let the brookie cups cool in the pan for several minutes before removing them. Finish with a light sprinkle of flaky sea salt and extra chopped peanuts if desired. This brief rest allows the structure to firm up enough for clean removal from the pan.
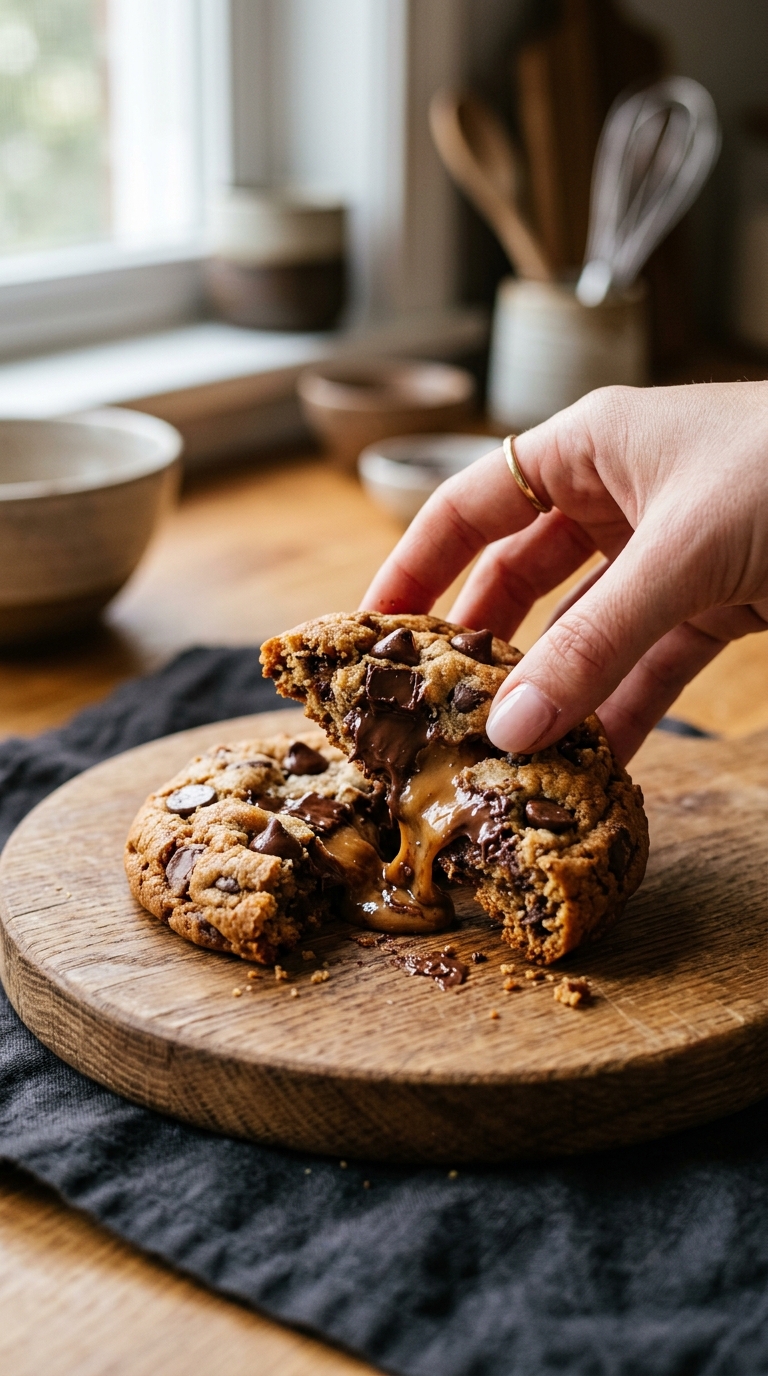
- For the most satisfying presentation, break one open while still slightly warm so the gooey brownie and creamy peanut butter center are clearly visible. That irresistible cross-section is the best way to show off the hidden treasure inside each cup.
Common Mistakes to Avoid
Even simple recipes have a few pitfalls that can trip up eager bakers. Keep these points in mind so your peanut butter brookie cups turn out picture-perfect every time.
- Overfilling the cups causes the cookie dough to spill over the edges and bake onto the pan.
- Skipping the chill on the peanut butter filling leads to a melted center that disappears into the brownie.
- Overbaking dries out the brownie layer and leaves you with crumbly instead of fudgy results.
- Using cold eggs can cause the melted butter in the brownie batter to seize and turn greasy.
Nutrition, Timing, and Variations
These indulgent cups are worth every bite. Knowing the timing helps you plan dessert perfectly and keeps your kitchen stress-free.
Servings: 12 / Calories per serving: approximately 480 / Note: These are approximate values.
Prep Time: 25 minutes / Cook Time: 20 minutes / Total Time: 45 minutes
For a fun twist, reverse the layers by pressing cookie dough on the bottom and finishing with brownie batter on top. You can also underbake by two minutes for an extra gooey center that stays molten and warm. Another option is to press all the chocolate chips into the brownie layer and leave the cookie dough plain for a striking visual contrast.
FAQ’s
Can I use natural peanut butter?
Natural peanut butter can separate and create an oily center, so a stabilized creamy variety gives the best results.
Do I need to chill the peanut butter filling?
Yes, chilling firms the filling and keeps it distinct during baking rather than dissolving into the batters.
Can I make these in a mini muffin pan?
Absolutely, just reduce the bake time to about 12–14 minutes and watch closely for golden edges.
Why did my cookie layer turn out hard?
Overmixing the dough or overbaking are the usual culprits, so mix until just combined and pull the pans when the centers are still soft.
Can I freeze Peanut Butter Brookie Cups?
Yes, once fully cooled, freeze them in an airtight container for up to two months and thaw at room temperature.
What if I do not have unsweetened cocoa powder?
You can use high-quality cocoa powder, though the exact brownie texture depends on real cocoa solids.
Is it better to use paper liners or just grease the pan?
Paper liners make removal effortless, but a well-greased pan yields slightly crisper edges on the brownie layer.
Can I halve this recipe?
Certainly, simply divide every ingredient by two and bake six cups, keeping the same temperature and time.
How do I know when the centers are done?
Look for golden cookie edges and a slight jiggle in the center that springs back gently when nudged.
Where can I find more hybrid dessert techniques?
Explore trusted baking resources like Serious Eats for deeper cookie science.
Conclusion
Peanut Butter Brookie Cups bring together everything we adore about brownies, cookies, and peanut butter into one perfect handheld treat. They are fun to make, even more fun to eat, and guaranteed to disappear fast. Bake a batch this weekend and watch faces light up when that creamy center is revealed.
PrintPeanut Butter Brookie Cups
Peanut Butter Brookie Cups are the ultimate dessert hybrid that delivers two classic treats in one irresistible bite. Imagine a fudgy brownie base hugging a creamy peanut butter center, all crowned with a soft, chewy chocolate chip cookie top.
- Prep Time: 25 minutes
- Cook Time: 20 minutes
- Total Time: 45 minutes
- Yield: 12 cups
- Category: Dessert
- Method: Baking
- Cuisine: American
- Diet: Vegetarian
Ingredients
- For the brownie layer
- ½ cup unsalted butter, melted
- ¾ cup granulated sugar
- ½ cup unsweetened cocoa powder
- 2 large eggs
- 1 teaspoon vanilla extract
- ½ cup all-purpose flour
- ¼ teaspoon salt
- ½ cup semi-sweet chocolate chips
- For the cookie layer
- ½ cup unsalted butter, softened
- ½ cup brown sugar
- ¼ cup granulated sugar
- 1 large egg
- 1 teaspoon vanilla extract
- 1¼ cups all-purpose flour
- ½ teaspoon baking soda
- ¼ teaspoon salt
- ¾ cup chocolate chips
- For the peanut butter center
- ¾ cup creamy peanut butter
- 2 tablespoons powdered sugar
- 1 teaspoon vanilla extract
Instructions
- Preheat the oven to 350°F (175°C). Grease a 12-cup muffin pan or line it with paper liners.
- Make the peanut butter filling by mixing the peanut butter, powdered sugar, and vanilla until smooth. Divide into 12 small portions and chill while preparing the dough.
- Make the brownie batter. Whisk together the melted butter, sugar, cocoa powder, eggs, and vanilla. Stir in the flour and salt, then fold in the chocolate chips.
- Make the cookie dough. Cream the softened butter with the brown sugar and granulated sugar until smooth. Mix in the egg and vanilla.
- Add the flour, baking soda, and salt. Mix until just combined, then fold in the chocolate chips.
- Assemble the brookie cups. Press a small amount of brownie batter into each muffin cup, add a peanut butter portion to the center, then cover with cookie dough. Do not overfill.
- Bake for 18–22 minutes, until the edges are golden and the centers are still slightly soft.
- Let the brookie cups cool in the pan for several minutes before removing them. Finish with a light sprinkle of flaky sea salt and extra chopped peanuts if desired.
- For the most satisfying presentation, break one open while still slightly warm so the gooey brownie and creamy peanut butter center are clearly visible.
Notes
- Keep butter temperatures distinct: melted for brownies, softened for cookies.
- Chill peanut butter portions until firm before assembly.
- Do not overmix cookie dough once flour is added.
- Use a light hand when pressing brownie batter into cups.
- Check for doneness at 18 minutes to preserve soft centers.
- Let cups rest in pan for at least 10 minutes before removing.
Nutrition
- Serving Size: 1 cup
- Calories: 480