Peanut Butter Brookie Cups
Peanut Butter Brookie Cups
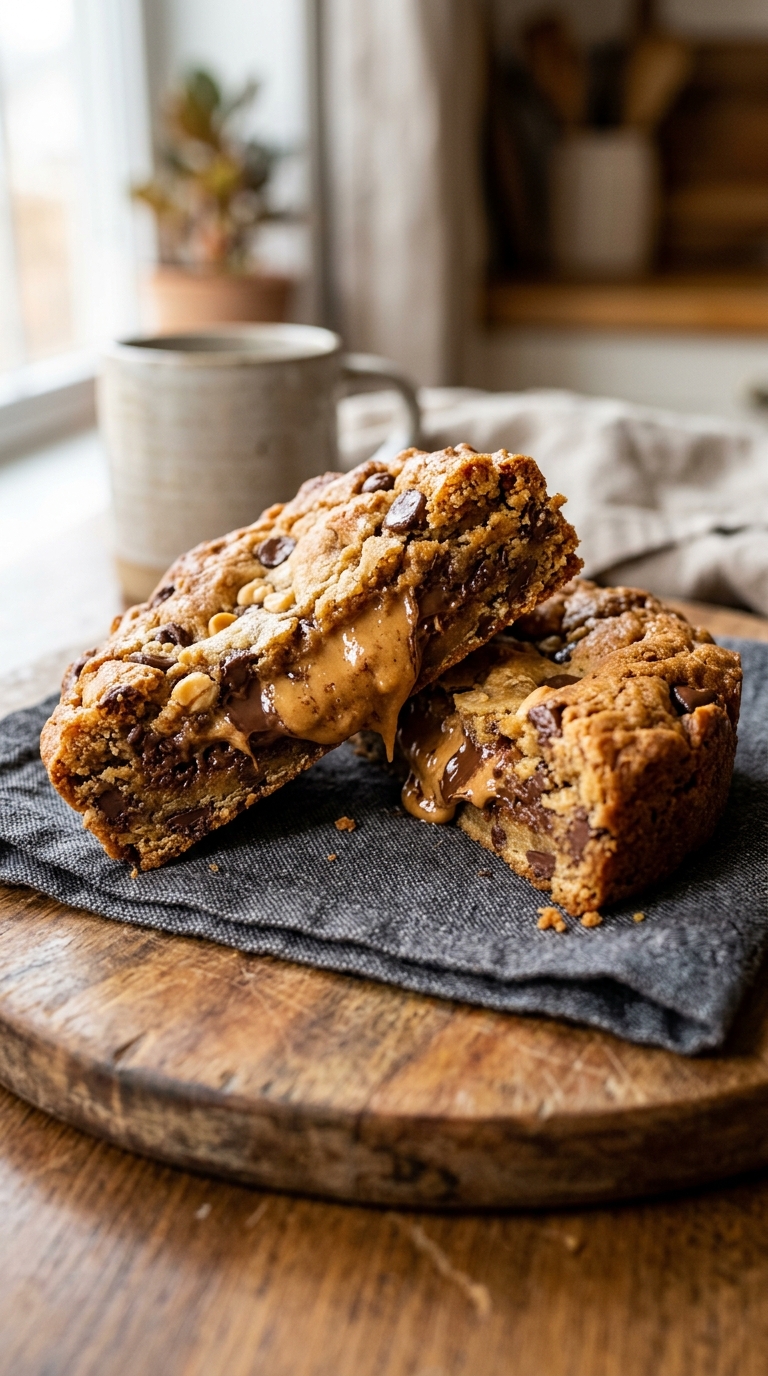
Peanut Butter Brookie Cups are the ultimate dessert hybrid that combines the best of both worlds. Imagine biting into a rich, fudgy brownie exterior that gives way to a soft, peanut butter center. These individual treats capture the magic of a brookie in perfect handheld form. Trust me, you’re going to love this combination of chocolate and peanut butter in every single bite.
The Irresistible Appeal of Peanut Butter Brookie Cups
The brookie phenomenon took the baking world by storm when someone brilliantly decided that choosing between brownies and cookies was simply unnecessary. Peanut Butter Brookie Cups elevate this concept by adding a creamy center that makes each bite feel like a gourmet experience. These treats represent the modern trend of mashup desserts that celebrate indulgence without apology. The history of combining peanut butter and chocolate dates back over a century in American confectionery tradition, much like the classic brownie itself. This one’s a total game-changer for anyone who loves decadent, layered desserts.
Why Peanut Butter Brookie Cups Work for Every Occasion
Versatile: These cups transition beautifully from afternoon snacks to elegant dinner party desserts without missing a beat. Serve them warm with ice cream or pack them for lunch boxes.
Budget-Friendly: Using pantry staples like flour, cocoa, and peanut butter keeps costs low while delivering bakery-quality results. You likely have most ingredients already sitting in your kitchen.
Quick and Easy: The straightforward mixing method requires no fancy equipment or advanced techniques. Even novice bakers can achieve impressive results on their first try.
Customizable: Adapt the fillings and toppings to suit your preferences or dietary needs. Swap chocolate chips for white chocolate or add extra nuts for crunch.
Crowd-Pleasing: The universal appeal of chocolate and peanut butter means both kids and adults will reach for seconds. These disappear quickly at potlucks and family gatherings.
Make-Ahead Friendly: Prepare the dough in advance and refrigerate until ready to bake. This flexibility makes entertaining stress-free and convenient.
Great for Leftovers: Store any extras in an airtight container for up to five days. The flavors actually deepen and improve after the first day.
Expert Tips and Essential Kitchen Tools
Success with these brookie cups comes down to a few professional techniques that ensure the perfect texture. Do not overmix the batter once you add the flour, as this develops gluten and creates tough cups. Use room temperature egg for better emulsification with the butter and sugar. Press the dough firmly against the sides of the muffin tin to create a sturdy cup that holds the filling. For more guidance on perfect baking techniques, remember that patience yields the best results.
Muffin Tin: A standard twelve-cup muffin tin creates the perfect vessel shape for these individual desserts. Light greasing ensures easy release without sticking.
Mixing Bowls: You will need two medium bowls to keep wet and dry ingredients separate before combining. Glass or ceramic bowls work best for visibility.
Silicone Spatula: This flexible tool is essential for folding ingredients gently and scraping every bit of batter from the bowl. It prevents overmixing while ensuring nothing goes to waste.
Whisk: A sturdy whisk incorporates air into the wet ingredients and ensures the egg blends smoothly without lumps.
Cooling Rack: Transferring the baked cups to a wire rack prevents soggy bottoms and allows air circulation for even cooling.
Gathering Your Ingredients and Smart Substitutions
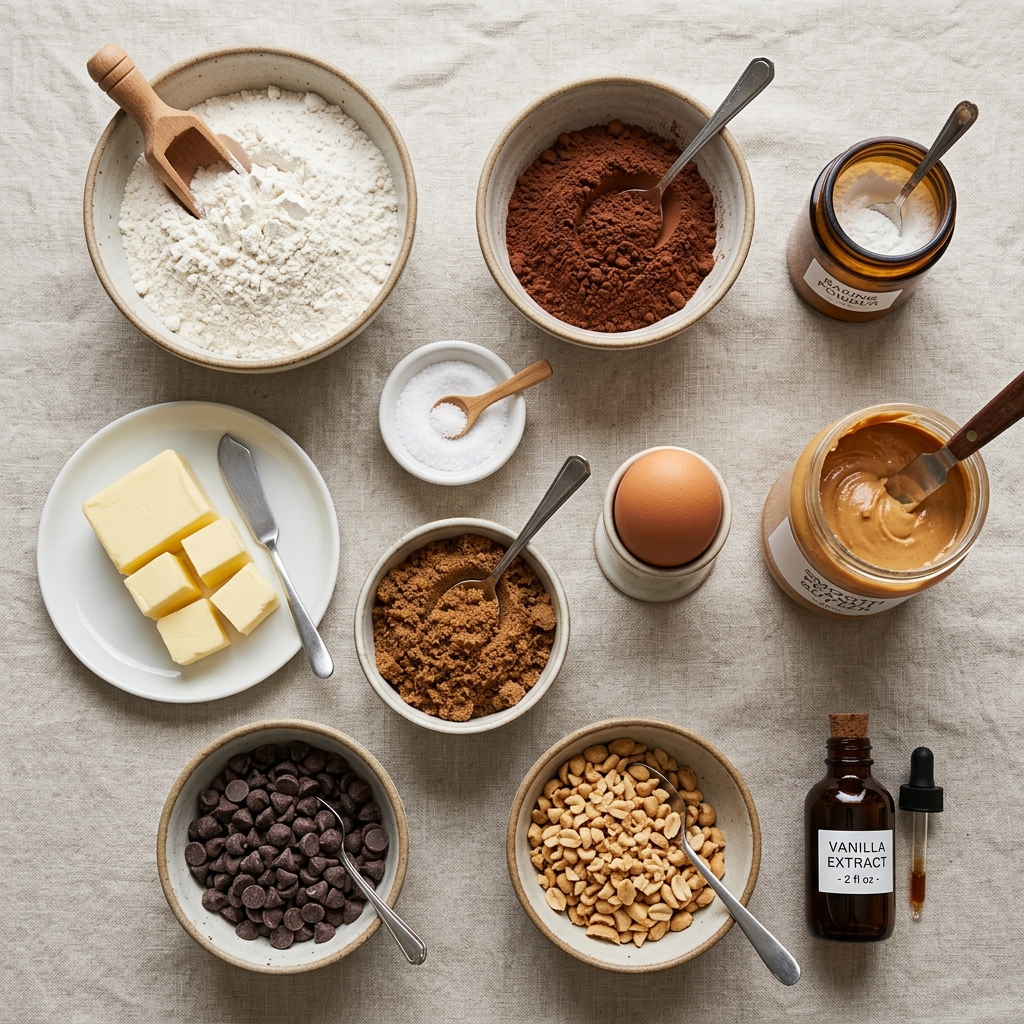
Quality ingredients make all the difference in achieving that perfect fudgy texture and rich flavor. Each component plays a specific role in creating the structure and taste of these delightful cups. Gather everything before starting to ensure a smooth baking process.
- All-Purpose Flour: 1 cup provides the structural backbone for the chocolate dough. This standard flour creates the perfect chew without being too heavy.
- Unsweetened Cocoa Powder: ½ cup delivers intense chocolate flavor and that characteristic dark color. Choose a high-quality Dutch process or natural cocoa for best results.
- Baking Powder: 1 teaspoon acts as the leavening agent to give the brookie cups a slight rise and tender crumb.
- Salt: ¼ teaspoon enhances the chocolate flavor and balances the sweetness of the brown sugar.
- Unsalted Butter: ½ cup melted creates richness and moisture while helping the sugar dissolve properly.
- Brown Sugar: ¾ cup adds moisture, caramel notes, and that distinctive fudgy texture. The molasses content keeps the centers soft.
- Large Egg: 1 egg binds the ingredients together and adds structure to the finished cups.
- Creamy Peanut Butter: ½ cup mixed into the batter creates the base flavor, with extra for the center filling. Use standard creamy style for the best texture.
- Chocolate Chips: ½ cup provides pockets of melted chocolate throughout the dough. Semi-sweet works beautifully here.
- Crushed Roasted Peanuts: ½ cup adds crunch and reinforces the nutty flavor profile. Roast your own or use pre-packaged.
- Vanilla Extract: ½ teaspoon rounds out the flavors and adds aromatic depth to the chocolate base.
- Extra Peanut Butter: For filling the centers, if desired, creating that signature gooey middle.
- Extra Chocolate Chips: For topping, adding visual appeal and extra chocolatey goodness.
- Melted Chocolate: Optional, for drizzling over the finished cups as a decorative finish.
All-Purpose Flour: You can substitute with a one-to-one gluten-free flour blend for dietary restrictions.
Unsweetened Cocoa Powder: Dutch process cocoa works interchangeably with natural cocoa in this recipe.
Brown Sugar: Coconut sugar makes an excellent alternative with a lower glycemic index.
Creamy Peanut Butter: Almond butter or sunflower seed butter works for those with peanut allergies.
Unsalted Butter: Coconut oil or a quality vegan butter substitute creates dairy-free results.
Spotlight on Key Ingredients
Creamy Peanut Butter: This ingredient provides the signature flavor and creates the luxurious center that makes these cups special. The protein and oils in peanut butter contribute to the tender texture while delivering that nostalgic comfort food taste.
Unsweetened Cocoa Powder: The quality of your cocoa directly impacts the depth of chocolate flavor in the final product. Look for cocoa with at least twenty percent fat content for the richest results.
Step-by-Step Guide to Making Peanut Butter Brookie Cups
Creating these treats requires patience and attention to detail, but the process is straightforward and rewarding. Follow each step carefully to ensure the perfect balance of textures and flavors in every cup.
- Preheat the oven to 350°F (180°C) and lightly grease a muffin tin. This temperature ensures even baking without drying out the edges while the centers remain gooey.
- In a bowl, whisk together the melted butter and brown sugar until smooth. The mixture should look glossy and well combined, with the sugar beginning to dissolve into the warm butter.
- Add the egg and vanilla extract and whisk until combined. The batter will lighten slightly in color and become more cohesive as the egg emulsifies with the fats.
- Mix in the peanut butter until the mixture becomes creamy. Take your time here to ensure no streaks remain and the peanut butter is fully incorporated.
- In a separate bowl, combine the flour, cocoa powder, baking powder, and salt. Whisk these together to distribute the leavening and salt evenly throughout the dry mixture.
- Gradually fold the dry ingredients into the wet mixture with a silicone spatula. Mix just until a thick chocolate dough forms. Be gentle here to avoid overworking the gluten in the flour.
- Fold in the chocolate chips. Distribute them evenly so every cup gets plenty of melted chocolate pockets throughout.
- Press some of the chocolate dough into each muffin cavity, covering the bottom and sides to create a cup. Use your fingers to push the dough up the sides, creating a well in the center for the filling.
- Add a spoonful of creamy peanut butter to the center. Do not overfill, as the peanut butter will melt and spread slightly during baking.
- Cover the peanut butter with another portion of chocolate dough and gently press to seal. Make sure the edges meet to prevent the filling from leaking out during baking.
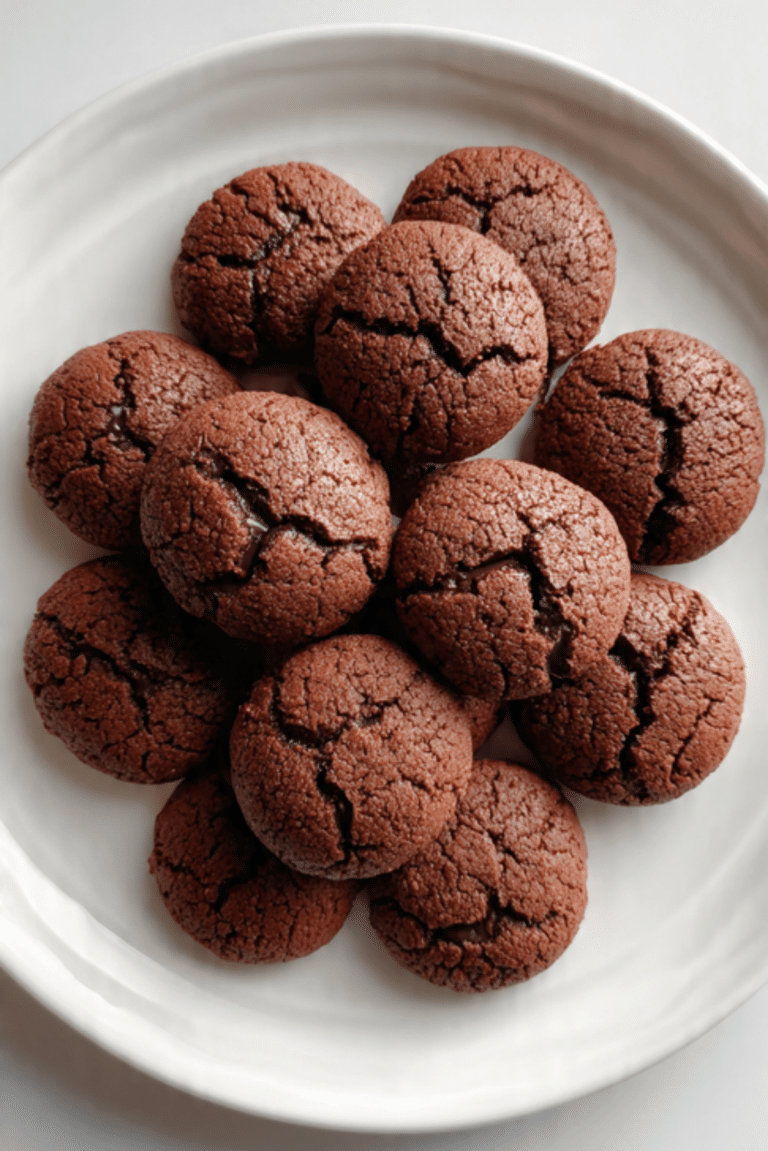
- Bake for about 18–22 minutes, until the edges are set and the tops look slightly crackled. The centers should still feel slightly soft when pressed gently.
- Let the brookie cups cool in the pan before carefully removing them. This resting period allows the structure to set properly so they do not fall apart when lifted out.
- Finish with melted chocolate, extra chocolate chips, or crushed peanuts if desired. These toppings add texture and make each cup look professionally bakery-made.
- Cut one open while slightly warm to reveal the gooey peanut-butter center. This is the moment that makes all the effort worthwhile, as the creamy center oozes out against the rich chocolate exterior.
What to Avoid When Making Brookie Cups
Even simple recipes have pitfalls that can affect the final texture and appearance. Watch out for these common errors to ensure your Peanut Butter Brookie Cups turn out perfectly every time.
- Overmixing the dough: Stirring too vigorously after adding flour develops gluten and creates tough, cakey cups instead of fudgy ones. Mix just until the flour disappears.
- Overfilling the centers: Adding too much peanut butter causes it to bubble out during baking and burn on the pan. Use a modest spoonful for clean results.
- Skipping the cooling time: Removing the cups from the pan while hot causes them to crumble and lose their shape. Patience yields better structural integrity.
- Underbaking: While gooey centers are desirable, underbaked dough tastes raw and lacks the proper texture. Look for set edges and crackled tops as your guide.
Nutrition Facts and Preparation Time
Servings: 12 brookie cups
Calories per serving: Approximately 280
Note: These are approximate values based on standard ingredients and portion sizes.
Prep Time: 20 minutes
Cook Time: 20 minutes
Total Time: 40 minutes
Variations to Try
Once you master the basic recipe, experiment with these creative twists to keep things interesting. Each variation maintains the core concept while offering a new flavor experience.
Nutella Centers: Replace the peanut butter filling with hazelnut spread for a different nutty profile. The chocolate-hazelnut combination pairs beautifully with the cocoa base.
Peanut Butter Cup Stuffed: Press a miniature peanut butter cup into the center instead of loose peanut butter for a candy bar surprise. This creates defined layers of chocolate and peanut butter.
Double Chocolate: Use white chocolate chips in the dough and drizzle white chocolate on top for visual contrast. The vanilla notes complement the peanut butter nicely.
Salted Caramel Swirl: Add a drizzle of caramel sauce to the peanut butter filling before sealing. The salt enhances both the chocolate and peanut butter flavors dramatically.
Crunchy Texture: Use crunchy peanut butter instead of creamy for added texture throughout the dough. The nut pieces provide satisfying bites against the smooth chocolate.
FAQ’s
1. Can I make these ahead of time?
Yes, you can prepare the dough up to three days in advance and store it covered in the refrigerator. Bring it to room temperature for about fifteen minutes before pressing into the muffin tin and baking.
2. How do I store leftover brookie cups?
Keep them in an airtight container at room temperature for up to five days. Place a piece of parchment paper between layers if you need to stack them to prevent sticking.
3. Can I freeze these treats?
Absolutely. Wrap individual Peanut Butter Brookie Cups tightly in plastic wrap and place in a freezer bag for up to three months. Thaw at room temperature or warm gently in the microwave for a fresh-baked taste.
4. Why did my peanut butter leak out?
This usually happens if the dough walls are too thin or the seal is not complete. Make sure to press the dough firmly against the sides and ensure the top layer completely encases the filling.
5. Can I use natural peanut butter?
Natural peanut butter tends to be oilier and can separate, affecting the texture. If using natural, stir it very well first and consider chilling it briefly to firm it up before filling.
6. What if I do not have a muffin tin?
You can use silicone cupcake liners placed on a baking sheet, though the shape will be slightly different. Ramekins also work for a more rustic presentation.
7. How do I know when they are done baking?
Look for set edges that pull slightly away from the pan and crackled tops. The centers should still feel soft but not wet when lightly touched.
8. Can I double this recipe?
Yes, simply double all ingredients and use two muffin tins or bake in batches. Do not crowd the oven as this affects heat circulation.
9. Why are my brookie cups dry?
Overbaking is the usual culprit. Start checking at the eighteen minute mark and remember that they continue cooking slightly while cooling in the pan.
10. Can I make these vegan?
Substitute the egg with a flax egg and use vegan butter and chocolate chips. The texture will be slightly different but still delicious and satisfying.
Conclusion
Peanut Butter Brookie Cups represent everything wonderful about home baking. They combine familiar flavors in an unexpected format that delights both the eyes and the palate. Whether you serve them at a celebration or enjoy them as a weekday treat, these cups deliver consistent satisfaction. The interplay of textures, from the fudgy exterior to the creamy center, creates a memorable dessert experience, and it’s worth every bite. Gather your ingredients and treat yourself to this perfect marriage of chocolate and peanut butter today.
PrintPeanut Butter Brookie Cups
Peanut Butter Brookie Cups are the ultimate dessert hybrid that combines the best of both worlds. Imagine biting into a rich, fudgy brownie exterior that gives way to a soft, peanut butter center.
- Prep Time: 20 minutes
- Cook Time: 20 minutes
- Total Time: 40 minutes
- Yield: 12 brookie cups
- Category: Dessert
- Method: Baking
- Cuisine: American
- Diet: Vegetarian
Ingredients
- 1 cup all-purpose flour
- ½ cup unsweetened cocoa powder
- 1 teaspoon baking powder
- ¼ teaspoon salt
- ½ cup unsalted butter, melted
- ¾ cup brown sugar
- 1 large egg
- ½ cup creamy peanut butter
- ½ cup chocolate chips
- ½ cup crushed or chopped roasted peanuts
- ½ teaspoon vanilla extract
- Extra peanut butter for the center, if desired
- Extra chocolate chips for topping
- Melted chocolate, optional, for drizzling
Instructions
- Preheat the oven to 350°F (180°C) and lightly grease a muffin tin.
- In a bowl, whisk together the melted butter and brown sugar until smooth.
- Add the egg and vanilla extract and whisk until combined.
- Mix in the peanut butter until the mixture becomes creamy.
- In a separate bowl, combine the flour, cocoa powder, baking powder, and salt.
- Gradually fold the dry ingredients into the wet mixture with a silicone spatula. Mix just until a thick chocolate dough forms.
- Fold in the chocolate chips.
- Press some of the chocolate dough into each muffin cavity, covering the bottom and sides to create a cup.
- Add a spoonful of creamy peanut butter to the center.
- Cover the peanut butter with another portion of chocolate dough and gently press to seal.
- Bake for about 18–22 minutes, until the edges are set and the tops look slightly crackled.
- Let the brookie cups cool in the pan before carefully removing them.
- Finish with melted chocolate, extra chocolate chips, or crushed peanuts if desired.
- Cut one open while slightly warm to reveal the gooey peanut-butter center.
Notes
- Do not overmix the batter once you add the flour to avoid tough cups.
- Use room temperature egg for better emulsification.
- Press the dough firmly against the sides of the muffin tin to create a sturdy cup.
- Do not overfill the centers with peanut butter to prevent leaking.
- Do not skip the cooling time to prevent crumbling.
- Avoid underbaking; look for set edges and crackled tops.
Nutrition
- Serving Size: 1 cup
- Calories: 280