Giant Gooey Skillet Cookie (Cookie Pie)
Giant Gooey Skillet Cookie (Cookie Pie)
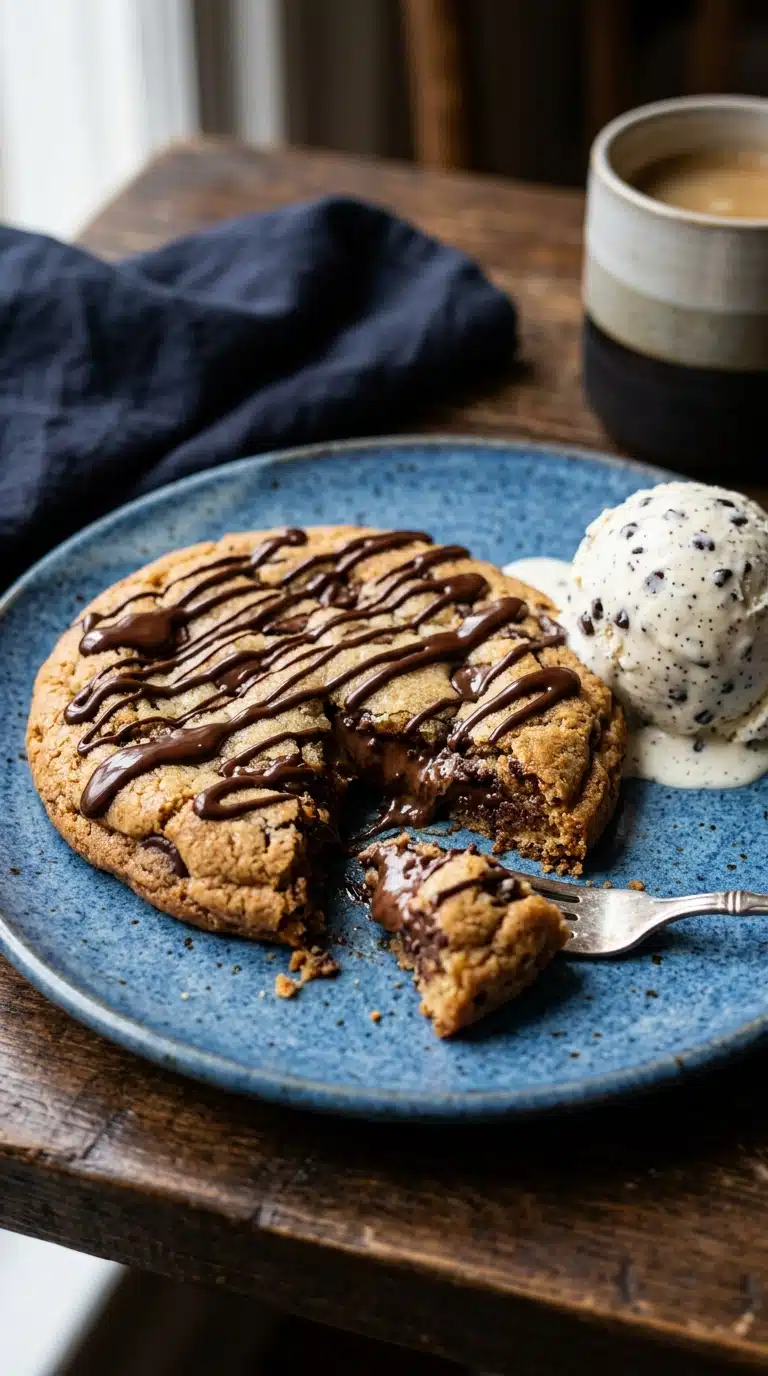
Giant Gooey Skillet Cookie is the ultimate dessert for when you cannot decide between a cookie and a warm pie. Imagine a golden-edged, molten-centered masterpiece that arrives at your table still sizzling, sending ribbons of vanilla and chocolate heaven into the air. This decadent treat brings the comfort of childhood baking into a shareable format that feels both rustic and special. Trust me, you’re going to love this straight-from-the-oven experience that demands a spoon and zero patience.
The Appeal and History of the Skillet Cookie
This dessert captures everything wonderful about home baking in one cast-iron embrace. The concept likely emerged from American home kitchens where bakers sought faster ways to serve warm cookies without portioning dough. By pressing batter into a hot skillet, you create crispy, caramelized edges while preserving a molten center that traditional sheet cookies cannot match. The chocolate chip cookie itself has a rich history dating back to Massachusetts in the 1930s, but the skillet method represents a modern evolution toward communal, shareable desserts. It is worth every bite when you break through that golden crust to reveal the gooey chocolate treasure within.
Why This Giant Gooey Skillet Cookie Works Every Time
This recipe delivers consistent results because it balances precise measurements with forgiving technique. The chemistry between brown sugar and butter creates that coveted chewy texture, while the skillet method ensures even heat distribution.
Versatile: Serve it for birthdays, movie nights, or impromptu gatherings with equal success.
Budget-Friendly: Pantry staples like flour, butter, and sugar transform into restaurant-quality dessert without expensive equipment.
Quick and Easy: From mixing bowl to table in under thirty minutes, this fits busy weeknights and lazy weekends alike.
Customizable: The base dough welcomes different chocolate types or nut additions while maintaining its essential character.
Crowd-Pleasing: The dramatic presentation of a warm Giant Gooey Skillet Cookie never fails to draw gasps of delight from guests.
Make-Ahead Friendly: Mix the dough earlier in the day and refrigerate until baking time approaches.
Great for Leftovers: While best warm, leftover slices microwave beautifully for instant comfort the next day.
Expert Advice and Common Pitfalls
Mastering this dessert requires understanding texture signals and timing. The difference between perfect and overbaked happens quickly, so vigilance matters. Check out Serious Eats guide to cookie textures for more science behind the perfect chew.
Watch the edges, not the clock: When the perimeter turns golden but the center still jiggles slightly, remove the skillet immediately. Carryover cooking will set the center without drying it out.
Room temperature matters: Ensure your butter is truly softened and your egg is at room temperature for proper emulsification. Cold ingredients create a greasy, separated dough that bakes unevenly.
Do not overmix: Once the flour hits the wet ingredients, fold gently until just combined. Overworking develops gluten, resulting in a tough, cake-like texture rather than the desired tender crumb.
Common mistakes include overbaking until the center is firm, which eliminates the signature gooeyness. If you prefer a firmer cookie, bake two minutes longer, but for the authentic experience, trust the jiggle. Another error is using a cold skillet, which shocks the butter and prevents proper spreading and edge formation.
Essential Kitchen Tools
You need minimal gear to create this showstopper, which makes spontaneous baking sessions entirely possible.
Large mixing bowl: Provides ample space for creaming butter and sugar without splattering.
Sturdy spatula: Essential for folding dry ingredients into wet without overmixing the delicate dough.
Oven-safe skillet or baking tin: A 10-inch cast iron works beautifully, but any oven-safe pan with sides holds the dough as it spreads and rises.
Oven mitts: The handle stays hot long after baking, so protect your hands when moving from oven to table.
Gathering Your Ingredients and Substitutions
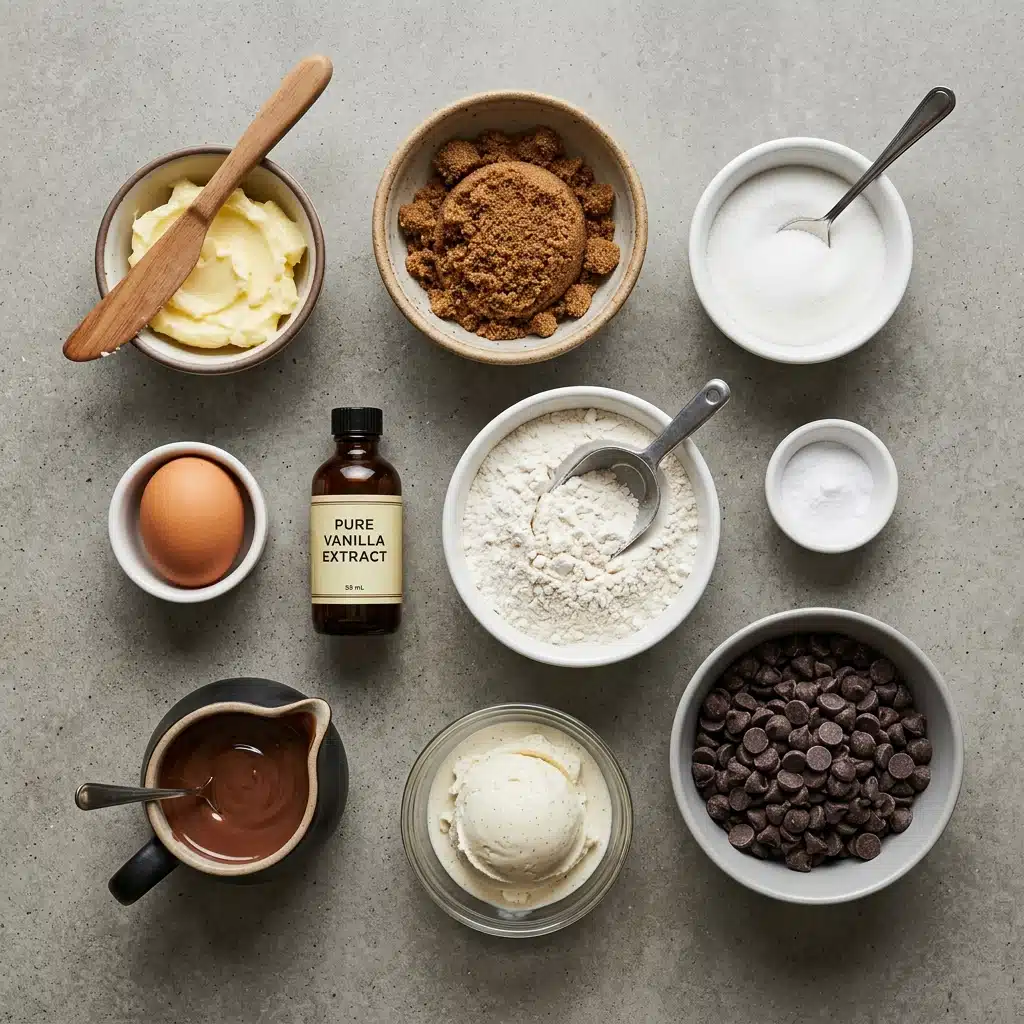
Quality matters when the ingredient list is short. Each component plays a specific role in creating that perfect balance of crisp and gooey.
- Unsalted butter: 115 g (1/2 cup), softened. Provides the rich foundation and helps create the tender, melt-in-your-mouth texture.
- Brown sugar: 100 g (1/2 cup). Delivers moisture and deep caramel undertones that define the cookie’s flavor profile.
- Granulated white sugar: 50 g (1/4 cup). Creates those lacy, crisp edges that contrast beautifully with the soft center.
- Large egg: 1. Binds everything together while adding structure and richness to the dough.
- Vanilla extract: 1 tsp. Rounds out the sweetness with warm, aromatic complexity.
- All-purpose flour: 180 g (1 1/2 cups). Forms the backbone of the dough, providing just enough structure without becoming heavy.
- Baking soda: 1/2 tsp. The leavening agent that gives a slight lift and tender crumb.
- Semi-sweet chocolate chips: 150 g (1 cup). Create pockets of melted chocolate throughout every bite.
- Vanilla ice cream: 2 scoops for serving. The cold, creamy counterpoint that makes the warm cookie irresistible.
- Warm hazelnut-chocolate drizzle: For serving. Adds a luxurious finishing touch that elevates the dessert to restaurant quality.
Butter: Coconut oil or vegan butter sticks work for dairy-free versions, though the flavor profile shifts slightly.
Chocolate chips: Dark chocolate chunks, milk chocolate morsels, or even butterscotch chips create different flavor experiences.
Brown sugar: You can use all granulated sugar in a pinch, though you will lose some moisture and that distinctive caramel note.
Brown sugar: This ingredient defines the cookie’s soul. With its molasses content, it keeps the center perpetually moist and adds butterscotch complexity that white sugar alone cannot provide.
Butter: Properly softened butter creams with the sugars to create air pockets that result in the perfect texture. Do not rush the creaming process, as this step builds the structure for everything that follows.
Bringing It All Together
Follow these steps precisely to achieve that signature gooey center and crisp edge contrast.
Cream the Base: In a large mixing bowl, beat the softened butter, brown sugar, and granulated sugar together until smooth and well combined. Take time to incorporate air here, as this step determines the final texture. The mixture should lighten in color and appear fluffy before proceeding.
Add Wet Ingredients: Whisk in the egg and vanilla extract until fully incorporated. Ensure the egg emulsifies completely into the butter mixture to prevent a greasy separation later. The batter should look glossy and uniform.
Combine Dry Ingredients: Sift in the flour and baking soda, folding gently with a spatula just until a dough forms. Fold in the chocolate chips. Resist the urge to beat vigorously, and stop as soon as you no longer see streaks of flour. Overmixing develops gluten and creates toughness.
Bake: Press the dough evenly into a greased baking tin or oven-safe skillet. Bake at 180°C (350°F) for 15 to 18 minutes until the edges are golden but the center remains soft and molten. Check at the 15-minute mark by gently shaking the pan, as the center should jiggle slightly like brownie batter.
Plate and Serve: Scoop while steaming hot into a bowl or tray, add scoops of vanilla ice cream on the side, and drizzle generously with warm chocolate-hazelnut sauce. The contrast of hot cookie and cold ice cream creates the perfect temperature balance.
Nutrition Facts and Preparation Time
Servings: 6 generous portions / Calories per serving: Approximately 480 / Note: These are approximate values.
Prep Time: 10 minutes / Cook Time: 15-18 minutes / Total Time: 25-28 minutes
FAQ’s
Can I make this without a cast iron pan?
Absolutely. Any oven-safe baking dish or cake pan works beautifully. Adjust baking time by a minute or two if using glass, which retains heat differently than metal.
Why is my cookie dry instead of gooey?
You likely overbaked it. The center should still look slightly underdone when you remove it from the oven. Remember that it continues cooking from residual heat after removal.
Can I prepare the dough ahead?
Yes, mix the dough up to 24 hours in advance and refrigerate it. Let it sit at room temperature for 15 minutes before pressing into the skillet and baking.
What if I do not have hazelnut-chocolate drizzle?
Melted chocolate chips with a splash of milk make an excellent substitute. You can also use caramel sauce or simply serve with extra ice cream.
Can I double this recipe?
For a larger crowd, double the ingredients and use a larger skillet or split between two pans. Do not pile the dough too deep or the edges will burn before the center cooks.
How do I store leftovers?
Cover the cooled skillet tightly with foil or transfer slices to an airtight container. Store at room temperature for two days or refrigerate for up to five days.
Can I freeze this?
Freeze the unbaked dough pressed into a freezer-safe skillet for up to one month. Bake from frozen, adding five extra minutes to the cooking time.
Why did my cookie sink in the middle?
This is actually desirable for this recipe. The slight sinking indicates a soft, molten center. If it collapses dramatically, you may have underbaked it slightly, but it will still taste delicious.
Is this recipe suitable for high altitude?
At high altitudes, reduce baking soda to 1/4 teaspoon and add an extra tablespoon of flour to prevent excessive spreading.
Can I use salted butter?
If using salted butter, the recipe still works fine, though the cookie may taste slightly saltier. No additional salt is needed in this dough.
Conclusion
This Giant Gooey Skillet Cookie represents everything wonderful about home baking. It requires no fancy equipment, uses pantry staples, and delivers maximum impact with minimal effort. Whether you are celebrating a special occasion or simply craving something sweet on a Tuesday night, this cookie pie brings warmth and joy to any table. Grab your spoon, add that ice cream, and dig into the gooey center while it is still warm.
PrintGiant Gooey Skillet Cookie (Cookie Pie)
Giant Gooey Skillet Cookie is the ultimate dessert combining a cookie and warm pie, featuring golden crisp edges, a molten chocolate center, and served hot with vanilla ice cream and hazelnut-chocolate drizzle.
- Prep Time: 10 minutes
- Cook Time: 15-18 minutes
- Total Time: 25-28 minutes
- Yield: 6 generous portions
- Category: Dessert
- Method: Baking
- Cuisine: American
- Diet: Vegetarian
Ingredients
- 115 g (1/2 cup) unsalted butter, softened100 g (1/2 cup) brown sugar50 g (1/4 cup) granulated white sugar1 large egg1 tsp vanilla extract180 g (1 1/2 cups) all-purpose flour1/2 tsp baking soda150 g (1 cup) semi-sweet chocolate chips For serving: 2 scoops of vanilla ice cream and warm hazelnut-chocolate drizzle
Instructions
- Cream the Base: In a large mixing bowl
- beat the softened butter
- brown sugar
- and granulated sugar together until smooth and well combined.Add Wet Ingredients: Whisk in the egg and vanilla extract until fully incorporated.Combine Dry Ingredients: Sift in the flour and baking soda
- folding gently with a spatula just until a dough forms. Fold in the chocolate chips. Bake: Press the dough evenly into a greased baking tin or oven-safe skillet. Bake at 180°C (350°F) for 15 to 18 minutes until the edges are golden but the center remains soft and molten. Plate and Serve: Scoop while steaming hot into a bowl or tray
- add scoops of vanilla ice cream on the side
- and drizzle generously with warm chocolate-hazelnut sauce.
Notes
- Watch the edges, not the clock: remove the skillet when the perimeter is golden but the center still jiggles slightly; carryover cooking will set the center.
- Ensure butter is truly softened and the egg is at room temperature for proper emulsification.
- Do not overmix once flour is added; fold gently until just combined to avoid a tough, cake-like texture.
- Use a room-temperature skillet; a cold skillet shocks the butter and prevents proper spreading and edge formation.
- For high-altitude baking, reduce baking soda to 1/4 teaspoon and add an extra tablespoon of flour.
Nutrition
- Serving Size: 1 generous portion (1/6 of skillet)
- Calories: Approximately 480