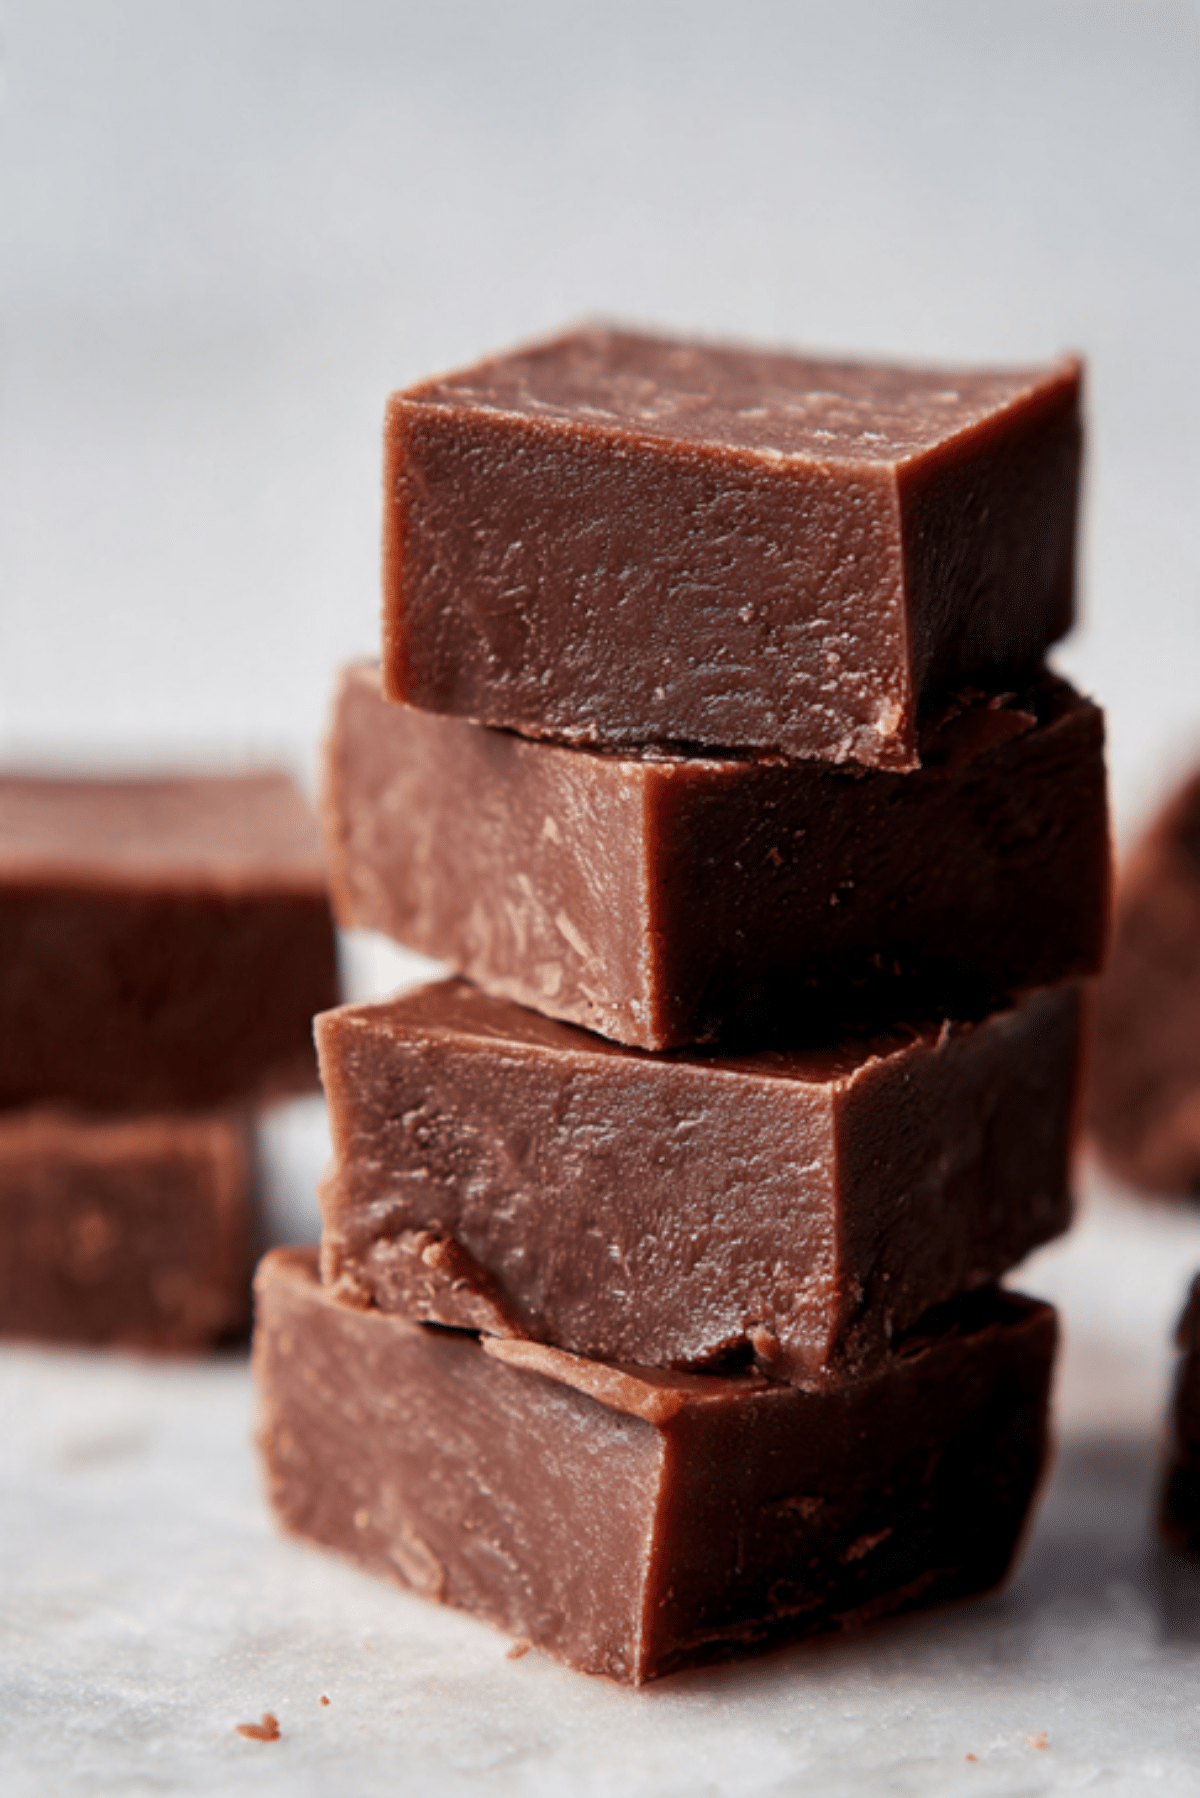
Bailey’s Fudge
There is something incredibly indulgent about the way a piece of homemade fudge slowly melts on your tongue, and this version takes that experience to a whole new level. By infusing the classic confection with the creamy, non-alcoholic essence of Irish cream, we create a treat that is both sophisticated and deeply comforting. Trust me, you’re going to love this recipe for its buttery smoothness and that unmistakable hint of toasted vanilla and cocoa.
The Ultimate Melt-in-Your-Mouth Confection
When the holiday season rolls around or you simply need a little pick-me-up, this fudge is the answer to your sweet tooth cravings. It has a texture that is firm enough to hold its shape but soft enough to be described as pure silk. This one’s a total game-changer because it uses a foolproof method that skips the stress of candy thermometers while delivering professional results every single time.
A Modern Twist on a Classic Sweet Tradition
Fudge as we know it is a relatively modern invention, gaining popularity in the late nineteenth century as a happy accident during a botched batch of caramels. Since then, it has become a staple of seaside shops and holiday gift boxes alike. This particular recipe draws inspiration from the lush dairy traditions of Ireland, using cream-based flavors to elevate a simple sugar-based candy into something truly gourmet.
Why This Creamy Fudge is a Total Game-Changer
Crafting the perfect batch of fudge can sometimes feel like a science experiment gone wrong, but this recipe is designed to be approachable and consistent. It relies on high-quality chocolate and condensed milk to do the heavy lifting, ensuring a perfect set without the grit.
Versatile: You can easily stir in chopped nuts, dried fruit, or even a swirl of dark chocolate to make this recipe your own.
Budget-Friendly: Despite its luxurious taste, it only requires a handful of ingredients that are easy to find at any local grocery store.
Quick and Easy: The active prep time is minimal, meaning you can have a batch ready for the fridge in under fifteen minutes.
Customizable: Decorate the top with sea salt, festive sprinkles, or a dusting of cocoa powder to match any occasion or holiday theme.
Crowd-Pleasing: Its rich, creamy flavor is universally loved, making it a safe and popular choice for office parties or family gatherings.
Make-Ahead Friendly: This fudge stays fresh for weeks, so you can check one more thing off your holiday to-do list well in advance.
Great for Leftovers: Even the smallest scraps can be chopped up and used as a decadent topping for vanilla ice cream or folded into brownie batter.
Secrets for the Smoothest Fudge Texture
The key to achieving that signature “melt-in-your-mouth” quality is to avoid overworking the mixture once the chocolate has melted. Over-stirring can sometimes introduce too much air or cause the sugar to crystallize, which leads to a grainy finish. Also, let me tell you, it’s worth every bite if you use high-quality white chocolate chips, as they provide the creamy fat content necessary for a stable and delicious set.
Essential Tools for Your Candy Making
- Square Baking Pan: An eight-by-eight inch pan is the perfect size for creating those thick, satisfying fudge squares we all crave.
- Parchment Paper: This is essential for lining your pan, allowing you to lift the entire block of fudge out for clean slicing.
- Heavy-Bottomed Saucepan: This ensures even heat distribution so your white chocolate melts gently without scorching or seizing.
- Silicone Spatula: The flexible edges allow you to scrape every last bit of creamy goodness from the pan into your mold.
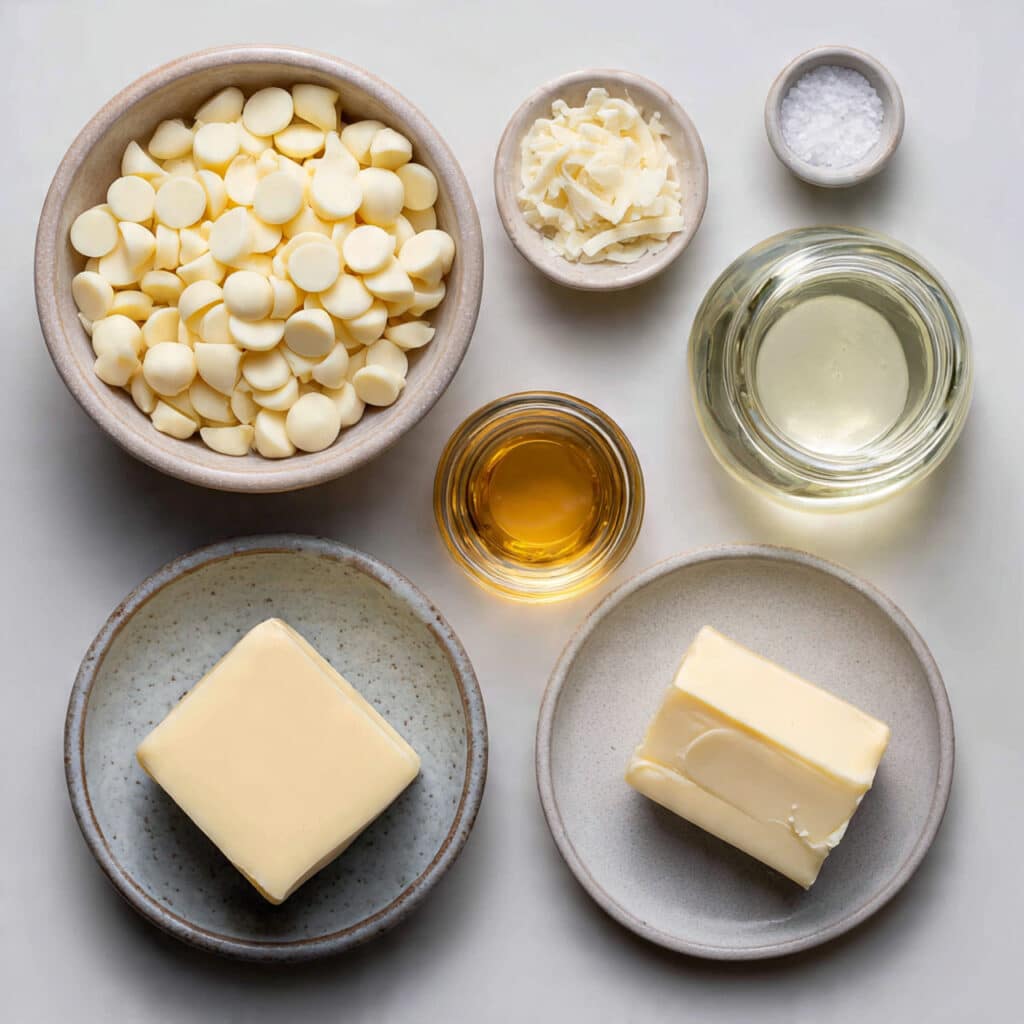
Ingredients You Will Need For This Recipe
The success of this fudge lies in the balance between the rich dairy and the aromatic cream flavoring.
- White Chocolate Chips: 3 cups. These act as the base and provide the sweet, creamy structure for the entire block.
- Sweetened Condensed Milk: 14 ounces. This provides the necessary sugar and moisture to create a fudge that is soft yet sliceable.
- Irish Cream Flavoring: 3 tablespoons. Use a non-alcoholic Irish cream syrup or liquid creamer to get that distinct, rounded flavor.
- Unsalted Butter: 2 tablespoons. A small amount of butter adds an extra layer of richness and a beautiful shine to the finished product.
- Vanilla Extract: 1 teaspoon. This enhances the floral notes of the white chocolate and ties all the dairy flavors together.
- Salt: 1 pinch. A tiny bit of salt is crucial to cut through the intense sweetness and highlight the creaminess.
Flexible Ingredient Substitutions
If you find yourself short on an ingredient, these simple swaps will keep your fudge-making journey on track without skipping a beat.
White Chocolate Chips: You can use milk chocolate chips for a “Mocha Irish Cream” vibe, though the color will be much darker.
Irish Cream Flavoring: A mix of half-and-half with a drop of almond extract and a teaspoon of cocoa powder can mimic the flavor profile.
Unsalted Butter: Coconut oil can be used in a pinch, though it will add a very subtle tropical note to the finish.
Key Ingredients Spotlight
Sweetened Condensed Milk: This ingredient is a miracle worker in the world of fudge, providing a concentrated dairy base that ensures a smooth, non-grainy texture.
Irish Cream Flavoring: This provides a complex blend of cream, chocolate, and vanilla notes that transforms standard white fudge into a gourmet treat.
Step by Step Guide to Fudge Perfection
Follow these steps precisely to create a batch of fudge that looks like it came straight from a high-end confectionery shop.
- Preheat Your Equipment: There is no oven needed for this recipe, but you should prepare your baking pan by lining it with parchment paper that hangs over the edges.
- Combine Ingredients: Place the white chocolate chips, sweetened condensed milk, and butter into a heavy saucepan over low heat.
- Prepare Your Cooking Vessel: Ensure your saucepan is completely dry before adding ingredients, as even a drop of water can cause the white chocolate to seize.
- Assemble the Dish: Stir the mixture constantly until the chocolate is completely melted and the texture is glossy and unified.
- Cook to Perfection: Remove from heat and quickly stir in the Irish cream flavoring, vanilla extract, and the pinch of salt until well incorporated.
- Finishing Touches: Pour the mixture into your prepared pan, smoothing the top with your spatula before placing it in the refrigerator.
- Serve and Enjoy: Allow the fudge to set for at least four hours, then lift it out by the parchment paper and slice into small, rich squares.
Focus on Creamy Texture and Rounded Flavor
The beauty of this fudge is the way the white chocolate carries the Irish cream notes without overpowering them. You will find that as the fudge sets, the flavors become more integrated, resulting in a cohesive taste that is reminiscent of a luxury truffle but with the satisfying chew of classic fudge.
Helpful Cooking Tips and Tricks
- Use a hot knife to slice your fudge by dipping the blade in warm water and drying it between each cut.
- Don’t rush the setting process in the freezer; the refrigerator provides a more stable environment for the fats to crystallize correctly.
- For an extra fancy touch, drizzle the set fudge with a little melted dark chocolate before slicing.
What to Avoid for Best Results
- High Heat: White chocolate is very delicate and will burn easily, so always keep your burner on the lowest setting possible.
- Old Chocolate: Chips that have been in the pantry too long might not melt smoothly, leading to a lumpy final product.
- Skipping the Parchment: Without a liner, the fudge will stick to the pan and be nearly impossible to remove in clean squares.
Nutrition Facts
Servings: 36
Calories per serving: 115
Note: These are approximate values.
Preparation Time
Prep Time: 10 minutes
Cook Time: 5 minutes
Total Time: 255 minutes
Make-Ahead and Storage Tips
This fudge is a dream for meal preppers because it stays perfect for up to three weeks when stored in an airtight container in the fridge. If you want to keep it longer, you can wrap individual squares in wax paper and freeze them for up to three months.
How to Serve and Pair
Because this fudge is very sweet and rich, it is best served in small portions alongside a cup of bitter black coffee or a strong Earl Grey tea. It also makes a wonderful addition to a dessert charcuterie board paired with tart dried cranberries and salty pretzels.
Creative Leftover Transformations
If you have leftover scraps, try melting them down gently and using the mixture as a dip for fresh strawberries or apple slices. You can also crumble the fudge over a warm bowl of oatmeal for a truly decadent breakfast treat.
Additional Tips for Flavor and Freshness
To keep your fudge tasting fresh, always keep it covered. Exposure to air can cause the edges to dry out and become slightly hard, though the center will usually remain soft.
Make It a Showstopper
For a beautiful presentation, dust the top of the fudge with a fine layer of unsweetened cocoa powder just before serving. This not only looks professional but the bitterness of the cocoa provides a wonderful contrast to the sweet white chocolate.
Variations to Try
- Espresso Bailey’s: Add a teaspoon of instant espresso powder to the melting chocolate for a caffeine-boosted treat.
- Toasted Nut: Stir in half a cup of toasted chopped pecans or walnuts for an added earthy crunch.
- Chocolate Swirl: Drop small spoonfuls of melted milk chocolate onto the top and swirl with a toothpick for a marble effect.
FAQ’s
- Is there alcohol in this recipe?
No, this recipe uses non-alcoholic Irish cream flavoring or liquid creamer to keep it family-friendly. - Why is my fudge too soft?
This can happen if the chocolate-to-milk ratio is off or if it hasn’t had enough time to chill in the refrigerator. - Can I use a microwave to melt the ingredients?
Yes, use 30-second intervals and stir well in between to prevent the white chocolate from burning. - My fudge is grainy, what happened?
The mixture was likely stirred too much after it started to cool or the sugar in the milk crystallized. - How should I store the fudge?
In an airtight container in the refrigerator is best to maintain the perfect texture. - Can I use dark chocolate instead?
Yes, but you may need to adjust the amount of condensed milk as dark chocolate sets more firmly than white chocolate. - How do I get clean cuts?
A sharp, warmed knife and a steady hand are the secrets to those perfect fudge shop squares. - Can I add marshmallows?
Adding a cup of mini marshmallows at the very end can create a “rocky road” style texture that is very popular. - What kind of Irish cream flavoring should I buy?
Look for coffee syrups or liquid coffee creamers found in the dairy or baking aisle. - Can I make this vegan?
You would need to use vegan white chocolate and sweetened condensed coconut milk, which works quite well.
Conclusion
Bailey’s Fudge is the ultimate treat for anyone who loves the creamy, comforting flavors of Irish cream in a bite-sized, decadent form. It is simple to make, beautiful to look at, and even better to eat. Let me tell you, it’s worth every bite, and it is sure to become a requested favorite for every holiday and celebration to come!
PrintBailey’s Fudge
A creamy, melt-in-your-mouth white chocolate fudge infused with the rich, aromatic flavors of non-alcoholic Irish cream.
Ingredients
- 3 cups White Chocolate Chips
- 14 ounces Sweetened Condensed Milk
- 3 tablespoons Irish Cream Flavoring (non-alcoholic)
- 2 tablespoons Unsalted Butter
- 1 teaspoon Vanilla Extract
- 1 pinch Salt
Instructions
- Line an 8×8 inch baking pan with parchment paper.
- In a heavy-bottomed saucepan, combine white chocolate chips, sweetened condensed milk, and butter over low heat.
- Stir constantly until the mixture is completely melted and smooth.
- Remove from heat and stir in the Irish cream flavoring, vanilla, and salt.
- Pour the mixture into the prepared pan and smooth the top with a spatula.
- Refrigerate for at least 4 hours or until completely firm.
- Lift from the pan using the parchment paper and slice into squares.
Notes
- Use a warmed knife for the cleanest cuts.
- Keep the heat as low as possible to prevent white chocolate from seizing.
- Store in an airtight container to prevent drying out.