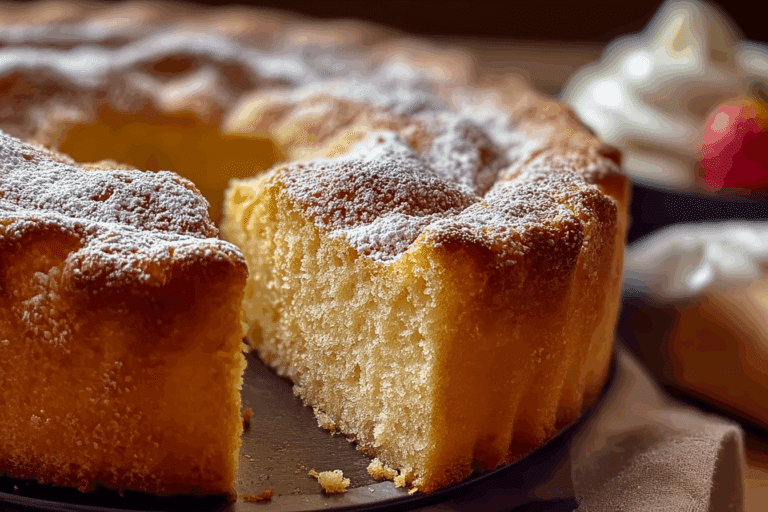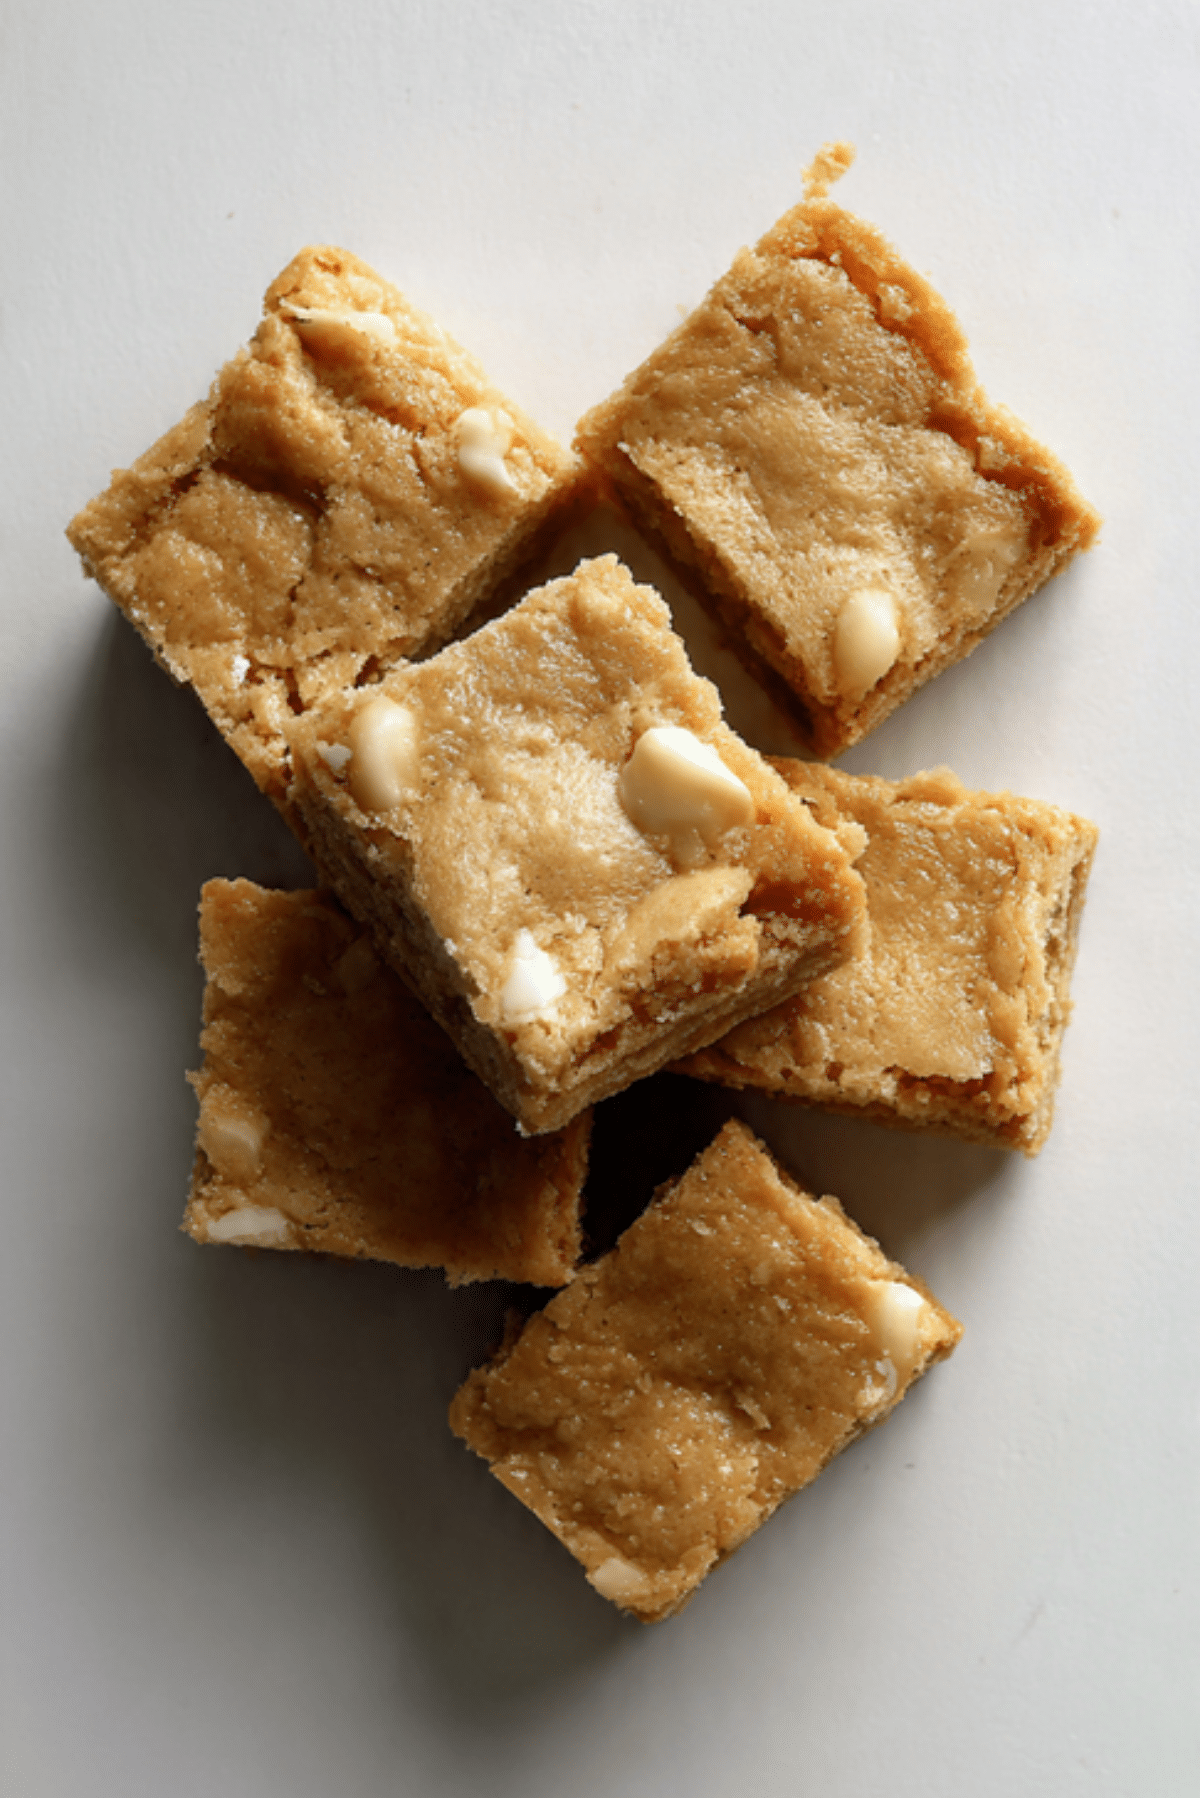
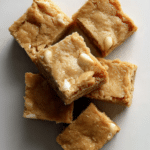
White Chocolate Blondies
Let me tell you, it’s worth every bite. These White Chocolate Blondies are the ultimate treat for anyone who craves a dessert that is dense, buttery, and packed with sweet, creamy flavor. Unlike a traditional brownie, these blondies rely on brown sugar and high quality white chocolate to create a rich, caramel like base that melts in your mouth. You’ll find that the texture is perfectly chewy on the edges while remaining soft and fudgy in the middle. Trust me, you’re going to love this recipe because it strikes the perfect balance between simple preparation and sophisticated taste.
The Irresistible Magic of Golden Buttery Blondies
There is something truly special about a dessert that manages to be both humble and luxurious at the same time. These blondies are a golden brown masterpiece, offering a deep vanilla profile that pairs beautifully with the milky sweetness of white chocolate. When you pull these out of the oven, the aroma of toasted sugar and melted butter will fill your entire kitchen, making it nearly impossible to wait for them to cool. It is the kind of treat that feels like a warm hug in dessert form, and once you try a piece, you will see exactly why this one’s a total game-changer for your baking repertoire.
A Sweet Journey into the History of Blondies
The history of the blondie actually predates the popular chocolate brownie by several years. Early versions of these “blonde brownies” appeared in late nineteenth century cookbooks and were often called butterscotch brownies because they relied on brown sugar and molasses for their distinct color and flavor. Over the decades, they evolved into the white chocolate studded versions we adore today. While the chocolate brownie eventually took the spotlight, the blondie has remained a beloved classic in American baking, representing a simpler time when pantry staples like butter and sugar were transformed into something extraordinary.
Why This White Chocolate Recipe is a Must Bake
If you are looking for a reliable dessert that never fails to impress, this is the one for you. This recipe is designed to be approachable for beginners yet satisfying enough for seasoned bakers who appreciate a perfect crumb.
Versatile: You can serve these blondies plain, warm them up with a scoop of vanilla ice cream, or even drizzle them with a bit of salted caramel for an extra touch of decadence.
Budget-Friendly: Most of the ingredients are likely already sitting in your pantry, making this an affordable way to whip up a gourmet tasting treat without a trip to a specialty store.
Quick and Easy: The batter comes together in just one or two bowls, meaning you spend less time cleaning up and more time enjoying your creation.
Customizable: While white chocolate is the star here, you can easily fold in macadamia nuts or a sprinkle of sea salt to make the recipe your own.
Crowd-Pleasing: Whether it is a school bake sale or a fancy dinner party, these blondies are always the first thing to disappear from the dessert table.
Make-Ahead Friendly: These actually taste even better the next day as the flavors have time to meld, making them perfect for busy schedules.
Great for Leftovers: They stay soft and chewy for several days, providing a delicious little pick-me-up whenever you need a sweet snack.
Expert Secrets for the Fudgiest Blondie Texture
To get that professional bakery finish, you need to pay attention to the details of the bake. One of the biggest secrets is to avoid overmixing the batter once you add the flour, as this can lead to a cakey texture rather than the desired fudgy consistency. Another pro tip is to use light brown sugar specifically because it provides the right amount of moisture and a subtle molasses hint without overpowering the delicate white chocolate. Lastly, always ensure your butter is melted but not boiling hot when you mix it with the sugar to keep the fats from separating.
Essential Tools for Your Baking Success
Before you start, make sure you have these simple tools ready to go so the process is smooth and enjoyable.
8×8 Inch Square Baking Pan: This is the ideal size to ensure your blondies have the perfect thickness and bake evenly through the center.
Parchment Paper: Lining your pan with parchment allows you to lift the entire block of blondies out easily for clean slicing.
Large Mixing Bowl: You will need a sturdy bowl to whisk together your melted butter and sugars until they are smooth and glossy.
Silicone Spatula: This is the best tool for gently folding in your white chocolate chips without overworking the batter.
Wire Cooling Rack: Allowing air to circulate under the pan after baking prevents the bottom from becoming soggy as it cools.
Ingredients You Will Need For These Blondies
The harmony of these ingredients is what creates that signature melt in your mouth feel. Each component plays a vital role in the structure and flavor of the final bake.
- Unsalted Butter: 1 cup or 225 grams of melted butter provides the rich base and creates a tender, moist crumb.
- Light Brown Sugar: 1 and 1/2 cups of packed sugar adds the essential caramel notes and keeps the blondies chewy.
- Large Eggs: 2 eggs at room temperature act as the binding agent and help the blondies rise just enough.
- Vanilla Extract: 1 tablespoon of high quality extract enhances the sweetness and depth of the white chocolate.
- All Purpose Flour: 2 cups of flour provide the structure needed to hold all those delicious chocolate chunks.
- Salt: 1/2 teaspoon of fine salt is crucial for balancing the sweetness of the white chocolate and sugar.
- White Chocolate Chips: 1 and 1/2 cups of chips or chopped chunks provide bursts of creamy flavor in every single bite.
Flexible Ingredient Substitutions to Suit Your Pantry
Don’t worry if you are missing an item, as these blondies are quite forgiving and allow for several easy swaps.
Light Brown Sugar: Dark brown sugar can be used if you prefer a deeper, more intense molasses flavor and a darker color.
All Purpose Flour: A 1:1 gluten free flour blend works wonderfully in this recipe if you need to avoid gluten.
White Chocolate Chips: You can substitute with white chocolate baking bars chopped into irregular chunks for a more rustic look.
Spotlighting the Key Ingredients
White Chocolate: This is the heart of the recipe, so using a brand you enjoy eating on its own will make a huge difference in the final taste.
Brown Sugar: This ingredient is responsible for the soft, dense texture that distinguishes a blondie from a traditional vanilla cake.

Step by Step Guide to Baking Perfection
Now it is time to bring these flavors together in your kitchen. Follow these steps carefully for the best results.
- Preheat Your Equipment: Set your oven to 350 degrees Fahrenheit and ensure your rack is in the center position for even heat distribution.
- Combine Ingredients: Whisk the melted butter and brown sugar in a large bowl until the mixture looks smooth, then add the eggs and vanilla, beating until well combined.
- Prepare Your Cooking Vessel: Line your square baking pan with parchment paper, leaving a little overhang on the sides to act as handles later.
- Assemble the Dish: Gently stir in the flour and salt until just a few streaks of white remain, then fold in the white chocolate chips with a spatula.
- Cook to Perfection: Spread the thick batter into the prepared pan and bake for twenty five to thirty minutes until the edges are golden and the center is set.
- Finishing Touches: Remove the pan from the oven and let it cool completely in the pan to allow the internal structure to firm up properly.
- Serve and Enjoy: Lift the blondies out using the parchment paper, slice them into squares, and share them with your favorite people.
Developing the Perfect Texture and Flavor
The beauty of these blondies lies in the contrast between the slightly crisp, papery top and the dense, buttery interior. As they bake, the sugars caramelize against the sides of the pan, creating a chewy border that everyone fights over. The white chocolate chips soften but retain their shape, providing creamy pockets of flavor that break up the richness of the dough. You will notice that as the blondies cool, the flavors deepen and the texture becomes even more fudgy.
Helpful Cooking Tips and Tricks
- For perfectly clean slices, let the blondies chill in the refrigerator for an hour before cutting them with a sharp knife.
- Do not overbake the blondies, as they will continue to firm up as they cool down on the counter.
- Use a light colored baking pan if possible to prevent the bottom and edges from browning too quickly.
Mistakes to Avoid for the Best Results
- Overmixing the Batter: This can incorporate too much air, leading to a cakey or tough blondie rather than a chewy one.
- Using Hot Butter: If the butter is too hot when you add the eggs, you might accidentally scramble them, so let it cool for a few minutes first.
- Skipping the Salt: Even though these are sweet, the salt is necessary to highlight the vanilla and chocolate notes.
Estimated Nutrition Facts
Servings: 16
Calories per serving: 285
Note: These are approximate values.
Estimated Preparation Time
Prep Time: 15 minutes
Cook Time: 30 minutes
Total Time: 45 minutes
Make Ahead and Storage Tips
You can easily bake these a day in advance as they hold their moisture exceptionally well. To store them, place the sliced blondies in an airtight container at room temperature for up to four days. If you want to keep them longer, they freeze beautifully for up to three months when wrapped tightly in plastic wrap and foil. To reheat, just pop a square in the microwave for ten seconds to bring back that fresh from the oven softness.
Creative Serving Suggestions
Serve these blondies on a beautiful wooden board for a rustic look, or plate them with a few fresh raspberries to add a pop of color and a touch of acidity. They also make a fantastic base for a dessert sundae when topped with whipped cream and a sprinkle of toasted nuts.
Creative Leftover Transformations
If you happen to have leftovers, you can crumble them over a bowl of yogurt for a decadent breakfast treat or mix them into a batch of homemade vanilla ice cream. Another fun idea is to sandwich a scoop of frosting between two small squares to make blondie sandwiches.
Additional Tips for Success
To ensure your white chocolate doesn’t scorch, make sure it is evenly distributed throughout the batter. If you prefer a less sweet version, you can reduce the white chocolate chips by half a cup without affecting the bake time.
Make It a Showstopper
For a truly stunning presentation, press a few extra white chocolate chips into the top of the batter right before putting it in the oven. This ensures that the star ingredient is visible and looks incredibly appetizing once sliced.
Variations to Try
- Salted Caramel Blondies: Swirl a few tablespoons of caramel sauce into the batter before baking for a salty sweet twist.
- Nutty White Chocolate: Add half a cup of chopped walnuts or macadamias for a satisfying crunch.
- Citrus Blondies: Stir in a teaspoon of orange zest to brighten up the heavy flavors with a bit of citrus aroma.
- Berry Blondies: Fold in some dried cranberries to provide a tart contrast to the creamy white chocolate.
FAQ’s
Q1. Can I use white chocolate bars instead of chips?
A1. Yes, chopping a high quality white chocolate bar into chunks often results in even better flavor and beautiful pools of melted chocolate.
Q2. Why are my blondies greasy?
A2. This usually happens if the butter and sugar were not fully emulsified or if the butter was too hot when mixed with the other ingredients.
Q3. How do I know when they are done?
A3. A toothpick inserted into the center should come out with a few moist crumbs attached, but it should not be wet with raw batter.
Q4. Can I double this recipe?
A4. Absolutely, you can double the ingredients and bake them in a 9×13 inch pan, just keep an eye on the bake time as it may increase slightly.
Q5. Why did my blondies sink in the middle?
A5. This can happen if the eggs were overbeaten or if the oven door was opened too early during the baking process.
Q6. Is light or dark brown sugar better?
A6. Light brown sugar is traditional for a classic flavor, but dark brown sugar works well if you want a more robust, toffee like taste.
Q7. Can I make these without eggs?
A7. You can try using a commercial egg replacer or applesauce, but the texture will be significantly different and less chewy.
Q8. Do I need to refrigerate these?
A8. No, they stay perfectly fresh at room temperature in an airtight container, which helps maintain their soft texture.
Q9. Why are my blondies dry?
A9. They were likely left in the oven too long. It is always better to slightly underbake blondies than to overbake them.
Q10. Can I add cocoa powder to make them chocolate?
A10. If you add cocoa powder, you are essentially making a brownie, which requires different ratios of flour and fat to turn out correctly.
Conclusion
These White Chocolate Blondies are a true celebration of simple ingredients coming together to create something spectacular. Whether you are baking for a special occasion or just want to treat yourself to a sweet afternoon snack, this recipe is sure to become a favorite in your household. The combination of chewy brown sugar and creamy white chocolate is a match made in heaven that will have everyone asking for seconds. Trust me, once you take that first bite, you will understand why these golden bars are such a classic.
PrintWhite Chocolate Blondies
A dense, buttery, and fudgy dessert bar packed with creamy white chocolate and rich brown sugar notes.
Ingredients
- 1 cup Unsalted Butter, melted
- 1 1/2 cups Light Brown Sugar, packed
- 2 Large Eggs, room temperature
- 1 tablespoon Vanilla Extract
- 2 cups All Purpose Flour
- 1/2 teaspoon Salt
- 1 1/2 cups White Chocolate Chips
Instructions
- Preheat oven to 350°F (175°C) and line an 8×8 inch baking pan with parchment paper.
- In a large bowl, whisk together the melted butter and brown sugar until smooth.
- Add the eggs and vanilla extract, beating until well combined.
- Gently stir in the flour and salt until just combined, being careful not to overmix.
- Fold in the white chocolate chips.
- Spread the batter evenly into the prepared pan.
- Bake for 25-30 minutes until the edges are golden and a toothpick comes out with moist crumbs.
- Allow to cool completely in the pan before slicing.
Notes
- Do not overbake to ensure a fudgy texture.
- Use room temperature eggs to prevent the melted butter from seizing.
- Chilling the blondies before slicing results in cleaner squares.