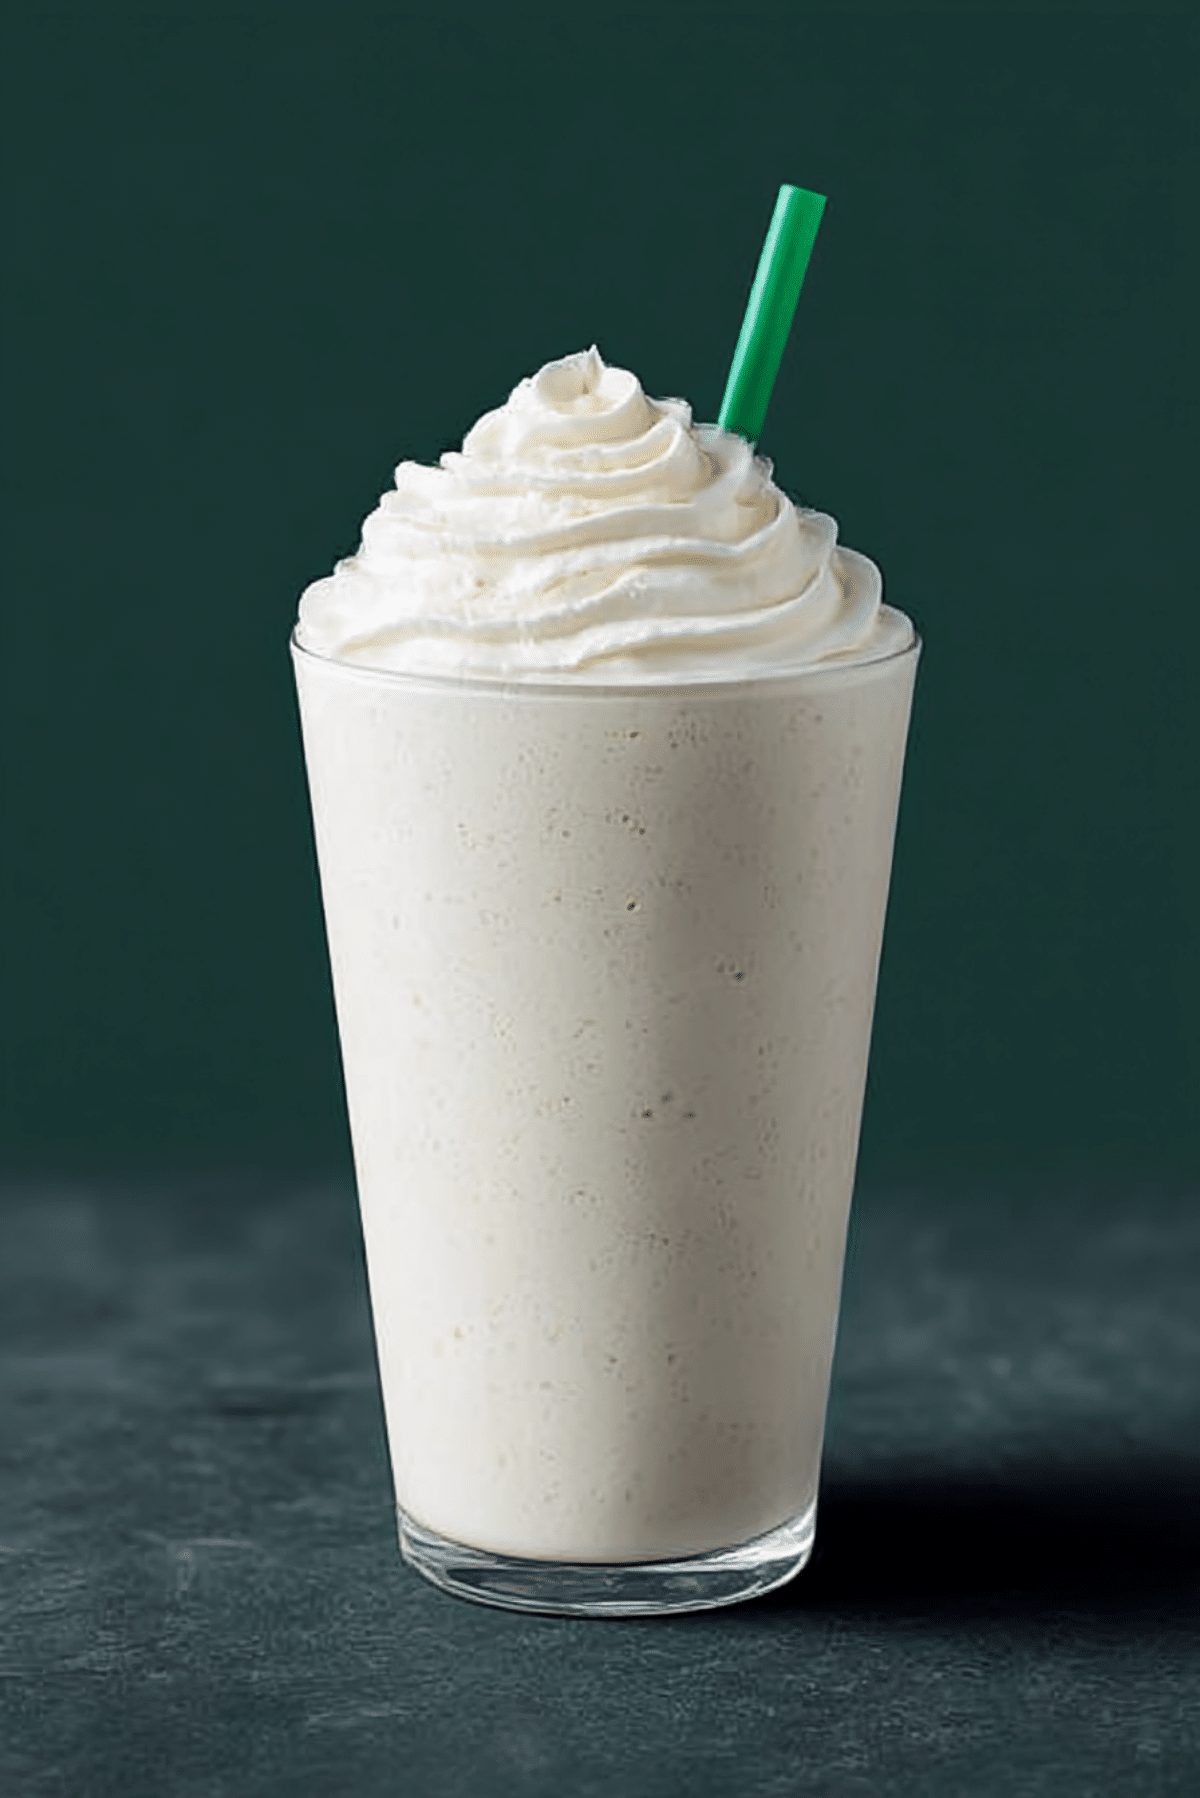
Vanilla Bean Creme Frappuccino
Close your eyes and imagine the most refreshing sip of smooth, velvety vanilla, chilled to perfection and crowned with a fluffy cloud of whipped cream. That, my friend, is exactly what you get with a Vanilla Bean Creme Frappuccino. It’s indulgent, it’s comforting, and it’s one of those drinks that makes any moment feel like a little celebration.
Behind the Recipe
I remember the first time I tried a Vanilla Bean Creme Frappuccino from a coffee shop. It wasn’t just the creamy texture or that sweet vanilla punch—it was the whole experience of holding that frosty cup on a warm day, sipping through the green straw like it was a treat meant just for me. This homemade version captures all of that, with ingredients you probably already have on hand.
Recipe Origin or Trivia
Vanilla Bean Creme Frappuccino is part of the blended creme drink family that skyrocketed in popularity through Starbucks. Unlike its coffee-based siblings, this one’s caffeine-free, making it a hit for kids and adults alike. It’s inspired by classic American milkshakes and frothed ice cream drinks but with that signature twist of vanilla bean magic.
Why You’ll Love Vanilla Bean Creme Frappuccino
This frosty treat isn’t just delicious—it’s super practical too:
Versatile: Perfect for breakfast, dessert, or a mid-day refresher.
Budget-Friendly: Cheaper than a trip to the café and just as indulgent.
Quick and Easy: Throw everything in a blender and boom—it’s done.
Customizable: Add chocolate chips, a drizzle of caramel, or swap the dairy.
Crowd-Pleasing: Kids and adults go crazy for it.
Make-Ahead Friendly: Blend and freeze in mason jars for ready-to-go treats.
Great for Leftovers: Leftover whipped cream or ice cream? Use it up deliciously.
Chef’s Pro Tips for Perfect Results
Before you hit that blend button, here are a few tricks to make this drink taste coffeehouse-level amazing:
- Use quality vanilla bean ice cream for that true vanilla bean flavor and visible flecks.
- Chill your glass ahead of time so the frappuccino stays colder longer.
- Blend in short bursts for a creamy, thick texture without melting too fast.
- Taste before you pour and adjust sweetness if needed.
- Top with freshly whipped cream for the fluffiest finishing touch.
Kitchen Tools You’ll Need
To bring this frosty dream to life, you don’t need much:
Blender: Essential for crushing ice and blending to a creamy consistency.
Tall glass: To showcase that gorgeous layered look and whipped topping.
Measuring spoons and cups: Accuracy matters, even with simple drinks.
Spoon or spatula: For smoothing the whipped cream topping just right.
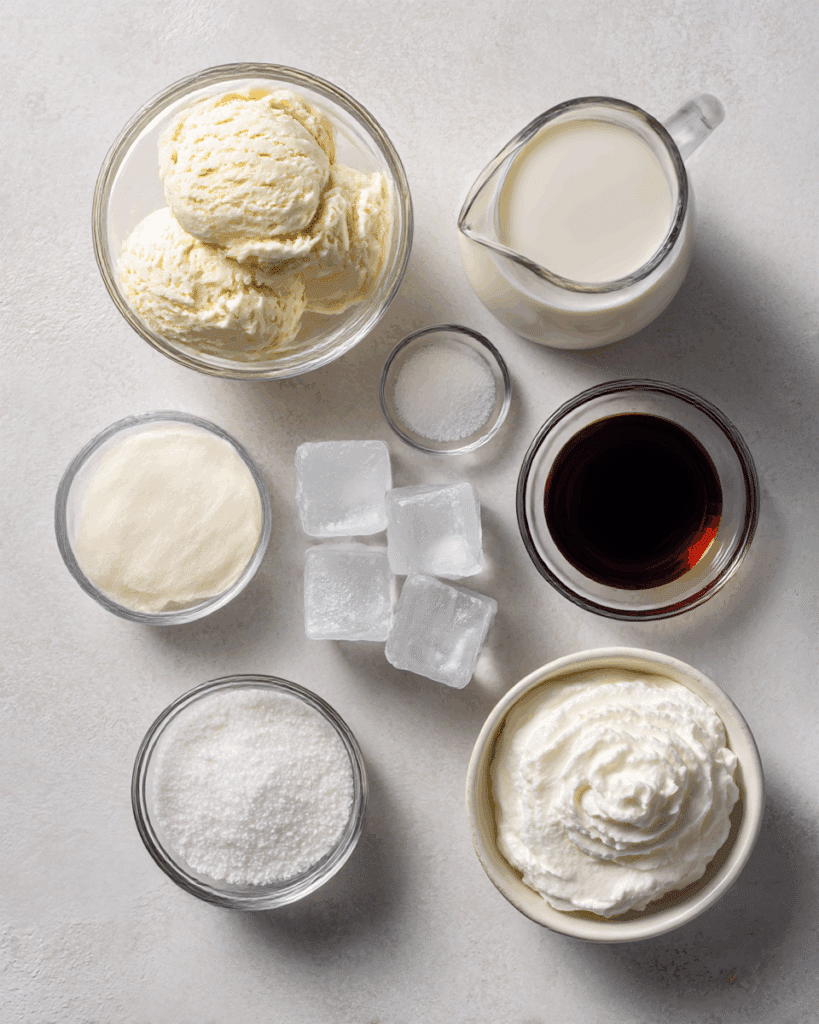
Ingredients in Vanilla Bean Creme Frappuccino
This drink is a symphony of just a few key ingredients, each playing its part to perfection.
- Vanilla Bean Ice Cream: 2 cups
The star of the show, giving creaminess and that iconic vanilla speckle. - Whole Milk: 1 cup
Helps thin the drink while keeping it rich and smooth. - Ice Cubes: 1 cup
Chills and thickens the frappuccino to that perfect café texture. - Vanilla Extract: 1 teaspoon
Adds depth and aroma to the vanilla profile. - Granulated Sugar: 2 tablespoons
Boosts sweetness and balances the creaminess. - Whipped Cream: For topping
Because every great frappuccino needs a cloud on top.
Ingredient Substitutions
Don’t have everything on hand? No problem. Try these easy swaps:
Vanilla Bean Ice Cream: Vanilla frozen yogurt or dairy-free vanilla ice cream.
Whole Milk: Use almond milk, oat milk, or coconut milk for dairy-free options.
Granulated Sugar: Honey, agave, or maple syrup can work too.
Whipped Cream: Coconut whipped cream for a vegan-friendly finish.
Ingredient Spotlight
Vanilla Bean Ice Cream: Not just any vanilla—this one brings the signature flavor, aroma, and those charming little specks that make the drink feel fancy.
Vanilla Extract: A small splash that goes a long way, adding floral and slightly woody notes to balance the sweetness.
Instructions for Making Vanilla Bean Creme Frappuccino
This part is where the magic happens, and trust me, it’s as fun as it is easy. Here are the steps you’re going to follow:
- Preheat Your Equipment:
Okay, you’re not really heating anything, but do rinse your blender with a bit of cold water to chill it slightly. - Combine Ingredients:
Add vanilla bean ice cream, whole milk, ice cubes, vanilla extract, and granulated sugar to your blender. - Prepare Your Cooking Vessel:
Get your tall glass ready—maybe even pop it in the freezer while you blend. - Assemble the Dish:
Blend everything until smooth and creamy, about 30 seconds to 1 minute depending on your blender. - Cook to Perfection:
This step is all about texture. If it’s too thick, splash in more milk. Too runny? Add a few more ice cubes. - Finishing Touches:
Pour into your chilled glass and top generously with whipped cream. - Serve and Enjoy:
Grab a straw, sit back, and enjoy the frosty magic.
Texture & Flavor Secrets
What makes this drink unforgettable? It’s the contrast. The icy thickness hits first, followed by a rich, creamy body that melts on your tongue. Vanilla takes the lead flavor-wise, with gentle sweetness and that little extra oomph from the extract.
Cooking Tips & Tricks
Here are a few things to keep in mind for that flawless frappuccino experience:
- Chill your glass to keep the drink cold longer.
- Use crushed ice if your blender struggles with full cubes.
- Add a drizzle of vanilla syrup on top for an extra flavor punch.
- Blend in chocolate chips or white chocolate bits for texture.
What to Avoid
This drink is easy to make, but here’s what could throw it off:
- Don’t over-blend or it will get watery fast.
- Avoid using low-fat milk unless you want a thinner drink.
- Don’t skip the vanilla extract—it boosts flavor depth.
- Don’t add too much ice or it’ll taste bland and lose creaminess.
Nutrition Facts
Servings: 1
Calories per serving: 390
Note: These are approximate values.
Preparation Time
Prep Time: 5 minutes
Cook Time: 0 minutes
Total Time: 5 minutes
Make-Ahead and Storage Tips
This frappuccino is best enjoyed fresh, but if you need to prep ahead, pour the blended mix into mason jars and freeze. When you’re ready to serve, thaw slightly and re-blend to revive that fluffy texture. Whipped cream should always be added fresh.
How to Serve Vanilla Bean Creme Frappuccino
Serve it in a tall glass with a generous swirl of whipped cream and a fun straw. Want to elevate it even more? Dust with crushed vanilla bean, white chocolate shavings, or a hint of cinnamon. It pairs beautifully with buttery cookies or a slice of pound cake.
Creative Leftover Transformations
Got some extra frappuccino?
- Pour into popsicle molds for vanilla bean pops.
- Freeze in an ice cube tray and blend later for a quick refresher.
- Add to iced coffee for a creamy vanilla twist.
Additional Tips
- Use a high-powered blender for the smoothest results.
- Add a scoop of protein powder to make it a post-workout treat.
- Want extra richness? Toss in a splash of heavy cream.
Make It a Showstopper
Presentation matters. Serve in a mason jar with a sprinkle of vanilla bean on top, or layer whipped cream in between two pours for a dramatic swirl. A drizzle of caramel or white chocolate syrup never hurts either.
Variations to Try
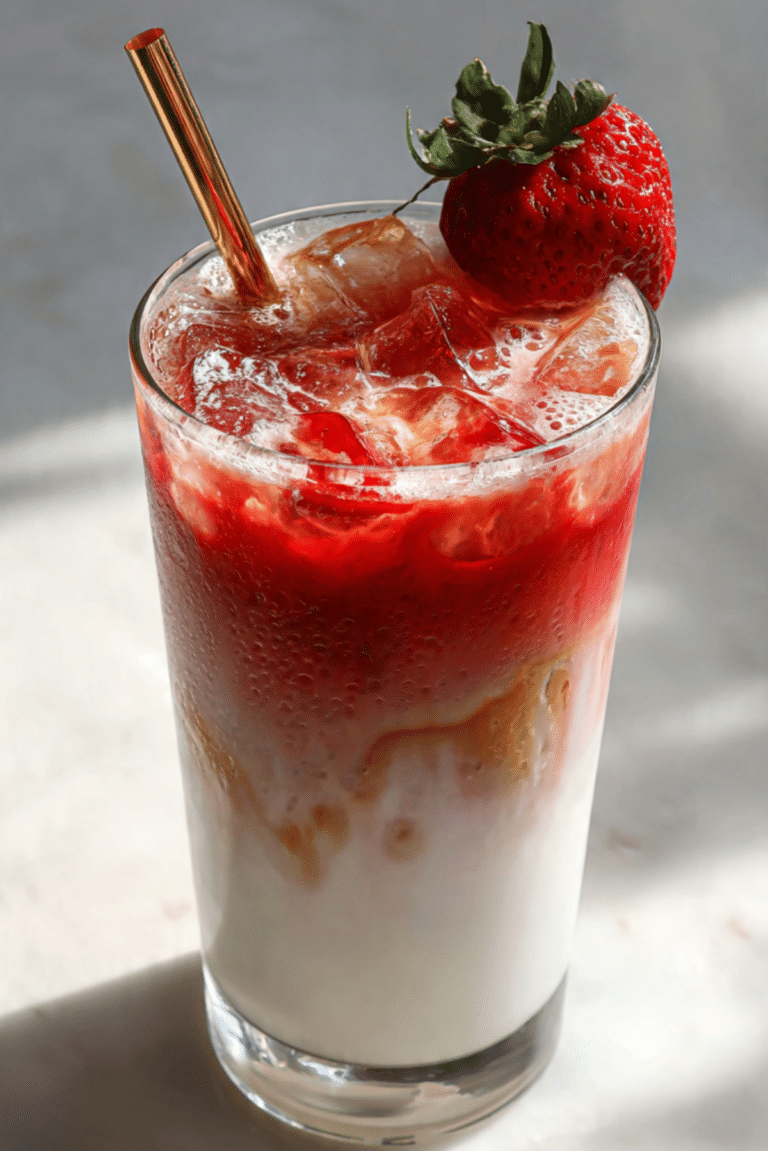
- Strawberry Vanilla Frappuccino: Add a handful of fresh strawberries to the blend.
- Chocolate Vanilla Bean: Mix in a teaspoon of cocoa powder.
- Coconut Cream Frappe: Use coconut milk and top with toasted coconut flakes.
- Caramel Swirl Version: Drizzle caramel sauce along the inside of the glass.
- Mint-Vanilla Twist: Add a drop of mint extract for a refreshing variation.
FAQ’s
Q1: Can I make this dairy-free?
Yes, use plant-based milk and a vegan vanilla ice cream.
Q2: Can I make this without sugar?
Yes, you can skip the sugar or use a sugar substitute like stevia.
Q3: How can I make it thicker?
Use more ice or less milk. Freezing your ingredients also helps.
Q4: Can I add coffee to it?
Absolutely, just add a shot of espresso or cold brew to the mix.
Q5: What’s the best blender for this recipe?
A high-speed blender like a Vitamix or Ninja works best.
Q6: Can I store leftovers?
Yes, freeze in jars and blend again before serving.
Q7: Is this recipe kid-friendly?
Totally! It has no caffeine and tastes like dessert.
Q8: Can I double the recipe?
Yes, just make sure your blender can handle the volume.
Q9: Can I use ice cream without vanilla bean?
Yes, just add a little more vanilla extract for flavor.
Q10: What’s a fun topping idea?
Try crushed cookies, sprinkles, or white chocolate curls.
Conclusion
If you’re craving something sweet, creamy, and totally satisfying, this Vanilla Bean Creme Frappuccino is your go-to. It’s one of those recipes that feels fancy but takes just minutes, and every sip delivers that smooth, vanilla-kissed magic. Give it a whirl—you’re going to love it.
PrintVanilla Bean Creme Frappuccino
A creamy, dreamy blend of vanilla bean ice cream, milk, and a touch of sweetness, topped with whipped cream. This homemade Vanilla Bean Creme Frappuccino tastes just like your favorite coffeehouse treat—only better.
Ingredients
- 2 cups vanilla bean ice cream
- 1 cup whole milk
- 1 cup ice cubes
- 1 teaspoon vanilla extract
- 2 tablespoons granulated sugar
- Whipped cream, for topping
Instructions
- Combine vanilla bean ice cream, whole milk, ice cubes, vanilla extract, and sugar in a blender.
- Blend until smooth and frothy, about 30 seconds.
- Pour into a tall glass.
- Top generously with whipped cream.
- Serve immediately with a straw and enjoy!
Notes
- You can adjust the sugar level to your taste preference.
- For a dairy-free version, use almond or oat milk and a plant-based ice cream.
- Add a splash of vanilla syrup for extra richness.