Swiss Meringue Buttercream
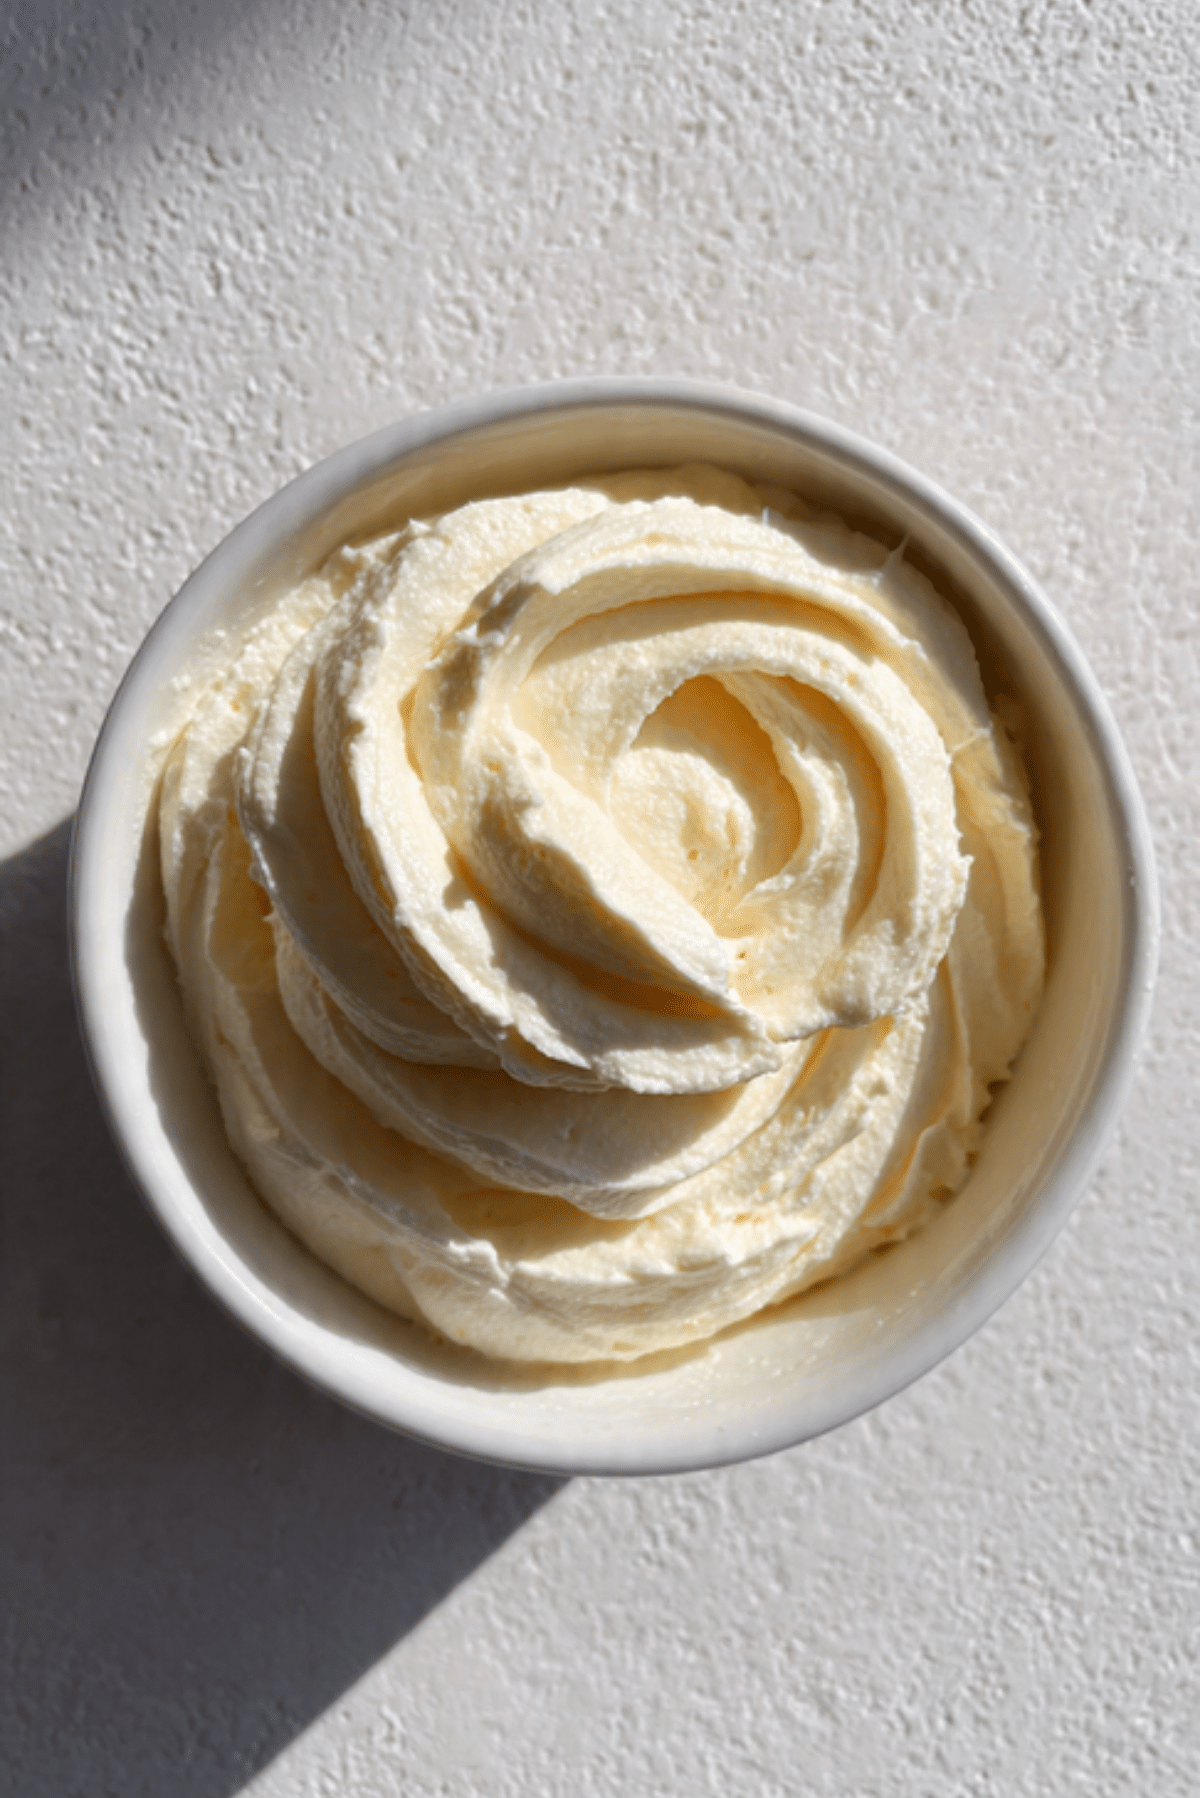
If you have ever wondered how professional bakers achieve those perfectly smooth, silky, and stable cake finishes, the secret lies in Swiss Meringue Buttercream. This recipe is a sophisticated upgrade from standard powdered sugar frostings, offering a buttery richness that is not overly sweet. It has a marshmallow-like fluffiness that holds its shape beautifully for piping intricate designs or creating a flawless base for decorations. Trust me, you’re going to love this because it transforms any simple sponge into a gourmet masterpiece. It is a total game-changer for your decorating skills, and let me tell you, it’s worth every bite of its cloud-like texture.
The Gold Standard of Professional Cake Frosting
There is something incredibly satisfying about working with a frosting that behaves exactly how you want it to. Unlike American buttercream which can be gritty, this version is perfectly smooth because the sugar is fully dissolved in the egg whites before the butter is added. The result is a glossy, ivory-toned cream that melts on the tongue without that heavy sugar hit. It is the kind of staple recipe that every baker should have in their back pocket, providing a reliable and delicious foundation for any flavor combination you can imagine.
A Tradition of European Pastry Excellence
The technique of heating egg whites and sugar over a bain-marie to create a stable meringue is a cornerstone of European confectionery. This method ensures that the eggs are safely cooked while creating a foam that is much more resilient than a simple French meringue. Traditionally used in high-end patisseries for its stability in warmer temperatures, it has become a favorite for wedding cakes and tiered desserts. Learning to master this “back to basics” technique connects you to a long history of culinary craftsmanship where temperature and timing are the keys to perfection.
Why This Silky Buttercream is a Baker’s Essential
Mastering a technical frosting might seem intimidating, but once you understand the simple chemistry involved, it becomes a predictable and rewarding process.
Versatile: This frosting can be flavored with anything from melted chocolate and fruit purees to nut butters and extracts, making it suitable for any cake.
Budget-Friendly: You only need four basic ingredients that are likely already in your kitchen, making it a cost-effective way to elevate your baking.
Quick and Easy: While it requires a bit of whisking, the actual hands-on time is minimal, and the result is far superior to store-bought alternatives.
Customizable: You can easily adjust the consistency for filling layers or for sharp-edged piping by slightly changing the temperature of your butter.
Crowd-Pleasing: Because it is less sweet than traditional frostings, it appeals to adults and those who prefer a more balanced dessert profile.
Make-Ahead Friendly: You can make a large batch and store it in the fridge or freezer, simply re-whipping it when you are ready to decorate.
Great for Leftovers: Any extra buttercream can be kept for days and used as a delicious dip for fruit or to sandwich cookies together.
Insider Secrets for a Stable and Glossy Finish
The key to a perfect meringue base is ensuring your equipment is completely grease-free. One of the best tips I can give you is to wipe your mixing bowl and whisk with a little lemon juice or white vinegar before starting to remove any trace of oil. Another secret is the temperature of the butter; it should be cool to the touch but soft enough that your finger leaves an indentation. if your mixture looks like it has curdled during the process, do not panic and keep whisking, as the emulsion will eventually come together into a silky smooth cream.
Essential Tools for Frosting Perfection
Having the right tools will make the temperature control and aeration process much easier to manage.
Heat-Proof Glass Bowl: This is necessary for the bain-marie step to ensure the egg whites heat up gently and evenly over the simmering water.
Electric Stand Mixer: A stand mixer is highly recommended because the meringue needs to be whisked for about ten to fifteen minutes to cool down completely.
Kitchen Thermometer: This helps you ensure the egg white and sugar mixture reaches 70°C, which is the safety point for pasteurization and sugar dissolution.
Silicone Spatula: Essential for scraping down the sides of the bowl to make sure every bit of butter is perfectly incorporated.
Small Saucepan: You will need this to create the water bath that provides the gentle steam for heating the meringue base.
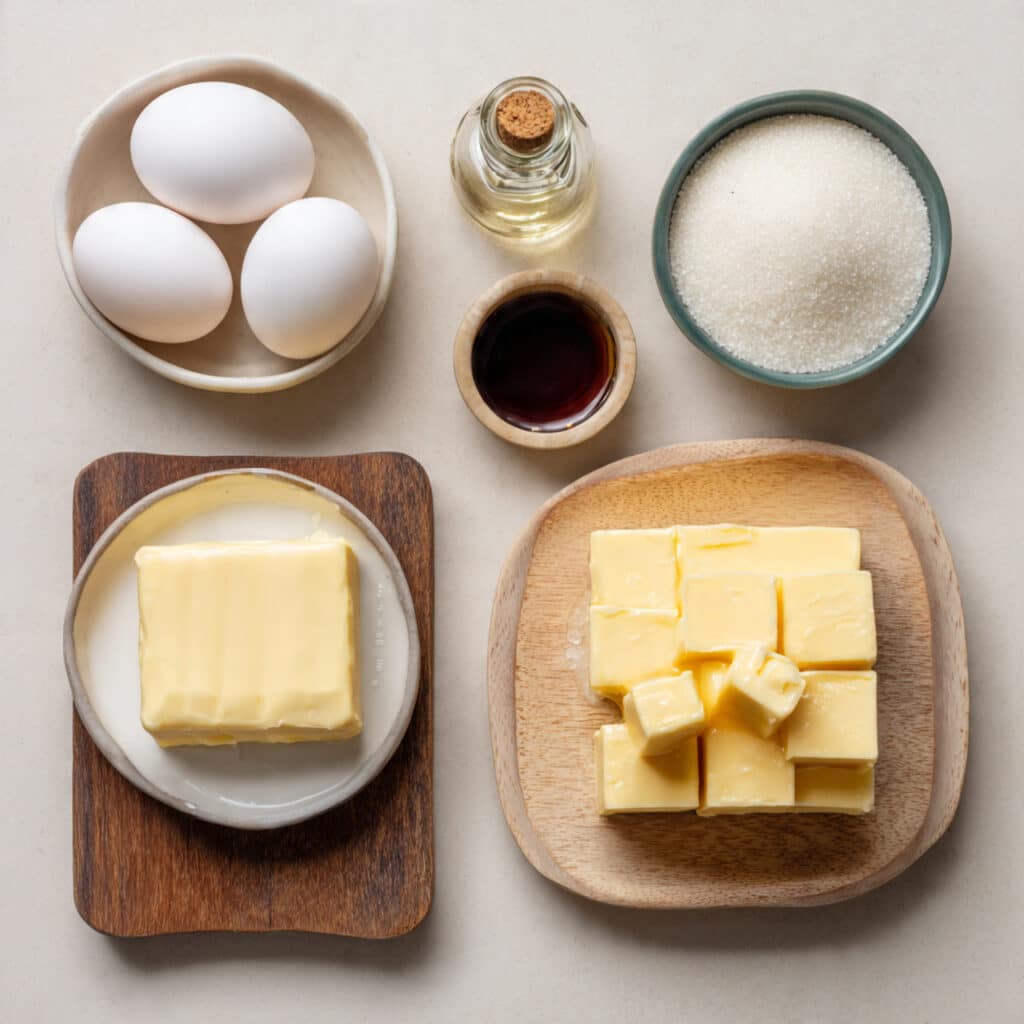
Ingredients for a Silky Swiss Meringue Buttercream
The balance of egg whites to butter is what creates that signature stability and lightness that professional chefs crave.
- Large Egg Whites: 5 egg whites provide the structural protein base for the light and airy meringue.
- Granulated Sugar: 300 grams sweetens the frosting and helps to stabilize the egg foam during the heating process.
- Unsalted Butter: 450 grams of high-quality butter added in small cubes creates the rich, creamy emulsion.
- Vanilla Extract: 2 teaspoons add a classic floral aroma that enhances the buttery notes of the frosting.
- Fine Sea Salt: A small pinch helps to balance the sweetness and brings out the complexity of the vanilla.
Flexible Ingredient Substitutions
While the classic recipe is hard to beat, there are ways to adapt it to your specific needs or pantry.
Granulated Sugar: Caster sugar can be used as it dissolves even faster, though regular granulated sugar works perfectly with the heat method.
Vanilla Extract: You can use vanilla bean paste for beautiful black speckles or any other clear extract like almond or coconut.
Unsalted Butter: You can use salted butter if you prefer, just make sure to omit the extra pinch of salt from the recipe.
Egg Whites: Cartoned pasteurized egg whites can be used, though they may take a little longer to reach a stiff peak than fresh ones.
Key Ingredients to Spotlight
Unsalted Butter: Since butter is the primary flavor and structural component, using a high-fat European-style butter will yield the best results.
Egg Whites: These are the magic behind the volume of the frosting, acting as the scaffolding that holds all that delicious butter in place.
A Shared Journey Through the Frosting Process
Following these steps will guide you through the transition from liquid eggs to a fluffy, cloud-like buttercream.
- Preheat Your Equipment: Place a small amount of water in a saucepan and bring it to a gentle simmer, ensuring the water does not touch the bottom of your bowl.
- Combine Ingredients: Whisk the egg whites and sugar together in your heat-proof bowl and place it over the simmering water.
- Prepare Your Cooking Vessel: Whisk the mixture constantly until the sugar has completely dissolved and it feels smooth when rubbed between your fingers.
- Assemble the Dish: Transfer the warm mixture to your stand mixer and whisk on high speed until it forms stiff, glossy peaks and the bowl feels cool to the touch.
- Cook to Perfection: Switch to the paddle attachment and add the butter one small cube at a time, mixing thoroughly between each addition.
- Finishing Touches: Once all the butter is in and the mixture is smooth, add the vanilla and salt and mix on low speed to remove any air bubbles.
- Serve and Enjoy: Use immediately to frost your favorite cakes or store it for later use in an airtight container.
Mastering Smooth Texture and Rich Flavor
The transformation of the buttercream is a fascinating process to watch. Initially, as you add the butter, the meringue may deflate and look like a soupy mess or a curdled curd, but this is a normal part of the emulsion. As you continue to beat the mixture, the fats and proteins align, resulting in a sudden change to a thick, creamy, and incredibly glossy consistency. The flavor is clean and sophisticated, providing a perfect canvas for any cake flavor.
Helpful Cooking Tips and Tricks
- If your buttercream is too runny, place the bowl in the fridge for fifteen minutes and then re-whip it.
- If the mixture looks curdled, use a hairdryer on the outside of the bowl for a few seconds to gently warm the butter while whisking.
- Always use a low speed at the very end to get rid of large air pockets for that perfectly smooth “pro” look on your cakes.
Mistakes to Avoid for the Best Result
- Fat in the Meringue: Even a tiny drop of egg yolk or a dirty bowl will prevent the egg whites from whipping into peaks.
- Adding Butter Too Warm: If the meringue is still hot, the butter will melt instantly and you will end up with a sweet soup.
- Cold Butter Cubes: If the butter is too cold, it will not incorporate smoothly and you will have small lumps throughout the frosting.
Nutritional Facts
Servings: 12
Calories per serving: 340
Note: These are approximate values.
Preparation Time
Prep Time: 30 minutes
Cook Time: 10 minutes
Total Time: 40 minutes
Make-Ahead and Storage Tips
This buttercream is incredibly durable. You can keep it in the fridge for up to a week or in the freezer for up to three months. When you are ready to use it, let it come to room temperature completely. This is crucial because if you try to whip it while it is still cold, it will break. Once at room temp, use the paddle attachment on your mixer to beat it back to its original silky glory.
How to Serve and Pair
This buttercream is the perfect partner for a rich chocolate cake or a delicate vanilla sponge. Because it is so stable, it is excellent for piping tall swirls on cupcakes or for creating a dam for fruit fillings. For a beautiful finish, use an offset spatula to create a smooth ombre effect or a rustic textured look that highlights the glossy nature of the cream.
Creative Leftover Transformations
If you have a small amount of buttercream left, use it to make “frosting sandwiches” between two graham crackers or cookies. You can also melt it down slightly and use it as a rich glaze for Bundt cakes or drizzle it over warm waffles for an over-the-top breakfast treat.
Additional Pro Advice
To achieve a pure white buttercream, add the tiniest drop of violet food coloring to the finished batch. The purple offsets the natural yellow tint of the butter, resulting in a bright, clean white that looks stunning on wedding cakes.
Make It a Showstopper
To make your frosted cake truly stand out, use a gold leaf accent or a sprinkle of dried edible flower petals. The smooth surface of the Swiss Meringue Buttercream provides a luxurious backdrop that makes even the simplest decorations look expensive and professionally done.
Variations to Try
- Chocolate Swiss Meringue: Fold in 100 grams of cooled, melted dark chocolate at the very end for a rich, mousse-like frosting.
- Strawberry Dream: Mix in two tablespoons of freeze-dried strawberry powder for an intense fruit flavor and a natural pink hue.
- Salted Caramel: Swirl in three tablespoons of thick salted caramel sauce for a decadent and salty-sweet experience.
FAQ’s
- Why won’t my egg whites whip up?
There might have been a trace of grease on your bowl or a tiny bit of yolk in the whites, which prevents the proteins from foaming. - Can I use a hand mixer?
Yes, but be prepared for a workout as the cooling process and whipping take a significant amount of time. - My buttercream is yellow, how do I make it white?
Keep whipping it for a few more minutes to incorporate more air, or use the violet food coloring trick mentioned above. - Is it safe to eat the egg whites?
Yes, because the egg whites are heated to 70°C, they are pasteurized and perfectly safe to consume. - How much cake does one batch cover?
This recipe typically yields enough to generously frost and fill an 8-inch two-layer cake or about 24 cupcakes. - Can I use brown sugar instead?
Yes, but you must ensure it is fully dissolved. It will give the buttercream a lovely toasted caramel flavor. - What if my butter is too soft?
Put the whole bowl in the fridge for ten minutes to firm up the fats before you continue whisking. - Can I add fruit juice?
It is better to use fruit purees or powders, as too much liquid can cause the emulsion to break and become runny. - Does it need to be refrigerated?
Once on a cake, it is stable at room temperature for a day, but for longer storage, the cake should be kept in the fridge. - Can I use margarine?
It is not recommended, as the water content in margarine is too high and it won’t provide the same structural stability as real butter.
Conclusion
Mastering Swiss Meringue Buttercream is a rite of passage for any serious baker, opening the door to a world of professional-level decorating. Its silky texture and balanced sweetness make it a favorite for a reason, and once you see the results, you will never want to go back to basic frostings. Take your time with the process, enjoy the transformation, and get ready to impress everyone with your stunning, silky creations. Happy baking!
PrintSwiss Meringue Buttercream
A professional-grade, silky-smooth Swiss Meringue Buttercream that is stable, glossy, and perfectly balanced in sweetness.
Ingredients
- 5 Large Egg Whites
- 300g Granulated Sugar
- 450g Unsalted Butter (cubed and slightly softened)
- 2 tsp Vanilla Extract
- 1 pinch Fine Sea Salt
Instructions
- Set up a bain-marie by bringing an inch of water to a simmer in a saucepan.
- In a heat-proof glass bowl, whisk together the egg whites and granulated sugar.
- Place the bowl over the simmering water, ensuring the bottom does not touch the water. Whisk constantly until the sugar is dissolved and the mixture reaches 70°C.
- Transfer the mixture to a stand mixer fitted with a whisk attachment. Whip on high speed for 10 to 15 minutes until stiff, glossy peaks form and the bowl feels cool to the touch.
- Switch to a paddle attachment. With the mixer on medium-low, add the butter one cube at a time, allowing each to incorporate fully.
- Once all the butter is added and the frosting is smooth, add the vanilla and salt.
- Mix on low speed for 2 minutes to remove any large air bubbles.
Notes
- Ensure all equipment is grease-free by wiping with lemon juice or vinegar.
- If the mixture curdles when adding butter, just keep mixing; it will come together.
- Butter should be cool-room temperature, not melted or too cold.