Sugar-Coated Cookies
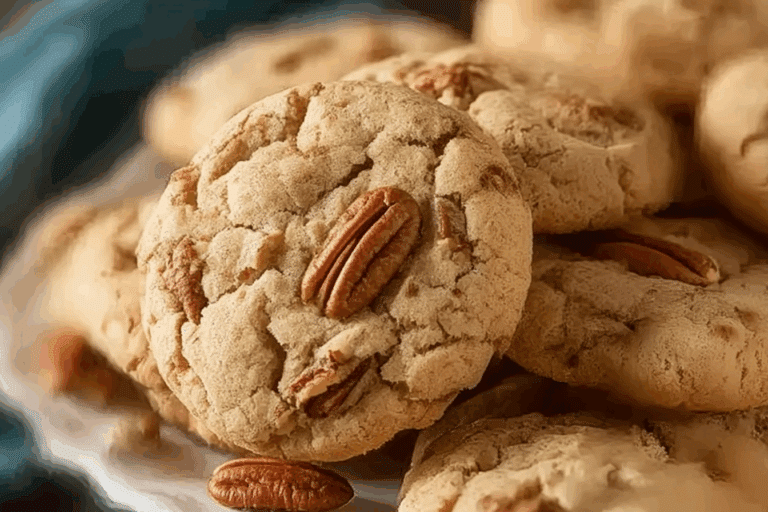
There’s something timeless about the crinkle and crunch of a sugar-coated cookie. These sparkly little treats are simple yet magical, like something pulled from a grandmother’s tin on a cozy Sunday afternoon. With golden edges, soft centers, and a glittering coat of sugar, these cookies strike the perfect balance between classic comfort and sweet indulgence. Trust me, one bite in and you’ll be hooked.
Behind the Recipe
This recipe takes me right back to childhood — standing on a stool, rolling dough balls in sugar with sticky fingers and a big grin. My mom would always keep a batch ready during the holidays, but they’re so easy and crave-worthy, I make them all year long now. They require no fancy ingredients, just basic pantry staples and a sprinkle of love.
Recipe Origin or Trivia
Sugar cookies have a long and delicious history, with roots in the 1700s, often associated with Pennsylvania Dutch and colonial American baking traditions. Originally created as plain butter cookies, they evolved into softer, chewier versions with a signature sugar crust that makes them sparkle. Over the years, they’ve become a universal favorite — no matter the culture or season.
Why You’ll Love Sugar-Coated Cookies
There’s a reason these cookies never go out of style. Here’s why they’ll become a staple in your baking rotation:
Versatile: Dress them up with spices or keep them pure and sweet.
Budget-Friendly: Made with ingredients you likely already have.
Quick and Easy: Simple to mix, roll, and bake.
Customizable: Add citrus zest, cinnamon, or even a chocolate drizzle.
Crowd-Pleasing: Always the first to disappear from the cookie tray.
Make-Ahead Friendly: Dough can be made and frozen for later.
Great for Leftovers: Store beautifully and stay soft for days.
Chef’s Pro Tips for Perfect Results
Want perfect texture and sparkle every time? Here’s what to keep in mind:
- Chill the dough before rolling — it makes handling easier and prevents spreading.
- Use a small cookie scoop to get uniform size and bake evenly.
- Roll generously in sugar for maximum sparkle and that classic crackled top.
- Don’t overbake — they should look slightly underdone when you pull them out.
- Cool on the tray for a few minutes before transferring to avoid breaking.
Kitchen Tools You’ll Need
You won’t need anything fancy to bring these cookies to life:
Mixing Bowl: For creaming butter and sugar.
Hand or Stand Mixer: Makes mixing faster and smoother.
Cookie Scoop: Helps portion uniform dough balls.
Baking Sheet: Use light-colored trays for even baking.
Parchment Paper: Prevents sticking and helps with cleanup.
Cooling Rack: To finish setting the cookies after baking.
Ingredients in Sugar-Coated Cookies
Simple, everyday ingredients come together to create pure magic. Here’s what you’ll need:
- All-Purpose Flour: 2 1/4 cups. Gives structure and body to the cookies.
- Baking Soda: 1 teaspoon. Helps the cookies rise and spread just right.
- Salt: 1/2 teaspoon. Balances sweetness and enhances flavor.
- Unsalted Butter: 1 cup (softened). Adds richness and a tender crumb.
- Granulated Sugar: 1 cup (plus more for rolling). Sweetens and provides that crackly sugar shell.
- Egg: 1 large. Binds everything together and adds richness.
- Vanilla Extract: 2 teaspoons. Adds warmth and depth.
Ingredient Substitutions
Out of something? Here’s how to make it work:
Butter: Use margarine or a plant-based butter for dairy-free cookies.
Sugar: Try organic cane sugar or superfine sugar for a slightly different texture.
Egg: Use a flax egg (1 tbsp ground flax + 3 tbsp water) for a vegan option.
Vanilla: Almond or lemon extract can give a fun flavor twist.
Ingredient Spotlight
Granulated Sugar: It’s not just for sweetness — it gives the cookies their iconic sparkly crust and helps with those beautiful cracks on top.
Unsalted Butter: Key to the soft, buttery texture. Using unsalted allows you to control the saltiness more precisely.

Instructions for Making Sugar-Coated Cookies
Let’s roll up our sleeves and bring this sweet tradition to life. Here’s how:
- Preheat Your Equipment: Preheat oven to 350°F and line baking sheets with parchment paper.
- Combine Ingredients: In a bowl, whisk together flour, baking soda, and salt. In another bowl, cream the butter and sugar until light and fluffy. Beat in egg and vanilla.
- Prepare Your Cooking Vessel: Slowly add the dry ingredients into the wet and mix until just combined.
- Assemble the Dish: Scoop tablespoon-sized portions of dough, roll into balls, then roll in granulated sugar.
- Cook to Perfection: Place cookies 2 inches apart on the baking sheet and bake for 9–11 minutes, until edges are set but centers are still soft.
- Finishing Touches: Let cool on the tray for 5 minutes before transferring to a rack.
- Serve and Enjoy: Enjoy warm with a glass of milk or store once fully cooled.
Texture & Flavor Secrets
These cookies walk the line between crisp and soft. The edges get that golden crunch while the centers stay pillowy. And that sugar coating? It crackles just slightly as you bite in, giving way to buttery vanilla heaven.
Cooking Tips & Tricks
Little details make these cookies shine. Keep these in mind:
- For extra sparkle, roll in coarse or sanding sugar.
- Add a pinch of cinnamon or nutmeg for warm spice.
- Chill dough 30 minutes for rounder, puffier cookies.
What to Avoid
A few easy missteps can flatten your cookie dreams:
- Overmixing the dough can lead to tough cookies.
- Using warm butter causes spreading — make sure it’s softened, not melted.
- Skipping parchment paper can lead to overbrowning.
Nutrition Facts
Servings: 24
Calories per serving: 160
Note: These are approximate values.
Preparation Time
Prep Time: 15 minutes
Cook Time: 10 minutes
Total Time: 25 minutes
Make-Ahead and Storage Tips
You can easily make the dough ahead and keep it refrigerated for up to 3 days. Or freeze dough balls for up to 2 months — roll in sugar before baking straight from frozen (just add 1–2 minutes to bake time). Once baked, store cookies in an airtight container at room temp for up to 5 days.
How to Serve Sugar-Coated Cookies
They’re perfect with coffee or tea, stacked high on a holiday platter, or wrapped in cellophane for a sweet homemade gift. You can even sandwich them with buttercream or ice cream for a playful twist.
Creative Leftover Transformations
Don’t toss those extras — turn them into something fun:
- Crumble over ice cream for a crunchy topping.
- Use in cookie trifle layers with whipped cream and fruit.
- Dip half in melted chocolate and top with sprinkles.
Additional Tips
To give them a festive touch, mix colored sugar into your rolling sugar. If you love a chewy center, underbake slightly. And always let them rest before storing to avoid moisture buildup.
Make It a Showstopper
Stack them on a vintage cake stand or fill a jar tied with ribbon. A dusting of powdered sugar or drizzle of icing adds a bakery-style finish. Serve them next to coffee or cocoa for a cozy dessert station.
Variations to Try
- Lemon Sugar Cookies: Add 1 tablespoon lemon zest and 1/2 teaspoon lemon extract.
- Spiced Sugar Cookies: Mix 1/2 teaspoon cinnamon and 1/4 teaspoon nutmeg into the dough.
- Chocolate-Dipped: Dip cooled cookies halfway in dark chocolate.
- Vanilla Bean: Use vanilla bean paste instead of extract for a richer flavor.
- Coconut Sugar Crust: Roll in coconut sugar for a caramel-like finish.
FAQ’s
Q1: Can I freeze these cookies?
A1: Yes! Freeze baked cookies or dough balls for up to 2 months.
Q2: Can I use salted butter?
A2: You can, just reduce added salt by half.
Q3: Why didn’t my cookies crack?
A3: The dough may have been too warm or not rolled in enough sugar.
Q4: Can I add mix-ins?
A4: Sure! Try mini chocolate chips or chopped nuts — just don’t overdo it.
Q5: How do I make them crispier?
A5: Bake a minute longer and skip chilling the dough.
Q6: Can I make them vegan?
A6: Yes, use plant-based butter and a flax egg.
Q7: Can I use whole wheat flour?
A7: You can sub half the flour with whole wheat, but texture will be denser.
Q8: How long do they stay fresh?
A8: Up to 5 days at room temp in an airtight container.
Q9: Do I need a mixer?
A9: A stand or hand mixer makes it easier, but you can mix by hand.
Q10: Can I use flavored extracts?
A10: Absolutely! Almond, lemon, or orange extract adds fun twists.
Conclusion
Sugar-Coated Cookies are the kind of treat that never go out of style — simple, sweet, and endlessly satisfying. With their soft centers, sparkling crusts, and buttery goodness, they’re the perfect comfort cookie for any occasion. Make them once, and you’ll keep coming back to their sweet, classic charm.
PrintSugar-Coated Cookies
These classic sugar-coated cookies are soft, buttery, and rolled in a sparkling layer of sugar that gives each bite a delightful crunch. Simple, nostalgic, and perfect for any occasion.
Ingredients
- 2 1/4 cups all-purpose flour
- 1 teaspoon baking soda
- 1/2 teaspoon salt
- 1 cup unsalted butter, softened
- 1 cup granulated sugar (plus extra for rolling)
- 1 large egg
- 2 teaspoons vanilla extract
Instructions
- Preheat oven to 350°F and line baking sheets with parchment paper.
- In a medium bowl, whisk together flour, baking soda, and salt.
- In a large bowl, cream butter and sugar until light and fluffy. Beat in egg and vanilla.
- Gradually mix in the dry ingredients until just combined.
- Roll dough into tablespoon-sized balls, then roll in granulated sugar to coat.
- Place balls on baking sheets about 2 inches apart and bake for 9–11 minutes, until edges are set.
- Cool on baking sheet for 5 minutes before transferring to wire rack to cool completely.
Notes
- Chilling the dough for 30 minutes helps the cookies hold their shape.
- Roll generously in sugar for that signature sparkle and crunch.
- Store in an airtight container at room temperature for up to 5 days.