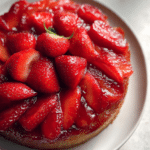
Strawberry Upside Down Cake
There is a rustic, undeniable charm to a cake that reveals its vibrant, jammy heart the moment you flip it onto a serving plate. This dessert is a beautiful marriage of a tender, buttery crumb and a crown of caramelized fruit that glistens under the light. Trust me, you’re going to love this because it turns a few simple garden ingredients into a striking centerpiece without the need for fancy frosting. Let me tell you, it’s worth every bite.
The Traditional Roots of the Upside Down Technique
Long before modern ovens were a household staple, cooks often prepared cakes in heavy cast iron skillets over open fires. Placing the fruit and sugar at the bottom of the pan served a dual purpose, as it protected the delicate batter from the direct heat and created a built-in sauce as the sugar melted. This strawberry version is a bright, summery evolution of that technique, swapping out the classic pineapple for the seasonal sweetness of berries.
Why This Dessert Is a Total Game-Changer
When you want a cake that looks professional but requires zero decorating skills, the upside down method is your best friend.
Versatile: While strawberries are the star here, you can mix in a few blueberries or rhubarb stalks for a different flavor profile.
Budget-Friendly: You only need a handful of baking basics like flour, eggs, and sugar, plus a carton of fresh berries.
Quick and Easy: The batter comes together in one bowl, and there is no need to wait for layers to cool before frosting.
Customizable: You can add a hint of lemon zest to the batter or a splash of balsamic to the berries for a gourmet touch.
Crowd-Pleasing: I have never seen anyone resist the sight of those glossy, ruby-red strawberries cascading over a golden sponge.
Make-Ahead Friendly: This cake actually holds its moisture very well, making it a great option to bake a few hours before your guests arrive.
Great for Leftovers: A slice of this cake slightly warmed up the next morning makes for an incredible breakfast treat.
Expert Secrets for the Perfect Fruit Topping
The secret to a successful flip lies in how you prepare the bottom of your pan. You want to melt your butter and sugar together until they form a thick, pale paste before neatly arranging your strawberry halves. Place them cut-side down in a tight, concentric pattern. As the cake bakes, the berries release their juices which mix with the sugar to create a natural syrup that soaks into the top of the cake, ensuring every bite is infused with fruit flavor.
Essential Tools for Your Pastry Station
Having the right equipment ensures a clean release and a perfectly baked crumb.
9 Inch Round Cake Pan: A high-sided pan is best to contain all those bubbling fruit juices without a mess.
Parchment Paper: Even with a buttery base, a circle of parchment at the bottom is a lifesaver for ensuring every berry stays attached to the cake.
Wire Cooling Rack: Essential for letting the cake rest just long enough for the juices to settle before the big reveal.
Offset Spatula: Great for smoothing the batter over the fruit without disturbing your careful berry arrangement.
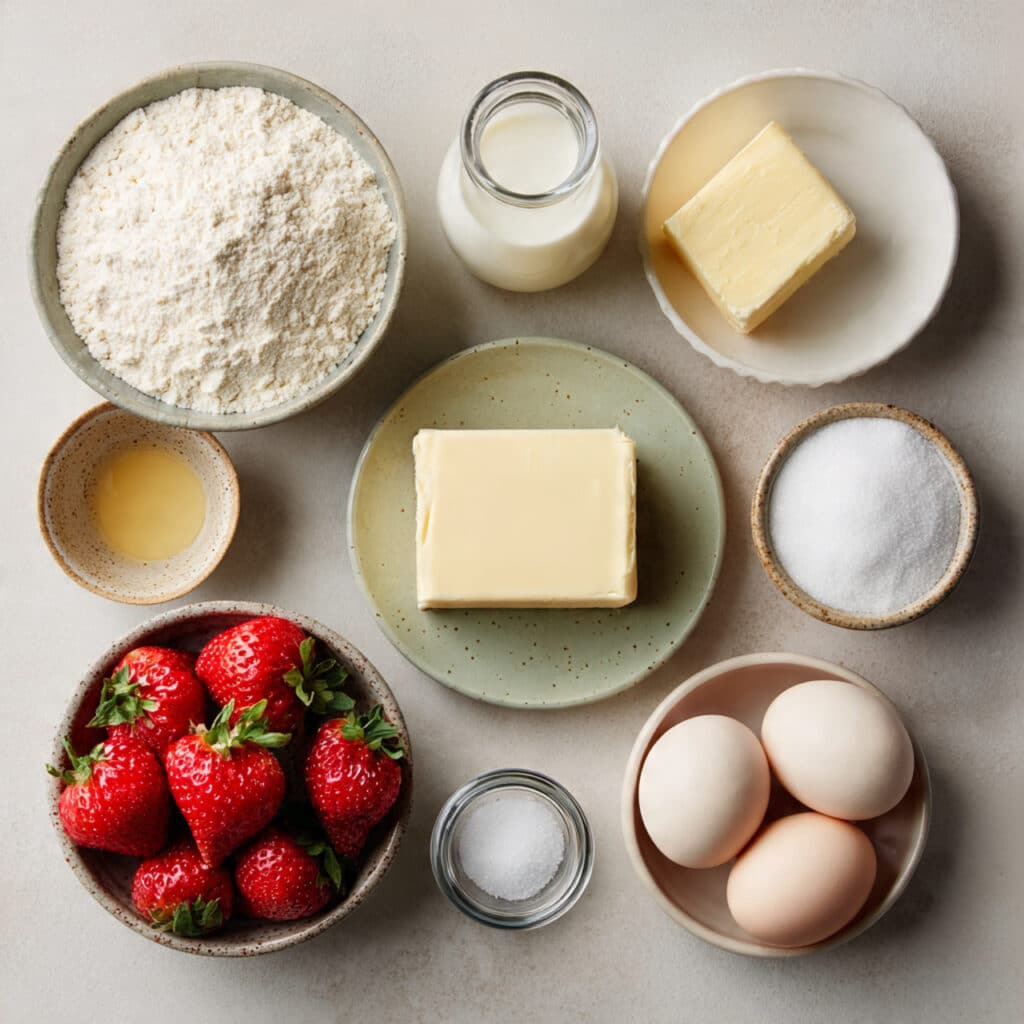
Ingredients for Your Decadent Creation
The balance of the light sponge against the dense, jammy fruit is what makes this cake so memorable.
- All Purpose Flour: 1.5 cups creates the structure for our soft and airy vanilla sponge.
- Granulated Sugar: 1 cup provides the sweetness for both the batter and the caramel base.
- Unsalted Butter: 0.75 cups is used for the rich batter and for greasing the berry layer.
- Large Eggs: 2 eggs give the cake its lift and a beautiful golden color.
- Fresh Strawberries: 1 pound of berries, hulled and halved, for that signature ruby crown.
- Baking Powder: 1.5 teaspoons to ensure the cake rises perfectly around the fruit.
- Milk: 0.5 cups keeps the crumb moist and tender.
- Vanilla Extract: 1 teaspoon to add a classic, aromatic sweetness to the sponge.
- Salt: 0.25 teaspoons to enhance the flavors of the butter and berries.
Flexible Ingredient Substitutions
If you find your pantry is missing an item, these swaps will keep your bake on track.
All Purpose Flour: A gluten-free 1-to-1 blend works remarkably well in this dense, moist cake.
Milk: Any plant-based milk like almond or oat milk can be substituted with great results.
Granulated Sugar: Brown sugar can be used for the fruit base if you prefer a deeper, molasses-like caramel.
The Star Players of the Recipe
Fresh Strawberries: These act as both the decoration and the sauce, providing the essential acidity and moisture for the dish.
Unsalted Butter: The high butter content in the batter ensures the cake remains soft and flavorful even after it has cooled.
Step By Step Journey to Tart Perfection
Follow these steps for a cake that is as fun to make as it is to flip.
- Preheat Your Equipment: Set your oven to 350 degrees Fahrenheit and line your cake pan with parchment paper.
- Combine Ingredients: Cream the butter and sugar together before adding the eggs, vanilla, and the sifted dry ingredients.
- Prepare Your Cooking Vessel: Melt a little butter and sugar in the bottom of the pan and arrange your strawberry halves cut-side down.
- Assemble the Dish: Gently pour the batter over the strawberries, taking care not to move the fruit.
- Cook to Perfection: Bake for 35 to 40 minutes or until a toothpick inserted in the center comes out clean.
- Finishing Touches: Let the cake cool in the pan for exactly 10 minutes to allow the syrup to thicken slightly.
- Serve and Enjoy: Place a plate over the pan and flip it quickly in one confident motion, then peel away the parchment.
Exploring Texture and Flavor
When you take your first forkful, you will experience the soft, pillowy texture of the vanilla sponge followed by the concentrated, almost candy-like sweetness of the baked strawberries. The edges of the cake where the sugar has caramelized offer a slight chewiness that contrasts beautifully with the juicy fruit.
Helpful Cooking Tips and Tricks
- Pat your strawberries dry after washing them to prevent excess water from making the cake soggy.
- Use a confident, quick motion when flipping the cake to ensure the fruit stays in place.
- Serve the cake slightly warm for the best flavor and texture.
Common Mistakes to Avoid
- Don’t Flip Too Early: If the cake is too hot, the fruit layer might slide off.
- Avoid Over-Mixing: Stirring the batter too much after adding the flour will result in a tough, rubbery cake.
- Don’t Use Frozen Berries: They hold too much water and will likely turn your cake into a purple, soggy mess.
Nutritional Information
Servings: 8 portions
Calories per serving: 310 calories
Note: These are approximate values.
Timing Your Masterpiece
Prep Time: 20 minutes
Cook Time: 40 minutes
Total Time: 60 minutes
Make-Ahead and Storage Tips
This cake is best served on the day it is made while the fruit is at its glossiest. If you have leftovers, store them in an airtight container in the refrigerator for up to 3 days. You can gently reheat a slice in the microwave for 15 seconds to restore that fresh-baked feel.
How to Serve
A dollop of unsweetened whipped cream or a scoop of vanilla bean ice cream is the perfect companion to this cake. The cold cream balances the warm, sweet strawberries beautifully.
Creative Leftover Transformations
Crumble any leftover cake into a glass and layer it with yogurt and extra fresh berries for a quick and decadent breakfast parfait.
Additional Tips
If your strawberries are not very red, you can add a tiny drop of natural red food coloring to the sugar and butter mixture at the bottom of the pan for a more dramatic look.
Make It a Showstopper
Garnish the top with a few sprigs of fresh mint or some tiny edible flowers to contrast against the deep red of the strawberries.
Variations to Try
- Strawberry Rhubarb: Mix in thin slices of rhubarb with the strawberries for a tart and classic pairing.
- Almond Sponge: Replace 0.25 cups of flour with almond flour for a nuttier, more delicate crumb.
- Lemon Strawberry: Add the zest of a full lemon to the batter for a bright, citrusy lift.
FAQ’s
- Why did my cake stick to the pan?
You may have forgotten the parchment paper or didn’t grease the sides well enough. - Can I use a different fruit?
Absolutely, peaches and plums work beautifully with this exact same batter. - What if the center of my cake is still wet?
Cover the top with foil and bake for another 5 to 10 minutes to allow the middle to set without burning the edges. - Is the butter supposed to be melted?
For the batter, use softened butter. For the pan base, melted butter is easier to spread. - How do I stop the fruit from bleeding into the cake?
Arrange the fruit tightly so the batter stays on top rather than seeping underneath. - Can I bake this in a skillet?
Yes, a 9 inch cast iron skillet is traditional and works perfectly for this recipe. - Why is my cake dry?
You may have over-baked it or used too much flour. Always level your measuring cups. - Can I make this dairy-free?
Yes, use a high-quality vegan butter substitute and any nut milk. - Does it need a glaze?
The fruit and sugar create their own natural glaze, so no extra topping is necessary. - Can I add nuts?
Chopped walnuts or pecans are a great addition to the bottom layer for extra crunch.
Conclusion
The Strawberry Upside Down Cake is a testament to the beauty of simple, seasonal baking. With its striking appearance and its perfect balance of fruit and sponge, it is a recipe that brings joy to the baker and the diner alike. Whether you are hosting a summer garden party or just want to treat your family to a special weekend dessert, this cake is sure to be a hit.
PrintStrawberry Upside Down Cake
A charming and rustic vanilla sponge cake featuring a beautiful caramelized crown of fresh strawberries that creates its own luscious syrup as it bakes.
Ingredients
- 1.5 cups All Purpose Flour
- 1 cup Granulated Sugar
- 0.75 cups Unsalted Butter, softened
- 2 Large Eggs
- 1 pound Fresh Strawberries, hulled and halved
- 1.5 teaspoons Baking Powder
- 0.5 cups Milk
- 1 teaspoon Vanilla Extract
- 0.25 teaspoons Salt
Instructions
- Preheat oven to 350°F (175°C) and line the bottom of a 9-inch round pan with parchment paper.
- In a bowl, cream together 0.5 cups of butter and 0.75 cups of sugar until light and fluffy. Add eggs and vanilla, beating well.
- Whisk together flour, baking powder, and salt. Add to the creamed mixture alternately with the milk.
- Melt the remaining 0.25 cups of butter and pour into the bottom of the cake pan. Sprinkle with the remaining 0.25 cups of sugar.
- Arrange the strawberry halves cut-side down in the bottom of the pan in a tight pattern.
- Gently spread the cake batter over the strawberries.
- Bake for 35-40 minutes until a toothpick comes out clean. Let cool in the pan for 10 minutes before inverting onto a plate.
Notes
- Do not skip the parchment paper; it ensures the fruit releases cleanly from the pan.
- Pat the strawberries dry after washing to prevent the cake from becoming too soggy.
- Flip the cake while it is still warm to prevent the caramel from hardening and sticking to the pan.