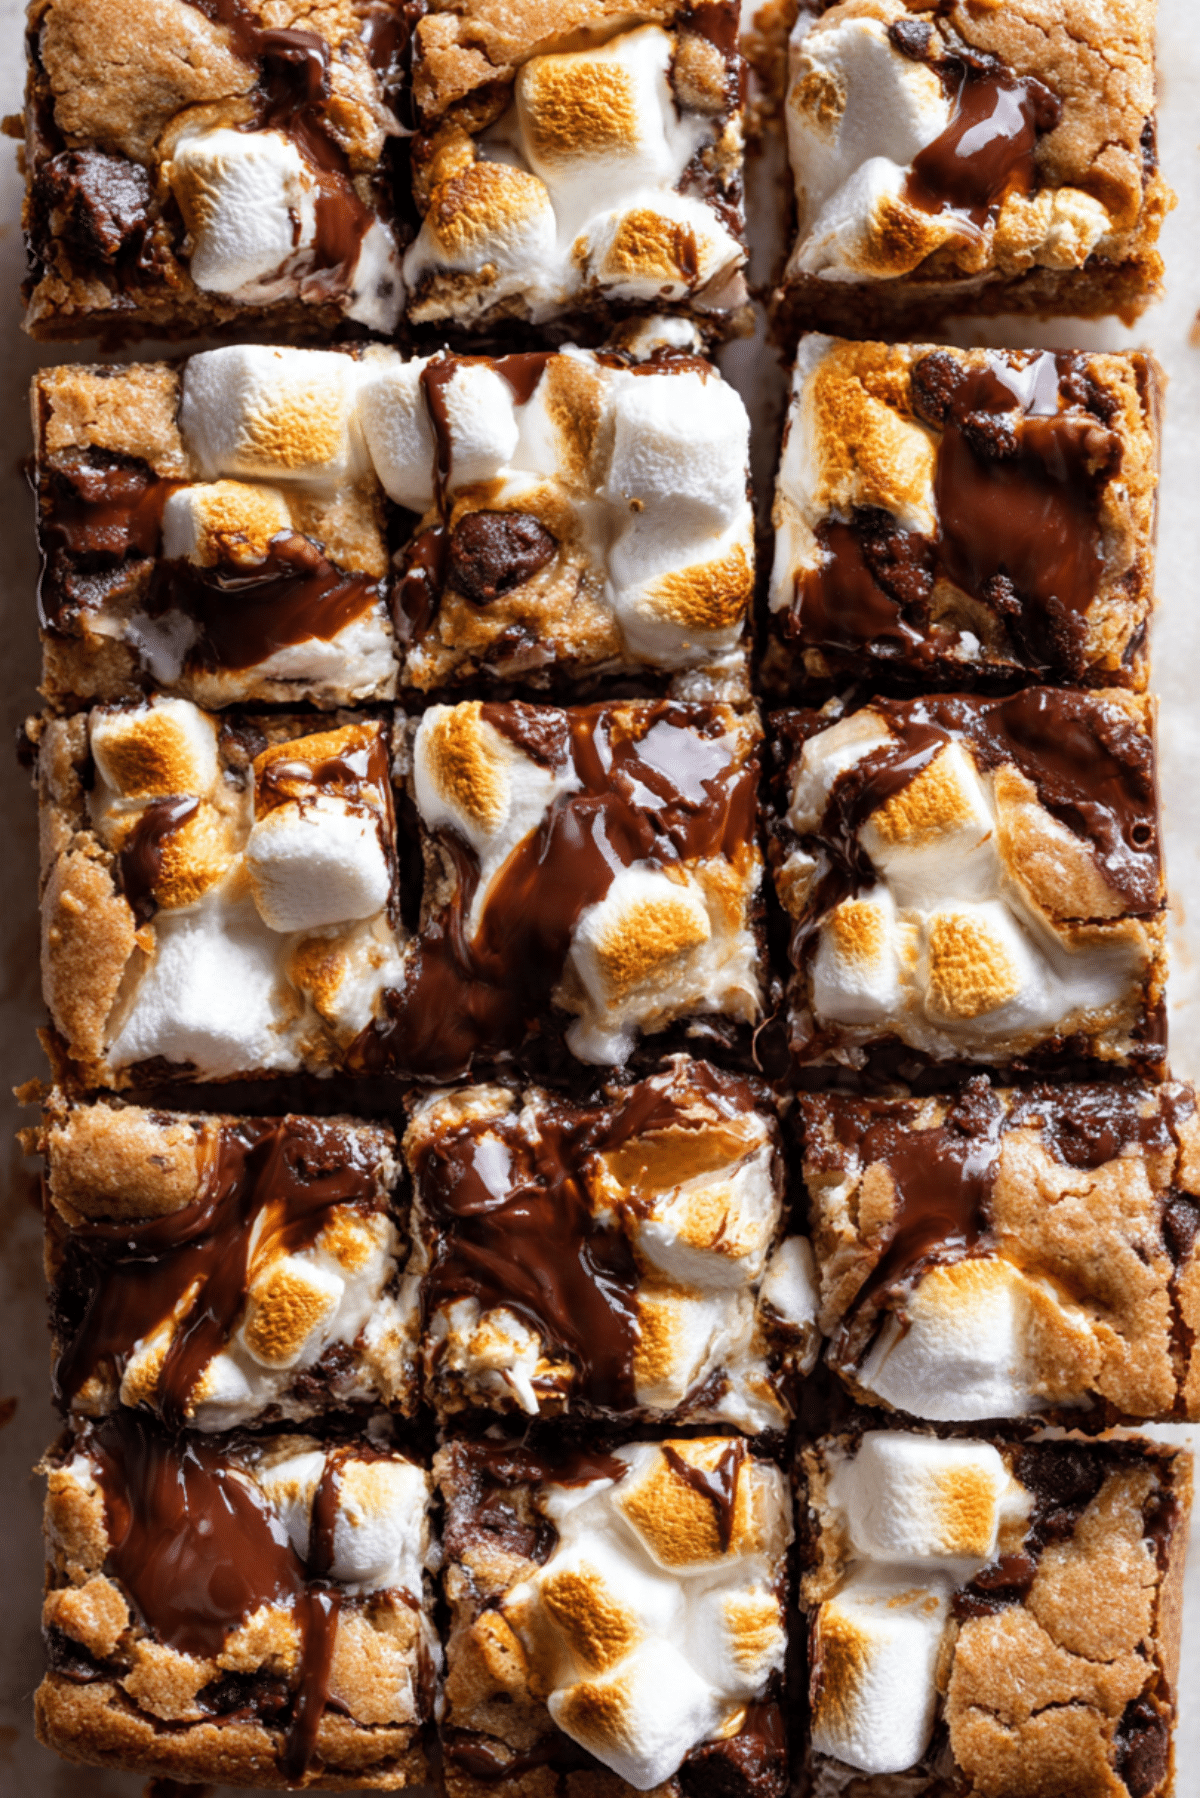
S’mores Cookie Bar
You know those desserts that just make you feel like a kid again? These S’mores cookie bars are one of them. With every bite, you get a hit of gooey marshmallow, melty chocolate, and that golden, buttery graham cracker cookie base. It’s everything we love about campfire s’mores, just easier to make and way less messy.
Behind the Recipe
There’s something nostalgic about s’mores. Maybe it’s the memory of sitting around a crackling campfire, marshmallow on a stick, trying not to burn it while still getting that perfect toast. This recipe was born on a rainy weekend when a campfire wasn’t an option, but the craving for that classic combo was very real. So, we turned to the oven and worked a little magic. The result? A pan of warm, gooey, golden bars that hit every craving note just right.
Recipe Origin or Trivia
While the origins of s’mores trace back to early 20th-century American camping culture, their popularity has only grown over the decades. Originally credited to the Girl Scouts in the 1920s, the treat was affectionately named “some more,” which eventually became “s’mores.” This cookie bar variation has gained traction as a more convenient way to enjoy the same nostalgic flavors without needing a campfire, bringing the outdoorsy fun indoors.
Why You’ll Love S’mores Cookie Bar
These bars are more than just delicious. They’re the perfect combination of ease, flavor, and fun.
Versatile: Great for school lunches, parties, potlucks, or just a weekend treat at home.
Budget-Friendly: Uses common pantry staples you likely already have on hand.
Quick and Easy: No chilling or complicated steps. Just mix, layer, and bake.
Customizable: Add a layer of peanut butter, use dark chocolate, or even mix in some crushed pretzels.
Crowd-Pleasing: Everyone from kids to adults loves a good s’mores treat.
Make-Ahead Friendly: Bake them the night before and they’re even better the next day.
Great for Leftovers: Store them in an airtight container and they’ll stay delicious for days.
Chef’s Pro Tips for Perfect Results
Nailing that perfect gooey bar doesn’t take much, but a few tips can help make it flawless.
- Don’t Overbake: The bars should look slightly underdone when you pull them from the oven. They firm up as they cool.
- Use Mini Marshmallows: They melt evenly and create that perfect gooey texture throughout.
- Line the Pan with Parchment Paper: It makes lifting the bars out and cutting clean squares so much easier.
- Press Dough Evenly: Use the back of a spoon to gently spread the dough without packing it down too much.
- Let Them Cool Before Cutting: They need time to set so you get clean slices instead of a gooey mess.
Kitchen Tools You’ll Need
You won’t need anything fancy here, just a few basics to bring these bars together.
Mixing Bowls: For combining your wet and dry ingredients.
Electric Mixer: To cream butter and sugars until light and fluffy.
8×8 Baking Pan: The perfect size for thick, chewy bars.
Parchment Paper: For easy removal and cleanup.
Spatula or Spoon: To spread the dough and fillings evenly.
Sharp Knife: For clean cuts once cooled.
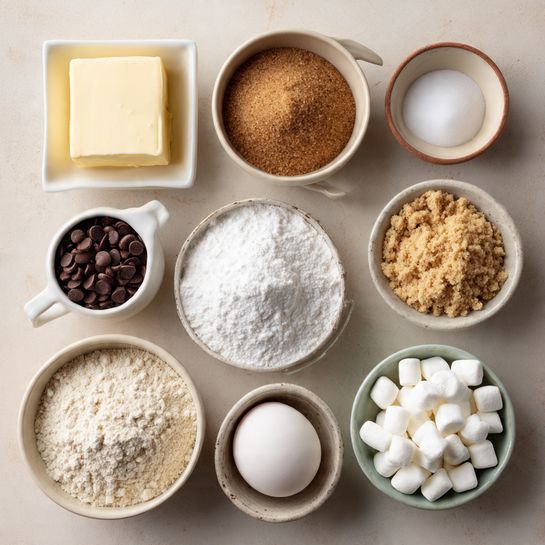
Ingredients in S’mores Cookie Bar
The ingredients come together like a symphony. Each one plays its part to bring that classic s’mores flavor into a soft, chewy bar.
- Unsalted Butter: ½ cup (softened). Adds richness and that melt-in-your-mouth texture.
- Brown Sugar: ½ cup (packed). Brings moisture and a deep, caramel-like sweetness.
- Granulated Sugar: ¼ cup. Balances the brown sugar with a light, clean sweetness.
- Egg: 1 large. Binds the dough and gives it structure.
- Vanilla Extract: 1 teaspoon. Rounds out the flavor and enhances the cookie base.
- All-Purpose Flour: 1 cup. Forms the structure of the cookie bars.
- Graham Cracker Crumbs: ¾ cup. Brings the classic s’mores flavor right into the dough.
- Baking Soda: ½ teaspoon. Gives the bars a little lift.
- Salt: ¼ teaspoon. Balances the sweetness and enhances all the flavors.
- Milk Chocolate Chips: 1 cup. Melts beautifully and mimics the classic chocolate square in s’mores.
- Mini Marshmallows: 1 ½ cups. Toast up golden and gooey for that authentic campfire vibe.
Ingredient Substitutions
Sometimes you just have to work with what’s in the pantry.
Brown Sugar: Use all granulated sugar, though the flavor will be slightly less rich.
Milk Chocolate Chips: Swap for semi-sweet or dark chocolate chips for a deeper cocoa flavor.
Graham Cracker Crumbs: Crushed digestive biscuits or vanilla wafers work in a pinch.
Mini Marshmallows: Use large marshmallows chopped into pieces if needed.
Ingredient Spotlight
Graham Cracker Crumbs: These give the dough that unmistakable s’mores flavor. Their subtle honey and cinnamon notes make the base taste like a campfire classic.
Mini Marshmallows: Not just for topping. They melt into pockets of gooey sweetness and give the bars that signature stretch and toast.
Instructions for Making S’mores Cookie Bar
Let’s get baking! Here’s the easy path to chewy, gooey perfection.
- Preheat Your Equipment:
Set your oven to 350°F (175°C). Line an 8×8 baking pan with parchment paper, leaving some overhang for easy lifting. - Combine Ingredients:
In a bowl, beat together the softened butter, brown sugar, and granulated sugar until light and fluffy. Add in the egg and vanilla extract and mix until smooth. - Prepare Your Cooking Vessel:
In a separate bowl, whisk together the flour, graham cracker crumbs, baking soda, and salt. Gradually add the dry mixture to the wet ingredients and mix until fully combined. - Assemble the Dish:
Press about two-thirds of the dough evenly into the prepared pan. Sprinkle the chocolate chips over the dough, followed by an even layer of mini marshmallows. Drop spoonfuls of the remaining dough over the top and gently spread to cover most of the marshmallows. - Cook to Perfection:
Bake for 22–25 minutes, or until the top is lightly golden. The center should still look slightly soft. - Finishing Touches:
Let the bars cool completely in the pan. The marshmallow and chocolate need time to set for clean cutting. - Serve and Enjoy:
Lift the bars out using the parchment overhang. Slice into squares and enjoy the gooey, melty magic.
Texture & Flavor Secrets
These bars are all about contrast. The cookie base is chewy yet firm, with just the right crisp edges. The marshmallows toast up golden on top and melt into gooey pools inside. Milk chocolate melts into soft ribbons, giving you that perfect creamy bite every time.
Cooking Tips & Tricks
You’ve got this, but here are a few extras to help you along.
- Let the butter soften to room temperature before mixing.
- Slightly toast the top under the broiler for an extra golden marshmallow finish.
- Use a plastic knife to cut cooled bars—it prevents sticking.
What to Avoid
A few small missteps can impact the final result. Here’s what to steer clear of.
- Overbaking: The bars will dry out and lose their gooey charm.
- Uneven dough spreading: Can lead to marshmallow overflow or dry spots.
- Cutting too soon: Letting them cool completely ensures clean slices.
Nutrition Facts
Servings: 12
Calories per serving: 245
Note: These are approximate values.
Preparation Time
Prep Time: 15 minutes
Cook Time: 25 minutes
Total Time: 40 minutes
Make-Ahead and Storage Tips
These bars are just as good the next day—maybe even better. Make them the night before and let them rest overnight. Store in an airtight container at room temperature for up to 4 days. You can freeze them for up to 2 months. To reheat, just microwave a square for 10–15 seconds.
How to Serve S’mores Cookie Bar
Serve warm with a scoop of vanilla ice cream for the ultimate treat. Pair with a glass of cold milk or a mug of hot cocoa. Perfect for potlucks, holiday platters, or cozy nights in.
Creative Leftover Transformations
Give leftover bars new life:
- Crumble over ice cream for a s’mores sundae.
- Chop and mix into homemade milkshakes.
- Warm and sandwich between graham crackers for a double s’mores hit.
Additional Tips
- Add chopped nuts or peanut butter chips for a twist.
- Sprinkle a pinch of sea salt on top before baking for a flavor pop.
- Press extra marshmallows into the top during the last 5 minutes of baking for a toasted finish.
Make It a Showstopper
Want that wow factor? Drizzle melted chocolate across the cooled bars. Add a few toasted mini marshmallows on top just before serving. Serve on a rustic wood board for cozy campfire vibes—even indoors.
Variations to Try
- Peanut Butter Swirl: Drop dollops of peanut butter over the chocolate layer before adding marshmallows.
- Nutella Layer: Spread a thin layer of Nutella over the base dough.
- Salted Caramel: Drizzle caramel sauce over the marshmallow layer before baking.
- Triple Chocolate: Use milk, dark, and white chocolate chips.
- Cookie Crust Base: Use a chocolate chip cookie dough base instead of graham cracker dough.
FAQ’s
Q1: Can I double the recipe for a larger batch?
Yes, just use a 9×13 pan and increase the bake time by about 5–7 minutes.
Q2: Can I use large marshmallows instead of mini?
Yes, chop them into smaller pieces so they melt evenly.
Q3: What’s the best way to cut the bars cleanly?
Let them cool completely, then use a plastic knife or one lightly greased with cooking spray.
Q4: Can I use store-bought cookie dough?
You can, but it won’t have that graham cracker flavor that makes these so unique.
Q5: How do I know when they’re done baking?
The edges should be golden and the center set but still soft.
Q6: Can I use dark chocolate chips instead?
Absolutely. They’ll add a more intense cocoa flavor.
Q7: Are these freezer-friendly?
Yes. Wrap tightly and freeze for up to 2 months.
Q8: Do I need to toast the marshmallows separately?
Nope! They’ll toast naturally in the oven.
Q9: Can I make them gluten-free?
Use gluten-free graham crackers and flour.
Q10: Can I add cinnamon or spices?
Sure! A touch of cinnamon or nutmeg adds a cozy twist.
Conclusion
These S’mores cookie bars are the kind of dessert that brings smiles with every bite. Whether you’re reminiscing about summer campfires or just want an easy, indulgent treat, this recipe has you covered. Trust me, it’s worth every single bite.
PrintS’mores Cookie Bar
These S’mores Cookie Bars bring all the campfire flavor without the fire. Gooey marshmallows, melty milk chocolate, and a buttery graham cracker cookie base come together in one delicious, easy-to-make dessert.
Ingredients
- ½ cup unsalted butter, softened
- ½ cup packed brown sugar
- ¼ cup granulated sugar
- 1 large egg
- 1 teaspoon vanilla extract
- 1 cup all-purpose flour
- ¾ cup graham cracker crumbs
- ½ teaspoon baking soda
- ¼ teaspoon salt
- 1 cup milk chocolate chips
- 1½ cups mini marshmallows
Instructions
- Preheat oven to 350°F (175°C) and line an 8×8-inch baking pan with parchment paper.
- In a large bowl, beat together softened butter, brown sugar, and granulated sugar until light and fluffy. Mix in the egg and vanilla extract.
- In a separate bowl, whisk together flour, graham cracker crumbs, baking soda, and salt.
- Gradually add the dry ingredients to the wet mixture and stir until combined.
- Press about two-thirds of the dough evenly into the prepared pan.
- Sprinkle chocolate chips over the dough, then add an even layer of mini marshmallows.
- Drop spoonfuls of the remaining dough on top and gently spread to mostly cover the marshmallows.
- Bake for 22–25 minutes or until lightly golden. The center should still be soft.
- Let the bars cool completely before lifting out of the pan and slicing into squares.
Notes
- Let bars cool completely for clean slices.
- Use a plastic knife or greased blade to prevent sticking when cutting.
- To enhance the toasted flavor, broil for 1-2 minutes at the end of baking (watch closely).