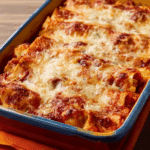
Shortcut Chicken Enchiladas
There are those nights when you want comfort food — fast. And that’s exactly where these Shortcut Chicken Enchiladas come in. They’re cheesy, saucy, and bursting with flavor, all without spending hours in the kitchen. Think of it as all the richness of traditional enchiladas, but simplified for busy weeknights. From the first bite, it’s warm, melty, and just spicy enough to keep you coming back for seconds.
Behind the Recipe
The first time I threw this recipe together, it was on a Wednesday — one of those days that felt two weeks long. I had some leftover rotisserie chicken, a can of enchilada sauce, and a fridge full of good intentions. But somehow, everything came together in a baking dish that hit all the right notes. Now, it’s become a weekly staple in our house — easy to prep, even easier to love.
Recipe Origin or Trivia
Enchiladas trace their roots to Mexican cuisine, where corn tortillas filled with meat and bathed in chili sauce date back to Aztec times. This shortcut version borrows those bold flavors but swaps a few steps to make it more weekday-friendly — no frying, no elaborate sauces. Just simple, accessible ingredients that deliver on flavor with minimal fuss.
Why You’ll Love Shortcut Chicken Enchiladas
If cozy meals are your love language, these enchiladas are speaking right to your heart:
Quick to Prepare: 10 minutes of prep and the oven does the rest.
Pantry Friendly: Uses canned and cooked items you likely have on hand.
Customizable: Spice it up, keep it mild, or toss in extras.
Freezer-Friendly: Make a double batch and freeze one for later.
Family Approved: Cheesy, hearty, and satisfying.
Easy Cleanup: Just one pan and a mixing bowl.
Chef’s Pro Tips for Perfect Results
Here’s how to get the most out of your shortcut dinner:
- Warm the tortillas before rolling to keep them from cracking.
- Don’t overstuff — 2 to 3 tablespoons of filling is plenty.
- Use pre-shredded rotisserie chicken to save time.
- Sprinkle a little extra cheese on top right before broiling for golden bubbles.
- Let it rest 5 minutes before serving so everything sets.
Kitchen Tools You’ll Need
Make sure you have these within reach:
Mixing Bowl: For combining the filling.
Casserole Dish: 9×13-inch works perfectly.
Spoon or Scoop: For portioning the filling.
Tongs or Hands: To roll the enchiladas.
Aluminum Foil: For covering while baking.
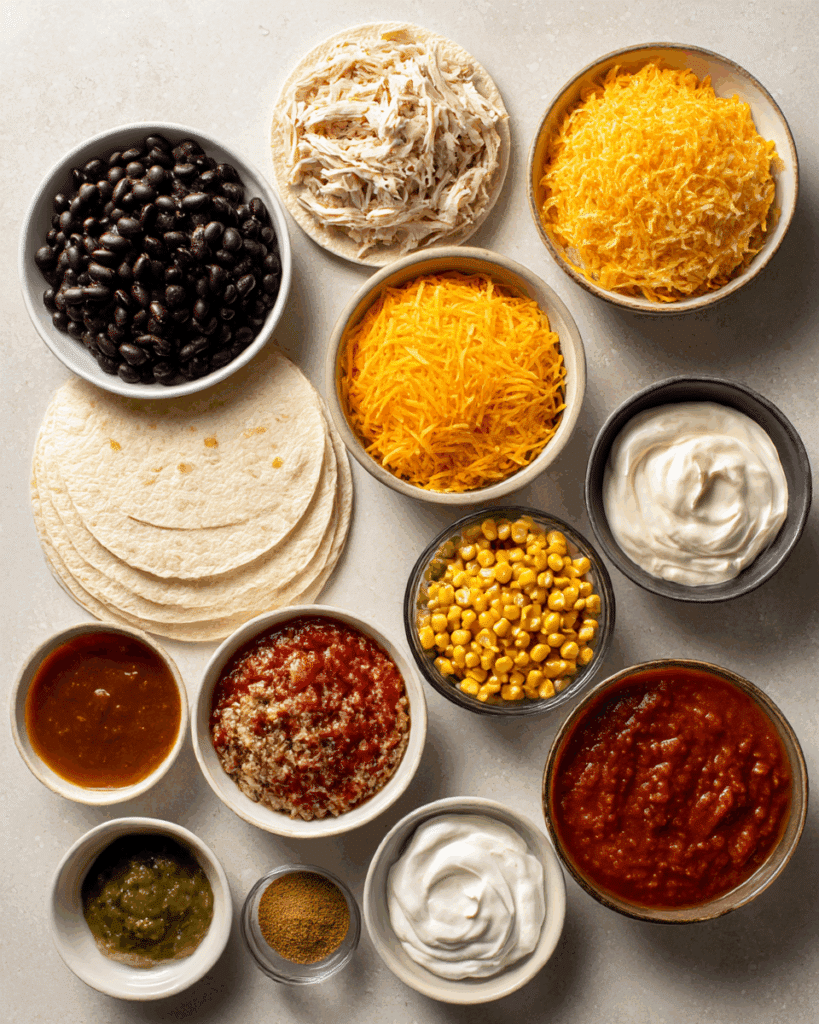
Ingredients in Shortcut Chicken Enchiladas
This is a simple list, and that’s what makes it beautiful:
- Shredded Cooked Chicken: 2 cups, rotisserie or leftovers work great.
- Flour Tortillas: 8 small (6-inch) tortillas, soft and rollable.
- Shredded Cheddar Cheese: 2 cups, divided — melty, rich, and sharp.
- Black Beans: 1 cup canned, rinsed and drained.
- Corn Kernels: 1 cup, fresh or canned.
- Diced Tomatoes: 1 cup, drained.
- Enchilada Sauce: 2 cups, red or green depending on your mood.
- Chopped Green Chiles: 1/2 cup, mild or spicy.
- Sour Cream: 1/2 cup, adds creaminess to the filling.
- Ground Cumin: 1 teaspoon, for a warm, earthy kick.
Ingredient Substitutions
Need to improvise? No problem:
Tortillas: Use corn for a more traditional twist.
Cheddar Cheese: Swap with Monterey Jack or a Mexican blend.
Black Beans: Pinto or white beans work just fine.
Sour Cream: Greek yogurt is a great substitute.
Green Chiles: Use jalapeños for more heat, or omit for less.
Ingredient Spotlight
Enchilada Sauce: The sauce makes or breaks the dish — use a good-quality canned one or make your own if you have the time. Red gives you rich, smoky flavors; green adds tangy brightness.
Rotisserie Chicken: The ultimate shortcut. It’s juicy, tender, and saves you at least 30 minutes of cooking time.
Instructions for Making Shortcut Chicken Enchiladas
Ready to get cozy? Let’s go step by step:
- Preheat Your Equipment:
Preheat oven to 190°C (375°F). Lightly grease a 9×13-inch casserole dish. - Combine Ingredients:
In a large bowl, mix shredded chicken, black beans, corn, diced tomatoes, green chiles, 1 cup of cheese, sour cream, and cumin. - Prepare Your Cooking Vessel:
Spread a thin layer of enchilada sauce on the bottom of your casserole dish. - Assemble the Dish:
Spoon about 2 tablespoons of filling into each tortilla, roll it up, and place seam-side down in the dish. Repeat until all filling is used. - Cook to Perfection:
Pour remaining enchilada sauce over the rolled tortillas. Top with the remaining cheese. Cover with foil and bake for 20 minutes. Remove foil and bake an additional 10 minutes until cheese is bubbling. - Finishing Touches:
Let rest for 5 minutes. Garnish with chopped cilantro, a dollop of sour cream, or sliced jalapeños if desired. - Serve and Enjoy:
Serve hot with a side of Mexican rice, guacamole, or a simple salad.
Texture & Flavor Secrets
You’ll get a creamy, cheesy filling with pops of sweet corn and tender chicken wrapped in soft tortillas. The edges get slightly crisp while the middle stays saucy and gooey. It’s like a Tex-Mex hug in a dish — warm, bold, and comforting.
Cooking Tips & Tricks
Make them better every time with these little tricks:
- Add a splash of enchilada sauce inside the filling for extra moisture.
- Sprinkle a pinch of chili powder for more depth.
- Use a fork to hold rolled tortillas while filling for easier handling.
- If the top starts browning too quickly, cover loosely with foil.
What to Avoid
Avoid these mistakes to keep your enchiladas on point:
- Overstuffing: Makes rolling tricky and can cause leaks.
- Dry tortillas: Warm them slightly to keep them pliable.
- Too much sauce: Can make things soggy — aim for coverage, not drowning.
- Skipping the rest time: Letting it sit helps flavors settle.
Nutrition Facts
Servings: 6
Calories per serving: 430
Note: Approximate values based on standard ingredients.
Preparation Time
Prep Time: 10 minutes
Cook Time: 30 minutes
Total Time: 40 minutes
Make-Ahead and Storage Tips
Assemble the enchiladas the night before and refrigerate until ready to bake. Leftovers? Store them in an airtight container in the fridge for up to 3 days or freeze for up to 2 months. Reheat covered in the oven or microwave.
How to Serve Shortcut Chicken Enchiladas
Serve on a plate with fresh lime wedges, a scoop of guacamole, or a drizzle of hot sauce. Add a side of chips and salsa to turn it into a full Tex-Mex feast.
Creative Leftover Transformations
Leftovers can totally have a second life:
- Enchilada-Stuffed Bell Peppers: Scoop filling into halved bell peppers and bake.
- Enchilada Quesadillas: Use the filling between tortillas for a crispy twist.
- Breakfast Bake: Top with a fried egg and some avocado slices.
- Taco Filling: Warm it up and use it in soft or hard shell tacos.
Additional Tips
Make this dish your own with these fun extras:
- Add sautéed onions or bell peppers to the filling.
- Mix in chopped spinach for a sneaky veggie boost.
- Use chipotle powder for smoky heat.
- Top with crumbled tortilla chips for crunch.
Make It a Showstopper
Want to make it feel restaurant-level? Serve it in a colorful dish, sprinkle with cotija cheese and cilantro, and place lime wedges along the edge. Add a drizzle of crema or sour cream zigzagged on top for that final, polished touch.
Variations to Try
Not in the mood for chicken? Try these:
- Beef Enchiladas: Use browned ground beef or leftover roast.
- Vegetarian Enchiladas: Swap chicken for roasted veggies or tofu.
- Spicy Verde Enchiladas: Use green sauce and add jalapeños.
- BBQ Chicken Enchiladas: Replace enchilada sauce with barbecue sauce and skip the cumin.
FAQ’s
Q1: Can I make this ahead of time?
A1: Yes! Assemble the dish up to 24 hours in advance and bake when ready.
Q2: Can I freeze it?
A2: Totally. Wrap tightly and freeze before or after baking.
Q3: What’s the best cheese to use?
A3: Cheddar, Monterey Jack, or a pre-shredded Mexican blend all melt beautifully.
Q4: Do I have to use sour cream?
A4: Not at all — Greek yogurt or cream cheese work great too.
Q5: Can I make it spicier?
A5: Yes — use hot enchilada sauce, jalapeños, or cayenne pepper.
Q6: What if I only have corn tortillas?
A6: That works! Just warm them first so they don’t break when rolled.
Q7: Can I bake it in a smaller dish?
A7: Sure! Use two smaller pans and adjust baking time slightly.
Q8: Is this gluten-free?
A8: Use corn tortillas and ensure all canned items are gluten-free.
Q9: Can kids help make it?
A9: Yes, they’ll love filling and rolling the tortillas.
Q10: What’s the best way to reheat leftovers?
A10: In the oven at 180°C (350°F), covered, until warmed through.
Conclusion
These Shortcut Chicken Enchiladas prove that comfort food doesn’t have to be complicated. With everyday ingredients and a little bit of layering, you can whip up a family favorite in no time. It’s cheesy, saucy, and oh-so-satisfying — the kind of dinner that turns a regular weeknight into something special.
PrintShortcut Chicken Enchiladas
These cheesy Shortcut Chicken Enchiladas are packed with flavor and ready in under an hour. A perfect quick weeknight meal using rotisserie chicken, beans, cheese, and a rich enchilada sauce.
Ingredients
- 2 cups shredded cooked chicken
- 8 small flour tortillas
- 2 cups shredded cheddar cheese, divided
- 1 cup canned black beans, rinsed and drained
- 1 cup corn kernels (fresh or canned)
- 1 cup diced tomatoes, drained
- 2 cups enchilada sauce
- 1/2 cup chopped green chiles
- 1/2 cup sour cream
- 1 teaspoon ground cumin
Instructions
- Preheat oven to 190°C (375°F). Lightly grease a 9×13-inch baking dish.
- In a bowl, combine chicken, black beans, corn, diced tomatoes, green chiles, 1 cup cheese, sour cream, and cumin.
- Spread 1/2 cup enchilada sauce on the bottom of the baking dish.
- Fill each tortilla with about 2 tablespoons of the mixture, roll, and place seam-side down in the dish.
- Pour remaining sauce over the top and sprinkle with remaining cheese.
- Cover with foil and bake for 20 minutes. Uncover and bake 10 more minutes until bubbly and golden.
- Let rest 5 minutes before serving. Garnish with cilantro or sour cream if desired.
Notes
- Use rotisserie chicken to save time.
- Warm tortillas before rolling to prevent cracking.
- Store leftovers in the fridge for up to 3 days or freeze for 2 months.