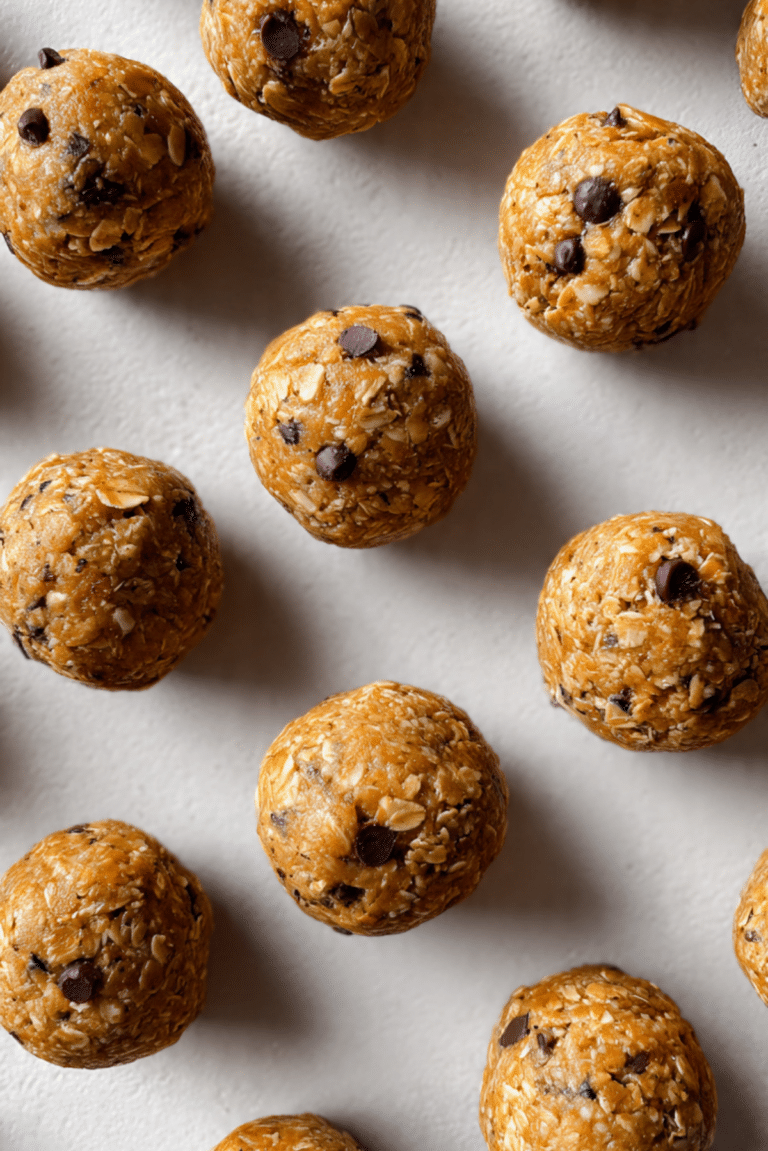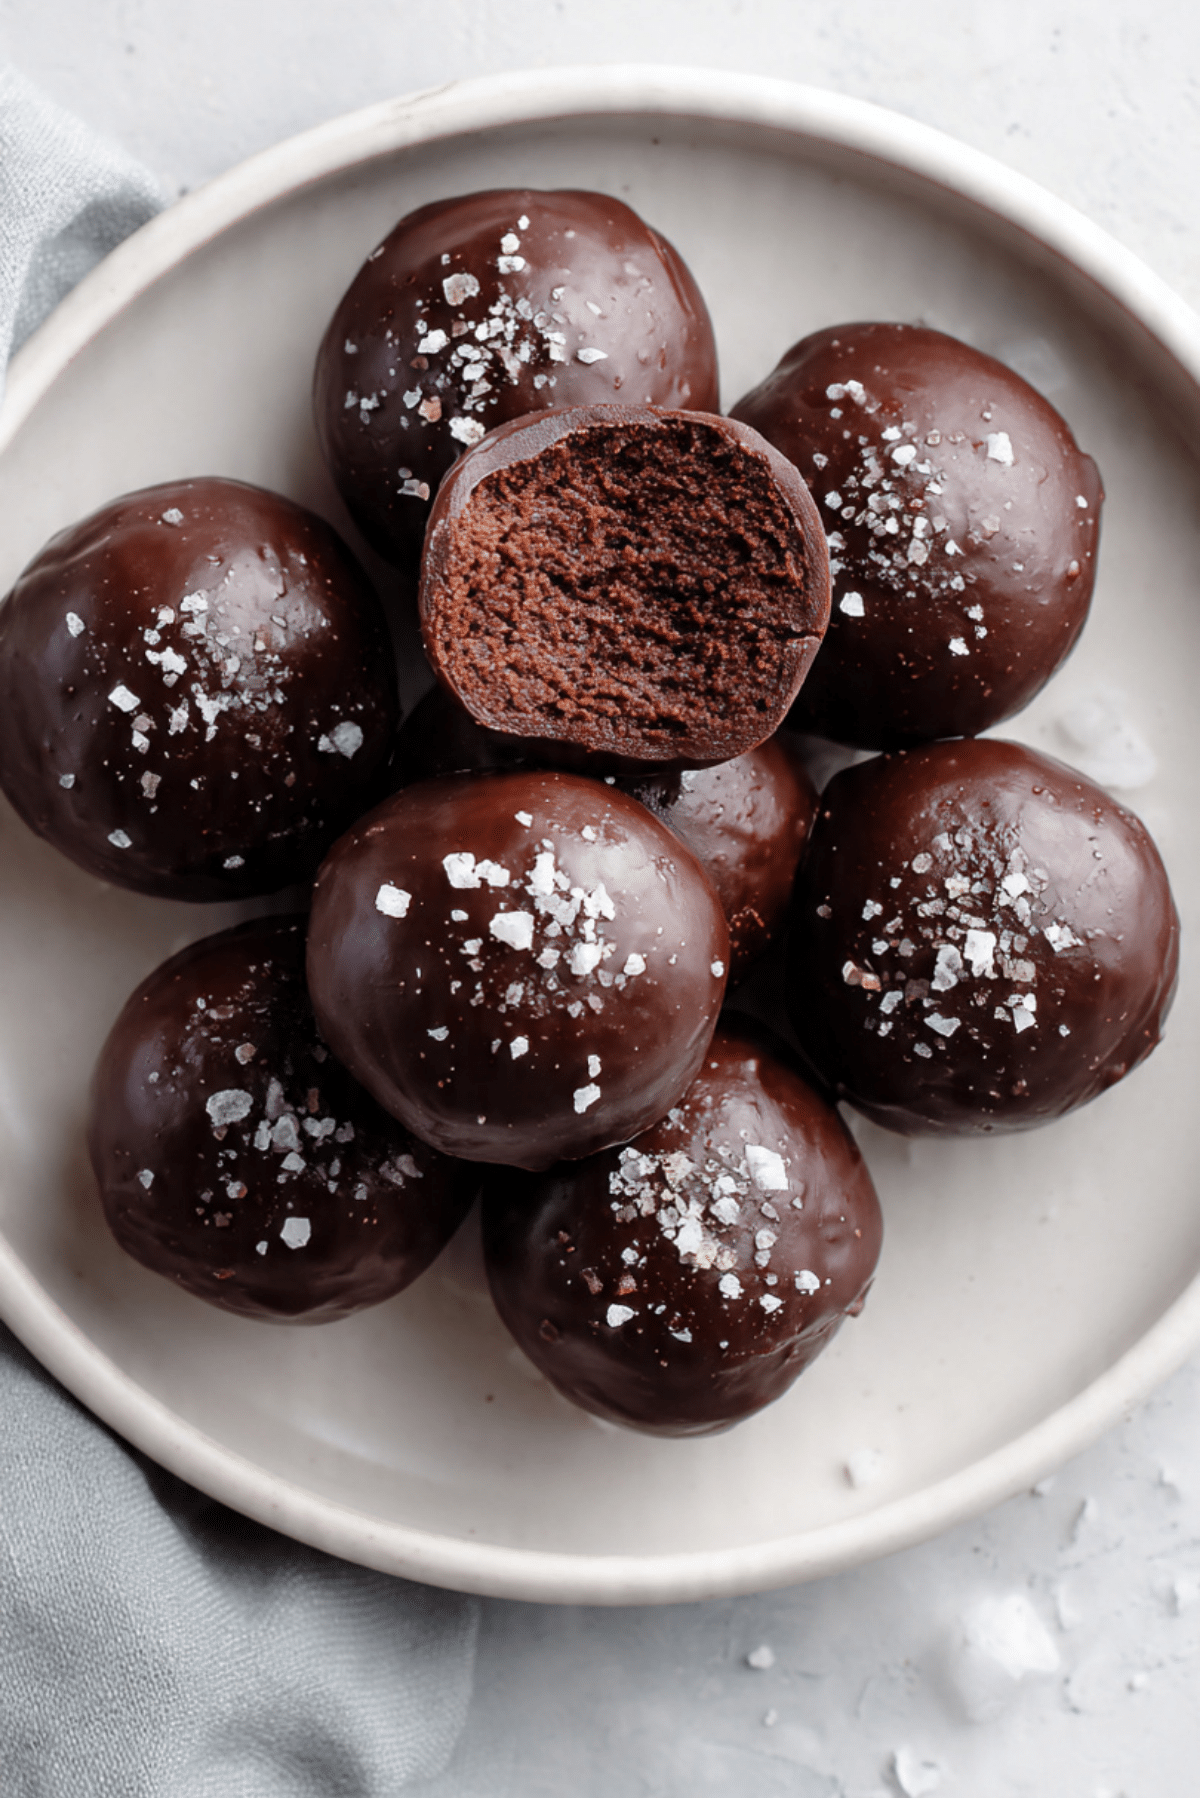
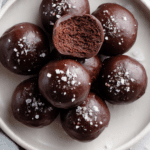
SALTED CHOCOLATE BROWNIE BALLS
There is something wildly comforting about a bite-sized chocolate treat that feels a little fancy and a little playful at the same time. These rich little brownie balls bring that deep cocoa flavor you crave, then finish with a touch of flaky salt that makes everything pop. Trust me, you’re going to love this, because every bite lands somewhere between a fudgy brownie and a smooth chocolate truffle.
Why These Little Chocolate Bites Always Steal the Show
Some desserts feel like they are made for special occasions, and some feel like they were created for those evenings when you just need something good with your coffee. This one manages to be both. The centers stay soft and brownie-like, the coating adds that delicate snap, and the salt on top keeps the sweetness from feeling too heavy.
They are also the kind of treat that disappears fast from dessert trays, lunch boxes, and holiday platters. This one’s a total game-changer, especially when you want something easy but still impressive enough to make people ask for the recipe.
The Sweet Story Behind This Chocolate Favorite
Chocolate truffle-style bites have been floating around home kitchens for years, especially as a clever way to turn simple brownies into something a little more elegant. The idea is wonderfully practical, crumble baked brownies, mix them into a soft filling, roll them into balls, then coat them in chocolate for that candy-shop finish.
What makes this version stand out is the sweet and salty balance. That little pinch of flaky sea salt on top gives the whole dessert a more grown-up edge, which is probably why treats like this stay so popular. They feel nostalgic and modern all at once, and now let’s dive into what makes them such a dependable recipe to keep in your back pocket.
What Makes This Recipe So Hard to Resist
This recipe earns its place quickly, not just because it tastes amazing, but because it makes life easier in all the right ways.
Versatile: These are perfect for holiday platters, birthday tables, edible gifts, or just a quiet late-night treat from the fridge. They fit in almost anywhere.
Budget-Friendly: Most of the ingredients are simple grocery store staples, and the recipe stretches into a generous batch without feeling expensive. That is always a win.
Quick and Easy: The process is straightforward, and once the brownies are baked, the rest comes together in a very manageable rhythm. Nothing here feels fussy.
Customizable: You can change the chocolate coating, play with toppings, or even add a little vanilla or espresso note to the filling if you want to nudge the flavor in a new direction.
Crowd-Pleasing: Chocolate lovers adore them, and even people who usually skip dessert seem to reach for one. Then they usually come back for another.
Make-Ahead Friendly: These hold beautifully in the fridge, which makes them ideal when you want dessert done before the busy part of the day begins.
Great for Leftovers: If you somehow have extras, they stay delicious for days and taste just as good chilled. Let me tell you, it’s worth every bite.
A Few Smart Tricks Before You Start Rolling
Before we move into the recipe itself, a few little tricks can make the whole process feel smoother and the final texture even better.
- Let the brownies cool completely: Warm brownies are too soft to roll neatly, so patience really helps here.
- Use softened cream cheese: This blends more evenly into the crumbs and gives you a smooth, truffle-like center.
- Chill before dipping: A short chill keeps the balls firm, which makes the chocolate coating much easier.
- Sprinkle the salt right away: The flaky salt sticks best while the chocolate coating is still wet.
- Use two forks for dipping: It keeps things tidy and helps the excess chocolate drip off without making a mess.
The Kitchen Tools That Make It All Easier
Now that you know a few helpful tricks, here are the tools that make the whole process feel simple and organized.
Mixing Bowl: You will need a large bowl for crumbling the baked brownies and mixing the filling until it becomes soft and scoopable.
8×8-Inch Baking Pan: This gives the brownies a nice thickness, which works beautifully for rolling into sturdy, fudgy centers.
Hand Mixer or Sturdy Spoon: Either works well for combining the brownie crumbs and cream cheese into a cohesive mixture.
Small Cookie Scoop: This helps keep the brownie balls even in size, which makes them look prettier and helps them set evenly.
Baking Sheet or Tray: A lined tray gives you a clean place to chill the rolled balls before coating them in chocolate.
Microwave-Safe Bowl: Perfect for melting the chocolate chips and coconut oil together into a smooth coating.
Everything You Need for That Fudgy, Glossy Finish
Once the tools are ready, the ingredient list feels refreshingly simple. Every ingredient has a clear job, and together they create that deep chocolate flavor, creamy interior, and shiny finish that makes these so irresistible.
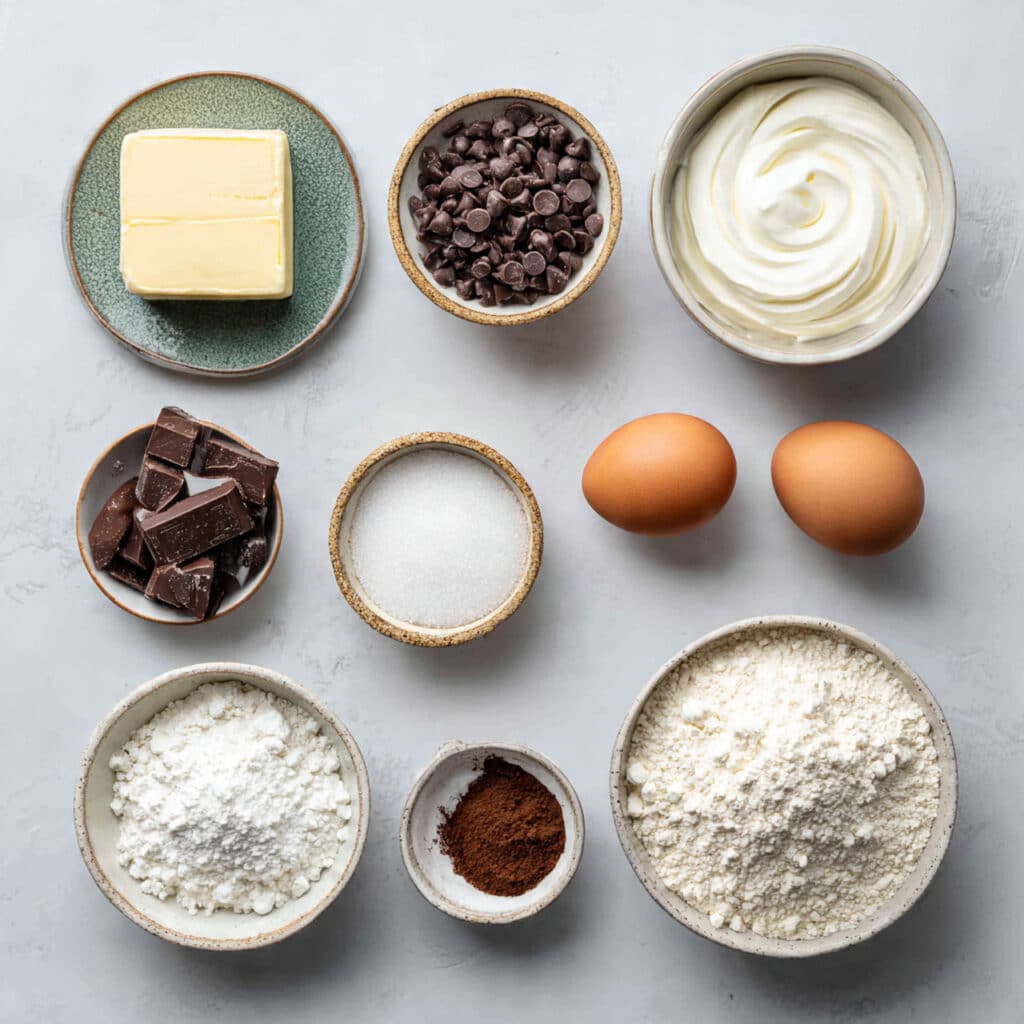
- Fudge Brownie Mix: 1 box, 18.3 ounces, this gives you a rich chocolate base without extra fuss and bakes into the chewy brownies you will turn into the filling.
- Large Eggs: 2 eggs, these help bind the brownie batter and give the baked brownies their structure.
- Vegetable Oil: 1/2 cup, this keeps the brownies moist and tender, which is exactly what you want for a soft truffle center.
- Water: 3 tablespoons, this loosens the batter just enough and helps everything mix smoothly.
- Cream Cheese: 8 ounces, softened, this transforms the crumbled brownies into a creamy, rollable mixture with a truffle-like texture.
- Semi-Sweet Chocolate Chips: 2 cups, these melt into the outer coating and add that glossy shell around each bite.
- Coconut Oil: 1 teaspoon, this helps the melted chocolate coat more smoothly and set with a nice sheen.
- Flaky Sea Salt: 1 teaspoon, this finishes the tops with that salty sparkle that makes the chocolate taste even deeper.
Easy Swaps If You Need to Improvise
Sometimes you need a little flexibility, and this recipe handles that surprisingly well.
Fudge Brownie Mix: Use a dark chocolate brownie mix for a deeper cocoa flavor.
Vegetable Oil: Use canola oil or melted unsalted butter.
Cream Cheese: Use block-style mascarpone for an even silkier center.
Semi-Sweet Chocolate Chips: Use dark chocolate chips if you prefer a less sweet finish.
Coconut Oil: Use neutral vegetable shortening in the coating if needed.
Flaky Sea Salt: Use a tiny pinch of coarse sea salt if that is what you have on hand.
The Ingredients That Really Make the Magic Happen
A couple of ingredients do most of the heavy lifting here, and they are absolutely worth appreciating.
Cream Cheese: This is what gives the filling that smooth, rich texture that turns ordinary brownie crumbs into something that feels almost like a bakery truffle.
Flaky Sea Salt: That final sprinkle may seem small, but it brightens the chocolate, sharpens the sweetness, and makes each bite feel finished instead of flat.
Let’s Roll, Dip, and Finish These Chocolate Gems
Now comes the fun part, and honestly, this is where the whole recipe starts to feel extra satisfying. You bake, crumble, mix, roll, dip, and suddenly you have a tray of glossy little treats that look far fancier than the effort they take.
- Preheat Your Equipment: Preheat your oven to 350°F. Lightly grease or line an 8×8-inch baking pan so the brownies release easily after baking.
- Combine Ingredients: In a mixing bowl, stir together the fudge brownie mix, eggs, vegetable oil, and water until the batter is smooth and fully combined.
- Prepare Your Cooking Vessel: Spread the batter evenly into the prepared baking pan. Bake for 22 to 25 minutes, or until the brownies are set in the center. Let them cool completely.
- Assemble the Dish: Crumble the cooled brownies into a large bowl. Add the softened cream cheese and mix until the mixture becomes thick, smooth, and evenly blended. Scoop and roll into 24 even balls, then place them on a lined tray. Chill for 30 minutes.
- Cook to Perfection: Melt the semi-sweet chocolate chips with the coconut oil in a microwave-safe bowl in short bursts, stirring until smooth. Dip each chilled brownie ball into the melted chocolate, letting the excess drip off before returning it to the tray.
- Finishing Touches: While the chocolate is still wet, sprinkle the tops lightly with flaky sea salt. Let the coating set at room temperature or chill briefly until firm.
- Serve and Enjoy: Arrange the finished brownie balls on a serving plate and enjoy them chilled or slightly softened for the best fudgy bite.
What Makes the Texture and Flavor So Good
The first thing you notice is that contrast. The shell has a delicate snap, then the center gives way into something soft, rich, and almost melt-in-your-mouth fudgy. It is not cakey, and it is not overly dense either. It lands right in that sweet spot where every bite feels indulgent without being heavy.
Flavor-wise, the chocolate comes in layers. The brownie center tastes warm and familiar, the coating adds a cleaner chocolate finish, and the sea salt wakes everything up at the very end. That tiny salty edge keeps the sweetness balanced and makes the cocoa feel darker and deeper.
Helpful Tips for the Best Batch
A few extra pointers can take these from good to seriously crave-worthy.
- Chill the rolled balls well: Firmer centers are much easier to dip cleanly into melted chocolate.
- Do not overheat the chocolate: Gentle melting keeps the coating smooth and glossy instead of thick or grainy.
- Work in small batches: Leave some of the brownie balls in the fridge while you dip the others so they stay firm.
- Use a fork to tap off excess coating: This keeps the bottoms from getting too thick with pooled chocolate.
What Can Go Wrong, and How to Fix It
Even easy recipes have a few moments where small details matter, so here are the common things to watch for.
- If the brownie mixture feels too soft: Chill it a little longer before rolling. Warm filling can turn sticky fast.
- If the coating looks thick: Stir in the coconut oil fully and make sure the chocolate is completely melted and smooth.
- If the brownie balls crack while dipping: They may be too cold compared to the warm chocolate, so let them sit for a minute or two before coating.
- If the salt slides off: Sprinkle it on immediately after dipping, while the coating is still wet.
A Quick Look at the Nutrition
These little treats feel luxurious, so it helps to know what you are working with.
Servings: 24 brownie balls
Calories per serving: 180
Note: These are approximate values.
Time Breakdown So You Can Plan Ahead
This recipe fits nicely into an afternoon baking session, and most of that time is simple, low-stress prep.
Prep Time: 55 minutes
Cook Time: 25 minutes
Total Time: 1 hour 20 minutes
Make-Ahead and Storage Tips That Actually Help
One of the best things about this dessert is how well it fits into a busy schedule. You can bake the brownies earlier in the day, or even the night before, then finish the rolling and dipping later when you have a quieter moment.
Store the finished brownie balls in an airtight container in the refrigerator for up to 5 days. For longer storage, freeze them in a single layer until firm, then transfer them to a freezer-safe container for up to 2 months. To serve, let them thaw in the fridge overnight or sit at room temperature for about 15 to 20 minutes before eating.
The Best Ways to Serve Them
These are lovely on a dessert board with fresh berries and coffee, but they also shine all on their own. Serve them chilled for a firmer truffle-style bite, or let them sit out briefly for a softer, fudgier center.
They pair beautifully with hot coffee, espresso, or a glass of cold milk. If you are building a dessert table, they sit nicely next to cookies, bars, and chocolate-covered fruit without getting lost in the crowd.
Smart Ideas for Leftovers That Feel Brand New
If you have extras, there are a few fun ways to turn them into something a little different the next day.
Crumble one over vanilla ice cream for a quick sundae topping. Chop a few and layer them into parfait glasses with whipped cream. You can even tuck one beside a scoop of ice cream and a drizzle of chocolate sauce for a last-minute plated dessert that looks far more planned than it really was.
Extra Little Details That Make a Difference
A few final touches can really sharpen the flavor and improve the finish.
Use good-quality chocolate chips for the coating if you can, because the outer shell is the first flavor people taste. Keep your sea salt light and delicate instead of heavy-handed, because it should highlight the chocolate, not overpower it. And if you want ultra-neat brownie balls, wipe your hands occasionally while rolling so the mixture stays smooth and tidy.
How to Make Them Look Bakery-Worthy
Presentation is part of the fun here, especially because these look so polished with very little effort. Place them in mini paper candy cups for a more giftable finish, or stack them on a white plate so the glossy coating and salt flakes really stand out.
A few halved pieces on the platter also help, because they show off that dense, fudgy middle. That little visual cue makes them even harder to resist.
Fun Variations to Try Next Time
Once you make the base version, it is easy to start imagining little twists.
- Dark Chocolate Version: Use dark chocolate chips for the coating and a pinch of espresso powder in the brownie batter for a deeper flavor.
- Cookies and Cream Style: Drizzle the tops with a little white chocolate after the coating sets.
- Mocha Twist: Add 1 teaspoon instant espresso powder to the brownie batter for a gentle coffee note.
- Nutty Finish: Press a few finely chopped toasted pecans onto the top before the coating sets.
- Holiday Sprinkle Batch: Replace the flaky salt on half the batch with festive sprinkles for parties and cookie trays.
FAQ’s
1. Can I make these a day ahead?
Yes, and they are actually great for that. The texture holds beautifully in the fridge, so making them ahead can make serving even easier.
2. Do I have to use cream cheese?
Cream cheese gives the filling its classic soft truffle texture, so it is the best choice for this version. Mascarpone can work as a substitute if needed.
3. Can I use homemade brownies instead of a mix?
Absolutely. Just use enough baked brownies to equal one standard 8×8-inch pan, then crumble and mix as directed.
4. Why are my brownie balls sticky to roll?
That usually means the brownie mixture is a little too warm. Chilling it for 15 to 20 minutes usually solves the problem.
5. Can I use milk chocolate for the coating?
Yes, though the finished treats will be sweeter. Semi-sweet or dark chocolate gives a better balance with the sea salt.
6. How do I keep the chocolate coating smooth?
Melt it gently and stir well with the coconut oil. Overheated chocolate can thicken or become dull.
7. Can I freeze them after dipping?
Yes, they freeze well. Store them in a sealed container and thaw in the refrigerator before serving.
8. How long do they last in the fridge?
They keep well for up to 5 days in an airtight container, and the flavor stays rich and satisfying.
9. Are they better cold or at room temperature?
That depends on what you like. Cold gives you a firmer, truffle-like texture, while room temperature makes the center softer and fudgier.
10. Can I double the recipe?
Yes, very easily. Just bake the brownies in two pans or in batches so the texture stays consistent.
Conclusion
These little chocolate bites have a way of feeling both simple and special, which is probably why they are so easy to fall for. They are rich, fudgy, glossy, and finished with just enough salt to keep every bite interesting. Whether you make them for a celebration or just because your sweet tooth says it is time, they bring that homemade magic that never really goes out of style. Trust me, once you make a batch, you will already be thinking about the next one.
PrintSALTED CHOCOLATE BROWNIE BALLS
Rich, fudgy brownie balls made from baked brownies and cream cheese, dipped in melted chocolate, and finished with flaky sea salt for the perfect sweet and salty bite.
- Prep Time: 55 minutes
- Cook Time: 25 minutes
- Total Time: 1 hour 20 minutes
- Yield: 24 brownie balls
- Category: Dessert
- Method: Baking
- Cuisine: American
- Diet: Vegetarian
Ingredients
- 1 box (18.3 ounces) fudge brownie mix
- 2 large eggs
- 1/2 cup vegetable oil
- 3 tablespoons water
- 8 ounces cream cheese, softened
- 2 cups semi-sweet chocolate chips
- 1 teaspoon coconut oil
- 1 teaspoon flaky sea salt
Instructions
- Preheat the oven to 350°F and lightly grease or line an 8×8-inch baking pan.
- In a mixing bowl, stir together the brownie mix, eggs, vegetable oil, and water until smooth.
- Spread the batter evenly into the prepared pan and bake for 22 to 25 minutes, or until set in the center. Let the brownies cool completely.
- Crumble the cooled brownies into a large bowl. Add the softened cream cheese and mix until smooth and fully combined.
- Scoop and roll the mixture into 24 balls. Place them on a lined tray and chill for 30 minutes.
- In a microwave-safe bowl, melt the chocolate chips with the coconut oil in short bursts, stirring until smooth.
- Dip each chilled brownie ball into the melted chocolate, letting the excess drip off, then place back on the tray.
- Sprinkle each one with flaky sea salt while the chocolate is still wet.
- Let the coating set at room temperature or chill briefly until firm, then serve.
Notes
- Chill the brownie balls well before dipping so they hold their shape.
- Use block-style cream cheese for the best texture.
- Sprinkle the sea salt on immediately after dipping so it sticks well.
- Store leftovers in an airtight container in the refrigerator for up to 5 days.
Nutrition
- Serving Size: 1 brownie ball
- Calories: 180
- Sugar: 16g
- Sodium: 120mg
- Fat: 10g
- Saturated Fat: 4g
- Unsaturated Fat: 5g
- Trans Fat: 0g
- Carbohydrates: 22g
- Fiber: 1g
- Protein: 2g
- Cholesterol: 25mg