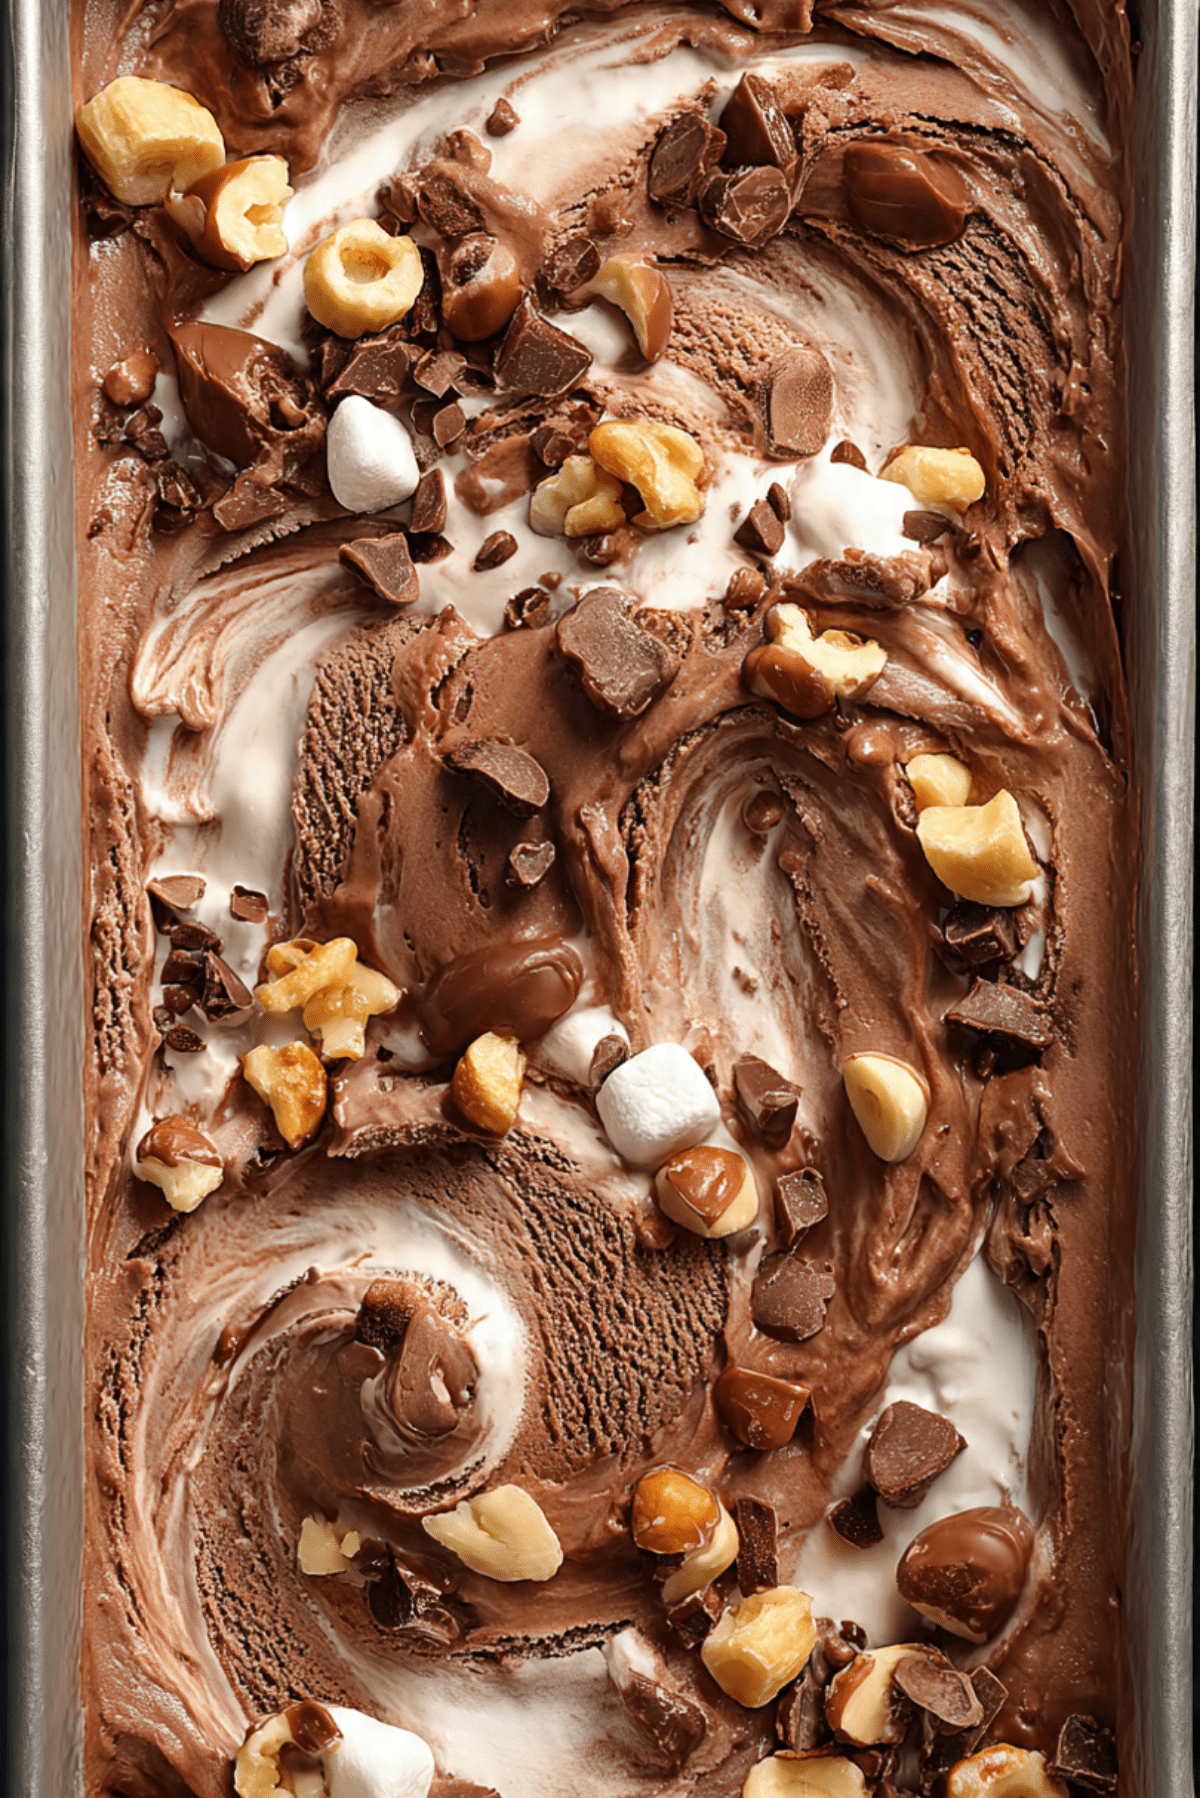
Rocky Road Ice Cream
There’s something undeniably comforting about Rocky Road Ice Cream. With its rich chocolate base, gooey marshmallows, and crunchy nuts, it brings together all the textures and flavors you crave in one nostalgic, scoopable dessert. It’s indulgent without being over-the-top and always hits the sweet spot, whether you’re enjoying a bowl on the couch or serving it at a summer party. Let me tell you, it’s worth every creamy, crunchy bite.
Behind the Recipe
Rocky Road was one of the first ice cream flavors I ever fell in love with as a kid. It felt adventurous, layered, and more exciting than plain chocolate. Years later, I decided to recreate it at home, using real ingredients and a no-churn method that makes it super easy to whip up. One bite of this homemade version, and I was hooked all over again — and so was everyone who tried it.
Recipe Origin or Trivia
Rocky Road has deep roots in American dessert history. It’s believed to have been invented in the late 1920s in California as a way to brighten spirits during the Great Depression. The name itself was a playful nod to the “rocky road” of life, and the combination of chocolate, marshmallows, and nuts offered a bit of joy in every bite. Today, it remains one of the most beloved and nostalgic flavors out there.
Why You’ll Love Rocky Road Ice Cream
This dessert is as fun to eat as it is to make.
Versatile: Serve in cones, bowls, or make into ice cream sandwiches.
Budget-Friendly: Uses basic ingredients you may already have.
Quick and Easy: No ice cream maker needed.
Customizable: Switch up the nuts or chocolate to your liking.
Crowd-Pleasing: A nostalgic favorite that never goes out of style.
Make-Ahead Friendly: Perfect for prepping in advance and pulling out when needed.
Great for Leftovers: Keeps beautifully in the freezer for weeks.
Chef’s Pro Tips for Perfect Results
Get the scoop on making this flavor just right.
- Use full-fat ingredients: For the creamiest texture.
- Whip the cream until stiff peaks form: This helps trap air and create a light base.
- Fold gently: You want to keep the mixture airy for that perfect scoop.
- Chill your mix-ins: Cold marshmallows and nuts help prevent sinking.
- Freeze at least 6 hours: Overnight is even better for a solid set.
Kitchen Tools You’ll Need
You won’t need fancy tools for this frozen masterpiece.
Mixing Bowls: One for whipping, one for folding ingredients together.
Hand Mixer or Stand Mixer: For whipping the cream to stiff peaks.
Rubber Spatula: Helps fold without deflating the mixture.
Loaf Pan or Freezer-Safe Container: For freezing and storing the ice cream.
Spoon or Ice Cream Scoop: For serving that perfect round scoop.
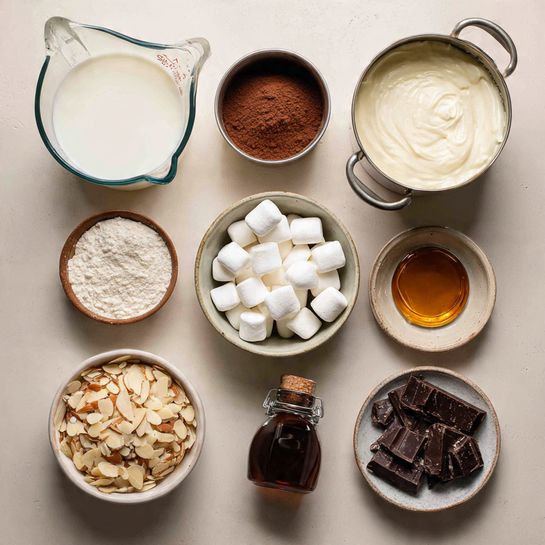
Ingredients in Rocky Road Ice Cream
Each ingredient brings bold flavor and fantastic texture to the party.
- Heavy Whipping Cream: 2 cups – Whipped to create a creamy, fluffy base.
- Sweetened Condensed Milk: 1 can (14 oz) – Sweetens and smooths out the base.
- Unsweetened Cocoa Powder: 1/3 cup – Adds a rich chocolate flavor.
- Vanilla Extract: 1 teaspoon – Rounds out and enhances the chocolate.
- Mini Marshmallows: 1 1/2 cups – Bring that soft, chewy contrast.
- Chopped Toasted Almonds: 3/4 cup – Adds crunch and a nutty flavor.
- Chocolate Chunks or Chips: 3/4 cup – Extra indulgence and texture.
Ingredient Substitutions
Change it up without losing the magic.
Heavy Cream: Use coconut cream for a dairy-free version.
Condensed Milk: Try a sweetened oat or coconut condensed milk for vegan options.
Almonds: Walnuts, pecans, or even hazelnuts work well too.
Chocolate Chunks: Swap with mini chips, shaved chocolate, or even crushed candy bars.
Marshmallows: Use vegan marshmallows if needed.
Ingredient Spotlight
Sweetened Condensed Milk: It keeps the texture ultra-smooth and adds just the right amount of sweetness without needing extra sugar.
Toasted Almonds: Toasting the nuts deepens their flavor and adds irresistible crunch that stands up to the creamy base.
Instructions for Making Rocky Road Ice Cream
You don’t need a machine to churn up something amazing. Here’s how to make it:
- Preheat Your Equipment:
No oven needed, but chill your loaf pan in the freezer while prepping to help the mixture freeze faster. - Combine Ingredients:
In a bowl, whisk cocoa powder into sweetened condensed milk until fully dissolved. Stir in vanilla extract. - Prepare Your Cooking Vessel:
Line or chill a loaf pan or freezer-safe container in advance. - Assemble the Dish:
In a separate bowl, whip heavy cream to stiff peaks using a mixer. Gently fold the whipped cream into the chocolate-condensed milk mixture until no streaks remain. - Cook to Perfection:
Fold in mini marshmallows, toasted almonds, and chocolate chunks. Be gentle to keep it airy. - Finishing Touches:
Pour the mixture into your prepared pan. Smooth the top and sprinkle with a few extra toppings for a fun finish. - Serve and Enjoy:
Freeze for at least 6 hours or until firm. Scoop and serve cold with your favorite toppings or in a cone.
Texture & Flavor Secrets
The texture of this ice cream is its shining star. The base is smooth and creamy, the marshmallows add softness, and the toasted nuts give a crackling crunch. With the mix of rich chocolate and chewy bits, it’s a flavor explosion in every bite.
Cooking Tips & Tricks
Here’s how to make every scoop even better.
- Use chilled bowls and beaters for faster cream whipping.
- Don’t overmix once you fold in the whipped cream — gentle is best.
- Add a swirl of fudge or caramel before freezing for extra indulgence.
- Store with a piece of parchment pressed on top to prevent ice crystals.
What to Avoid
Avoid these common mistakes for the best outcome.
- Using low-fat cream — it won’t whip properly and the texture will suffer.
- Skipping the cocoa powder step — it’s essential for full chocolate flavor.
- Overmixing the base — this deflates the cream and creates icy texture.
Nutrition Facts
Servings: 10
Calories per serving: 380
Note: These are approximate values.
Preparation Time
Prep Time: 20 minutes
Cook Time: 0 minutes
Total Time: 6 hours 20 minutes (including freezing)
Make-Ahead and Storage Tips
This ice cream is ideal for making ahead. After mixing and assembling, cover tightly and freeze for up to 2 weeks. For best texture, let it sit at room temp for 5 minutes before scooping. Use a metal scoop warmed in hot water for clean, easy serving.
How to Serve Rocky Road Ice Cream
Serve it in a classic cone, waffle bowl, or straight from the pan. Top with chocolate syrup, crushed nuts, or even a cherry if you’re feeling retro. It’s also perfect as a filling for ice cream sandwiches or scooped over a warm brownie.
Creative Leftover Transformations
Get creative with any extras.
- Blend into a milkshake with a splash of milk and extra chocolate syrup.
- Use as a layer in an ice cream cake.
- Scoop onto cookies and freeze for easy ice cream sandwiches.
Additional Tips
Here are a few ways to make it even better.
- Add a pinch of sea salt for a flavor boost.
- Try a swirl of peanut butter or Nutella.
- Use fun mix-ins like crushed pretzels or toffee pieces.
Make It a Showstopper
Scoop it into a waffle cone dipped in chocolate and rolled in chopped almonds. Garnish with extra marshmallows and a drizzle of chocolate sauce for a dessert that looks as good as it tastes.
Variations to Try
- Mint Rocky Road: Add peppermint extract and white chocolate chips.
- Tropical Twist: Use coconut flakes and macadamia nuts.
- Peanut Butter Crunch: Swirl in peanut butter and use crushed peanuts.
- Mocha Road: Add espresso powder to the cocoa mixture.
- Salted Caramel: Mix in chopped salted caramel candies.
FAQ’s
Q1: Do I need an ice cream maker?
Nope! This is a no-churn recipe.
Q2: How long does it take to freeze?
At least 6 hours, but overnight is best.
Q3: Can I use store-bought marshmallows?
Absolutely — mini marshmallows work perfectly.
Q4: Can I make it dairy-free?
Yes, use coconut cream and a dairy-free condensed milk alternative.
Q5: Can I toast the nuts myself?
Yes, toast in a dry skillet for a few minutes until fragrant.
Q6: What kind of container should I use?
A metal loaf pan works best, but any freezer-safe container is fine.
Q7: Can I add fudge swirl?
Definitely! Swirl it in just before freezing.
Q8: How do I prevent ice crystals?
Press parchment or plastic wrap directly onto the surface before sealing.
Q9: Can I use whipped topping instead of cream?
You can, but the texture may be softer and less rich.
Q10: Is this kid-friendly?
Very! Kids love the chocolate-marshmallow combo.
Conclusion
Homemade Rocky Road Ice Cream is everything you love in a scoop — rich, creamy, crunchy, and nostalgic. Whether you’re making it for a summer party or just craving something sweet and cool, this no-churn recipe is guaranteed to become a freezer favorite. One scoop, and you’ll understand why it’s a classic.
PrintRocky Road Ice Cream
Creamy, chocolatey, and packed with crunchy almonds, fluffy marshmallows, and chocolate chunks, this homemade Rocky Road Ice Cream is a no-churn treat that brings back all the nostalgic flavors of the classic scoop shop favorite.
Ingredients
- 2 cups heavy whipping cream
- 1 (14 oz) can sweetened condensed milk
- 1/3 cup unsweetened cocoa powder
- 1 teaspoon vanilla extract
- 1 1/2 cups mini marshmallows
- 3/4 cup chopped toasted almonds
- 3/4 cup chocolate chunks or chips
Instructions
- Chill your loaf pan or container in the freezer while preparing the base.
- In a mixing bowl, whisk cocoa powder into sweetened condensed milk until smooth. Stir in vanilla extract.
- In a separate bowl, whip the heavy cream to stiff peaks using a mixer.
- Gently fold the whipped cream into the chocolate mixture until fully combined and fluffy.
- Fold in marshmallows, toasted almonds, and chocolate chunks gently.
- Pour mixture into chilled loaf pan. Smooth the top and sprinkle with extra mix-ins if desired.
- Cover and freeze for at least 6 hours or until firm.
- Let sit at room temperature for 5 minutes before scooping and serving.
Notes
- Use full-fat cream for the best texture.
- Chilling the mix-ins helps prevent sinking.
- Toast almonds before using for deeper flavor.
- Freeze overnight for firmer scoops and cleaner texture.