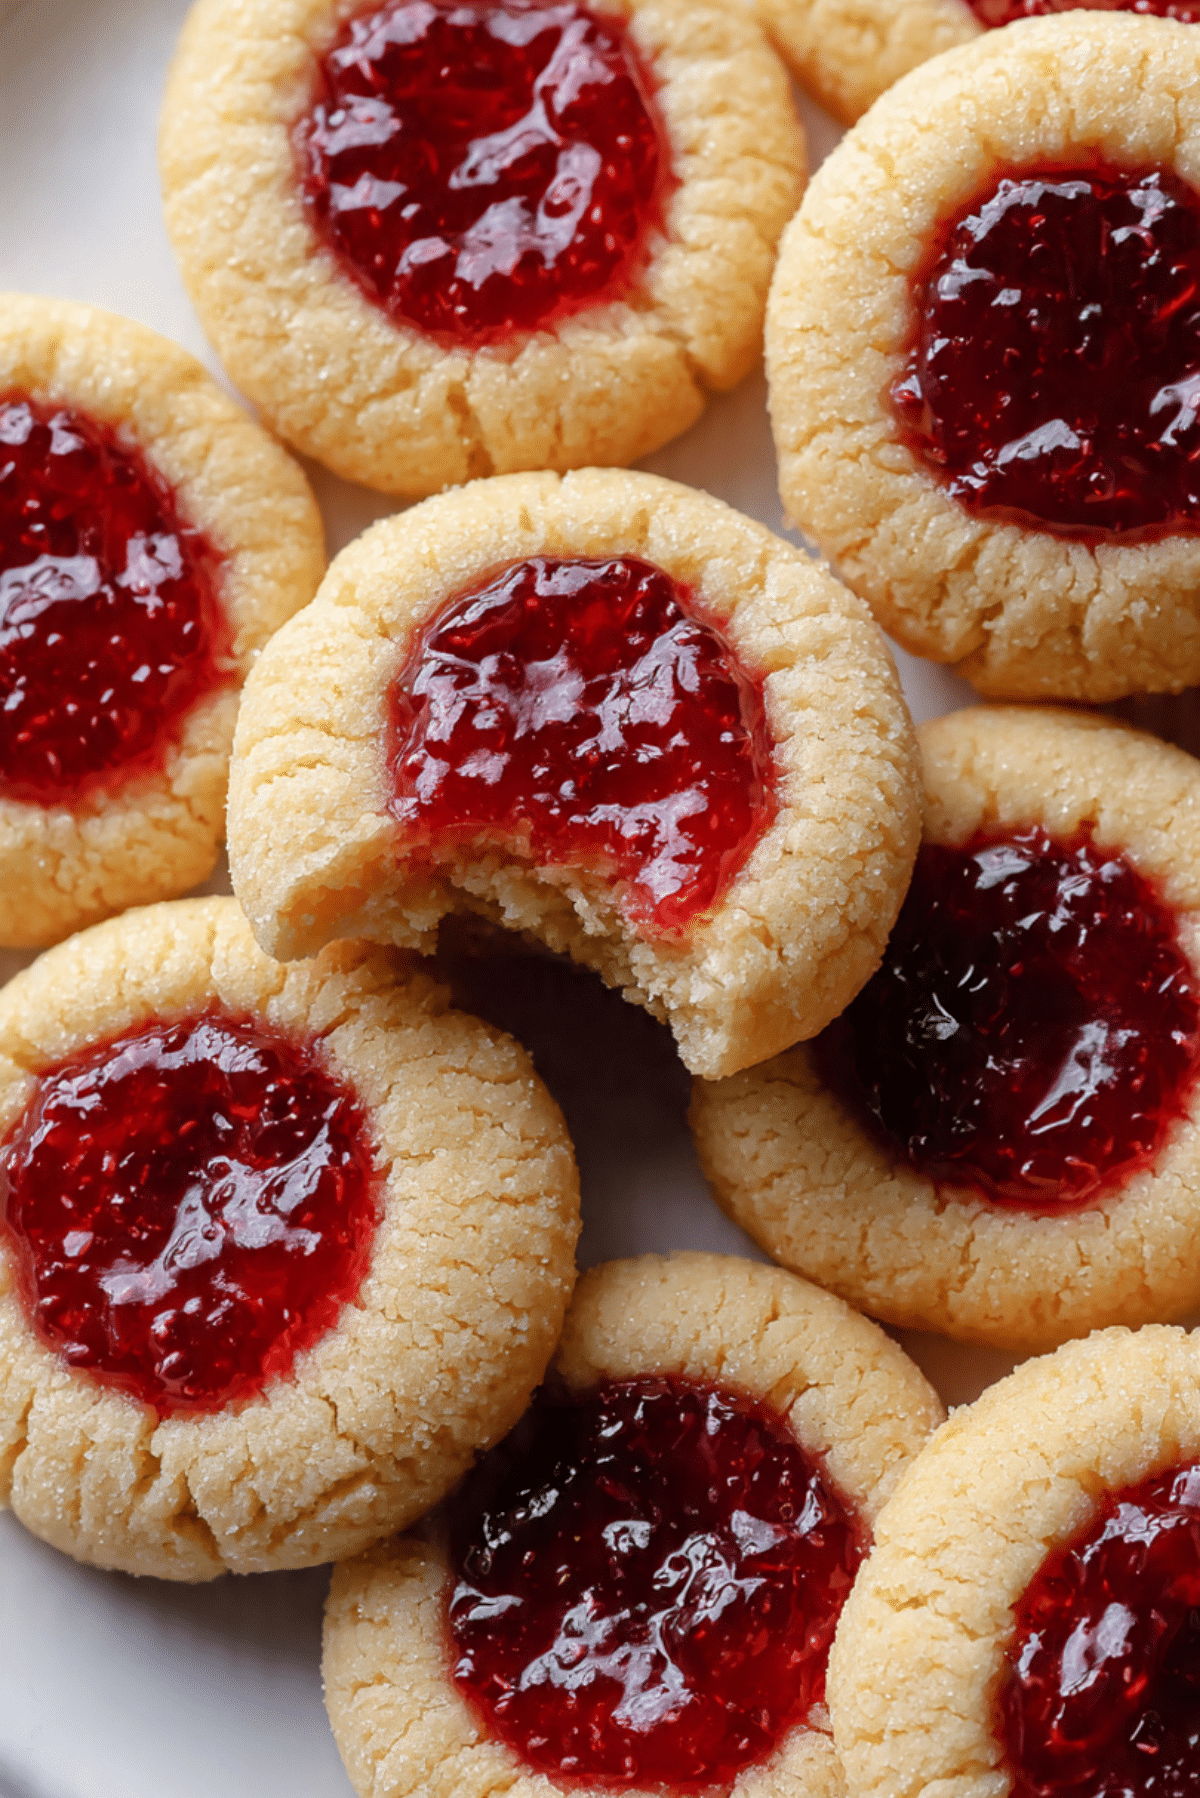
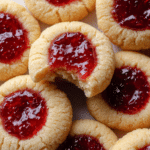
Raspberry Thumbprint Cookies
There’s something wonderfully nostalgic about Raspberry Thumbprint Cookies. With their buttery, melt-in-your-mouth texture and jewel-toned centers of raspberry jam, they’re the kind of treat that brings you back to childhood baking days and cozy holiday kitchens. Whether you’re making them for a party tray or a quiet afternoon with tea, these cookies deliver pure joy in every bite.
Behind the Recipe
The first time I baked these was with my grandmother. I remember the way she gently pressed her thumb into each ball of dough, like it was a tiny act of magic. Then came the raspberry jam — a small spoonful placed perfectly in the center. The aroma of buttery cookies and warm fruit filling the kitchen is one I’ll never forget. These cookies became a tradition, one I still hold dear, and now, they’re even better with just a few modern tweaks.
Recipe Origin or Trivia
Thumbprint cookies, or “Hallongrotta” (Swedish for “raspberry cave”), originated in Sweden and have long been a holiday favorite across Europe and the U.S. Traditionally filled with raspberry jam, they symbolize simplicity and homemade comfort. Over time, bakers around the world have put their own spin on the classic, using different jams or even chocolate, but raspberry remains the most loved and iconic.
Why You’ll Love Raspberry Thumbprint Cookies
These cookies may look dainty, but they’re big on flavor and charm:
Versatile: Great for holidays, tea time, cookie exchanges, or gifting.
Budget-Friendly: Made with simple pantry staples.
Quick and Easy: No chilling or fancy equipment needed.
Customizable: Use your favorite jam or add a drizzle of glaze.
Crowd-Pleasing: Everyone loves the buttery-soft texture and fruity centers.
Make-Ahead Friendly: Store well and freeze beautifully.
Great for Leftovers: Just as tasty the next day — or the next week.
Chef’s Pro Tips for Perfect Results
Here’s how to get the best batch every single time:
- Use room temperature butter: It creams better and creates that perfect soft dough.
- Chill dough briefly if too soft: It makes shaping easier and helps them hold their form.
- Don’t overfill the centers: A small spoonful of jam is enough — it will spread slightly.
- Re-indent after baking if needed: Sometimes the cookies puff and lose their center; gently press again while warm.
- Use seedless raspberry jam: For a smooth, glossy finish and better bite.
Kitchen Tools You’ll Need
Simple tools are all it takes to create these sweet little beauties:
Mixing Bowls: For creaming the butter and combining the dough.
Electric Mixer: Speeds up the creaming process.
Baking Sheet: Lined with parchment paper.
Measuring Spoons: For creating even jam wells.
Spatula: Helps mix and scrape dough with ease.
Wire Rack: For cooling the cookies without sogginess.
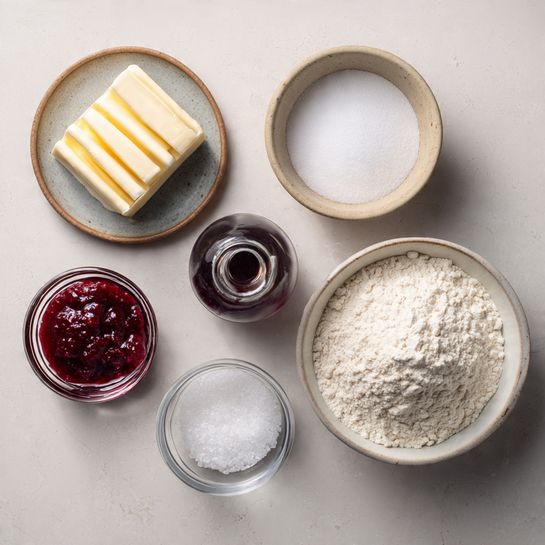
Ingredients in Raspberry Thumbprint Cookies
Classic ingredients come together to create cookies with timeless flavor and texture:
- Unsalted Butter: 1 cup (2 sticks), softened. Gives richness and a tender crumb.
- Granulated Sugar: ½ cup. Adds sweetness and structure.
- Vanilla Extract: 1 teaspoon. Rounds out the flavor with warmth.
- All-Purpose Flour: 2 cups. The base that holds the cookies together.
- Salt: ¼ teaspoon. Enhances all the flavors.
- Raspberry Jam: ½ cup. Adds bright, fruity contrast to the buttery cookie base.
Ingredient Substitutions
Want to make a change? Here are some easy swaps:
Raspberry Jam: Use strawberry, apricot, or even lemon curd.
Butter: Use vegan butter for a dairy-free option.
Vanilla Extract: Try almond extract for a twist.
Flour: Use a 1:1 gluten-free flour blend to make them gluten-free.
Ingredient Spotlight
Raspberry Jam: The sweet and slightly tart star of the show, it adds not just flavor but visual appeal, turning each cookie into a tiny edible jewel.
Butter: High-quality butter is key for that melt-in-your-mouth texture. It gives the cookies their signature richness and soft bite.
Instructions for Making Raspberry Thumbprint Cookies
Let’s walk through these step by step — they’re as easy as they are beautiful:
- Preheat Your Equipment:
Preheat oven to 350°F (175°C) and line a baking sheet with parchment paper. - Combine Ingredients:
In a mixing bowl, cream the softened butter and sugar together until light and fluffy. Mix in the vanilla extract. - Prepare Your Cooking Vessel:
Gradually add the flour and salt to the butter mixture, stirring just until a soft dough forms. - Assemble the Dish:
Roll dough into 1-inch balls and place on the prepared baking sheet. Use your thumb or the back of a spoon to gently press an indentation into the center of each. - Cook to Perfection:
Fill each well with about ½ teaspoon of raspberry jam. Bake for 12–14 minutes, or until the edges are just beginning to turn golden. - Finishing Touches:
Let cookies cool on the sheet for 5 minutes, then transfer to a wire rack to cool completely. - Serve and Enjoy:
Serve as-is or dust with powdered sugar for an extra festive touch.
Texture & Flavor Secrets
These cookies are buttery and tender with just the right amount of crumble. The jam adds a glossy, sweet-tart contrast to the mild richness of the dough. When you take a bite, the jam gives a soft burst, while the cookie melts effortlessly on your tongue — like shortbread with a fruity surprise.
Cooking Tips & Tricks
Little things that make a big difference:
- Don’t overbake — they should be pale with lightly golden bottoms.
- Use a small spoon to drop jam neatly into the centers.
- For extra flavor, stir a pinch of lemon zest into the dough.
What to Avoid
Avoid these pitfalls for perfect results:
- Using cold butter: It won’t cream properly, leading to dense cookies.
- Adding too much jam: It may overflow and make cookies sticky.
- Skipping parchment paper: Helps prevent spreading and sticking.
Nutrition Facts
Servings: 24 cookies
Calories per serving: 120
Note: These are approximate values.
Preparation Time
Prep Time: 15 minutes
Cook Time: 14 minutes
Total Time: 29 minutes
Make-Ahead and Storage Tips
These cookies are ideal for prepping in advance. You can freeze the dough balls (unfilled) and bake from frozen — just add an extra minute or two of baking time. Baked cookies keep well in an airtight container at room temperature for up to 5 days. Freeze for longer storage.
How to Serve Raspberry Thumbprint Cookies
These cookies shine on holiday trays, tea party platters, or as a sweet little bite after dinner. Pair with a hot mug of tea or coffee, or serve alongside other cookies for a festive spread.
Creative Leftover Transformations
Got leftovers? Try this:
- Crumble over yogurt or oatmeal for a fruity crunch.
- Sandwich two together with cream cheese frosting for a sweet mini treat.
- Chop and mix into vanilla ice cream for a raspberry-cookie swirl.
Additional Tips
Want to make them extra fancy? Add a tiny dollop of lemon curd over the jam after baking, or drizzle with white chocolate. A sprinkle of coconut or slivered almonds before baking also adds texture and visual flair.
Make It a Showstopper
Display these on a white platter or cake stand with fresh raspberries scattered around. Dust with powdered sugar or edible glitter for a magical, snowy finish.
Variations to Try
- Almond Joy: Use almond extract and top with coconut flakes.
- Chocolate Raspberry: Stir in mini chocolate chips to the dough.
- Nutty Thumbprints: Roll dough balls in crushed pecans before baking.
- Lemon Twist: Add lemon zest to the dough and use lemon jam.
- Apricot Delight: Swap raspberry jam for apricot and add a pinch of cardamom.
FAQ’s
Q1: Can I use store-bought jam?
Absolutely! Just make sure it’s not too runny.
Q2: Do I need to chill the dough?
Not always, but if it feels too soft, a quick 15-minute chill helps.
Q3: Can I freeze these cookies?
Yes, both unbaked dough balls and baked cookies freeze well.
Q4: What if the cookies lose their thumbprint shape?
Gently re-press the center right after baking.
Q5: Can I use whole wheat flour?
You can, but the texture will be slightly denser.
Q6: Are these cookies overly sweet?
Nope — the buttery dough balances the sweet-tart jam perfectly.
Q7: Can I add glaze?
Yes! A simple powdered sugar and milk glaze works great.
Q8: Can I make them gluten-free?
Use a 1:1 gluten-free baking flour blend.
Q9: What size should the dough balls be?
About 1 inch or roughly 1 tablespoon of dough each.
Q10: Can I use other jam flavors?
Definitely — strawberry, cherry, or fig are all delicious options.
Conclusion
Raspberry Thumbprint Cookies are the perfect blend of simplicity, beauty, and nostalgic flavor. They look delicate, taste rich, and bring a smile with every soft, jammy bite. Whether for a holiday tray or an everyday treat, these cookies are a timeless classic that never goes out of style. Trust me — they’ll be gone before you know it.
PrintRaspberry Thumbprint Cookies
These Raspberry Thumbprint Cookies are soft, buttery, and filled with sweet-tart raspberry jam. A simple, elegant cookie perfect for holidays, tea time, or everyday treats.
Ingredients
- 1 cup unsalted butter, softened
- 1/2 cup granulated sugar
- 1 teaspoon vanilla extract
- 2 cups all-purpose flour
- 1/4 teaspoon salt
- 1/2 cup raspberry jam (seedless preferred)
Instructions
- Preheat oven to 350°F (175°C) and line a baking sheet with parchment paper.
- In a bowl, cream together butter and sugar until light and fluffy. Mix in vanilla extract.
- Gradually add flour and salt, mixing until a soft dough forms.
- Roll dough into 1-inch balls and place on baking sheet. Press a thumbprint or use the back of a spoon to create a well in each cookie.
- Fill each indentation with about 1/2 teaspoon of raspberry jam.
- Bake for 12–14 minutes until edges are lightly golden. Cool on sheet for 5 minutes, then transfer to a wire rack.
Notes
- Use seedless jam for a smoother texture and easier filling.
- Don’t overfill cookies — the jam will spread as it bakes.
- Dust with powdered sugar after cooling for a festive touch.