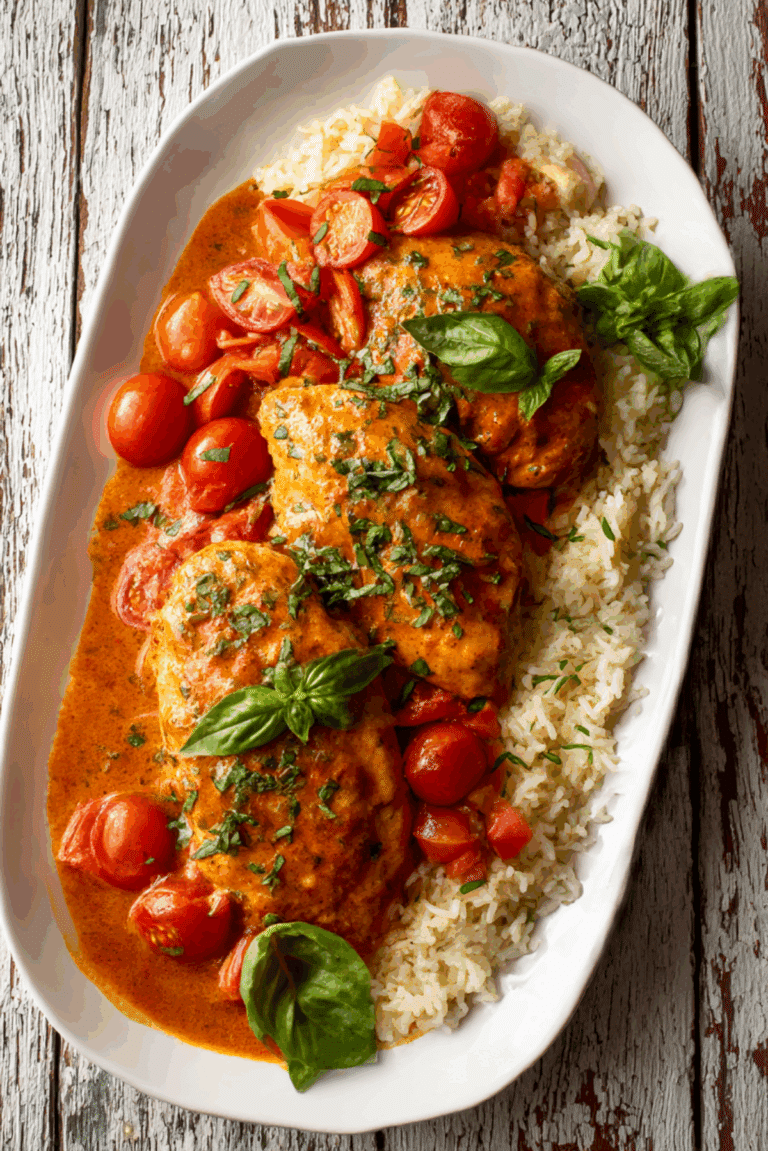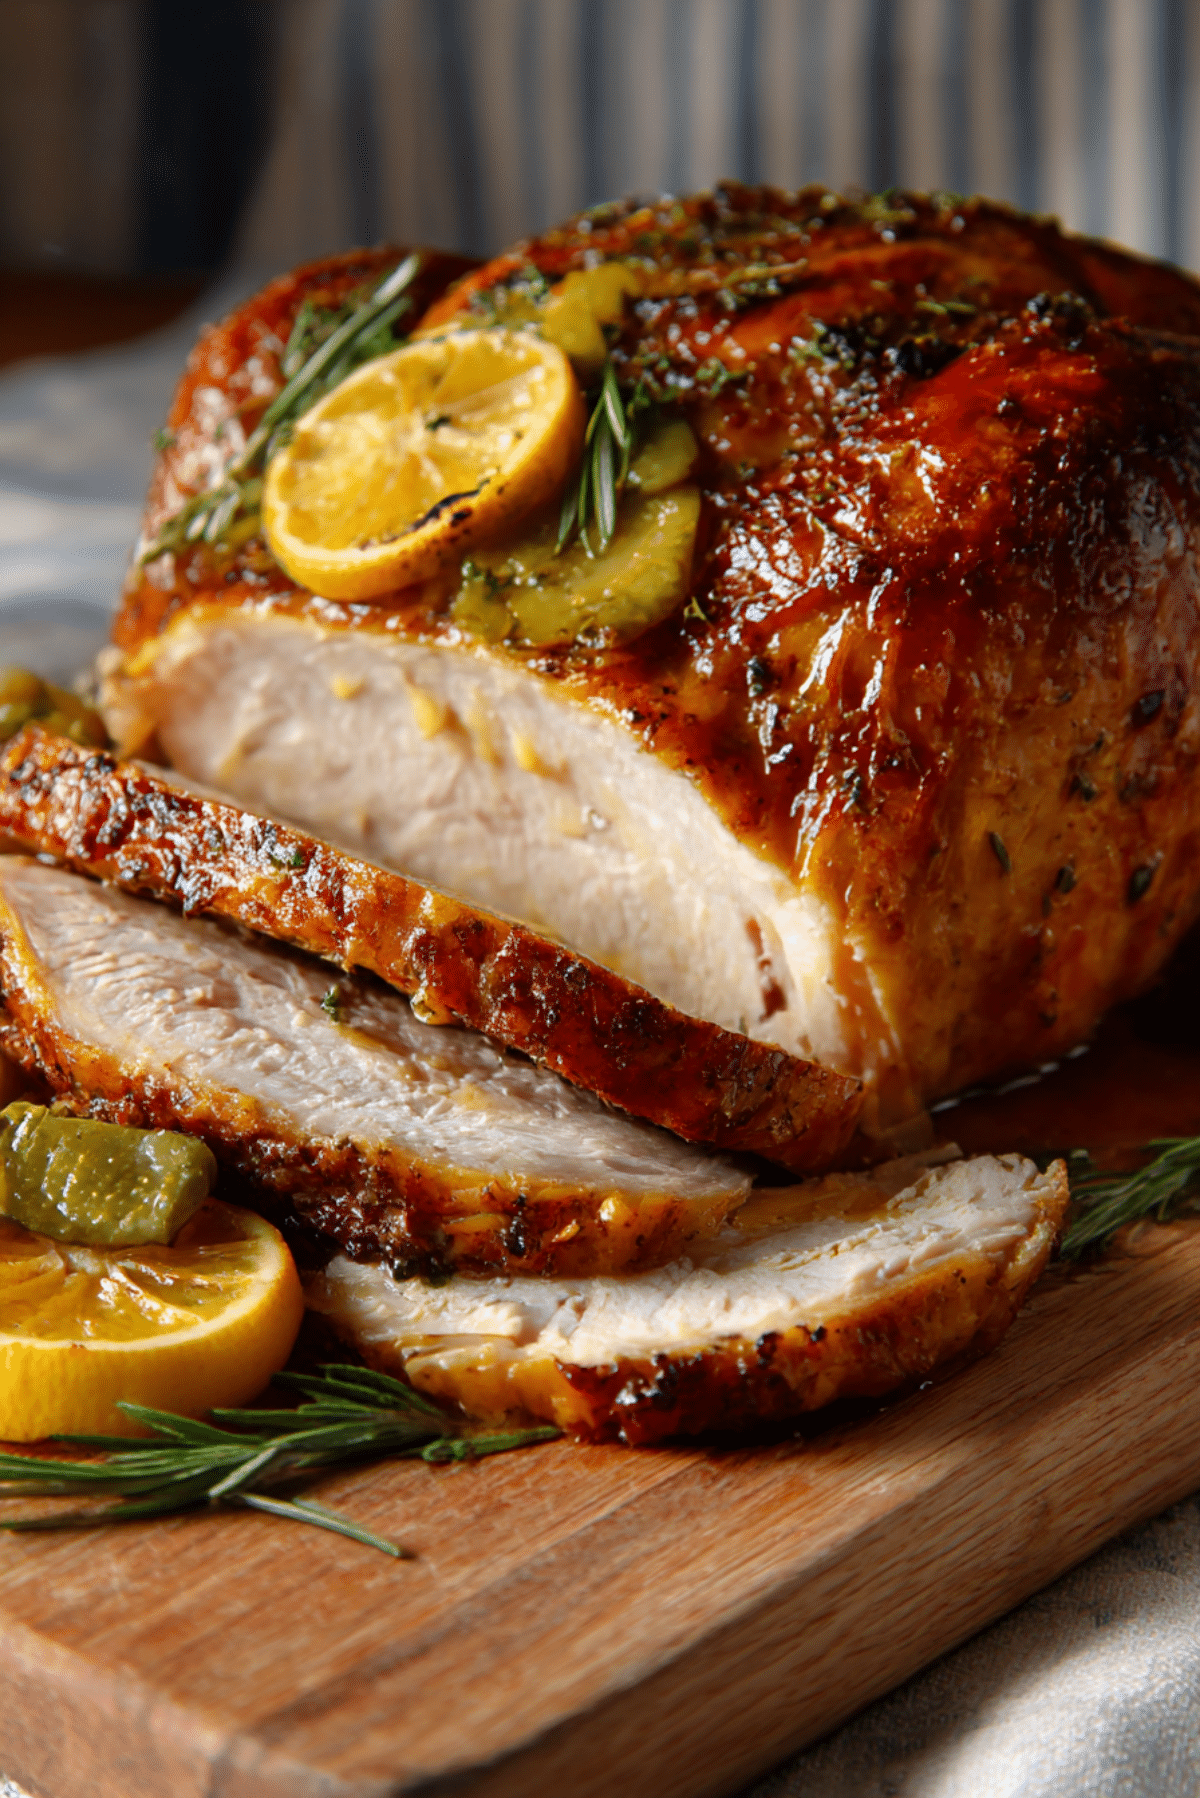
Pickle‑Brine Turkey
Think of juicy turkey with a subtle tang, savory depth, and a crisp skin that says “eat me now.” That’s what a pickle-brine can bring to your bird. Using pickle juice as part of the wet brine gives a twist—salt, acid, spices—all wrapped into one. The brine helps the turkey hold moisture, while the pickle flavors impart a delicate brightness, especially in the dark meat or where the skin is thinner.
Behind the Recipe
The idea of using pickle brine came from folks wanting to avoid wasting leftover pickle juice and wondering if that tangy elixir could rescue a dry turkey. It turns out it can — people have brined turkeys with pickle juice and reported beautifully moist results. What really sold me was when I tried a small breast with pickle brine: the flavor was subtle, but the texture was beyond what a plain salt brine often gives.
Why You’ll Love This Version
Versatile: Works with whole birds or just breasts or thighs.
Budget-Friendly: Uses leftover pickle juice and pantry staples.
Quick and Easy: The brine is fast to make and does all the work for you.
Customizable: Add herbs, aromatics, or sweet-spicy brine versions.
Crowd-Pleasing: The texture and flavor surprise everyone in the best way.
Make-Ahead Friendly: Brine in advance and roast when ready.
Great for Leftovers: Sandwiches, soups, and salads will all pop with extra flavor.
Chef’s Pro Tips for Perfect Results
Balance your brine: Too much pickle juice can make it overtly sour. Dilute with water and taste first.
Brine time matters: 12–24 hours is typical. Don’t over-brine, or the texture gets mushy.
Rinse and dry: After brining, rinse off the exterior, pat completely dry for crisp skin.
Under-salt lightly: Because the brine already infuses salt, go easier on added salt.
Use aromatics: Stuff the cavity or float in the brine onions, garlic, herbs to layer flavor.
Let it rest: After roasting, give 15–20 minutes rest so juices redistribute.
Kitchen Tools You’ll Need
Brining vessel or food-safe bag: Large enough to hold the turkey submerged.
Measuring cups and spoons: For precise ratios.
Roasting pan with rack: To lift turkey and circulate heat.
Meat thermometer: For accurate internal temperature.
Tongs and carving knife: For handling and slicing.
Ingredients for Pickle‑Brine Turkey
Pickle Juice: 4 cups (dill or garlic variety preferred)
Water: 6–8 cups (or enough to fully submerge turkey)
Kosher Salt: 1 cup (adjust based on how salty your pickle juice is)
Sugar: 1/3 cup (light brown or granulated)
Whole Peppercorns: 1 tablespoon
Pickling Spices or Fresh Herbs: 2 tablespoons (thyme, dill, bay leaf)
Aromatics: 1 onion (quartered), 4 garlic cloves (crushed), 1 lemon (halved)
Whole Turkey: 12–15 lbs, thawed, giblets removed
Butter or Oil: For coating before roasting
Optional Spices: Smoked paprika, cracked black pepper, dried herbs
Ingredient Substitutions
Pickle Juice: Use homemade brine or sauerkraut juice.
Sugar: Use honey or omit for a less sweet brine.
Turkey: Swap in turkey breast or legs for smaller portions.
Butter: Use olive oil or ghee.
Ingredient Spotlight
Pickle Juice: Packed with vinegar, salt, and spices — it penetrates the meat and helps break down muscle fibers for a juicy interior and flavor boost.
Aromatics: Onion, garlic, lemon, and herbs add subtle background notes that round out the brine’s sharpness.
Instructions for Making Pickle‑Brine Turkey
- Preheat Your Equipment:
No heat needed yet — just prepare your roasting pan and preheat oven to 350°F when ready to cook. - Combine Ingredients:
In a large container or bag, mix pickle juice, water, salt, sugar, peppercorns, herbs, and aromatics. - Prepare Your Cooking Vessel:
Add the turkey, breast-side down if possible, to fully submerge in brine. Refrigerate or keep cold for 12–24 hours. - Assemble the Dish:
Remove turkey from brine, rinse lightly, and pat very dry. Tuck wings, tie legs if desired. Rub skin with butter or oil and season lightly. - Cook to Perfection:
Roast at 325–350°F until thickest part of thigh reads 165°F. Baste occasionally with drippings or melted butter. - Finishing Touches:
Let rest 15–20 minutes before carving to allow juices to redistribute. - Serve and Enjoy:
Slice and arrange on a platter. Garnish with herbs, citrus slices, or pickles for fun.
Texture & Flavor Secrets
Thanks to the brine’s acid and salt, the meat stays juicy and tender while developing a complex flavor — not overtly pickle-y, but layered with brightness and depth. The skin crisps beautifully when the turkey is dried well before roasting, and a simple butter rub gives that glossy finish.
Cooking Tips & Tricks
- Use cold brine and refrigerate the bird during soaking.
- Taste your brine before committing — dilute or adjust saltiness if needed.
- Rotate turkey in brine if it floats and doesn’t fully submerge.
- Roast breast-side down for the first hour for moister white meat, then flip.
What to Avoid
- Brining too long: Past 24 hours can create mushy texture.
- Skipping the dry-off: Moisture on skin prevents crisping.
- Adding too much extra salt: The brine already seasons the bird well.
- High oven temps: Can dry the meat or burn the skin.
Nutrition Facts
Servings: 10–12
Calories per serving: ~360
Note: These are approximate and depend on exact ingredients and portions.
Preparation Time
Prep Time: 20 minutes
Brine Time: 12–24 hours
Cook Time: 3–4 hours
Total Time: Up to 1 day (mostly passive)
Make-Ahead and Storage Tips
You can brine the turkey up to a day in advance, then rinse and refrigerate uncovered for a few hours to help dry the skin. Leftovers keep well refrigerated for 3–4 days. Sliced meat can be frozen for up to 2 months.
How to Serve Pickle‑Brine Turkey
Serve warm with gravy, roasted veggies, mashed potatoes, or slaw. A side of pickles or mustard-based sauces enhances the theme. For texture contrast, include crispy roasted potatoes or crunchy green salad.
Creative Leftover Transformations
- Shred into sandwiches with slaw or pickled onions.
- Use in turkey salad with dill and mayo.
- Add to turkey chili or tortilla soup for a tangy twist.
- Toss into fried rice or pasta for next-day flavor bomb.
Additional Tips
- Save some pickle juice to whisk into the pan drippings or glaze the turkey at the end.
- Infuse compound butter with dill or garlic to slide under the turkey skin.
- Use a probe thermometer for best roasting accuracy.
Make It a Showstopper
Present the turkey on a board or platter with sprigs of fresh herbs, lemon slices, and a few mini pickles scattered around. Glaze with butter and pan drippings before serving for shine. Carve tableside for drama.
Variations to Try
- Spicy Pickle Brine: Use brine from spicy pickles or add chili flakes.
- Herb Brine: Add rosemary, thyme, sage to brine for a Thanksgiving twist.
- Maple-Pickle Fusion: Add maple syrup or brown sugar for sweet-and-sour depth.
- Smoked Turkey: Smoke the bird after brining for next-level flavor.
- Buttermilk Finish: Brine in pickle juice, then soak in buttermilk overnight for ultra tenderness.
FAQ’s
Q1: Will my turkey taste like pickles?
Not overwhelmingly. It will have a subtle tang and savoriness, especially in the darker meat or skin-on areas.
Q2: Can I reuse leftover pickle juice?
Yes, if it’s clean and from the fridge. Do not reuse brine once raw turkey has been added.
Q3: Is this safe for dry brining?
This is a wet brine method — dry brine needs salt only, no liquid.
Q4: Can I use flavored or sweet pickles?
You can, but expect more sweetness or unexpected spice. Dill or garlic varieties are best.
Q5: Should I brine a pre-brined turkey?
No — skip this for turkeys labeled “self-basting” or “pre-brined.”
Q6: Can I use turkey parts instead of whole?
Yes — thighs, breasts, or drumsticks all work. Adjust brine time accordingly (6–12 hours).
Q7: What happens if I brine too long?
Texture may turn mushy or too salty. Stick to 12–24 hours max.
Q8: Can I make this recipe gluten-free?
Yes — just ensure the pickle juice and all added ingredients are gluten-free.
Q9: Do I need to baste?
Optional — the brine keeps it moist, but basting with butter adds flavor and color.
Q10: How do I get crispy skin?
Dry the turkey well before roasting, rub with fat, and roast uncovered.
Conclusion
If you’re looking to breathe new life into a classic roast, Pickle-Brine Turkey is the twist that transforms. It’s unexpected, but it works — balancing deep savoriness with a touch of tang, juicy meat with golden-crisp skin. Whether you’re hosting Thanksgiving or Sunday supper, this bird won’t just feed your crowd — it’ll surprise and delight them too. Plus, it’s a brilliant way to use what’s already in your fridge. So go ahead — save that pickle juice and brine like a pro.
Because in the end, it’s not just about cooking the perfect turkey. It’s about creating moments around the table that people will talk about long after the plates are cleared.
PrintPickle‑Brine Turkey
Juicy, savory, and with a subtle tang, this Pickle-Brine Turkey is a game-changer for your holiday table or weekend feast. The pickle juice brine ensures tender meat and flavorful bites, while the crispy skin finishes it off beautifully.
- Prep Time: 20 minutes
- Cook Time: 3–4 hours
- Total Time: Up to 1 day
- Yield: 10–12 servings
- Category: Main Course
- Method: Roasting
- Cuisine: American
- Diet: Gluten Free
Ingredients
- Pickle Juice: 4 cups (dill or garlic variety preferred)
- Water: 6–8 cups (to fully submerge turkey)
- Kosher Salt: 1 cup
- Sugar: 1/3 cup (light brown or granulated)
- Whole Peppercorns: 1 tablespoon
- Pickling Spices or Fresh Herbs: 2 tablespoons (thyme, dill, bay leaf)
- Aromatics: 1 onion (quartered), 4 garlic cloves (crushed), 1 lemon (halved)
- Whole Turkey: 12–15 lbs, thawed, giblets removed
- Butter or Oil: For rubbing the skin
- Optional Spices: Paprika, cracked pepper, dried herbs
Instructions
- Preheat Your Equipment: No heat needed yet — prepare brining container.
- Combine Ingredients: In a large vessel, mix pickle juice, water, salt, sugar, peppercorns, herbs, and aromatics.
- Prepare Your Cooking Vessel: Submerge turkey completely and refrigerate for 12–24 hours.
- Assemble the Dish: Remove from brine, rinse, pat very dry. Rub skin with butter/oil and season lightly.
- Cook to Perfection: Roast at 325–350°F until internal temp reaches 165°F in the thigh (about 13 min per lb).
- Finishing Touches: Rest turkey 15–20 minutes after roasting before carving.
- Serve and Enjoy: Slice and serve with your favorite sides. Garnish with herbs or pickles for fun.
Notes
- Don’t over-brine — 12–24 hours is perfect for a whole bird.
- Dry the turkey well before roasting for crispy skin.
- Reserve some pickle juice for a basting glaze or gravy twist.
- Adjust salt if your pickle juice is already quite salty.
Nutrition
- Serving Size: 6 oz cooked meat
- Calories: 360
- Sugar: 1g
- Sodium: 480mg
- Fat: 20g
- Saturated Fat: 7g
- Unsaturated Fat: 12g
- Trans Fat: 0g
- Carbohydrates: 2g
- Fiber: 0g
- Protein: 38g
- Cholesterol: 120mg