Oreo Pie
This No-Bake Oreo Pie is the kind of dessert that makes you feel like a kid again — creamy, chocolatey, and so simple, it almost feels like a magic trick. With just a handful of ingredients, you can whip up a rich, decadent treat that tastes like it came straight from your favorite dessert shop. Each bite delivers that perfect crunch from the Oreo crust and a smooth, dreamy filling, all coated in silky chocolate. No oven, no fuss, just pure indulgence in every bite.
Behind the Recipe
I made these Oreo pies on a whim one afternoon when I didn’t feel like turning on the oven. What started as a quick kitchen experiment quickly became a go-to dessert whenever I needed something fun and foolproof. They come together fast, store well, and disappear even faster. Kids love them, adults sneak extras, and I find myself making double batches more often than not. It’s a guaranteed win, every time.
Recipe Origin or Trivia
Oreo-based desserts have been around for decades, and for good reason — that crunchy cookie and cream combo is endlessly adaptable. From cheesecakes to milkshakes, Oreos have found their way into countless sweet creations. The no-bake Oreo pie takes that love to a new level, combining a cookie crust, creamy center, and a chocolate shell for a handheld dessert that’s as satisfying as it is nostalgic.
Why You’ll Love Oreo Pie
This dessert checks every box — easy, tasty, and downright addictive.
Versatile: Make them large or mini, shape them into bars or domes, or even freeze them for ice cream-style pies.
Budget-Friendly: Just a few common pantry ingredients create a treat that looks gourmet.
Quick and Easy: No baking, no fancy steps — just mix, chill, dip, and enjoy.
Customizable: Add peanut butter, use flavored Oreos, or top with sprinkles.
Crowd-Pleasing: These pies are a party favorite and make perfect gifts too.
Make-Ahead Friendly: Store them in the fridge or freezer for whenever the craving hits.
Great for Leftovers: Leftover crushed Oreos? Use them for toppings or other no-bake treats.
Chef’s Pro Tips for Perfect Results
Here’s how to make sure your Oreo pies come out perfect every time:
- Use a food processor for a fine Oreo crumb that holds together well.
- Soften the cream cheese fully before mixing to avoid lumps.
- Chill the pies well before dipping in chocolate to help them keep their shape.
- Melt chocolate slowly to keep it smooth and glossy.
- Tap off excess chocolate after dipping for a clean, even finish.
Kitchen Tools You’ll Need
Nothing fancy needed — just the basics.
Food Processor or Rolling Pin: To crush the Oreos finely.
Mixing Bowl: For combining the creamy filling.
Cookie Scoop or Spoon: To portion the pies evenly.
Freezer or Fridge: For chilling the pies before coating.
Microwave-Safe Bowl: To melt the chocolate coating.
Fork or Dipping Tool: To dip and coat each pie neatly.
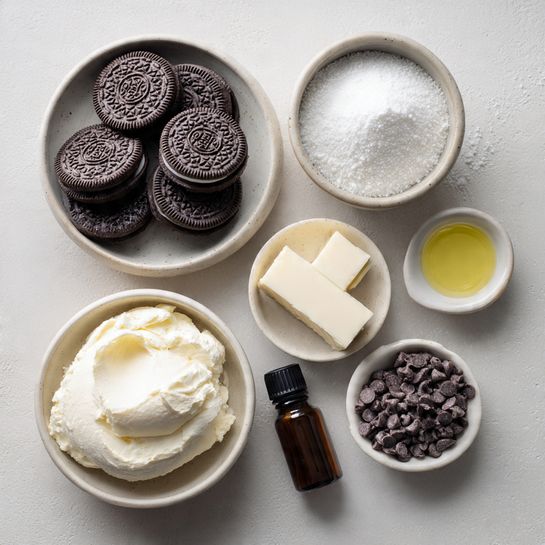
Ingredients in Oreo Pie
This simple lineup of ingredients turns into something unbelievably delicious.
- Oreo Cookies: 24 — for both the crust and that signature chocolatey crunch.
- Cream Cheese: 8 ounces, softened — creamy, tangy, and binds the filling.
- Powdered Sugar: 1/3 cup — adds sweetness and a smooth texture.
- Vanilla Extract: 1 teaspoon — brings out the flavor in the cream.
- Chocolate Chips or Melting Wafers: 1 1/2 cups — for the silky outer coating.
- Coconut Oil (Optional): 1 tablespoon — helps thin the chocolate for dipping.
Ingredient Substitutions
Don’t worry if you’re missing something:
Cream Cheese: Try mascarpone or a thick Greek yogurt for a twist.
Chocolate Chips: Use white chocolate, milk, or dark — whatever you love.
Coconut Oil: Any neutral oil works, or skip if your chocolate melts smoothly.
Vanilla Extract: Almond or hazelnut extract for a fun change.
Ingredient Spotlight
Oreo Cookies: These iconic cookies bring crunch and cocoa flavor, forming both the base and texture of the pies.
Cream Cheese: Smooth and rich, it adds structure and tang that balances the sweetness of the Oreos and chocolate.
Instructions for Making Oreo Pie
You’ll be amazed at how easily these come together. Here’s the full step-by-step:
- Preheat Your Equipment:
No oven needed, but clear space in your fridge or freezer for chilling the pies. - Combine Ingredients:
Crush the Oreos into fine crumbs using a food processor. Set aside 1/4 cup for topping or rolling. Mix remaining crumbs with softened cream cheese, powdered sugar, and vanilla until smooth. - Prepare Your Cooking Vessel:
Line a baking tray with parchment paper. Scoop the mixture into evenly sized rounds or press into silicone molds. - Assemble the Dish:
Shape into disks or domes and place on the tray. Chill in the freezer for at least 30 minutes until firm. - Cook to Perfection:
Melt chocolate chips with coconut oil (if using) in the microwave in 30-second intervals. Stir until smooth. - Finishing Touches:
Dip each chilled Oreo pie into the melted chocolate, covering completely. Let excess drip off and return to tray. - Serve and Enjoy:
Chill until chocolate is set. Serve cold or at room temperature for a creamy center and crisp shell.
Texture & Flavor Secrets
These Oreo pies are all about contrast — the smooth, creamy filling against the snap of the chocolate shell, with that deep chocolate flavor from the Oreo base. Sweet, rich, and a little salty from the cream cheese, each bite is pure bliss.
Cooking Tips & Tricks
For the best results, keep these in mind:
- Chill longer for cleaner dipping and less mess.
- Add a pinch of salt to enhance the chocolate flavor.
- Use a fork under the pies when dipping to minimize fingerprints.
What to Avoid
Avoid these common mistakes:
- Skipping the chill time — warm pies fall apart in chocolate.
- Overheating the chocolate — it can seize and become grainy.
- Using double-stuffed Oreos — they throw off the crumb-to-filling ratio.
Nutrition Facts
Servings: 8
Calories per serving: 280
Note: These are approximate values.
Preparation Time
Prep Time: 20 minutes
Cook Time: 0 minutes
Total Time: 20 minutes + chilling time
Make-Ahead and Storage Tips
These pies are perfect for prepping ahead. Once coated in chocolate, store in an airtight container in the fridge for up to 5 days or freeze for up to a month. Just let frozen pies thaw slightly before enjoying for the best texture.
How to Serve Oreo Pie
Serve them on a platter for parties, pack them in lunchboxes, or wrap in parchment and twine for the cutest edible gift. Pair with milk or coffee for the ultimate treat.
Creative Leftover Transformations
If you have extra filling or crushed cookies:
- Roll into truffle balls and dip in chocolate.
- Layer in parfait cups with whipped cream and fruit.
- Use as filling between cookies for sandwich treats.
Additional Tips
- For neater edges, trim chilled pies with a round cookie cutter before dipping.
- Want extra crunch? Roll dipped pies in crushed Oreos or chopped nuts before the chocolate sets.
- Use silicone molds for perfect, uniform shapes.
Make It a Showstopper
Drizzle melted white chocolate over the set coating or add edible glitter or sprinkles before the chocolate sets. Stack on a cake stand or serve on marble for a luxe dessert table look.
Variations to Try
- Peanut Butter Oreo Pies: Add 1–2 tablespoons of peanut butter to the filling.
- Mint Oreo Pies: Use mint-flavored Oreos and add a drop of mint extract.
- Strawberry Oreo Pies: Add freeze-dried strawberry powder to the filling for a fruity twist.
- White Chocolate Coated: Use white melting chocolate for a lighter shell.
- Mini Oreo Truffles: Make bite-sized versions with a toothpick for dipping.
FAQ’s
Q1: Can I use double-stuffed Oreos?
It’s best to use regular — the extra cream makes the mixture too soft.
Q2: Can I freeze Oreo pies?
Absolutely. They freeze beautifully for up to a month.
Q3: Do I need a food processor?
No, a ziplock bag and rolling pin work too.
Q4: Can I skip the chocolate coating?
Yes, but the shell gives them a nice finish and texture.
Q5: How do I keep the chocolate smooth?
Melt slowly and stir often — don’t overheat it.
Q6: What if I don’t like cream cheese?
Try mascarpone or use less for a milder flavor.
Q7: Can I make these dairy-free?
Yes, use dairy-free cream cheese and chocolate.
Q8: How long do they last?
Up to 5 days in the fridge or 1 month frozen.
Q9: Can I dip them in white chocolate instead?
Definitely! It’s delicious and looks great too.
Q10: Are these gluten-free?
Only if you use gluten-free Oreos and certified gluten-free chocolate.
Conclusion
These no-bake Oreo pies are the ultimate sweet shortcut. Whether you’re making them for a party, gifting them, or just sneaking one from the fridge after dinner, they’re guaranteed to deliver joy in every bite. With a creamy filling, crispy chocolate shell, and that unmistakable Oreo magic, they’re a dessert you’ll come back to again and again.
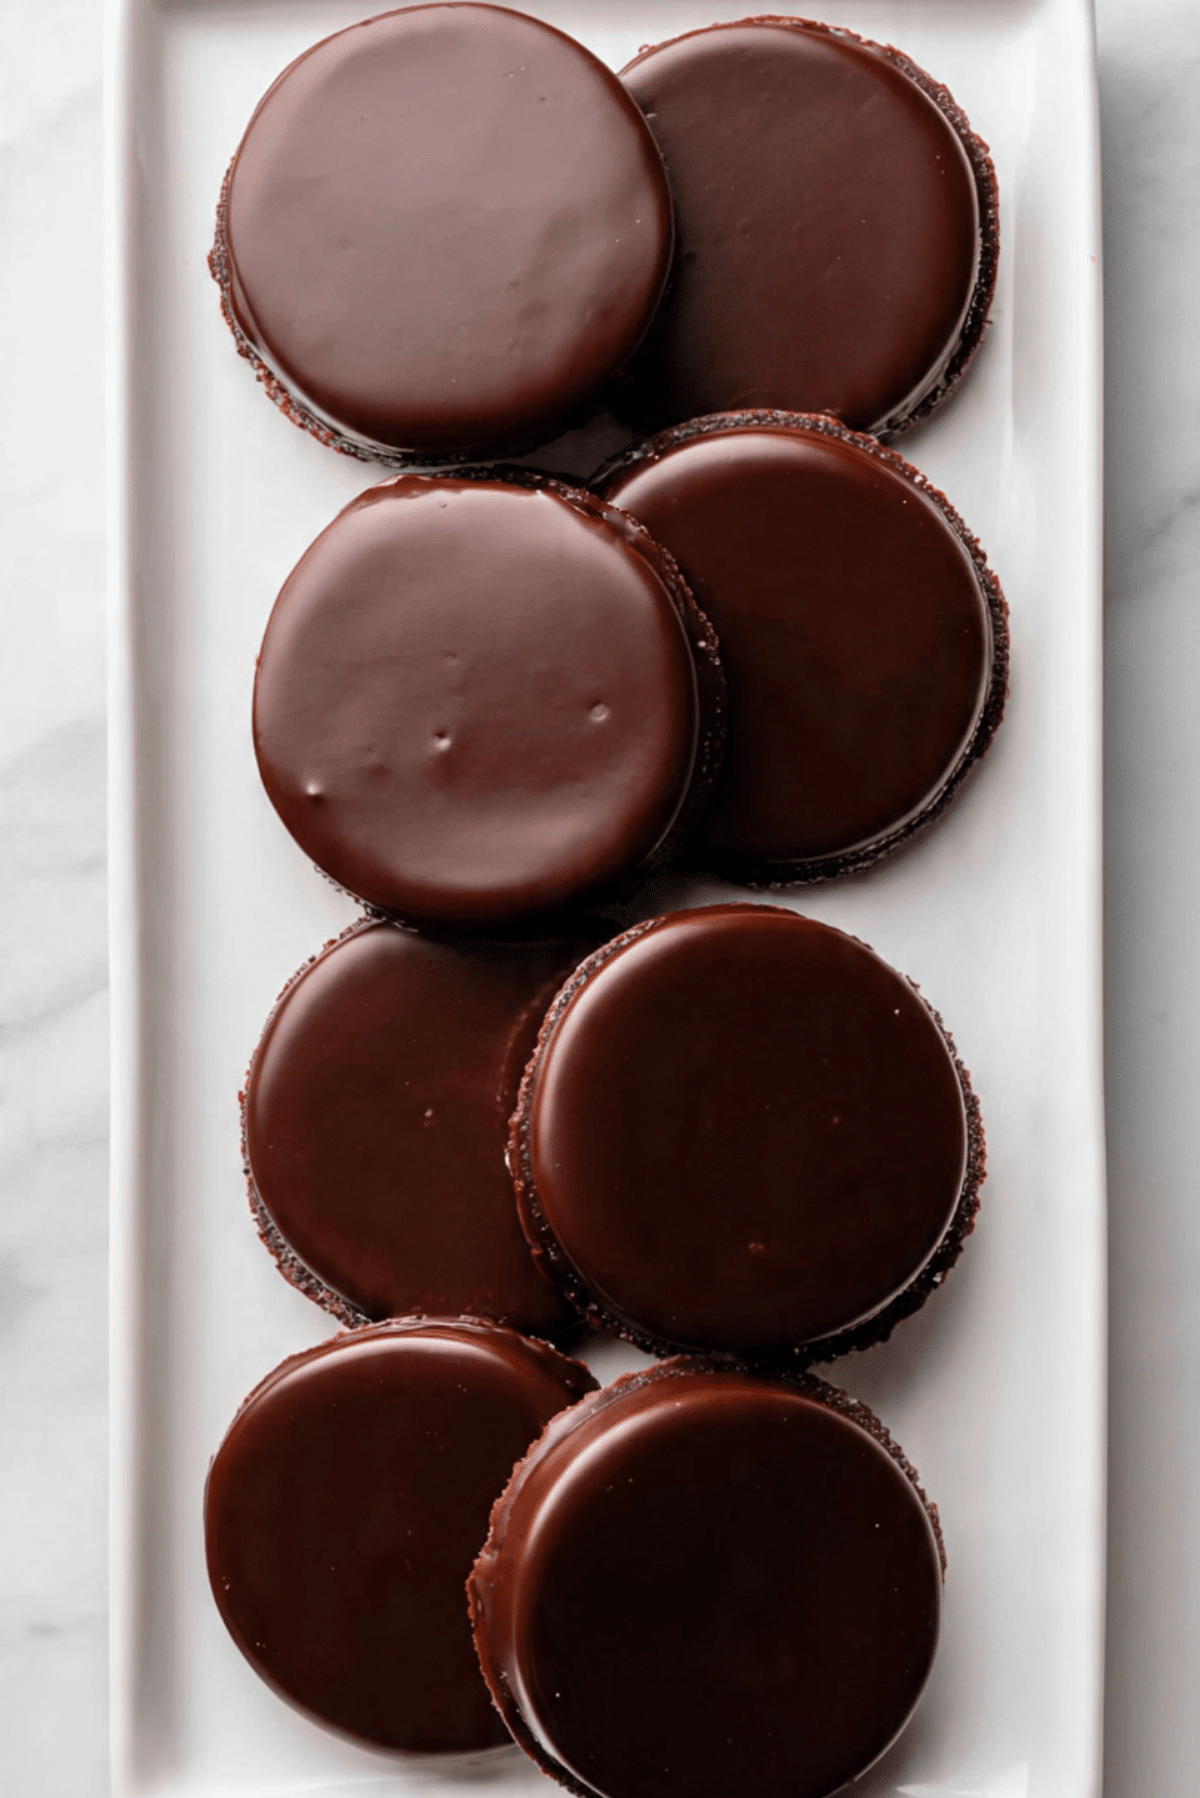
PrintOreo Pie
These No-Bake Oreo Pies are creamy, chocolatey, and coated in a glossy chocolate shell. Made with crushed Oreos and cream cheese, they’re the perfect quick treat for parties, gifts, or anytime cravings.
- Prep Time: 20 minutes
- Cook Time: 0 minutes
- Total Time: 20 minutes + chilling time
- Yield: 8 pies
- Category: Dessert
- Method: No-Bake
- Cuisine: American
- Diet: Vegetarian
Ingredients
- 24 Oreo cookies
- 8 ounces cream cheese, softened
- 1/3 cup powdered sugar
- 1 teaspoon vanilla extract
- 1 1/2 cups chocolate chips or melting wafers
- 1 tablespoon coconut oil (optional)
Instructions
- Crush Oreo cookies into fine crumbs using a food processor or ziplock bag and rolling pin. Set aside 1/4 cup for garnish.
- In a bowl, mix the remaining crumbs with softened cream cheese, powdered sugar, and vanilla until smooth.
- Shape the mixture into small round pies or disks. Place on a parchment-lined tray and chill in the freezer for 30 minutes.
- Melt chocolate chips with coconut oil (if using) in a microwave-safe bowl in 30-second intervals, stirring until smooth.
- Dip each chilled Oreo pie into the melted chocolate, coating completely. Tap off excess and place back on the tray.
- Chill again until the chocolate is fully set. Serve cold or at room temperature.
Notes
- Use regular Oreos for best texture — double-stuffed may be too soft.
- Chill the pies well before dipping to keep their shape intact.
- Customize with flavored Oreos, peanut butter, or white chocolate coating.
- Store in an airtight container in the fridge for up to 5 days or freeze up to a month.
Nutrition
- Serving Size: 1 pie
- Calories: 280
- Sugar: 20g
- Sodium: 140mg
- Fat: 18g
- Saturated Fat: 10g
- Unsaturated Fat: 6g
- Trans Fat: 0g
- Carbohydrates: 26g
- Fiber: 1g
- Protein: 3g
- Cholesterol: 15mg