Nonnie’s 6 Ingredient Chocolate Peanut Butter Ice Cream Cake
Imagine the ultimate frozen treat that brings together the salty crunch of peanuts and the deep, velvet embrace of dark chocolate in every single forkful. This Nonnie’s 6 Ingredient Chocolate Peanut Butter Ice Cream Cake is the definition of effortless indulgence, proving that you do not need a long list of supplies to create a dessert that everyone will be talking about for weeks. It is the kind of cooling, creamy delight that turns a simple backyard gathering into a celebration.
The Frozen Duo That Never Fails
This cake is a nostalgic journey back to those perfect summer afternoons when the only thing that mattered was how fast you could eat your dessert before it melted. By focusing on just six high-quality components, we allow the bold flavors of cocoa and roasted peanuts to shine without any unnecessary clutter. Let me tell you, it is worth every bite.
A Legacy of Simple Sweetness
The tradition of ice cream cakes dates back to the Victorian era, where they were often referred to as bombes or trifles. However, the modern obsession with the chocolate and peanut butter combination really took hold in the mid-20th century as home cooks sought out recipes that were both impressive and easy to assemble without turning on the oven. This specific version carries on that legacy of “no-bake” brilliance, making it a staple for busy families who refuse to compromise on flavor.
Why This Cake Is a Total Game-Changer
Trust me, you are going to love this because it is the ultimate stress-free showstopper for any occasion.
Versatile: You can easily swap the type of cookies used for the base or choose a different ice cream flavor to suit your mood.
Budget-Friendly: With only six ingredients, your grocery list remains short and very affordable.
Quick and Easy: Since there is no actual baking involved, the preparation is incredibly straightforward and perfect for beginners.
Customizable: Feel free to add a layer of chopped nuts or a drizzle of caramel between the ice cream layers for extra texture.
Crowd-Pleasing: I have never met a person who can turn down the classic combination of chocolate and peanut butter.
Make-Ahead Friendly: This dessert actually requires you to make it ahead of time, leaving you free to enjoy your guests when it is time to serve.
Great for Leftovers: Because it lives in the freezer, you can enjoy a perfect slice days after the initial serving.
Secrets to the Perfect Frozen Slice
One of the best insider tips is to slightly soften your ice cream at room temperature for about ten minutes before you start spreading it. This ensures you get even, beautiful layers without crushing your cookie crust. Also, when you are ready to serve, dip your knife in hot water before each cut to get those professional, clean edges that look just like a photo.
Essential Tools for Your Baking Success
Having the right tools makes the assembly of this frozen masterpiece a total breeze.
9-inch Springform Pan: This is crucial for being able to remove the sides of the cake without damaging the beautiful layers.
Large Mixing Bowl: You will need this to combine your crushed cookies and butter for a sturdy foundation.
Sturdy Spatula: A silicone spatula or an offset spatula is perfect for smoothing out the ice cream layers.
Food Processor: The fastest way to turn your chocolate cookies into fine crumbs for the base.
Plastic Wrap: Essential for covering the cake while it sets in the freezer to prevent any ice crystals from forming.
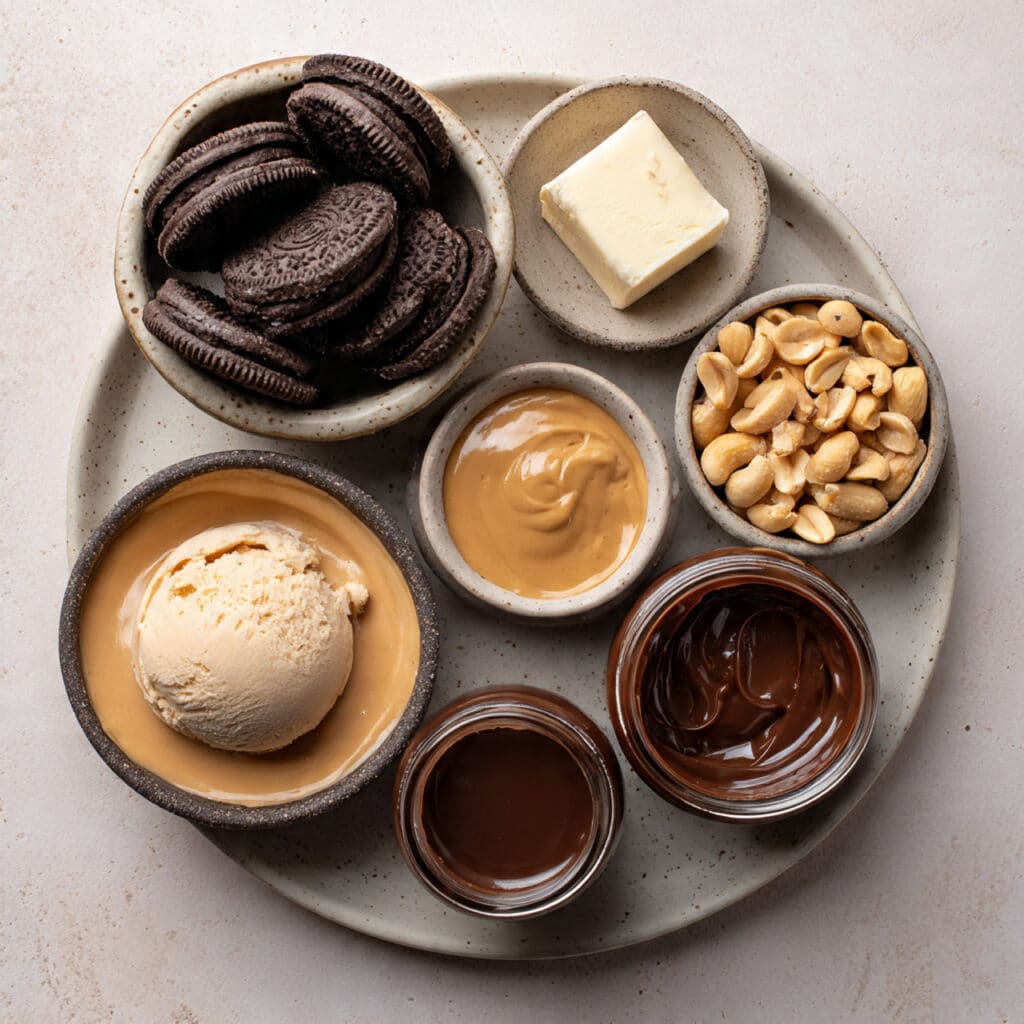
Ingredients You Will Need For This Masterpiece
The harmony of these six elements is what creates the legendary texture and flavor we are aiming for.
- Chocolate Sandwich Cookies: 24 cookies finely crushed to create a deep, chocolatey and crunchy base.
- Unsalted Butter: 1/2 cup melted to bind the cookie crumbs together into a firm crust.
- Peanut Butter Ice Cream: 1.5 quarts of high-quality ice cream to serve as the creamy heart of the cake.
- Creamy Peanut Butter: 1/2 cup to drizzle between layers and add an extra punch of salty-sweet flavor.
- Chocolate Fudge Sauce: 1 cup of rich fudge to top the cake and provide a decadent finish.
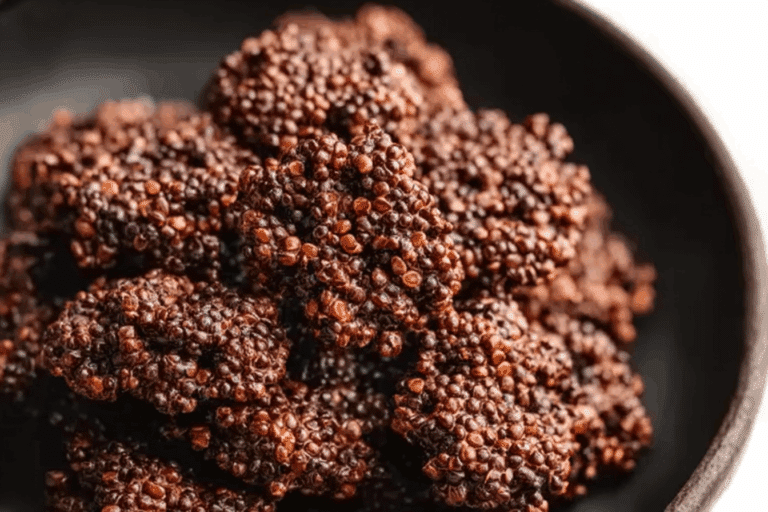
- Roasted Salted Peanuts: 1/2 cup roughly chopped to add a necessary crunch and visual appeal.
Flexible Substitutions for Your Kitchen
- Chocolate Sandwich Cookies: Graham crackers or vanilla wafers mixed with a tablespoon of cocoa powder.
- Peanut Butter Ice Cream: Vanilla ice cream swirled with extra peanut butter.
- Chocolate Fudge Sauce: Melted chocolate chips mixed with a splash of heavy cream.
Key Ingredients to Highlight
Creamy Peanut Butter: Using a high-quality creamy peanut butter for the drizzle ensures it stays soft enough to eat even when frozen, providing a wonderful texture contrast.
Chocolate Sandwich Cookies: These provide the structural integrity and the dark cocoa notes that perfectly balance the sweetness of the ice cream.
Step Into the Cooking Process
Let the excitement build as we assemble this chilly masterpiece.
- Preheat Your Equipment: No oven needed here, but make sure your springform pan is clean and your freezer has a flat spot ready.
- Combine Ingredients: Mix the crushed chocolate cookies with the melted butter until it feels like wet sand.
- Prepare Your Cooking Vessel: Press the cookie mixture firmly into the bottom of the springform pan to create an even crust.
- Assemble the Dish: Spread half of the softened peanut butter ice cream over the crust, then drizzle with the extra peanut butter.
- Cook to Perfection: Add the remaining ice cream and smooth the top, then place the cake in the freezer for at least four hours.
- Finishing Touches: Pour the chocolate fudge sauce over the top and sprinkle with the chopped salted peanuts.
- Serve and Enjoy: Remove from the freezer, let it sit for five minutes, then slice and serve to your waiting guests.
Texture and Flavor Development
The first thing you will experience is the cold, velvety smoothness of the peanut butter ice cream, followed immediately by the satisfying crunch of the dark chocolate crust. As the cake sits on your tongue, the salty notes of the roasted peanuts and the richness of the fudge sauce develop, creating a complex and deeply satisfying profile. The contrast between the frozen cream and the solid cookie base is a total game-changer.
Pro Tips for the Best Results
- Freeze the crust for 15 minutes before adding the ice cream to ensure it stays crisp and firm.
- Use a warm, damp cloth to wipe the outside of the springform pan before opening it to help the cake release smoothly.
- If you want extra flair, use a spoon to create “swirls” in the top layer of ice cream before it fully hardens.
Common Pitfalls to Avoid
- Avoid using “natural” peanut butter that separates, as the oil can create an unappealing texture when frozen.
- Do not rush the freezing time; if the cake is too soft, it will collapse when you try to slice it.
- Make sure your fudge sauce is at room temperature when you pour it, or it will melt the top layer of ice cream.
Nutrition Facts
Servings: 10
Calories per serving: 480
Note: These are approximate values.
Timing Your Bake
Prep Time: 20 minutes
Cook Time: 0 minutes
Total Time: 4 hours 20 minutes
Make-Ahead and Storage Tips
This cake is the ultimate make-ahead dessert and can stay in the freezer for up to two weeks if wrapped tightly. To store leftovers, simply place plastic wrap directly against the cut surfaces of the cake to prevent freezer burn. It is always ready for a quick dessert emergency!
Creative Serving Suggestions
Serve a slice with an extra drizzle of warm chocolate sauce or a side of fresh sliced bananas. The combination of banana and peanut butter is a classic that adds a fresh, fruity dimension to this decadent cake.
Creative Leftover Transformations
If you have a small amount of cake left, you can blend it into a “Cake Shake” by adding a splash of milk and whizzing it in a blender. It creates the most incredible, thick peanut butter chocolate milkshake you have ever tasted.
Additional Advice for Freshness
Always keep the cake in the coldest part of your freezer, away from the door. Fluctuations in temperature can cause the ice cream to develop a grainy texture over time, so consistency is key for that professional mouthfeel.
Make It a Showstopper
To make this a true visual masterpiece, use a vegetable peeler to create large chocolate curls from a bar of dark chocolate and pile them high in the center of the cake along with the peanuts. It adds a touch of elegance that makes the cake look like it came from a high-end creamery.
Variations to Try
- Chocolate Chip Cookie Base: Swap the sandwich cookies for crushed chocolate chip cookies for a different flavor profile.
- Double Chocolate Version: Use chocolate ice cream instead of peanut butter ice cream for the ultimate cocoa experience.
- Salted Caramel Twist: Add a layer of salted caramel sauce between the ice cream layers for a sophisticated salty-sweet kick.
FAQ’s
- Can I use chunky peanut butter?
Absolutely, it will just add more texture to the interior of the cake. - How long does it take to thaw before slicing?
About 5 to 10 minutes at room temperature is usually perfect. - Can I make this dairy-free?
Yes, by using dairy-free ice cream, vegan butter, and dairy-free chocolate cookies. - What if I don’t have a springform pan?
You can use a regular deep-dish pie plate, but you will have to serve it directly from the dish. - How do I crush the cookies without a food processor?
Place them in a heavy-duty zip-top bag and crush them with a rolling pin. - Can I add a middle layer of fudge?
Yes, adding a “hidden” layer of fudge in the middle is a fantastic idea. - Is this cake very sweet?
The salt from the peanuts and the bitterness of the chocolate cookies balance the sweetness beautifully. - Can I use homemade ice cream?
Homemade ice cream works wonderfully, just make sure it is at a “soft serve” consistency when assembling. - Why did my crust crumble?
This usually means there wasn’t enough butter or it wasn’t pressed firmly enough into the pan. - How many people does this serve?
A 9-inch cake easily serves 10 to 12 people because it is very rich.
Conclusion
Nonnie’s 6 Ingredient Chocolate Peanut Butter Ice Cream Cake is a testament to the fact that the simplest things in life are often the best. With its perfect layers and classic flavors, it is a recipe that brings joy to the table and ease to the kitchen. I hope this becomes a new favorite in your household and brings a little extra sweetness to your next celebration!
PrintNonnie’s 6 Ingredient Chocolate Peanut Butter Ice Cream Cake
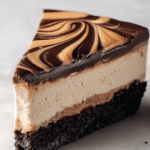
An effortless, no-bake frozen delight featuring a crunchy chocolate cookie crust, creamy peanut butter ice cream layers, and a decadent chocolate fudge topping.
Ingredients
- 24 Chocolate Sandwich Cookies (crushed)
- 1/2 cup Unsalted Butter (melted)
- 1.5 quarts Peanut Butter Ice Cream
- 1/2 cup Creamy Peanut Butter
- 1 cup Chocolate Fudge Sauce
- 1/2 cup Roasted Salted Peanuts (chopped)
Instructions
- Preheat Your Equipment: Ensure your 9-inch springform pan is clean and you have a flat, cleared space in your freezer.
- Combine Ingredients: Mix the finely crushed chocolate cookies with the melted unsalted butter until the mixture is well-combined and moist.
- Prepare Your Cooking Vessel: Press the cookie mixture firmly into the bottom of the springform pan to create a solid, even crust.
- Assemble the Dish: Spread half of the softened ice cream over the crust, drizzle with peanut butter, add the remaining ice cream, and smooth the top.
- Cook to Perfection: Place the cake in the freezer and allow it to set firmly for at least four hours or overnight.
- Finishing Touches: Pour the room-temperature chocolate fudge sauce over the top and garnish generously with chopped roasted peanuts.
- Serve and Enjoy: Let the cake sit at room temperature for 5 minutes, remove the pan sides, slice with a warm knife, and serve.
Notes
- Note: Soften the ice cream at room temperature for 10 minutes before spreading to avoid crushing the base.
- Note: Dip your slicing knife in hot water and wipe dry between each cut for perfectly clean slices.
- Note: Wrap the cake tightly in plastic wrap once set to prevent freezer burn and ice crystals.