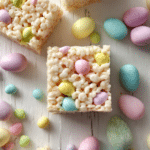
Mini Egg Rice Krispie Squares
If you are looking for the ultimate treat to brighten up your snack table, you have found it. These squares are a delightful twist on a classic childhood favorite, bringing together the nostalgic crunch of toasted cereal with the creamy, satisfying snap of milk chocolate eggs. Every bite is a symphony of textures, from the stretchy, buttery marshmallow pull to the crunch of the candy shells. Trust me, you’re going to love this because it perfectly captures that festive feeling in a simple, no-bake bar. This one’s a total game-changer for anyone who wants a treat that looks as good as it tastes. Let me tell you, it’s worth every bite.
The Magic of Festive Cereal Treats
There is something truly special about a dessert that requires no oven time but delivers maximum joy. These squares take the foundation of a traditional crispy treat and elevate it with a pop of color and extra chocolatey goodness. They are perfect for spring gatherings, school snacks, or just a weekend project with the family. The combination of salt, sugar, and crunch is addictive, making it nearly impossible to stop at just one square.
A Brief History of Marshmallow Crispy Treats
The history of these beloved snacks dates back to the late 1930s when they were first created in a home economics test kitchen. Originally designed as a clever way to use puffed rice cereal, they quickly became a staple of bake sales and lunchboxes across the country. Over the decades, people began adding their own creative touches, like peanut butter or chocolate. Incorporating mini chocolate eggs is a modern tradition that adds a seasonal flair, turning a simple pantry staple into a celebratory centerpiece.
Why This Recipe is a Kitchen Staple
You will find yourself coming back to this method time and time again because it is just so reliable and satisfying.
Versatile: You can easily swap the type of cereal or add different themed candies to suit any occasion throughout the year.
Budget-Friendly: The ingredients are simple and affordable, mostly consisting of pantry staples like butter and marshmallows.
Quick and Easy: Since there is no baking involved, you can have these whipped up and cooling in under twenty minutes.
Customizable: You can stir in extra sprinkles, a drizzle of white chocolate, or even a hint of vanilla to make them your own.
Crowd-Pleasing: From toddlers to grandparents, everyone recognizes and loves the flavor profile of a marshmallow treat.
Make-Ahead Friendly: These stay fresh and chewy for several days, so you can prep them well before your guests arrive.
Great for Leftovers: Even if you have a few squares left, they pack perfectly into containers for a sweet treat on the go.
Tips for the Perfect Marshmallow Melt
Getting that iconic stretchy texture is all about how you handle the heat.
- Low and Slow is Key: Always melt your butter and marshmallows over low heat to prevent the sugar from scorching or becoming too hard.
- Don’t Over-Compress: When pressing the mixture into the pan, use a light touch or a piece of buttered parchment paper so the squares stay airy and soft.
- Freshness Matters: Use a fresh bag of marshmallows for the best melt, as older ones tend to be drier and won’t give you that gooey pull.
Essential Tools for No-Bake Success
Having the right gear makes the process smooth and keeps the sticky mess to a minimum.
Large Non-Stick Pot: This is essential for melting the butter and marshmallows without everything clinging to the sides.
Silicone Spatula: A heat-resistant spatula is the best tool for folding the cereal and candy together efficiently.
Square Baking Pan: An 8×8 or 9×9 inch pan provides the perfect depth for thick, satisfying squares.
Parchment Paper: Lining your pan ensures the squares lift out easily so you can cut clean, beautiful edges.
Ingredients You Will Need For Mini Egg Rice Krispie Squares
The harmony of these ingredients creates a balanced sweetness that isn’t too overpowering.
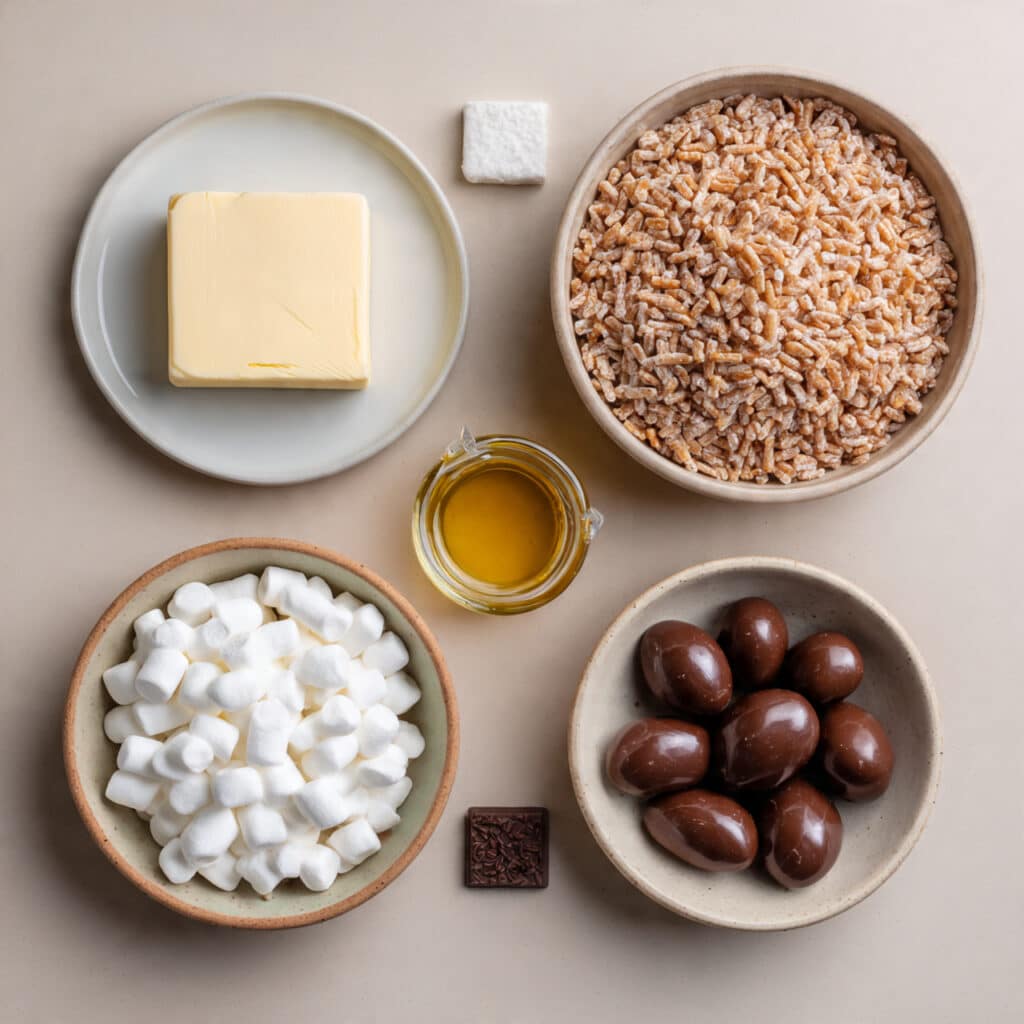
- Salted Butter: 4 tablespoons (60 grams). The salt helps balance the sweetness of the sugar and adds a rich, savory depth.
- Mini Marshmallows: 10 ounces (280 grams). These melt down into a smooth, gooey coating that binds everything together perfectly.
- Vanilla Extract: 1 teaspoon (5 milliliters). A touch of vanilla enhances the marshmallow flavor and makes the treats smell amazing.
- Crispy Rice Cereal: 6 cups (160 grams). This provides the essential crunch and structural base for the squares.
- Mini Chocolate Eggs: 1.5 cups (approx 225 grams). These are the star of the show, providing bursts of milk chocolate and a colorful crunch.
Flexible Ingredient Substitutions
If you find your pantry is missing an item, these alternatives work wonderfully.
Salted Butter: Unsalted butter with a pinch of sea salt added.
Mini Marshmallows: Large marshmallows cut into smaller pieces will melt just as well.
Crispy Rice Cereal: Puffed brown rice cereal or even toasted oat cereal for a different texture.
Mini Chocolate Eggs: Chocolate chips or M&M candies if the eggs are out of season.
Spotlight on Key Ingredients
Mini Chocolate Eggs: These are the defining feature of the recipe. Their pastel candy shells provide a unique texture that standard chocolate chips can’t replicate, and the milk chocolate center melts slightly when stirred into the warm marshmallow.
Salted Butter: Never underestimate the power of butter in this recipe. It’s what gives the treats their professional, bakery-quality flavor and prevents the marshmallow from being one-dimensionally sweet.
Let’s Get Cooking
It is time to head into the kitchen and create some magic with just a few simple steps.
- Preheat Your Equipment: Place your large non-stick pot on the stove over low heat to get it ready for the butter.
- Combine Ingredients: Add the butter to the pot and let it melt completely before stirring in the marshmallows and vanilla extract.
- Prepare Your Cooking Vessel: While the marshmallows are melting, line your square baking pan with parchment paper and lightly grease it.
- Assemble the Dish: Once the marshmallows are smooth, remove from heat and gently fold in the cereal until every piece is coated.
- Cook to Perfection: Fold in about two-thirds of the mini chocolate eggs, being careful not to melt them completely.
- Finishing Touches: Transfer the mixture to the prepared pan and press down gently, then scatter the remaining eggs on top for a beautiful finish.
- Serve and Enjoy: Let the squares cool at room temperature for at least thirty minutes before slicing into even blocks.
Developing Texture and Flavor
The secret to these squares is the contrast between the soft, pillowy marshmallow and the sharp, clean snap of the chocolate eggs. As the mixture cools, the marshmallow sets into a flexible bond that holds the crispy cereal in place. The tiny hint of vanilla works in the background to tie the dairy notes of the butter and chocolate together, creating a well-rounded flavor.
Helpful Cooking Tips and Tricks
- Butter your hands: If the mixture is sticking to you while pressing it into the pan, rub a little butter on your fingertips for a non-stick surface.
- Warm the eggs: If you want the chocolate eggs to be slightly softer, let them sit at room temperature before adding them to the warm cereal.
- Use a serrated knife: For the cleanest cuts, use a long serrated knife and wipe it clean between each slice.
Common Mistakes to Avoid
- Overheating the marshmallows: If the heat is too high, the sugar in the marshmallows will crystallize and the squares will turn out rock hard.
- Packing too tight: Pressing down too hard with the spatula will result in a dense, tough treat rather than a light and crispy one.
- Adding eggs too early: If the marshmallow mixture is boiling hot, the chocolate eggs will melt entirely and turn the squares a murky brown color.
Estimated Nutrition Facts
Servings: 12 squares
Calories per serving: 215
Note: These are approximate values.
Preparation and Timing
Prep Time: 10 minutes
Cook Time: 5 minutes
Total Time: 15 minutes
Storage and Freshness Tips
These treats are best enjoyed within the first two days, but they can be stored in an airtight container at room temperature for up to five days. If you want to keep them longer, you can freeze them with parchment paper between layers for up to a month. To reheat, just let them sit at room temperature for an hour.
Creative Serving Suggestions
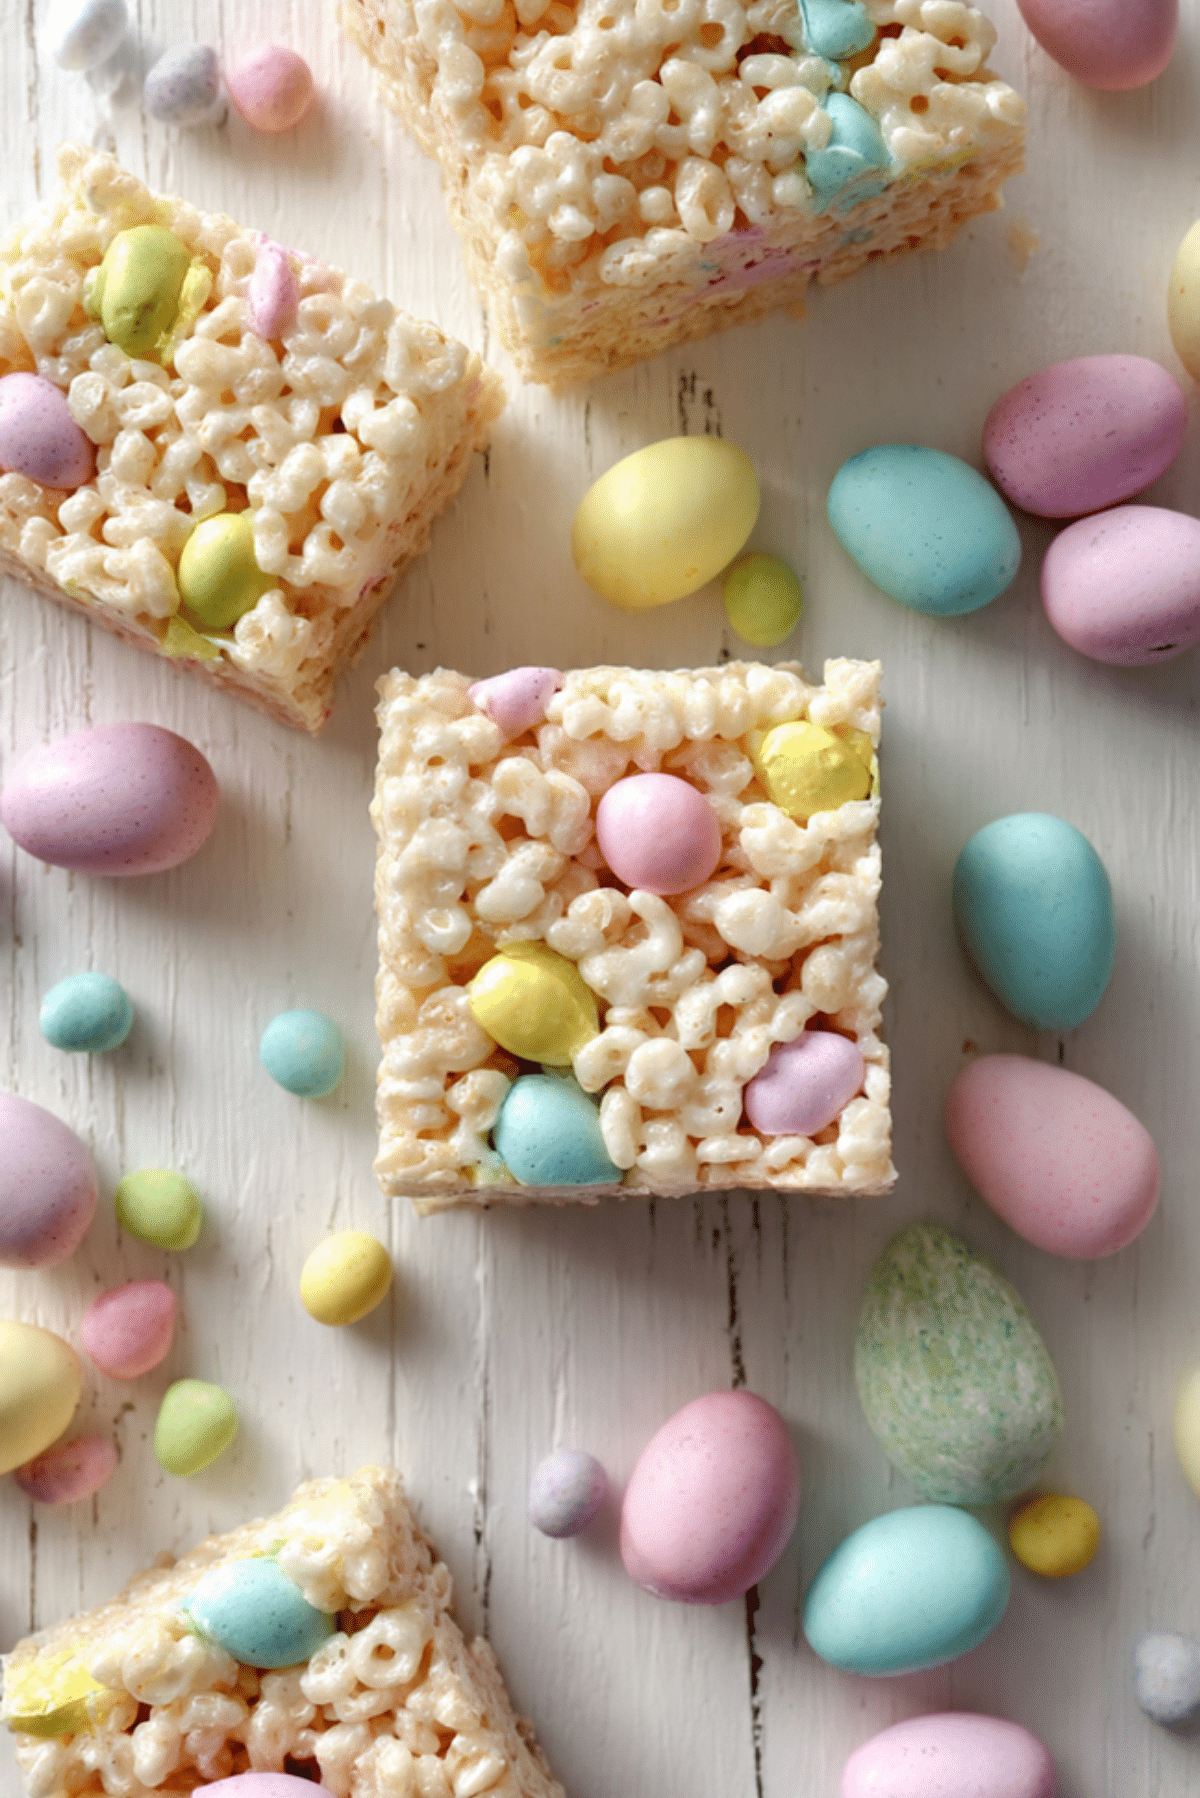
Serve these on a white ceramic platter to make the pastel colors of the eggs pop. They look wonderful when stacked in a pyramid shape, perhaps tied with a simple twine ribbon if you are giving them as a gift. They also pair excellently with a cold glass of milk or a hot cup of coffee.
Leftover Transformations
If you have leftovers that are starting to get a bit firm, try crumbling them over vanilla ice cream for a delicious sundae topping. You could also dip half of a square into melted dark chocolate for an extra layer of indulgence.
Extra Advice for Success
For the best flavor, use high-quality chocolate eggs rather than the generic versions. The quality of the chocolate really stands out because the rest of the ingredients are so simple. Also, try to work quickly once the cereal is added to the pot, as the marshmallow starts to set as soon as it begins to cool.
Make It a Showstopper
To really impress your guests, save the most vibrant-colored chocolate eggs for the very top. You can even lightly crush a few eggs and sprinkle the “dust” over the squares to add more visual texture and hint at the treasures hidden inside.
Variations to Try
- Dark Chocolate Drizzle: Once the squares are set, drizzle melted dark chocolate in a zig-zag pattern across the top.
- White Chocolate Variation: Use white chocolate eggs and add a handful of dried cranberries for a different flavor profile.
- Peanut Butter Twist: Stir in two tablespoons of creamy peanut butter into the melted marshmallow mixture before adding the cereal.
- Salted Caramel: Drizzle a little store-bought caramel sauce over the top and add a tiny pinch of flaky sea salt.
FAQ’s
- Can I make these gluten-free? Yes, just ensure your rice cereal is specifically labeled as gluten-free, as some brands use malt flavoring.
- Can I use marshmallow fluff? It is not recommended as it doesn’t set the same way as melted marshmallows, resulting in a very messy square.
- How do I keep them from getting hard? Store them at room temperature and never in the fridge, as the cold makes the sugar brittle.
- Can I double the recipe? Absolutely, just use a larger pot and a 9×13 inch baking pan.
- What if my marshmallows won’t melt? Make sure they are fresh and add a teaspoon of water to the pot to help steam them slightly.
- Can I use different cereal? Yes, cocoa flavored rice cereal works great for a double chocolate version.
- Do I have to use butter? Butter provides the best flavor, but a neutral margarine can work in a pinch.
- Why did my chocolate eggs melt? The marshmallow mixture was likely still too hot when they were added.
- How long do they take to set? They usually set in about 30 minutes at room temperature.
- Are these suitable for freezing? Yes, they freeze very well in an airtight container.
Conclusion
Making Mini Egg Rice Krispie Squares is such a joy because it brings a touch of whimsy to the kitchen with very little effort. The result is a bright, cheerful, and delicious treat that is guaranteed to put a smile on everyone’s face. Whether you are making them for a party or just a mid-week snack, these squares are a reminder that sometimes the simplest recipes are the most rewarding. Go ahead and give them a try, your sweet tooth will definitely thank you.
PrintMini Egg Rice Krispie Squares
A festive and colorful twist on the classic marshmallow treat, featuring crunchy mini chocolate eggs and gooey marshmallows for a perfect no-bake dessert.
Ingredients
- 4 tablespoons Salted Butter
- 10 ounces Mini Marshmallows
- 1 teaspoon Vanilla Extract
- 6 cups Crispy Rice Cereal
- 1.5 cups Mini Chocolate Eggs
Instructions
- Line an 8×8 inch baking pan with parchment paper and set aside.
- In a large non-stick pot, melt the butter over low heat.
- Add the marshmallows and vanilla extract to the pot, stirring constantly until completely smooth and melted.
- Remove the pot from the heat and immediately stir in the crispy rice cereal until evenly coated.
- Gently fold in 1 cup of the mini chocolate eggs.
- Press the mixture lightly into the prepared pan using a buttered spatula.
- Press the remaining 0.5 cup of chocolate eggs into the top of the squares.
- Allow to cool at room temperature for 30 minutes before slicing into 12 squares.
Notes
- Use fresh marshmallows for the best gooey texture.
- Do not press the mixture too firmly into the pan to keep them light.
- Store at room temperature in an airtight container; do not refrigerate.