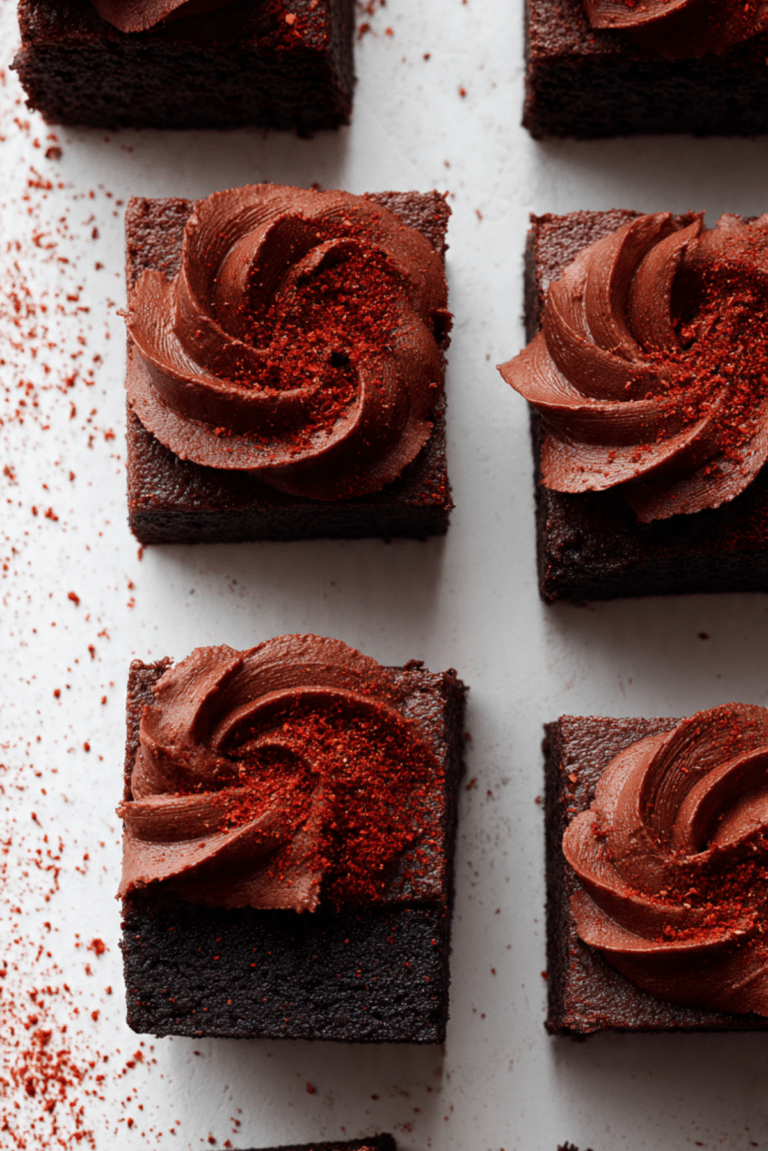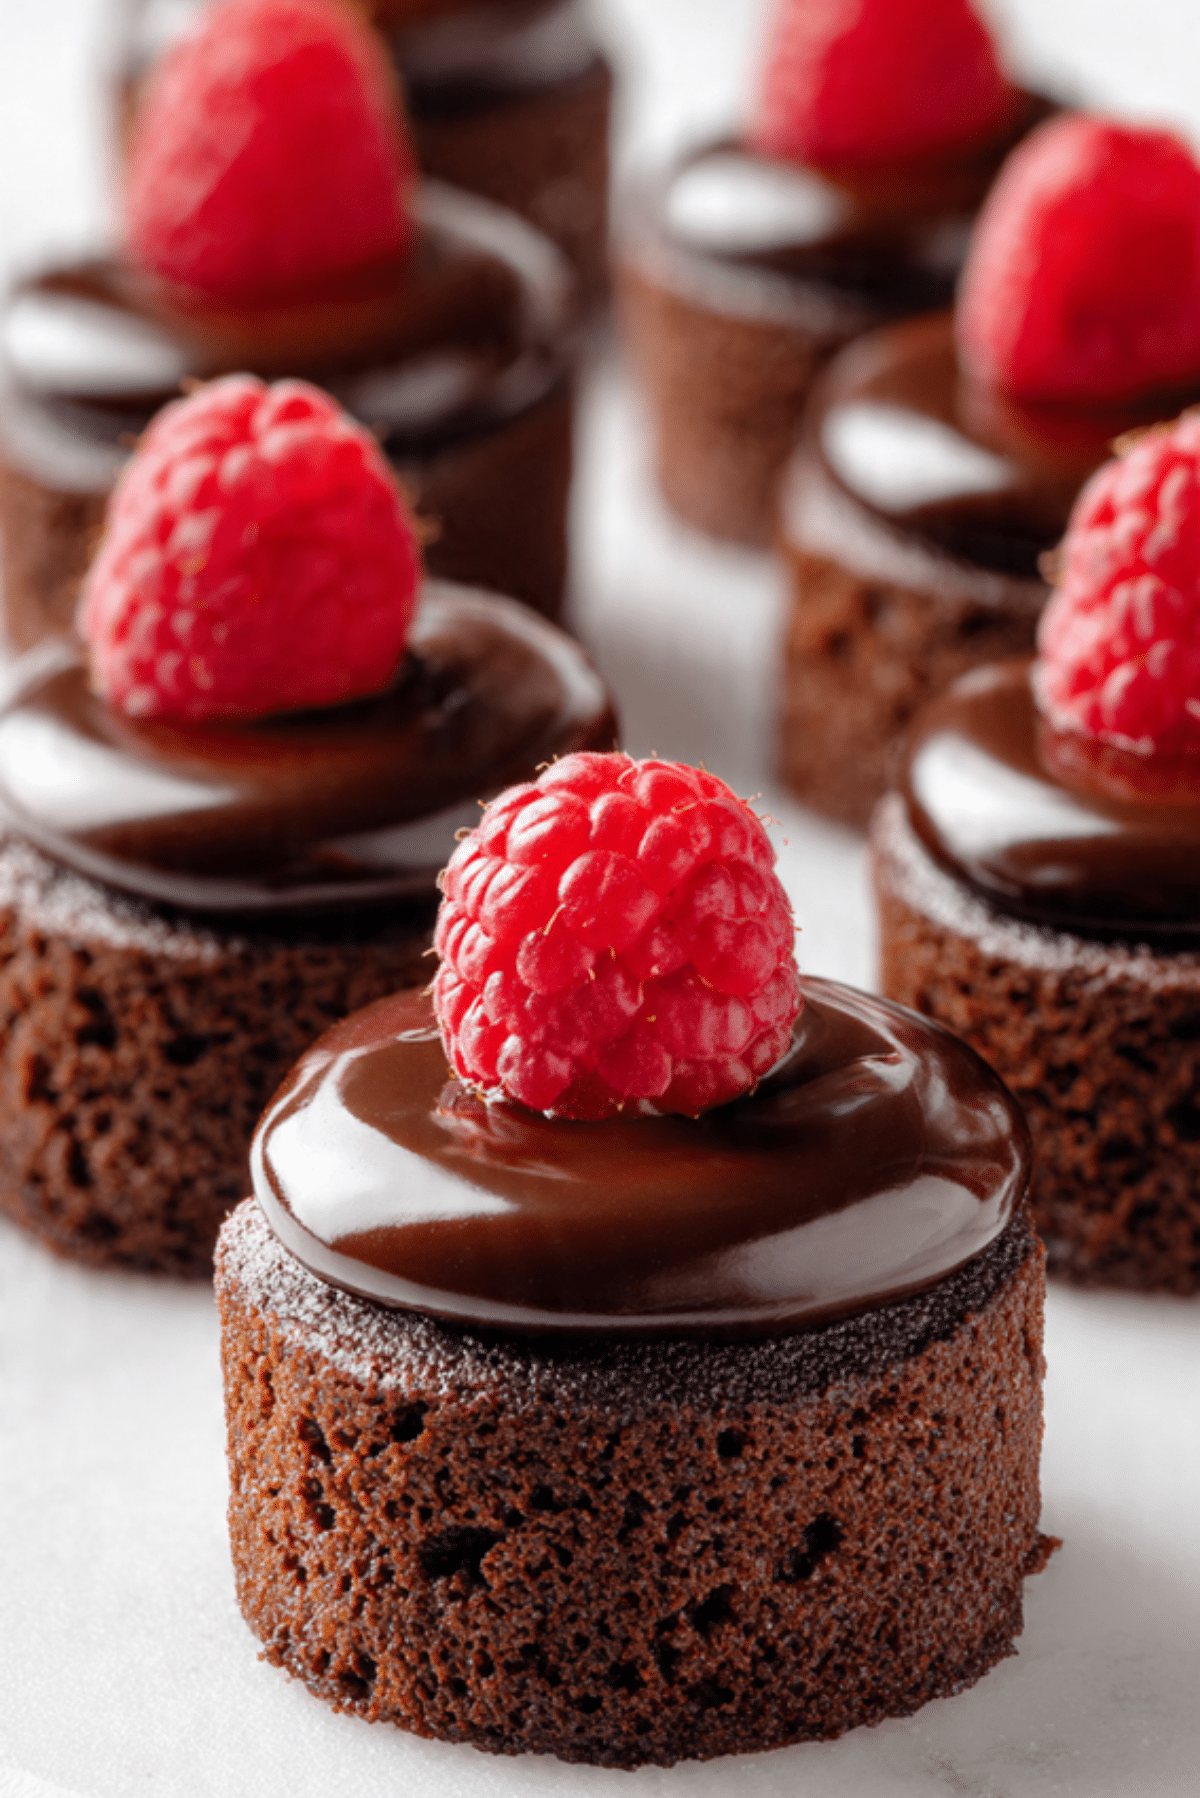
Mini Chocolate Cakes
There is something inherently special about having a dessert all to yourself, and these Mini Chocolate Cakes offer that perfect sense of individual indulgence. Imagine a rich, velvet-like crumb that is intensely dark and moist, topped with a silky ganache that melts the moment it hits your tongue. Trust me, you’re going to love this recipe because it delivers the deep, complex flavor of a gourmet bakery cake in a charming, bite-sized format. Let me tell you, it’s worth every bite when you experience the contrast between the tender sponge and the decadent frosting. This one’s a total game-changer for dinner parties or whenever you want to make an ordinary evening feel like a celebration.
Personal Portions of Pure Chocolate Bliss
The beauty of the mini cake is that it ensures every guest gets the best part of the dessert, which is a perfectly centered, moist piece with plenty of frosting. These cakes are designed to be decadent without being overwhelming, using high-quality cocoa to provide a sophisticated bitterness that balances the sweetness. Each little cake acts as a canvas for decoration, whether you choose a simple dusting of sugar or an elaborate swirl of buttercream. It is a recipe that prioritizes texture, ensuring that the middle remains fudge-like while the edges develop a slight, delicate crust.
The Art of the Individual Dessert
The concept of individual cakes has roots in the classic French “petit four” tradition, where small, ornate confections were served at the end of lavish meals. Over time, this evolved into the modern trend of mini cakes and cupcakes which allow for easier serving and beautiful presentation. While a large cake is impressive, there is a unique elegance in a perfectly formed mini version that feels curated and intentional. This recipe builds on that tradition, focusing on a high-quality chocolate base that feels timeless and universally loved.
Why These Petite Treats Are a Kitchen Favorite
Adding this recipe to your repertoire means you will always have a sophisticated dessert option that is surprisingly easy to execute.
Versatile: These are just as appropriate for a kid’s birthday party as they are for an elegant wedding shower or anniversary dinner.
Budget-Friendly: You likely have the flour, sugar, and oil in your pantry, so the only real investment is a good quality cocoa powder.
Quick and Easy: Because they are smaller than a standard cake, they bake much faster and cool in a fraction of the time.
Customizable: You can fill the centers with cream, top them with different fruits, or even stir in some chocolate chips for extra texture.
Crowd-Pleasing: Chocolate is a universal language, and these small portions make it easy for everyone to say yes to dessert.
Make-Ahead Friendly: These cakes actually stay moist for days, and the flavor of the chocolate often intensifies after twenty four hours.
Great for Leftovers: They are the perfect size to pop into a lunchbox or enjoy as a midnight snack without needing to cut a whole cake.
Insider Tips for the Moistest Chocolate Crumb
The secret to a truly moist chocolate cake is the use of oil instead of butter and the addition of a hot liquid at the very end of the mixing process. Oil stays liquid at room temperature, which keeps the cake feeling soft and tender even after it has cooled. When you add hot water or coffee to the batter, it “blooms” the cocoa powder, releasing all of its hidden aromatic compounds and ensuring a deep, dark color. Be careful not to overmix once you add the flour, as this can develop the gluten and make your petite cakes tough rather than fluffy.
Essential Tools for Mini Cake Mastery
Having the right pans and mixing tools will help you achieve that consistent, professional shape every time you bake.
Mini Cake Pan or Jumbo Muffin Tin: This provides the structure for the individual portions and ensures they bake evenly.
Whisk and Large Bowl: Since this is a liquid-based batter, you don’t even need an electric mixer, just a good whisk.
Kitchen Scale: For the best results, weighing your dry ingredients ensures the perfect ratio of flour to cocoa.
Wire Cooling Rack: This allows air to circulate around the small cakes so they don’t become soggy as they cool.
Offset Spatula: This is the best tool for spreading a smooth layer of ganache or frosting over the tops of your minis.
Ingredients You Will Need For Chocolate Minis
Selecting the right ingredients is the first step toward creating a dessert that tastes like it came from a professional pastry chef.
- All Purpose Flour: 1.5 cups to provide a soft structure for the delicate chocolate sponge.
- Granulated Sugar: 1 cup to sweeten the batter and help create a tender, moist texture.
- Unsweetened Cocoa Powder: 0.5 cups of dark cocoa for that essential chocolate punch.
- Baking Powder and Soda: 1 teaspoon of each to ensure your cakes rise beautifully in their small tins.
- Salt: 0.5 teaspoons to enhance the chocolate flavor and balance the sugar.
- Vegetable Oil: 0.5 cups to keep the crumb incredibly moist and soft for days.
- Large Egg: 1 egg at room temperature to bind the ingredients together.
- Whole Milk: 0.75 cups to add richness and moisture to the batter.
- Hot Water: 0.5 cups to bloom the cocoa and create a smooth, pourable batter.
- Vanilla Extract: 1 tablespoon for a warm, aromatic background note.
Flexible Substitutions for Your Baking
If you are missing an item, these easy swaps will help you get your cakes into the oven without a trip to the store.
Vegetable Oil: Melted coconut oil or a neutral-flavored olive oil can be used with great success.
Whole Milk: Buttermilk is a fantastic alternative that adds a slight tang and makes the cake even more tender.
Hot Water: Use hot decaf coffee to deepen the chocolate flavor without adding a distinct coffee taste.
Spotlight on the Key Ingredients
The Unsweetened Cocoa Powder is the defining element of this dish, so choosing a high-quality brand will directly impact the richness of your final cake. The Hot Water is the hidden hero of the recipe, as it transforms the texture of the batter and ensures the cocoa is fully incorporated, leading to a much more intense flavor profile.
Guiding You Through the Baking Journey
Creating these is a simple and joyful process that fills your home with the incredible aroma of dark chocolate.
- Preheat Your Equipment: Set your oven to 350 degrees and grease your mini cake pan thoroughly so the cakes release easily.
- Combine Ingredients: Whisk the flour, sugar, cocoa, baking powder, baking soda, and salt together in a large bowl until well combined.
- Prepare Your Cooking Vessel: Add the egg, milk, oil, and vanilla to the dry ingredients and whisk until the batter is smooth.
- Assemble the Dish: Stir in the hot water by hand, being careful not to splash, until the batter is thin and glossy.
- Cook to Perfection: Pour the batter into the prepared tins and bake for eighteen to twenty two minutes until a toothpick comes out clean.
- Finishing Touches: Let the cakes cool completely before topping them with a simple chocolate ganache or a swirl of frosting.
- Serve and Enjoy: Place each mini cake on a small dessert plate and garnish with a fresh berry for a touch of color.
Texture and Flavor Development
The texture of these cakes is famously light and airy, yet they possess a richness that feels quite substantial. As you take a bite, the ganache on top provides a creamy, dense contrast to the delicate sponge underneath. Because we use oil, the flavor of the chocolate is very clean and forward, and it only gets better as the cake sits and the moisture redistributes through the crumb.
Helpful Cooking Tips and Tricks
- Only fill your cake tins about two-thirds full to allow enough room for the cakes to rise without spilling over.
- Tap the filled pan on the counter once or twice before baking to release any large air bubbles.
- If you want a flat top for easier decorating, use a lower oven temperature and bake them for a few minutes longer.
What to Avoid
- Overbaking: Because these cakes are small, they can dry out quickly, so start checking them a few minutes before the timer goes off.
- Opening the Oven Door: Try to keep the door closed until the very end to prevent a sudden drop in temperature that could cause the cakes to sink.
- Frosting While Warm: If you apply ganache or frosting to a warm cake, it will melt and run off, so patience is key.
Nutrition Facts
Servings: 12 mini cakes
Calories per serving: 245
Note: These are approximate values.
Preparation Time
Prep Time: 15 minutes
Cook Time: 20 minutes
Total Time: 35 minutes
Make-Ahead and Storage Tips
These mini cakes are incredibly resilient and can be made a day in advance. Store them in an airtight container at room temperature for up to three days, or in the refrigerator if your frosting contains dairy. They also freeze exceptionally well; just wrap the unfrosted cakes in plastic wrap and freeze for up to two months, then thaw and frost when you are ready to serve.
How to Serve
For a beautiful presentation, serve these on a white porcelain platter with a few sprigs of mint and some extra chocolate shavings. They look wonderful when paired with a small scoop of vanilla bean ice cream or a dollop of freshly whipped cream.
Creative Leftover Transformations
If you have a couple of cakes left that are starting to feel a bit dry, you can crumble them up to make high-end chocolate cake pops. You can also slice them horizontally and layer them with fruit and cream in small jars to create individual chocolate trifles.
Additional Tips for Success
If you find the batter seems very thin, do not be alarmed as this is normal for this style of chocolate cake. The thin batter is exactly what creates that moist, tight crumb that we are looking for in a professional-grade mini cake.
Make It a Showstopper
To turn these into a true centerpiece, use a vegetable peeler to create large chocolate curls from a bar of dark chocolate and pile them high on top of each cake. A light dusting of gold luster dust or a few edible flower petals can also elevate the look for a special occasion.
Variations to Try
- Chocolate Peanut Butter: Fill the centers with a small amount of peanut butter before frosting.
- Salted Caramel: Drizzle a bit of warm salted caramel over the top of the chocolate ganache.
- Double Chocolate: Stir in half a cup of mini chocolate chips to the batter for extra texture.
FAQ’s
- Can I use this batter for a regular cake?
Yes, this recipe will fit into two 8 inch round cake pans, though the baking time will be longer. - Why is my cake sinking in the middle?
This can happen if the oven door was opened too early or if there was too much baking powder in the batter. - Can I use milk instead of water?
You can, but the hot water is specifically used to bloom the cocoa for a better flavor. - How do I get the cakes out of the pan?
Let them cool for ten minutes, then run a thin knife around the edges before gently lifting them out. - Is the coffee flavor strong?
If you use coffee instead of water, it won’t taste like coffee; it will just make the chocolate taste more intense. - Can I make these gluten-free?
A high-quality 1:1 gluten-free flour blend usually works well with this liquid-based batter. - Why did my cakes come out dry?
They were likely in the oven for a few minutes too long, so try reducing the bake time next time. - What kind of oil is best?
Any neutral oil like canola, vegetable, or grapeseed will work perfectly. - Can I use natural cocoa powder?
Yes, this recipe contains baking soda which will react with natural cocoa powder to help the rise. - Do I need to frost them?
They are delicious plain with just a dusting of powdered sugar if you prefer a lighter dessert.
Conclusion
These Mini Chocolate Cakes are the ultimate expression of chocolate love, offering a perfect, private moment of indulgence in every bite. Whether you are celebrating a big milestone or just the end of a long day, these little cakes bring a touch of elegance and a whole lot of flavor to the table. I hope you enjoy the simplicity of the process and the richness of the result. Happy baking!
PrintMini Chocolate Cakes
Decadent and moist individual-sized chocolate cakes with a rich, dark crumb and a silky ganache finish. Perfect for elegant serving and personal indulgence.
Ingredients
- 1.5 cups All Purpose Flour
- 1 cup Granulated Sugar
- 0.5 cups Unsweetened Cocoa Powder
- 1 teaspoon Baking Powder
- 1 teaspoon Baking Soda
- 0.5 teaspoons Salt
- 0.5 cups Vegetable Oil
- 1 large Egg, room temperature
- 0.75 cups Whole Milk
- 0.5 cups Hot Water
- 1 tablespoon Vanilla Extract
Instructions
- Preheat oven to 350°F (175°C) and grease a mini cake pan or jumbo muffin tin.
- In a large bowl, whisk together flour, sugar, cocoa, baking powder, baking soda, and salt.
- Add the egg, milk, oil, and vanilla; whisk until the batter is smooth and well combined.
- Carefully stir in the hot water by hand until the batter is thin and glossy.
- Pour batter into the prepared tins, filling each about two-thirds full.
- Bake for 18 to 22 minutes or until a toothpick inserted in the center comes out clean.
- Cool in the pan for 10 minutes before transferring to a wire rack to cool completely.
- Frost with chocolate ganache or buttercream once fully cooled.
Notes
- Do not overmix the batter after adding the flour to keep the texture light.
- The batter will be very thin; this is normal and results in a moist cake.
- Using hot coffee instead of water will enhance the chocolate flavor.