Lindt Chocolate Fondants
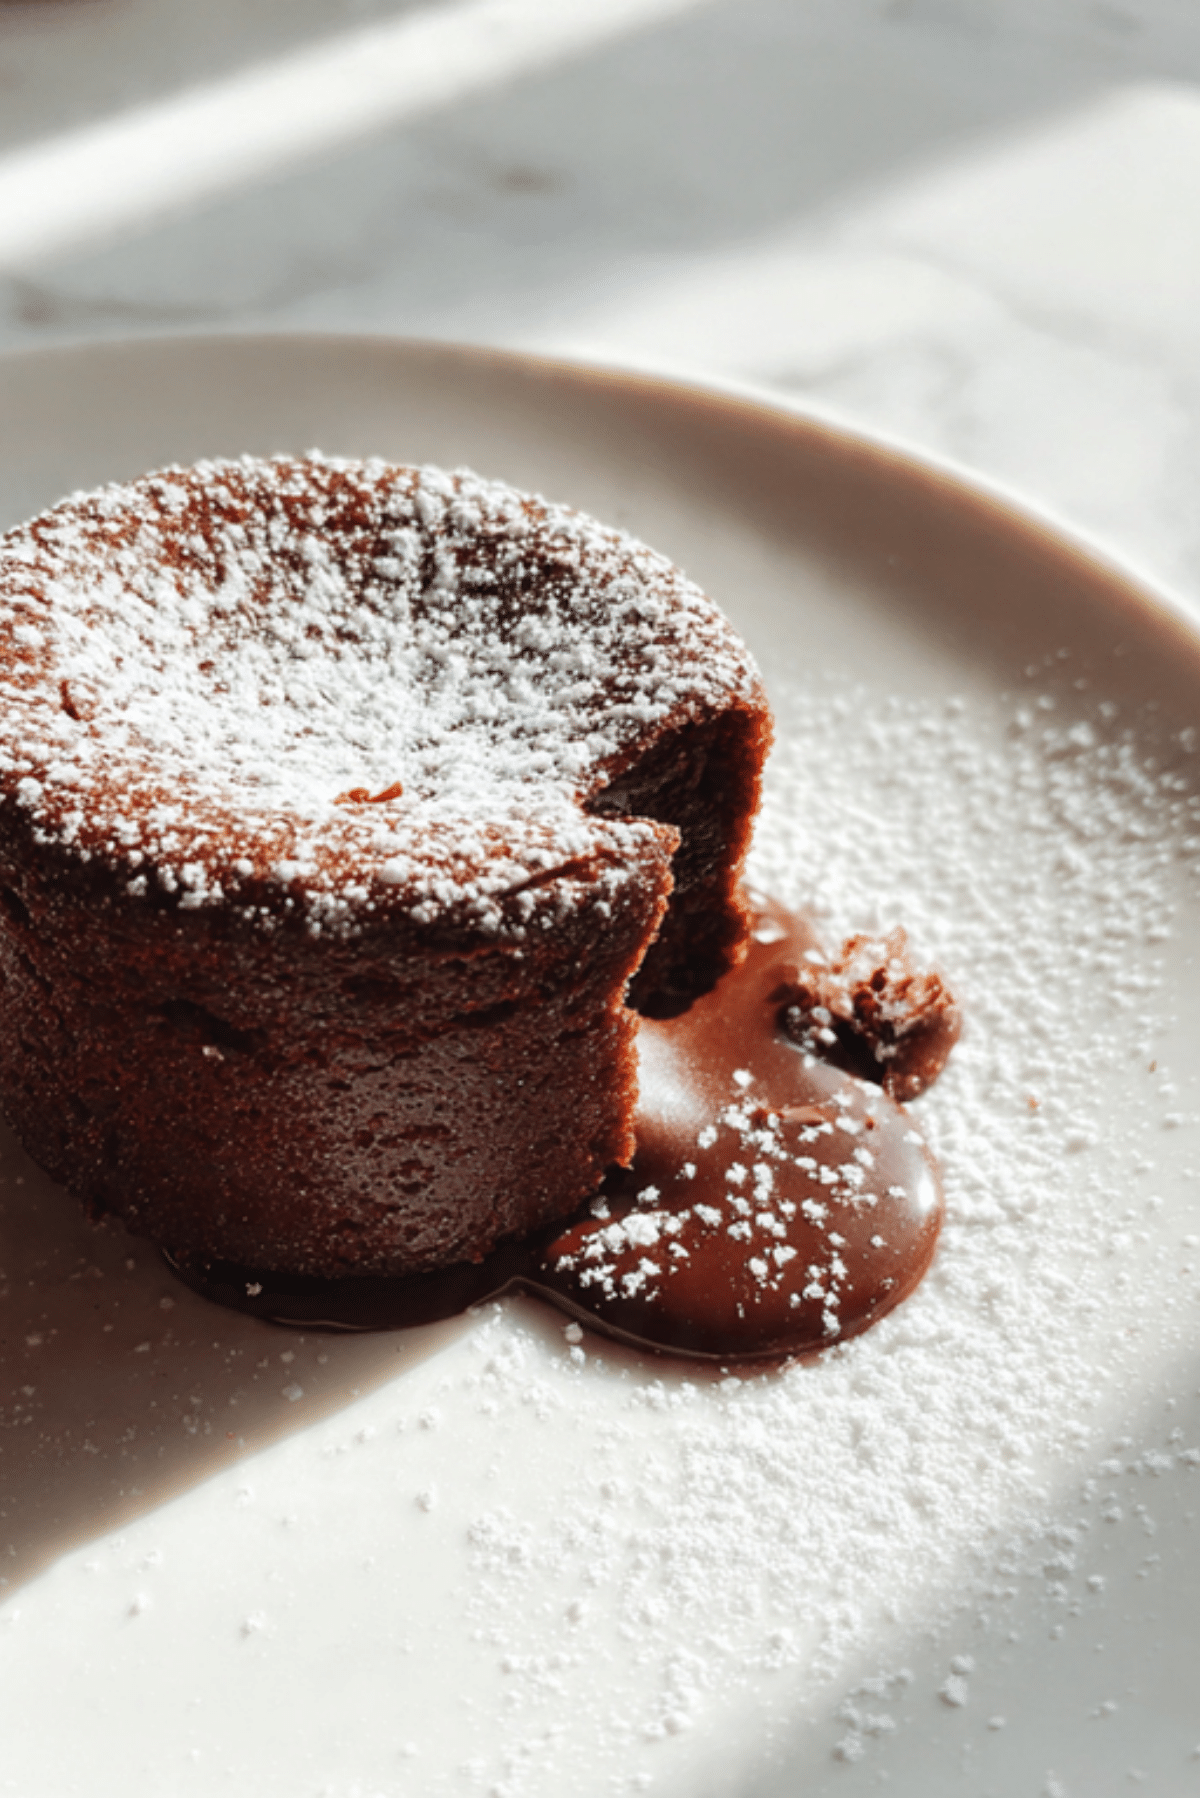
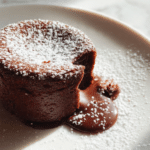
There is a specific kind of magic that happens when you break the outer shell of a warm cake to find a river of molten chocolate waiting inside. These Lindt chocolate fondants represent the peak of home indulgence, combining the world class quality of Swiss chocolate with the comforting warmth of a freshly baked dessert. It is the kind of dish that looks like it took hours of professional training to master, but in reality, it relies on a few simple techniques and the finest ingredients you can find.
The Ultimate Indulgence for Dark Chocolate Lovers
When you pull these little cakes out of the oven, the aroma of toasted cocoa will immediately fill your kitchen, creating an atmosphere of pure luxury. The texture is a beautiful play between the light, airy sponge on the outside and the thick, velvety center that flows out like silk. Trust me, you’re going to love this because it brings a five star restaurant experience right to your dining room table.
A Brief History of the Molten Lava Cake
The chocolate fondant, often referred to as a lava cake, has a bit of a debated history, with famous chefs in both France and the United States claiming its creation in the late twentieth century. Regardless of its exact origin, the dish became a global sensation because of its dramatic presentation and intense flavor profile. By using Lindt chocolate, we are honoring that tradition of excellence, ensuring that every bite is as smooth and rich as the original creators intended.
Why This Recipe is Your New Secret Weapon
If you want a dessert that guarantees a “wow” moment from your guests, this is the one you need to keep in your back pocket. Let me tell you, it’s worth every bite, and here is why it stands out as a total game changer for your dessert rotation.
Versatile: You can serve these for a formal dinner party or just as a special weekend treat for your family.
Budget-Friendly: Despite the luxurious taste, the ingredient list is short and relies on high quality basics rather than expensive equipment.
Quick and Easy: The actual active preparation time is very minimal, leaving the oven to do most of the heavy lifting.
Customizable: You can easily tuck a white chocolate truffle or a dash of espresso powder into the center for a different flavor surprise.
Crowd-Pleasing: Everyone loves the theatrical element of the molten center, making it a hit with both kids and adults.
Make-Ahead Friendly: You can prepare the batter in the ramekins and keep them chilled until you are ready to bake them fresh for dessert.
Great for Leftovers: While best fresh, they can be gently reheated to restore that signature gooey center the next day.
Insider Secrets for the Perfect Molten Center
The most important factor in a successful fondant is the timing, as even one minute too long can turn your molten center into a solid cake. You want the edges to be firm and pulling away from the sides, while the very center should still have a slight wobble when you gently shake the ramekin. Using room temperature eggs is another crucial tip, as it helps the batter emulsify perfectly with the melted chocolate and butter.
Essential Tools for Elegant Baking
To achieve that professional look and texture, having these specific tools ready will make your life much easier.
Ceramic Ramekins: These are the traditional vessels for fondants, providing even heat and a beautiful shape for unmolding.
Double Boiler or Heatproof Bowl: You need this to gently melt the Lindt chocolate without burning it or losing its smooth consistency.
Fine Mesh Sieve: Using this to sift your flour ensures there are no lumps in your batter, resulting in a perfectly smooth sponge.
Everything You Need for Chocolate Perfection
The success of this recipe lies in the quality of the chocolate, so choosing a high cocoa percentage Lindt bar will yield the best results.
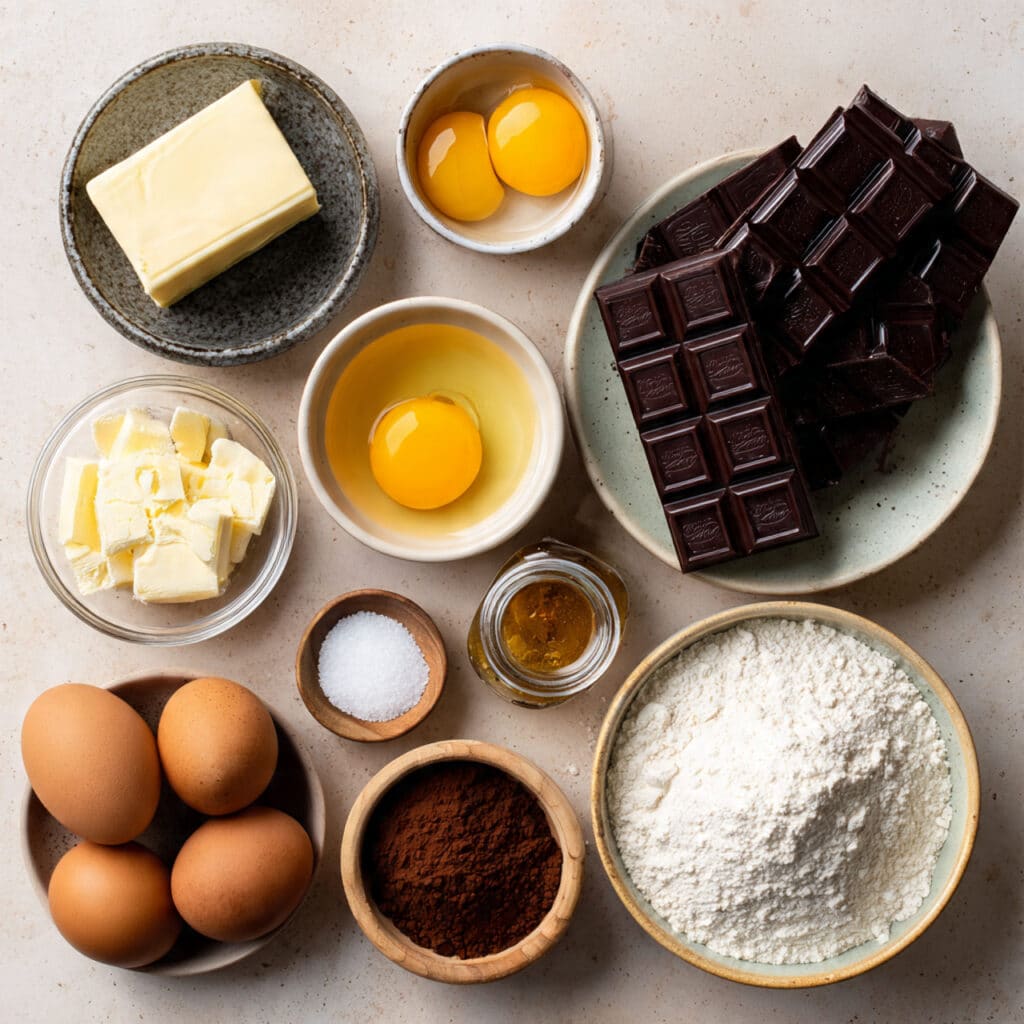
- Lindt Excellence Dark Chocolate: 100 grams, broken into pieces for smooth melting and a deep flavor.
- Unsalted Butter: 100 grams, plus extra for greasing the ramekins to ensure they release easily.
- Large Eggs: 2 whole eggs and 2 additional yolks for a rich, custard like interior.
- Granulated Sugar: 50 grams, to provide sweetness and help the edges caramelize slightly.
- All Purpose Flour: 50 grams, just enough to give the cake structure without making it heavy.
- Cocoa Powder: 1 tablespoon, used for dusting the ramekins to prevent sticking while adding extra chocolate flavor.
- Vanilla Extract: 1 teaspoon, which rounds out the bitterness of the dark chocolate perfectly.
- Salt: 1 pinch, to enhance the cocoa notes and balance the sweetness of the sugar.
Smart Ingredient Substitutions
If you need to pivot based on what is in your pantry, these alternatives will still result in a delicious warm dessert.
Lindt Dark Chocolate: Lindt Milk Chocolate or even their Sea Salt intense bars for a savory twist.
Unsalted Butter: Coconut oil for a slightly different fat profile and a hint of tropical aroma.
All Purpose Flour: A fine almond flour can work for a grain free version, though the texture will be denser.
Granulated Sugar: Fine caster sugar or even a light muscovado for a deeper molasses undertone.
Spotlighting the Star Ingredients
Lindt Excellence Dark Chocolate: This is the backbone of the dish, providing the refined Swiss quality that makes the molten center so incredibly smooth.
Additional Egg Yolks: These are the secret to that extra creamy and rich “lava” that flows out when the cake is cut.
Stepping Into the Kitchen
Let us walk through the process of creating these masterpieces, ensuring we treat the chocolate with the respect it deserves.
- Preheat Your Equipment: Set your oven to 400 degrees and place a baking sheet inside to get it nice and hot.
- Combine Ingredients: Melt the chocolate and butter together over a pot of simmering water, stirring until completely liquid.
- Prepare Your Cooking Vessel: Grease your ramekins thoroughly with butter and dust them with cocoa powder, tapping out any excess.
- Assemble the Dish: Whisk the eggs, yolks, sugar, and vanilla together until pale and thick, then gently fold in the chocolate mixture and the flour.
- Cook to Perfection: Divide the batter between the ramekins and bake for exactly 10 to 12 minutes until the tops are set but the centers are soft.
- Finishing Touches: Let the fondants sit for one minute in the ramekins before carefully running a thin knife around the edge and inverting them onto plates.
- Serve and Enjoy: Dust with a little powdered sugar and serve immediately while the center is still in its liquid state.
Texture and Flavor Development
The first thing you will notice is the thin, delicate crust that gives way to a decadent, warm sauce. The high fat content from the Lindt chocolate and butter creates a mouthfeel that is incredibly coating and luxurious, with the salt bringing out hidden fruit and nut notes in the cocoa.
Cooking Tips and Tricks
- Always use a high quality butter, as its flavor will be very prominent in the finished cake.
- If you are nervous about unmolding, you can serve them directly in the ramekins for a more rustic look.
- Add a tiny pinch of chili powder to the batter if you want a subtle, warming kick that pairs beautifully with dark chocolate.
Common Pitfalls to Avoid
- Cold Eggs: If your eggs are cold, they can cause the melted chocolate to seize up and become grainy.
- Over Greasing: While you want them to release, too much butter can cause the edges to fry rather than bake.
- Opening the Oven: Avoid opening the oven door during the first 8 minutes to prevent the cakes from collapsing.
Nutrition Facts
Servings: 4
Calories per serving: 410
Note: These are approximate values.
Timing Your Treat
Prep Time: 15 minutes
Cook Time: 12 minutes
Total Time: 27 minutes
Storage and Make Ahead Advice
You can prepare the batter up to 24 hours in advance and keep it covered in the fridge. If you bake them from cold, you may need to add an extra 2 minutes to the timer. Leftover baked fondants can be stored in the fridge and microwaved for 20 seconds to bring back the gooey center.
Creative Serving Suggestions
A tart raspberry coulis or a handful of fresh blackberries provides a beautiful acidity that cuts through the richness of the Lindt chocolate. For a classic pairing, a simple scoop of high quality vanilla bean ice cream is hard to beat.
Giving Your Leftovers New Life
If a fondant has fully set and lost its molten center, you can slice it thin and serve it with a cup of coffee like a dense, rich brownie.
Final Touches for Flavor
A few flakes of sea salt on top of the finished cake can transform the flavor profile, making the chocolate taste even more intense and complex.
Making it a Visual Masterpiece
Use a white plate to create a high contrast with the dark chocolate cake, and garnish with a single fresh mint leaf for a pop of vibrant green.
Variations to Try
- Salted Caramel Center: Push a soft caramel square into the center of the batter before baking.
- Orange Chocolate: Add the zest of half an orange to the chocolate and butter mixture.
- Hazelnut Fondant: Stir in a teaspoon of crushed toasted hazelnuts for a bit of hidden texture.
FAQ’s
- Can I use a different brand of chocolate?
You can, but the high cocoa butter content in Lindt is what ensures that perfectly smooth molten flow. - What if I don’t have ramekins?
A muffin tin can work, but you will need to reduce the baking time to about 8 to 10 minutes. - Why did my cake stick to the ramekin?
This usually happens if the buttering and dusting with cocoa powder was not thorough enough. - My center was solid, what did I do wrong?
The cakes were likely in the oven for too long, or your oven runs hotter than the setting indicates. - Can I make these dairy free?
You can use a dairy free Lindt bar and a vegan butter substitute, though the texture may vary slightly. - Do I have to sift the flour?
It is highly recommended to avoid any tiny white flour clumps in your dark chocolate cake. - Can I use brown sugar?
Yes, it will add a slight fudge like chewiness to the outer cake layer. - Why do I need extra yolks?
The yolks provide the emulsifiers needed to keep the center liquid and rich rather than cakey. - Can I freeze the raw batter?
Yes, you can freeze them in the ramekins and bake them directly from frozen, adding about 5 minutes to the time. - What is the best way to melt the chocolate?
Gently over a water bath is best to avoid scorching the delicate fats in the Swiss chocolate.
Conclusion
Mastering the Lindt chocolate fondant is a journey into the heart of dessert luxury. It is a recipe that rewards patience and quality ingredients with a result that is truly unforgettable. Whether you are celebrating a special milestone or just treating yourself to a moment of indulgence, these fondants are sure to become a staple in your kitchen.
PrintLindt Chocolate Fondants
Luxurious Swiss-style chocolate fondants with a perfectly molten center, featuring the rich taste of Lindt dark chocolate.
Ingredients
- 100 grams Lindt Excellence Dark Chocolate
- 100 grams Unsalted Butter
- 2 Large Eggs
- 2 Large Egg Yolks
- 50 grams Granulated Sugar
- 50 grams All Purpose Flour
- 1 tablespoon Cocoa Powder
- 1 teaspoon Vanilla Extract
- 1 pinch Salt
Instructions
- Preheat oven to 400 degrees Fahrenheit and place a baking sheet inside.
- Grease four 6-ounce ramekins with butter and dust with cocoa powder, tapping out the excess.
- Melt the Lindt chocolate and butter together in a heatproof bowl over simmering water until smooth.
- In a separate bowl, whisk the eggs, yolks, sugar, and vanilla until thick and pale.
- Gently fold the melted chocolate mixture into the egg mixture.
- Sift in the flour and salt, then fold gently until just combined.
- Divide the batter between the prepared ramekins and bake for 10 to 12 minutes.
- Let stand for 1 minute before inverting onto plates and serving immediately.
Notes
- The center should still be soft and slightly wobbly when taken out of the oven.
- Use room temperature eggs to prevent the chocolate from seizing.
- High-quality butter is essential for the best flavor profile.