Hot Chocolate Fudge
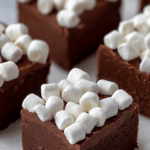
There is nothing quite like the cozy feeling of wrapping your hands around a warm mug of cocoa, and this Hot Chocolate Fudge translates that exact comfort into a decadent, bite-sized treat. It is creamy, intensely chocolatey, and topped with those signature mini marshmallows that we all dive for. Trust me, you’re going to love this recipe because it captures the essence of winter in every single square.
A Decadent Twist on a Fireside Classic
When you slice into this fudge, the knife glides through a velvety chocolate base that is surprisingly light yet deeply satisfying. The mini marshmallows on top provide a soft, pillowy contrast to the dense fudge, creating a texture play that is reminiscent of the very last sip of a gourmet hot chocolate. Let me tell you, it’s worth every bite, especially when the fudge starts to melt slightly on your tongue.
The Timeless Appeal of Confections
Fudge has long been a staple of American candy shops, dating back to the late 19th century when it was famously crafted by students at women’s colleges. While traditional fudge requires precise temperature control and a candy thermometer, this modern hot chocolate version simplifies the process without sacrificing that old-fashioned charm. By adding marshmallows, we pay homage to the classic beverage pairing that has brought joy to families for generations. It is a nostalgic recipe that feels both sophisticated and wonderfully simple.
Why This Recipe is a Total Game-Changer
This recipe is designed to be your secret weapon for holiday gift-giving, bake sales, or a quiet night in by the fire.
Versatile: You can stir in crushed peppermint or a dash of cinnamon to create different seasonal “hot cocoa” flavors.
Budget-Friendly: The ingredients are simple staples like chocolate chips and condensed milk which are very affordable in bulk.
Quick and Easy: Since this is a no-bake recipe, you can have it prepared and chilling in less than fifteen minutes.
Customizable: Use dark chocolate for a more mature palate or milk chocolate if you want it to taste exactly like a classic cocoa packet.
Crowd-Pleasing: No one can resist a tray of fudge, and the marshmallow topping makes it an instant visual favorite.
Make-Ahead Friendly: This fudge keeps beautifully for weeks, so you can check one more thing off your prep list early.
Great for Leftovers: Even the smallest scraps can be repurposed into other desserts or enjoyed as a quick sweet pick-me-up.
Secrets for Silky Smooth Fudge
To achieve that professional, glossy finish, make sure you melt your chocolate slowly over low heat to prevent it from seizing or becoming grainy. If you are using a microwave, always go in short bursts and stir well in between. Also, when adding the marshmallows to the top, press them down very gently while the fudge is still slightly warm so they anchor themselves without disappearing into the chocolate.
Essential Tools for Fudge Mastery
Using the right tools ensures your fudge sets properly and is easy to serve without any messy sticking.
8×8 Square Baking Pan: The perfect size to give your fudge that classic, thick, and chunky profile.
Parchment Paper: Lining your pan with parchment is non-negotiable for lifting the set fudge out cleanly for slicing.
Heat-Proof Spatula: Essential for scraping every last bit of melted chocolate from the bowl and smoothing the top perfectly.
Heavy-Bottomed Saucepan: If melting on the stove, a thick base prevents the chocolate from burning or sticking to the bottom.
Long Bench Scraper or Knife: A long, straight blade allows you to make clean, vertical cuts for perfectly uniform squares.
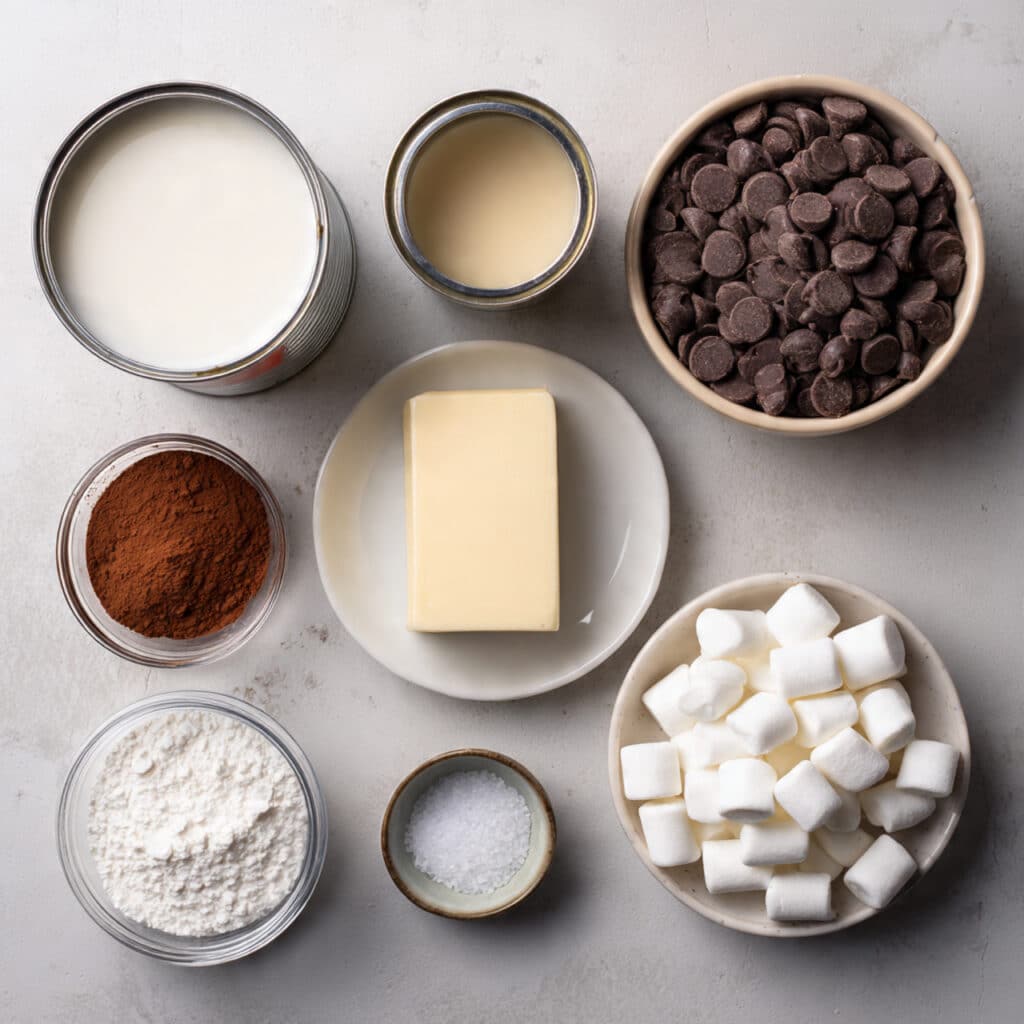
Ingredients You Will Need For Hot Chocolate Fudge
The simplicity of these ingredients belies the complex and rich flavor they produce when combined.
- Semi-Sweet Chocolate Chips: 3 cups to form the sturdy and rich foundation of the fudge.
- Sweetened Condensed Milk: 1 can (14 ounces) to provide the creamy sweetness and perfectly smooth texture.
- Unsalted Butter: 2 tablespoons to add a luxurious mouthfeel and a beautiful shine to the finish.
- Vanilla Extract: 1 teaspoon to enhance the chocolate and give it that classic hot cocoa aroma.
- Mini Marshmallows: 1.5 cups to generously cover the top and provide that iconic hot chocolate look.
- Instant Cocoa Mix: 2 tablespoons stirred into the batter to double down on the authentic hot chocolate flavor.
- Pinch of Salt: 0.125 teaspoons to cut through the richness and balance the sugar.
Smart Ingredient Substitutions
If you need to change things up, these substitutions maintain the delicious spirit of the recipe.
Semi-Sweet Chocolate Chips: You can use milk chocolate chips for a sweeter, creamier fudge or dark chocolate for more intensity.
Mini Marshmallows: If you cannot find minis, you can use marshmallow fluff swirled into the top for a marbled effect.
Unsalted Butter: A tablespoon of coconut oil can be used instead to provide a similar shine and smooth texture.
Vanilla Extract: Almond extract or even a tiny drop of peppermint oil can create a fun flavor variation.
Spotlight on Key Ingredients
Sweetened Condensed Milk: This is the magic ingredient that allows the fudge to set into a sliceable consistency without the need for complicated sugar boiling.
Instant Cocoa Mix: By including the actual mix in the fudge, we ensure the flavor profile is unmistakable and tastes exactly like the drink.
Step-by-Step Culinary Journey
Follow these steps for a foolproof batch of fudge that will impress everyone who tries it.
- Preheat Your Equipment: There is no oven needed here, so simply line your 8×8 baking pan with parchment paper, leaving a slight overhang on the sides.
- Combine Ingredients: In a medium saucepan over low heat, combine the chocolate chips, sweetened condensed milk, and butter.
- Prepare Your Cooking Vessel: Stir the mixture constantly until the chocolate is completely melted and the texture is perfectly smooth and glossy.
- Assemble the Dish: Remove from the heat and quickly stir in the vanilla extract, instant cocoa mix, and salt until fully incorporated.
- Cook to Perfection: Pour the warm fudge into your prepared pan and use a spatula to smooth the surface into an even layer.
- Finishing Touches: Sprinkle the mini marshmallows over the top and press them down very lightly so they stick to the surface.
- Serve and Enjoy: Refrigerate for at least three hours until firm, then lift from the pan and slice into 1-inch squares for the best presentation.
Texture and Flavor Development
The initial taste is one of pure, unadulterated chocolate that melts slowly, followed by the soft, airy chew of the marshmallows. Because we use cocoa mix in the base, you get those malted and dairy notes that distinguish hot chocolate from regular fudge. It is a harmonious blend that feels light enough to keep you reaching for a second piece.
Pro Tips and Tricks
- For an even more “toasted” flavor, you can briefly place the set fudge under a broiler for 30 seconds to brown the marshmallows.
- Always use a clean knife for every cut, wiping it with a warm cloth to ensure the edges of each square are sharp.
- Stir the cocoa powder through a sieve to ensure there are no dry clumps in your smooth fudge.
What to Avoid for Best Results
- Do not boil the mixture, as overcooking the condensed milk can lead to a crumbly or hard texture.
- Avoid using generic chocolate chips if possible, as higher quality chocolate contains more cocoa butter and melts much smoother.
- Do not forget the salt, it is the secret ingredient that prevents the fudge from tasting cloyingly sweet.
Nutritional Information
Servings: 36 squares
Calories per serving: 110 calories
Note: These are approximate values.
Preparation Time
Prep Time: 10 minutes
Cook Time: 5 minutes
Total Time: 15 minutes (plus 3 hours chilling)
Storage and Freshness Tips
This fudge is incredibly shelf-stable and can be kept in an airtight container at room temperature for up to 2 weeks. For longer storage, you can keep it in the refrigerator for a month or freeze it for up to 3 months, making it the perfect treat to keep on hand for unexpected guests.
How to Serve
Arrange the squares on a festive platter or place them in individual paper cupcake liners for a professional look. They are best served at room temperature to allow the chocolate to be at its most velvety and flavorful.
Creative Leftover Transformations
If you have leftovers, try melting a few squares down to use as a rich topping for waffles or pancakes. You can also chop the fudge into smaller bits and fold them into a batch of brownie batter for a “double chocolate” surprise.
Additional Tips for Flavor
A light dusting of extra cocoa powder over the marshmallows right before serving adds a beautiful matte finish and an extra boost of chocolate aroma. This one’s a total game-changer for the overall aesthetic.
Make It a Showstopper
To make this look like a professional confection, use a culinary torch to lightly toast the marshmallows on top until they are golden brown and bubbling. This adds a “campfire” element that makes the fudge look absolutely irresistible.
Variations to Try
- Peppermint Hot Cocoa: Add crushed candy canes to the top along with the marshmallows.
- Mexican Hot Chocolate: Add a half teaspoon of cinnamon and a tiny pinch of cayenne pepper to the melt.
- Mocha Fudge: Stir in a teaspoon of instant espresso powder to the chocolate mixture.
- White Hot Chocolate: Use white chocolate chips and white cocoa mix for a creamy, snowy version.
FAQ’s
- Why didn’t my fudge set?
This usually happens if the ratio of chocolate to milk was off or if the mixture wasn’t heated enough to combine properly. - Can I use marshmallow fluff?
Yes, you can swirl it in, but the traditional mini marshmallows give the best hot chocolate look. - Is it okay to use milk chocolate?
Absolutely, it will just be a bit sweeter and softer than the semi-sweet version. - Do I need a candy thermometer?
No, this is a “cheat” fudge recipe that relies on the condensed milk, so no thermometer is required. - Can I add nuts?
Yes, chopped pecans or walnuts would be a great addition for some crunch. - How do I prevent the marshmallows from melting?
Wait about 2 minutes after pouring the fudge into the pan before adding the marshmallows so it is not boiling hot. - Can I make this dairy-free?
You would need to use vegan chocolate chips and a condensed coconut milk alternative. - Why is my fudge grainy?
Graininess usually comes from overcooking the mixture or getting a drop of water in the melting chocolate. - How small should I cut the squares?
Because fudge is so rich, 1-inch squares are usually the perfect serving size. - Can I double the recipe?
Yes, just use a 9×13 pan instead of an 8×8 pan.
Conclusion
Hot Chocolate Fudge is the ultimate tribute to everyone’s favorite winter drink, offering a concentrated burst of cocoa joy in every bite. It is easy to make, beautiful to look at, and even better to eat. Whether you are sharing it with friends or keeping a stash for yourself, this fudge is sure to become a seasonal favorite. Now, gather your ingredients and let’s get melting, because you’re going to love this sweet chocolate adventure!
PrintHot Chocolate Fudge
A rich, velvety no-bake chocolate fudge infused with hot cocoa flavor and topped with a layer of soft mini marshmallows.
Ingredients
- 3 cups Semi-Sweet Chocolate Chips
- 1 can (14 ounces) Sweetened Condensed Milk
- 2 tablespoons Unsalted Butter
- 1 teaspoon Vanilla Extract
- 1.5 cups Mini Marshmallows
- 2 tablespoons Instant Cocoa Mix
- 0.125 teaspoons Salt
Instructions
- Line an 8×8 inch square baking pan with parchment paper, ensuring there is a slight overhang on the sides for easy removal.
- In a medium saucepan over low heat, combine the chocolate chips, sweetened condensed milk, and unsalted butter.
- Stir the mixture constantly until the chocolate is completely melted and the texture is smooth and glossy.
- Remove the saucepan from the heat and stir in the vanilla extract, instant cocoa mix, and salt until fully combined.
- Pour the warm fudge into the prepared baking pan and smooth the top with a spatula.
- Let the fudge sit for 2 minutes, then evenly sprinkle the mini marshmallows over the top, pressing them down very gently to set.
- Place the pan in the refrigerator and chill for at least 3 hours, or until the fudge is completely firm.
- Once set, use the parchment paper handles to lift the fudge out of the pan.
- Slice into 1-inch squares using a sharp, clean knife.
- Store in an airtight container at room temperature or in the fridge.
Notes
- Avoid boiling the mixture to keep the fudge creamy rather than hard.
- Wipe your knife with a warm damp cloth between cuts for perfectly clean edges.
- Toast the marshmallows with a kitchen torch for a campfire hot cocoa effect.