Homemade Tagalong Cookies
There is something deeply nostalgic about a classic girl scout cookie, but these Homemade Tagalong Cookies elevate that experience to an entirely new level. Combining a buttery, crisp shortbread base with a luscious layer of creamy peanut butter and a smooth chocolate finish, these treats are a texture lover’s dream. Trust me, you’re going to love this because it brings that iconic flavor home with higher-quality ingredients and a freshness you just can’t get from a box.
A Perfect Trio of Flavors and Textures
When it comes to dessert, few combinations are as legendary as chocolate and peanut butter, but the addition of a crunchy biscuit makes it a total game changer. This recipe is designed to give you that satisfying “snap” from the cookie followed by the melt-in-your-mouth richness of the toppings. The balance between the slight saltiness of the nut butter and the sweetness of the milk chocolate is pure heaven, and let me tell you, it’s worth every bite.
The Evolution of a Cookie Classic
The Tagalong, also known as Peanut Butter Patties in some regions, has been a staple of American cookie culture for decades. Originally inspired by traditional thumbprint cookies, this version replaces the jam with a creamy peanut butter filling and wraps the whole thing in a protective chocolate shell. Making them at home allows you to control the thickness of each layer, ensuring you get exactly the cookie-to-peanut-butter ratio you desire.
Why You Will Love These Tagalongs
You are going to find that these homemade biscuits are as reliable as they are delicious, making them a perfect project for any weekend baker.
Versatile: These work beautifully for holiday cookie platters, school bake sales, or a simple late-night snack.
Budget-Friendly: You likely already have most of the shortbread ingredients in your pantry, making these an affordable luxury.
Quick and Easy: Once the shortbread is baked, the assembly is straightforward and requires no further oven time.
Customizable: You can use dark chocolate for a more sophisticated bite or crunchy peanut butter if you want extra texture.
Crowd-Pleasing: I have never seen a plate of these last more than five minutes at a gathering.
Make-Ahead Friendly: These cookies actually hold up remarkably well and can be stored for days without losing their crunch.
Great for Leftovers: If you have extra chocolate or peanut butter filling, they make a fantastic dip for apple slices.
Pro Tips for the Ultimate Cookie Snap
Getting a crisp shortbread base is the secret to a great Tagalong, so keep these expert tricks in mind while you work.
The biggest tip I can give you is to chill your dough before cutting out your circles, as this prevents the cookies from spreading and losing their shape in the oven. When applying the peanut butter layer, use a small piping bag or a spoon to create a neat mound in the center, leaving a tiny bit of room at the edges for the chocolate to grip. Also, ensure your cookies are completely cool before adding the toppings, or the peanut butter will melt and slide right off.
Essential Tools for Success
Having the right equipment on hand will make the assembly process much smoother and more professional.
Round Cookie Cutter: A 2-inch cutter creates the perfect size for a two-bite snack.
Electric Hand Mixer: Essential for creaming the butter and sugar to get that light, airy shortbread texture.
Cooling Rack: Allows air to circulate around the cookies so they crisp up properly after baking.
Dipping Fork: A specialized tool or a regular fork helps you submerge the cookies in chocolate without leaving messy fingerprints.
Ingredients You Will Need For Success
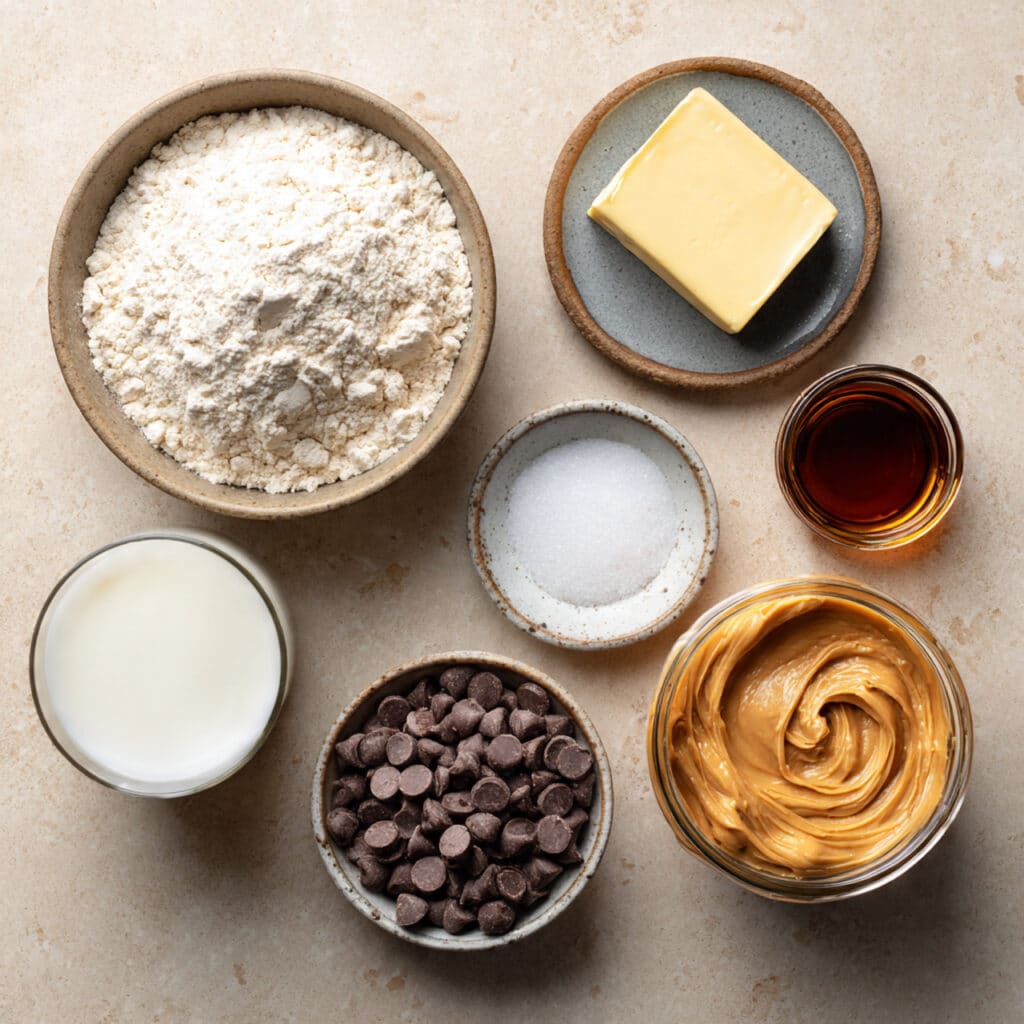
Every element of this recipe works together to create a balanced, decadent treat that feels much more special than store-bought.
- All-Purpose Flour: 2 cups to provide the structural foundation for the crunchy shortbread base.
- Unsalted Butter: 1 cup softened to create that signature rich and buttery biscuit flavor.
- Granulated Sugar: 1/2 cup to provide just enough sweetness to the base without overpowering the toppings.
- Creamy Peanut Butter: 1 cup of smooth nut butter mixed with a little powdered sugar for a stable, pipeable filling.
- Milk Chocolate Chips: 2 cups of high-quality chocolate for a smooth, melty coating.
- Vanilla Extract: 1 teaspoon to enhance the buttery notes of the shortbread.
Flexible Ingredient Substitutions
If you find yourself missing an item, there are several ways to pivot while keeping the essence of the cookie intact.
Milk Chocolate: Dark chocolate or even white chocolate for a different flavor profile.
Peanut Butter: Almond butter or sunflower seed butter for a nut-free alternative.
Granulated Sugar: Powdered sugar in the base can create an even more tender, melt-in-your-mouth shortbread.
Spotlight on Our Star Ingredients
Unsalted Butter: This is the heart of the shortbread, providing the fat necessary for that perfectly crumbly and golden texture.
Creamy Peanut Butter: This ingredient provides the lush, salty-sweet middle layer that makes the Tagalong so famous.
Let Us Start the Baking Process
Rolling out the dough and dipping the cookies is where the magic happens, so let’s get into the step-by-step process.
- Preheat Your Equipment: Set your oven to 350°F and line two large baking sheets with parchment paper to prevent sticking.
- Combine Ingredients: Cream the butter and sugar until fluffy, then mix in the vanilla and flour until a soft dough forms.
- Prepare Your Cooking Vessel: Roll the dough out to a quarter-inch thickness and cut out circles, placing them an inch apart on the sheets.
- Assemble the Dish: Bake the shortbread for 10 to 12 minutes until the edges are just barely golden, then let them cool completely.
- Cook to Perfection: Mix the peanut butter with a half cup of powdered sugar, then place a small dollop on top of each cooled cookie.
- Finishing Touches: Melt the chocolate chips in the microwave, then dip each cookie until fully coated and return to the parchment.
- Serve and Enjoy: Let the cookies sit at room temperature for an hour until the chocolate is firm, or pop them in the fridge for 15 minutes.
Flavor and Texture Development
As these cookies set, the oils from the peanut butter slightly permeate the top of the shortbread, creating a seamless transition of flavors. The chocolate shell acts as a barrier, locking in the freshness of the biscuit and keeping the peanut butter creamy. When you take a bite, you get the immediate snap of cold chocolate, the silkiness of the nut butter, and the final satisfying crunch of the butter cookie.
Helpful Cooking Tips and Tricks
- Use a toothpick to pop any small air bubbles in the chocolate after dipping for a perfectly smooth finish.
- If your chocolate is too thick for dipping, add a teaspoon of coconut oil to thin it out without affecting the flavor.
- Sprinkle a tiny pinch of sea salt on top of the chocolate before it sets to highlight the peanut butter flavor.
What to Avoid for Best Results
- Do not overbake the shortbread, as it will continue to firm up as it cools and you don’t want it to be rock hard.
- Avoid using natural peanut butter that separates, as the oil will leak out and prevent the chocolate from adhering.
- Don’t dip the cookies while the chocolate is piping hot; let it cool for a minute so it coats the cookie thickly and evenly.
Nutritional Information
Servings: 24 cookies
Calories per serving: 215
Note: These are approximate values.
Preparation Time
Prep Time: 30 minutes
Cook Time: 12 minutes
Total Time: 42 minutes
Make-Ahead and Storage Tips
These cookies are fantastic for making in advance because the chocolate coating keeps them fresh. You can store them in an airtight container at room temperature for up to five days, or in the refrigerator for up to two weeks. If you live in a warm climate, keeping them in the fridge is best to prevent the chocolate from softening or blooming.
How to Serve
For a classic experience, serve these with a tall, cold glass of milk. They also look beautiful arranged in a circular pattern on a white ceramic platter for a party. If you want to get creative, crumble one over a bowl of vanilla bean ice cream for an instant gourmet sundae.
Creative Leftover Transformations
If you have a few broken cookies, don’t throw them away! Chop them into small pieces and fold them into brownie batter for a “Tagalong Brownie.” You can also use the crumbs as a crust for a peanut butter cheesecake or a chocolate tart.
Additional Tips
If you want to speed up the process, you can use store-bought shortbread cookies as a shortcut, though the flavor won’t be quite as rich. Always ensure your hands are cool when handling the chocolate-covered cookies to avoid leaving smudges on the finish.
Make It a Showstopper
To make these look like they came from a high-end confectionery, drizzle a little bit of leftover melted chocolate in a zig-zag pattern across the top. You can also press a single roasted peanut into the peanut butter before dipping to create a small “bump” that adds visual interest and extra crunch.
Variations to Try
- Dark Chocolate Sea Salt: Use 70% dark chocolate and a heavy sprinkle of flaky salt for an adult version.
- Double Peanut Butter: Add a half cup of chopped peanuts to the shortbread dough for extra nuttiness.
- Chocolate Shortbread: Replace a quarter cup of flour with cocoa powder for a deep chocolate base.
- White Chocolate Raspberry: Use raspberry jam instead of peanut butter and coat in white chocolate.
FAQ’s
- Can I freeze these cookies?
Yes, they freeze beautifully for up to three months; just thaw them at room temperature for an hour before eating. - Why did my chocolate turn white?
This is called “bloom” and usually happens if the chocolate is stored in a place with fluctuating temperatures; it’s still safe to eat! - My peanut butter is too runny, what should I do?
Mix in a little more powdered sugar until it reaches a paste-like consistency that holds its shape. - Can I use a different shape?
Of course! Hearts or squares work just as well as circles. - How do I get a thin chocolate coating?
Tap the dipping fork on the edge of the bowl several times to let the excess chocolate drain off before setting the cookie down. - Can I make these vegan?
Yes, use vegan butter and dairy-free chocolate chips; the peanut butter is already naturally vegan. - Do I have to use an electric mixer?
It helps get the shortbread light, but you can definitely do it by hand with a sturdy wooden spoon and some elbow grease. - Why are my cookies spreading in the oven?
The butter was likely too warm; try chilling the cut-out cookies for 15 minutes before baking. - Can I use crunchy peanut butter?
Yes, it adds a great texture, though it might make the top of the cookie look a little more lumpy. - What chocolate is best for melting?
Couverture chocolate or high-quality chips with a high cocoa butter content will give you the best results.
Conclusion
Making Homemade Tagalong Cookies is a labor of love that pays off in every crunchy, creamy, chocolatey bite. They are a wonderful reminder that some of the best treats are the ones we craft with our own hands in our own kitchens. I hope this recipe becomes a new favorite in your household and brings a bit of that classic cookie joy to your table. Now, let’s get baking!
PrintHomemade Tagalong Cookies

A homemade version of the classic Girl Scout cookie featuring a buttery shortbread base, creamy peanut butter filling, and a smooth chocolate coating.
Ingredients
- 1 cup Unsalted Butter, softened
- 1/2 cup Granulated Sugar
- 1 teaspoon Vanilla Extract
- 2 cups All-Purpose Flour
- 1 cup Creamy Peanut Butter
- 1/2 cup Powdered Sugar
- 2 cups Milk Chocolate Chips
Instructions
- Preheat oven to 350°F and line baking sheets with parchment paper.
- Cream the softened butter and granulated sugar until light and fluffy.
- Add vanilla and then gradually mix in the flour until a dough forms.
- Roll out dough to 1/4-inch thickness and cut into 2-inch circles.
- Bake for 10-12 minutes until edges are barely golden; cool completely on a wire rack.
- Mix peanut butter and powdered sugar together until smooth.
- Place a tablespoon-sized dollop of the peanut butter mixture onto each cooled cookie.
- Melt chocolate chips in the microwave in 30-second intervals until smooth.
- Dip each cookie into the melted chocolate, coating completely, and place back on parchment paper to set.
Notes
- Chill the dough for 30 minutes before cutting to prevent spreading.
- Ensure cookies are completely cool before adding peanut butter to avoid melting.
- Store in the refrigerator for a firmer chocolate snap.