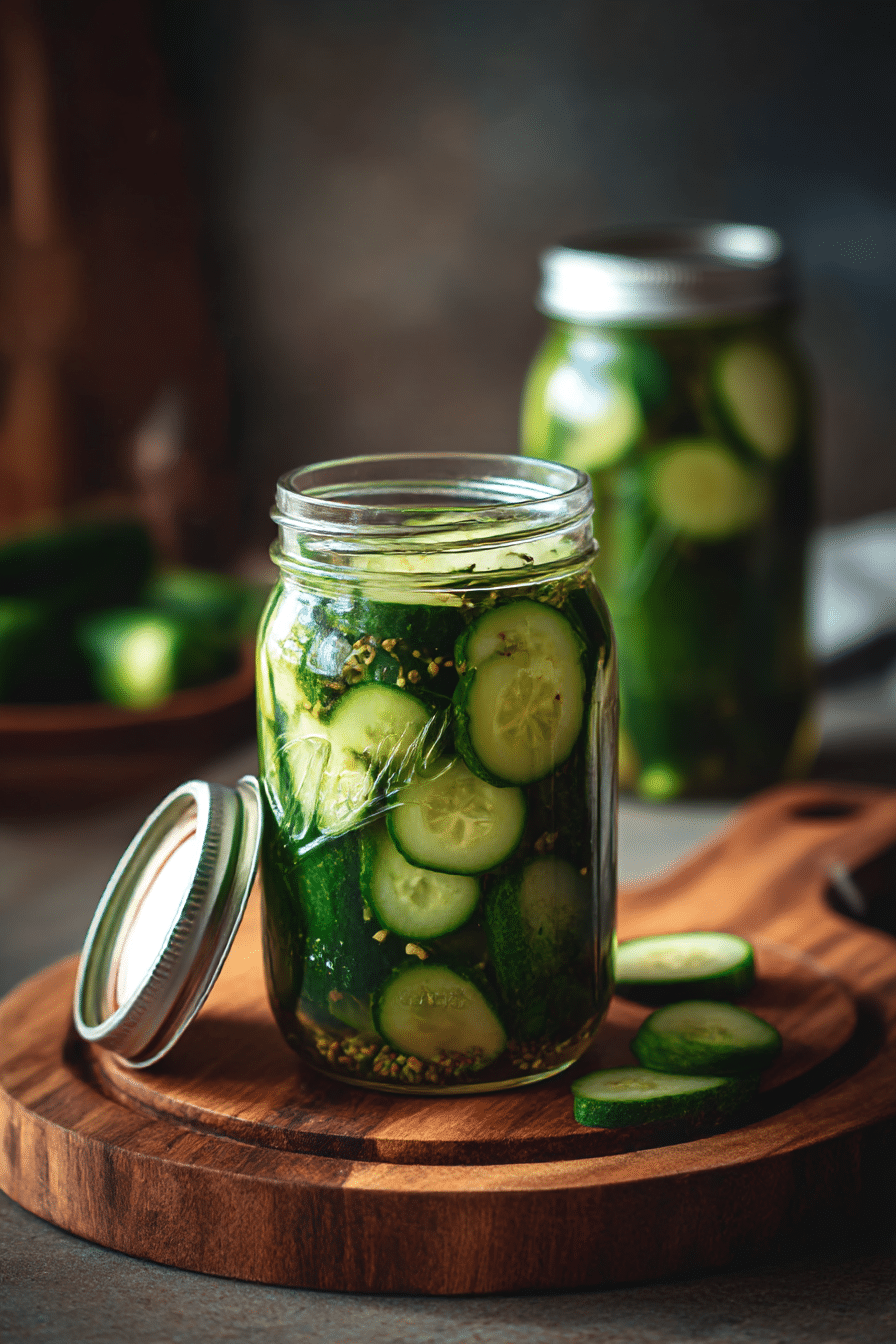
Homemade Claussen Pickles
Few things in life rival the crunch of a perfectly brined pickle. With a crisp snap, a tangy burst, and that unmistakable garlicky aroma, Homemade Claussen Pickles bring the deli right into your kitchen. Imagine opening the jar and catching a whiff of dill and spices mingling in the salty brine, the cucumbers transformed into green jewels of flavor. Trust me, you’re going to love this — these pickles are a total game-changer.
Behind the Recipe
The first time I tried Claussen pickles was at a summer barbecue. Cold from the fridge, they had a crunch like no other. Later, when I discovered they were never cooked but fermented in a cold brine, I knew I had to recreate them at home. This recipe was born from that curiosity — a way to capture the deli-style crispness without preservatives, just like the ones from the jar, only fresher.
Recipe Origin or Trivia
Claussen pickles are a beloved American classic, created in 1870 by C. F. Claussen & Sons in Chicago. Unlike most commercial pickles, they’re known for being “never heated,” which preserves their crunch and fresh flavor. The process mimics old-world fermentation methods where cucumbers sat in barrels of cold brine with garlic and spices. This tradition of cold brining stretches back centuries, making these pickles a modern twist on an ancient preservation technique.
Why You’ll Love Homemade Claussen Pickles
- Versatile: Perfect as a snack, burger topping, or side to sandwiches.
- Budget-Friendly: Fresh cucumbers and a handful of spices transform into jars of pickles for pennies.
- Quick and Easy: A simple brine and a bit of patience are all you need.
- Customizable: Adjust garlic, dill, and spice levels to your liking.
- Crowd-Pleasing: A crunchy, tangy treat everyone will reach for.
- Make-Ahead Friendly: They get better the longer they sit in the fridge.
- Great for Leftovers: The brine can be reused for other vegetables.
Chef’s Pro Tips for Perfect Results
Here’s how to nail that signature crunch every time:
- Choose firm cucumbers. Kirby or pickling cucumbers are ideal.
- Trim the blossom ends. They contain enzymes that soften pickles.
- Use filtered water. Chlorine in tap water can interfere with fermentation.
- Keep it cold. Always refrigerate — this is key to crispness.
- Give them time. They need at least 3–4 days to develop flavor.
Kitchen Tools You’ll Need
Before you begin, grab these essentials:
- Large Jars with Lids: Quart-size glass jars work perfectly.
- Measuring Cups and Spoons: For precise brine ratios.
- Sharp Knife: To trim cucumbers and cut spears if desired.
- Cutting Board: For prepping cucumbers and garlic.
- Large Bowl or Pitcher: To mix the brine.
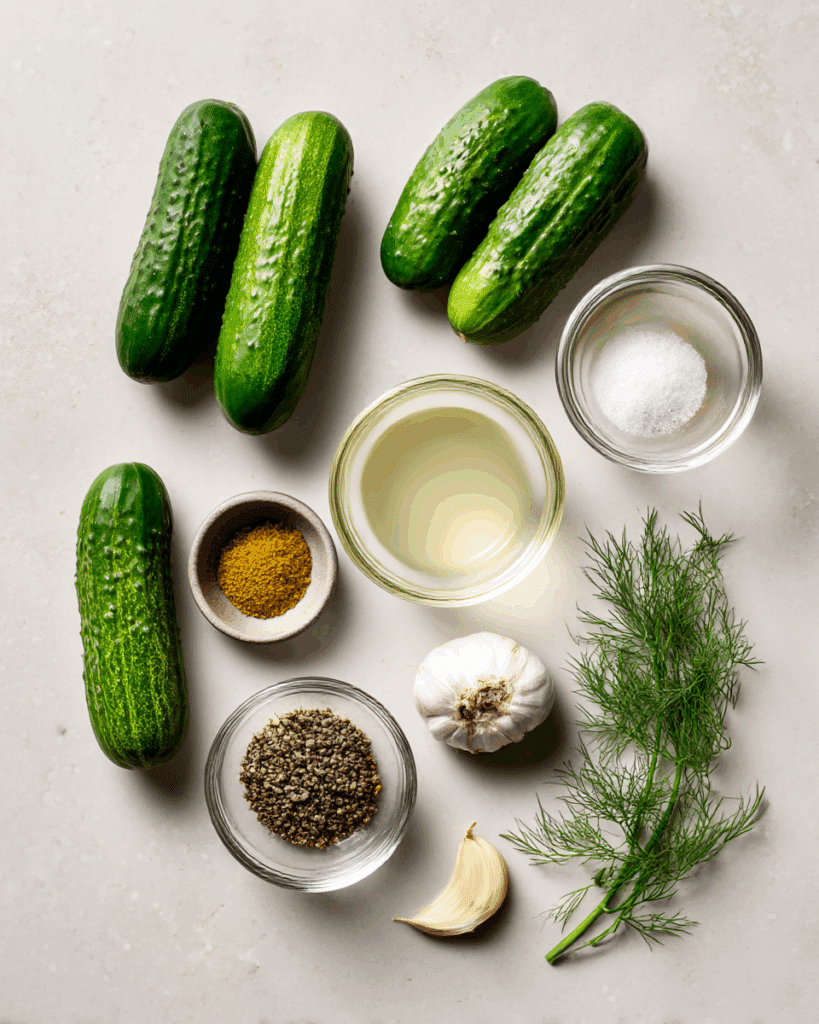
Ingredients in Homemade Claussen Pickles
Every ingredient here works in harmony to create that classic flavor and crunch.
- Kirby Cucumbers: 2 pounds — firm, crisp cucumbers that hold their bite.
- Fresh Garlic Cloves: 6 — adds bold, savory depth.
- Fresh Dill: 6 sprigs — the heart of pickle flavor.
- Pickling Salt (non-iodized): 3 tablespoons — keeps the brine clear and balanced.
- White Vinegar: 1 cup — adds tang and sharpness.
- Cold Filtered Water: 4 cups — essential for crisp texture.
- Mustard Seeds: 1 tablespoon — brings a subtle spice note.
- Black Peppercorns: 1 teaspoon — adds gentle heat.
- Crushed Red Pepper Flakes: ½ teaspoon — optional, for a kick.
Ingredient Substitutions
No need to worry if you’re missing something:
Kirby Cucumbers: English cucumbers (cut smaller).
Pickling Salt: Kosher salt.
White Vinegar: Apple cider vinegar for a sweeter tang.
Fresh Dill: Dried dill (use 2 teaspoons per sprig).
Mustard Seeds: Coriander seeds for a citrusy twist.
Ingredient Spotlight
Kirby Cucumbers: These short, knobby cucumbers are the gold standard for pickling, staying crunchy even after brining.
Fresh Dill: More than just a garnish, it infuses the brine with a grassy, aromatic freshness that defines the flavor.
Instructions for Making Homemade Claussen Pickles
Get ready — your kitchen is about to smell like a deli in the best possible way.
- Preheat Your Equipment:
Sterilize jars by washing in hot soapy water and rinsing well. No oven needed since this is a refrigerator pickle. - Combine Ingredients:
In a large bowl, whisk together water, vinegar, and salt until dissolved. Stir in mustard seeds, peppercorns, and red pepper flakes. - Prepare Your Cooking Vessel:
Place dill sprigs and garlic cloves at the bottom of each jar. - Assemble the Dish:
Pack cucumbers tightly into the jars. Pour brine over them, ensuring they are fully submerged. - Cook to Perfection:
No cooking here! Just seal jars and refrigerate. - Finishing Touches:
Let sit at least 3–4 days before tasting. The longer they rest, the more intense the flavor. - Serve and Enjoy:
Crisp, tangy, and garlicky — enjoy straight from the jar or pile onto burgers and sandwiches.
Texture & Flavor Secrets
The secret lies in cold brining. By never cooking the cucumbers, their natural crunch is preserved. The vinegar and salt penetrate slowly, balancing tang and savor, while dill and garlic weave in freshness and aroma. Over time, the flavors deepen without losing crispness.
Cooking Tips & Tricks
Keep these in mind to ensure pickle perfection:
- Always keep cucumbers submerged in brine.
- Use non-reactive containers like glass or ceramic.
- For extra crunch, add a grape leaf to each jar — it contains tannins.
- Taste daily after day 3 to find your ideal flavor.
What to Avoid
Avoid these pitfalls for flawless pickles:
- Don’t use table salt — iodine clouds the brine.
- Avoid soft cucumbers — they’ll never crisp up.
- Don’t leave them unrefrigerated — they’re not shelf-stable.
- Don’t rush — pickles need time to reach peak flavor.
Nutrition Facts
Servings: 12 spears
Calories per serving: 10
Note: These are approximate values.
Preparation Time
Prep Time: 15 minutes
Cook Time: 0 minutes
Total Time: 15 minutes (plus 3–4 days brining)
Make-Ahead and Storage Tips
These pickles are the ultimate make-ahead snack. Once brined, they last up to 2 months in the refrigerator. Keep jars tightly sealed, and always ensure cucumbers are submerged in liquid. If you make multiple batches, you can reuse the brine once for fresh cucumbers.
How to Serve Homemade Claussen Pickles
They shine as a snack but can elevate any meal:
- Stack on burgers or hot dogs.
- Serve alongside barbecue or deli sandwiches.
- Chop into potato salad or egg salad for zing.
- Pair with cheese boards for contrast.
Creative Leftover Transformations
Don’t toss leftover pickles or brine — get creative:
- Blend brine into salad dressings for tang.
- Use chopped pickles in deviled eggs.
- Add brine to Bloody Marys for a kick.
- Make pickle dip with cream cheese and dill.
Additional Tips
- Slice cucumbers into spears or chips depending on preference.
- Add extra garlic for bold flavor.
- A sprinkle of sugar balances tang if desired.
- Label jars with the date for tracking fermentation.
Make It a Showstopper
Serve pickles in a rustic mason jar with fresh dill sprigs peeking out. Add a small dish of mustard or aioli for dipping, and they’ll steal the show at any table spread.
Variations to Try
- Spicy Pickles: Add jalapeño slices or extra red pepper flakes.
- Garlic Lovers’ Pickles: Double the garlic cloves.
- Sweet & Tangy: Add 1 tablespoon sugar to the brine.
- Herb Infusion: Add thyme or tarragon for unique twists.
- Pickle Chips: Slice into rounds for snacking or sandwiches.
FAQ’s
Q1: How long do these pickles last?
Up to 2 months in the fridge if submerged in brine.
Q2: Can I reuse the brine?
Yes, once, for another batch of cucumbers.
Q3: Can I use regular cucumbers?
Yes, but they may not be as crunchy as Kirby cucumbers.
Q4: Why are my pickles soft?
Likely due to old cucumbers or blossom ends not being trimmed.
Q5: Do I need to sterilize the jars?
A good wash is enough since these are refrigerated.
Q6: Can I skip the vinegar?
No, it’s key for tang and safe preservation.
Q7: Do they get stronger with time?
Yes, flavor intensifies the longer they brine.
Q8: Can I make them without garlic?
Yes, but garlic is traditional and adds boldness.
Q9: Are they probiotic?
No, since vinegar-based brine doesn’t ferment like lacto-fermentation.
Q10: Can I make them spicy?
Absolutely — add chili flakes, jalapeños, or hot peppers.
Conclusion
Homemade Claussen Pickles bring the deli experience straight to your fridge, no cooking required. With their unbeatable crunch and bold, garlicky flavor, they’re proof that the best things really are homemade. Let me tell you, it’s worth every bite — so grab those cucumbers, mix your brine, and get ready for pickle perfection.
PrintHomemade Claussen Pickles
Crisp, garlicky, and tangy Homemade Claussen Pickles made with a cold brine for that deli-style crunch — no cooking required.
- Prep Time: 15 minutes
- Cook Time: 0 minutes
- Total Time: 15 minutes (plus 3–4 days brining)
- Yield: 12 spears
- Category: Snack
- Method: Cold Brine
- Cuisine: American
- Diet: Vegan
Ingredients
- Kirby Cucumbers: 2 pounds – firm, crisp cucumbers that hold their bite
- Fresh Garlic Cloves: 6 – adds bold, savory depth
- Fresh Dill: 6 sprigs – the heart of pickle flavor
- Pickling Salt (non-iodized): 3 tablespoons – keeps the brine clear and balanced
- White Vinegar: 1 cup – adds tang and sharpness
- Cold Filtered Water: 4 cups – essential for crisp texture
- Mustard Seeds: 1 tablespoon – brings a subtle spice note
- Black Peppercorns: 1 teaspoon – adds gentle heat
- Crushed Red Pepper Flakes: ½ teaspoon – optional, for a kick
Instructions
- Preheat Your Equipment: Sterilize jars by washing in hot soapy water and rinsing well.
- Combine Ingredients: In a large bowl, whisk together water, vinegar, and salt until dissolved. Stir in mustard seeds, peppercorns, and red pepper flakes.
- Prepare Your Cooking Vessel: Place dill sprigs and garlic cloves at the bottom of each jar.
- Assemble the Dish: Pack cucumbers tightly into the jars. Pour brine over them, ensuring they are fully submerged.
- Cook to Perfection: No cooking needed — just seal jars and refrigerate.
- Finishing Touches: Let sit at least 3–4 days before tasting for best flavor.
- Serve and Enjoy: Enjoy cold, crisp pickles straight from the jar or on your favorite sandwiches.
Notes
- Trim blossom ends of cucumbers to prevent softening
- Always keep cucumbers submerged in brine
- Use filtered water to avoid chlorine interference
- Pickles improve in flavor after several days of brining
Nutrition
- Serving Size: 1 spear
- Calories: 10
- Sugar: 0g
- Sodium: 280mg
- Fat: 0g
- Saturated Fat: 0g
- Unsaturated Fat: 0g
- Trans Fat: 0g
- Carbohydrates: 2g
- Fiber: 0.5g
- Protein: 0g
- Cholesterol: 0mg