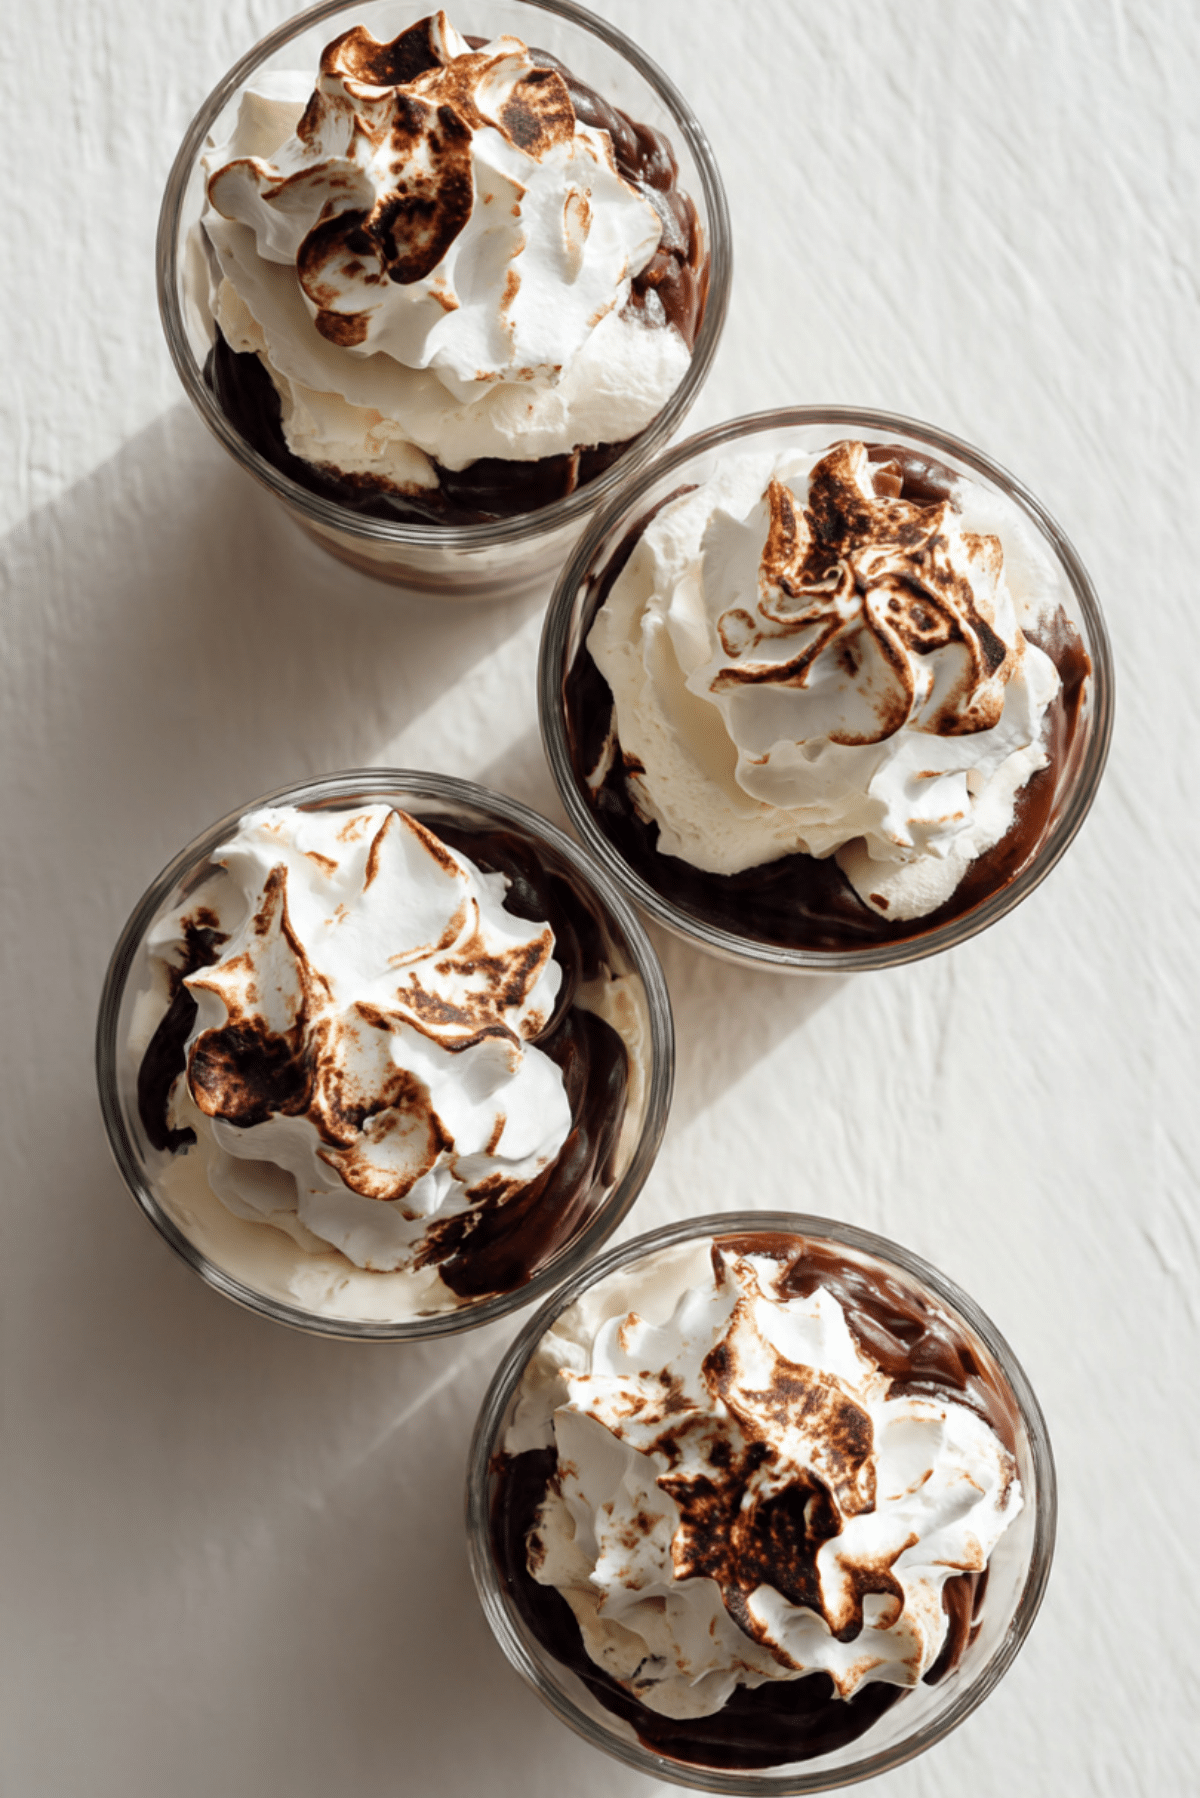
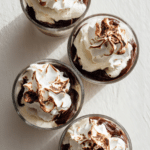
Heaven & Hell Trifles
There is something profoundly satisfying about a dessert that plays with dramatic contrasts, and these Heaven & Hell Trifles do exactly that. By layering airy, ethereal angel food cake with dense, decadent chocolate pudding, you create a sensory experience that lives up to its evocative name. Trust me, you’re going to love this recipe because it offers the perfect balance of light and heavy, sweet and rich, making every spoonful a delightful journey between two culinary extremes.
A Tale of Two Textures
The concept of “Heaven and Hell” in desserts traditionally refers to the pairing of angel food cake representing the divine lightness and devil’s food or dark chocolate representing the sinful indulgence. Historically, trifles were a way to repurpose leftover cake, but this modernized version turns that practicality into a deliberate art form. These individual parfaits have become a favorite at dinner parties because they look incredibly sophisticated in clear glass while remaining a comforting, familiar treat. This one’s a total game-changer for anyone who wants a stunning presentation without hours of intricate baking.
Why This Recipe is a Total Game-Changer
Let me tell you, it’s worth every bite when you taste the way the light cake soaks up just enough of the rich chocolate to become a perfectly unified dessert.
Versatile: You can serve these in elegant wine glasses for a formal event or in simple mason jars for a casual backyard gathering.
Budget-Friendly: Most of the ingredients are simple pantry and dairy staples that provide a high-end look for a very low cost.
Quick and Easy: By using pre-made or quickly baked components, the assembly takes only minutes but looks like it took hours.
Customizable: You can add layers of fresh berries or a sprinkle of sea salt to the chocolate to make the recipe uniquely your own.
Crowd-Pleasing: It is hard to find anyone who doesn’t enjoy the classic combination of vanilla cake, chocolate, and whipped cream.
Make-Ahead Friendly: These trifles actually benefit from sitting in the fridge for an hour or two, allowing the flavors to meld beautifully.
Great for Leftovers: If you find yourself with extra cake or pudding, these individual portions are the perfect way to use them up.
Insider Tips for Divine Layers
To get those clean, professional-looking layers, the secret is all in the assembly technique. First, make sure your pudding is completely chilled and set before you start layering, otherwise, it will seep too far into the cake and lose that distinct visual contrast. When adding the whipped cream, use a piping bag or a steady hand with a small spoon to keep the edges of the glass clean. Finally, don’t press down on the layers; let the weight of the ingredients settle naturally to keep the angel food cake light and fluffy rather than compressed and dense.
Essential Kitchen Tools for Success
Preparing these trifles is a joy when you have the right tools to handle the different textures of “Heaven” and “Hell.”
Individual Glass Parfaits: Clear glass is essential so that your guests can see the beautiful contrasting layers you’ve created.
Serrated Knife: This is the best tool for cutting the angel food cake into clean, bite-sized cubes without squishing the delicate structure.
Whisk or Electric Mixer: You will need this to whip the cream to stiff, billowy peaks and to ensure your chocolate pudding is perfectly smooth.
Piping Bags: Using a bag for the pudding and cream layers ensures precision and prevents messy streaks on the sides of your glasses.
Offset Spatula: A small spatula can help you level out the layers if you aren’t using piping bags.
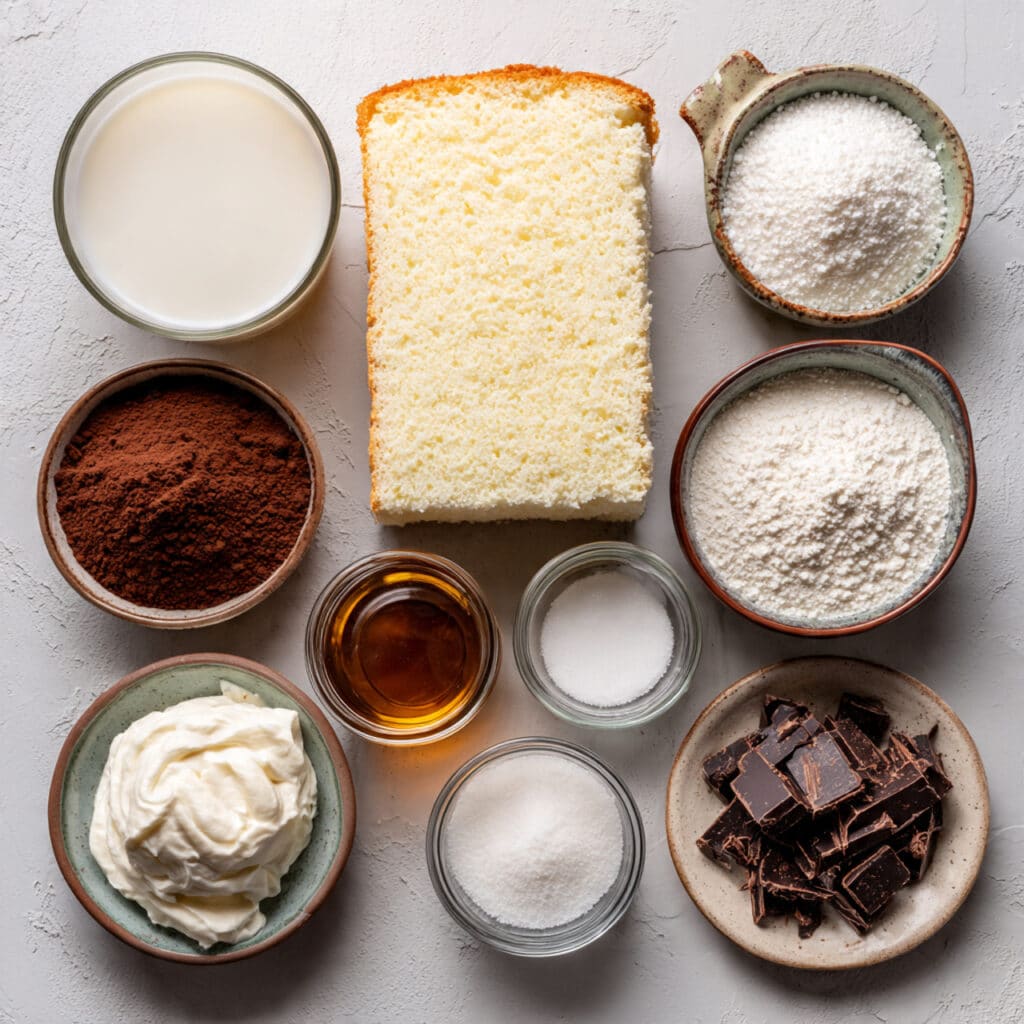
Ingredients You Will Need For Heaven & Hell Trifles
The harmony of these simple components creates a dessert that is far greater than the sum of its parts.
- Angel Food Cake: 1 loaf or round cake, cut into 1-inch cubes to provide the “Heaven” layer of airy sweetness.
- Whole Milk: 2 cups to create a rich and creamy base for the chocolate pudding.
- Granulated Sugar: half a cup to sweeten the dark cocoa without overpowering it.
- Unsweetened Cocoa Powder: 1 third of a cup of high-quality cocoa for a deep, intense “Hell” layer.
- Cornstarch: 2 tablespoons to act as the thickening agent for a silky, spoonable pudding.
- Salt: a pinch to enhance the chocolate flavor and balance the sweetness of the cake.
- Vanilla Extract: 1 teaspoon to add a warm, floral note to both the pudding and the whipped cream.
- Heavy Whipping Cream: 1 cup, kept very cold, to create the light and airy topping.
- Powdered Sugar: 2 tablespoons to stabilize and lightly sweeten the whipped cream.
- Dark Chocolate Shavings: 2 tablespoons for a decorative and crunchy finishing touch.
Flexible Ingredient Substitutions
If you need to make a change, these swaps will still produce a heavenly result.
Angel Food Cake: Pound cake or vanilla sponge cake, though the texture will be denser and less “angelic.”
Whole Milk: Any full-fat plant milk like oat or coconut milk for a slightly different flavor profile in the pudding.
Unsweetened Cocoa Powder: Melted dark chocolate chips (about half a cup) can be stirred into the milk for an even richer pudding.
Cornstarch: Arrowroot powder or tapioca starch can work as alternative thickeners.
Key Ingredients Spotlight
Angel Food Cake: This is the soul of the “Heaven” portion. Its unique egg-white-based structure provides a sponge-like quality that is incredibly light, allowing it to act as the perfect foil to the heavy chocolate.
Dark Cocoa Pudding: This represents the “Hell” portion. By making it from scratch with real cocoa and whole milk, you achieve a depth of flavor and a silky mouthfeel that instant mixes simply cannot replicate.
Let’s Get Cooking
The assembly of these trifles is a fun and creative process that allows you to play with the visual balance of the dish.
- Preheat Your Equipment: While no oven is needed for assembly, ensure your mixing bowls and whisk for the cream are chilled in the freezer for ten minutes.
- Combine Ingredients: Whisk together the sugar, cocoa, cornstarch, and salt in a saucepan before gradually adding the milk to prevent lumps.
- Prepare Your Cooking Vessel: Cook the chocolate mixture over medium heat, stirring constantly until it thickens into a glossy pudding.
- Assemble the Dish: Start by placing a layer of angel food cake cubes at the bottom of each glass, followed by a generous layer of cooled chocolate pudding.
- Cook to Perfection: Repeat the layers once more, ending with a final layer of cake or pudding depending on your visual preference.
- Finishing Touches: Whip the heavy cream with powdered sugar and vanilla until stiff peaks form, then pipe a large swirl onto the top of each trifle.
- Serve and Enjoy: Top with chocolate shavings and a drizzle of any remaining pudding, and serve immediately or chill for later.
Texture and Flavor Development
The first spoonful gives you the cloud-like whipped cream followed by the dense, earthy sweetness of the chocolate. As you reach the angel food cake, you’ll notice how it has stayed springy while absorbing the essence of the vanilla and cocoa. The contrast between the cool, creamy pudding and the dry, airy cake creates a dynamic mouthfeel that keeps you coming back for more. Over an hour in the fridge, the flavors deepen and the cake becomes even more tender.
Helpful Cooking Tips and Tricks
- Always let your homemade pudding cool to room temperature before layering to prevent the cake from becoming soggy.
- Use a clear glass with straight sides to make the layers look as sharp and defined as possible.
- If you want an extra “Hell” kick, add a tiny pinch of cinnamon or cayenne pepper to the chocolate pudding while it’s cooking.
What to Avoid
- Don’t over-mix the heavy cream or it will turn into butter; stop as soon as you have stiff, stojanding peaks.
- Avoid using a regular knife to cut the angel food cake, as it will crush the air bubbles and ruin the texture.
- Never assemble the trifles more than four hours in advance, or the cake may lose too much of its structural integrity.
Nutrition Facts
Servings: 4 trifles
Calories per serving: 320
Note: These are approximate values.
Preparation Time
Prep Time: 15 minutes
Cook Time: 10 minutes (for pudding)
Total Time: 25 minutes
Make-Ahead and Storage Tips
These trifles are best enjoyed within a few hours of assembly, but they can be stored in the refrigerator for up to 24 hours if covered tightly with plastic wrap. If you are making them ahead, wait to add the final whipped cream and chocolate shavings until just before you are ready to serve to keep the presentation fresh and the cream stable.
How to Serve
Serve these trifles on a dark platter to make the white cake and cream really pop. They are best enjoyed with a long-handled dessert spoon so you can get a bit of every layer in a single bite. For a romantic touch, place a single fresh raspberry or a mint leaf on top of the whipped cream.
Creative Leftover Transformations
If you have assembled trifles left over, you can actually blend them into a thick, decadent milkshake. The cake adds a unique “cake batter” thickness to the shake, and the chocolate pudding provides all the rich flavor you need. Simply add a splash of milk and a scoop of ice cream for a “Heaven and Hell” shake.
Additional Flavor Tips
For a more intense “Hell” layer, try using a dark “extra brut” cocoa powder. This increases the bitterness and the dark color, providing an even sharper contrast to the snow-white angel food cake and whipped cream.
Make It a Showstopper
To turn these into a true showstopper, drizzle a little bit of warm chocolate ganache over the whipped cream right before serving. The heat of the ganache will slightly melt into the cool cream, creating a beautiful marbled effect that looks incredibly professional.
Variations to Try
- Berry Heaven: Add a layer of macerated strawberries between the cake and pudding.
- Salted Hell: Add a sprinkle of flaky sea salt to each chocolate layer.
- Coffee Trifle: Soak the angel food cake cubes in a little bit of cold espresso before layering.
FAQ’s
- Can I use store-bought pudding?
Yes, but homemade pudding is much richer and provides a better contrast in this specific recipe. - How do I keep the glass clean while layering?
Using a piping bag for the pudding and cream is the best way to ensure tidy layers. - Can I use devil’s food cake instead?
You can, but the dessert would then be “Hell and Hell,” losing the light-dark contrast. - Is angel food cake hard to make?
It requires some care with egg whites, but for this recipe, a high-quality store-bought loaf works perfectly. - Why did my pudding not thicken?
Make sure the cornstarch is fully dissolved in cold milk before heating, and let it come to a gentle boil. - Can I make this as one large trifle?
Absolutely, just increase the quantities and use a large glass trifle bowl. - What can I use instead of chocolate shavings?
Crushed chocolate cookies or a dusting of cocoa powder both look great. - Is this dessert very sweet?
It is balanced; the dark cocoa pudding helps cut the sweetness of the cake and cream. - Can I add nuts?
Toasted slivered almonds would add a great crunch to the “Heaven” layers. - How long should the pudding cool?
At least 30 minutes at room temperature, or 15 minutes in the fridge with plastic wrap touching the surface.
Conclusion
Heaven & Hell Trifles are the perfect example of how simple ingredients can be transformed into a dramatic and delicious masterpiece. The play between the light, airy cake and the rich, dark chocolate ensures that every bite is exciting and satisfying. Whether you are looking for a quick weeknight treat or a stunning finale to a dinner party, these trifles are a guaranteed success. So, gather your glasses and prepare to enjoy a dessert that is truly the best of both worlds!
PrintHeaven & Hell Trifles
A dramatic and decadent layered dessert featuring light, airy angel food cake and rich, homemade dark chocolate pudding topped with billowy whipped cream.
Ingredients
- 1 loaf Angel Food Cake, cubed
- 2 cups Whole Milk
- 1/2 cup Granulated Sugar
- 1/3 cup Unsweetened Cocoa Powder
- 2 tbsp Cornstarch
- 1 pinch Salt
- 1 tsp Vanilla Extract
- 1 cup Heavy Whipping Cream, cold
- 2 tbsp Powdered Sugar
- 2 tbsp Dark Chocolate Shavings
Instructions
- In a medium saucepan, whisk together granulated sugar, cocoa powder, cornstarch, and salt until no lumps remain.
- Gradually whisk in the milk over medium heat, stirring constantly until the mixture reaches a gentle boil and thickens into a pudding.
- Remove from heat, stir in 1/2 teaspoon of vanilla extract, and let the pudding cool completely to room temperature.
- In a chilled bowl, whip the heavy cream with powdered sugar and the remaining 1/2 teaspoon of vanilla until stiff peaks form.
- Cut the angel food cake into 1-inch cubes.
- In individual glass parfaits, place a layer of angel food cake cubes followed by a layer of the cooled chocolate pudding.
- Repeat the layers, ending with a generous swirl of the whipped cream on top.
- Garnish with dark chocolate shavings and serve chilled.
Notes
- Press plastic wrap directly onto the surface of the pudding while cooling to prevent a skin from forming.
- Use a piping bag for the pudding and cream layers to keep the glasses looking neat and professional.
- Angel food cake can be lightly toasted for a different texture if desired.