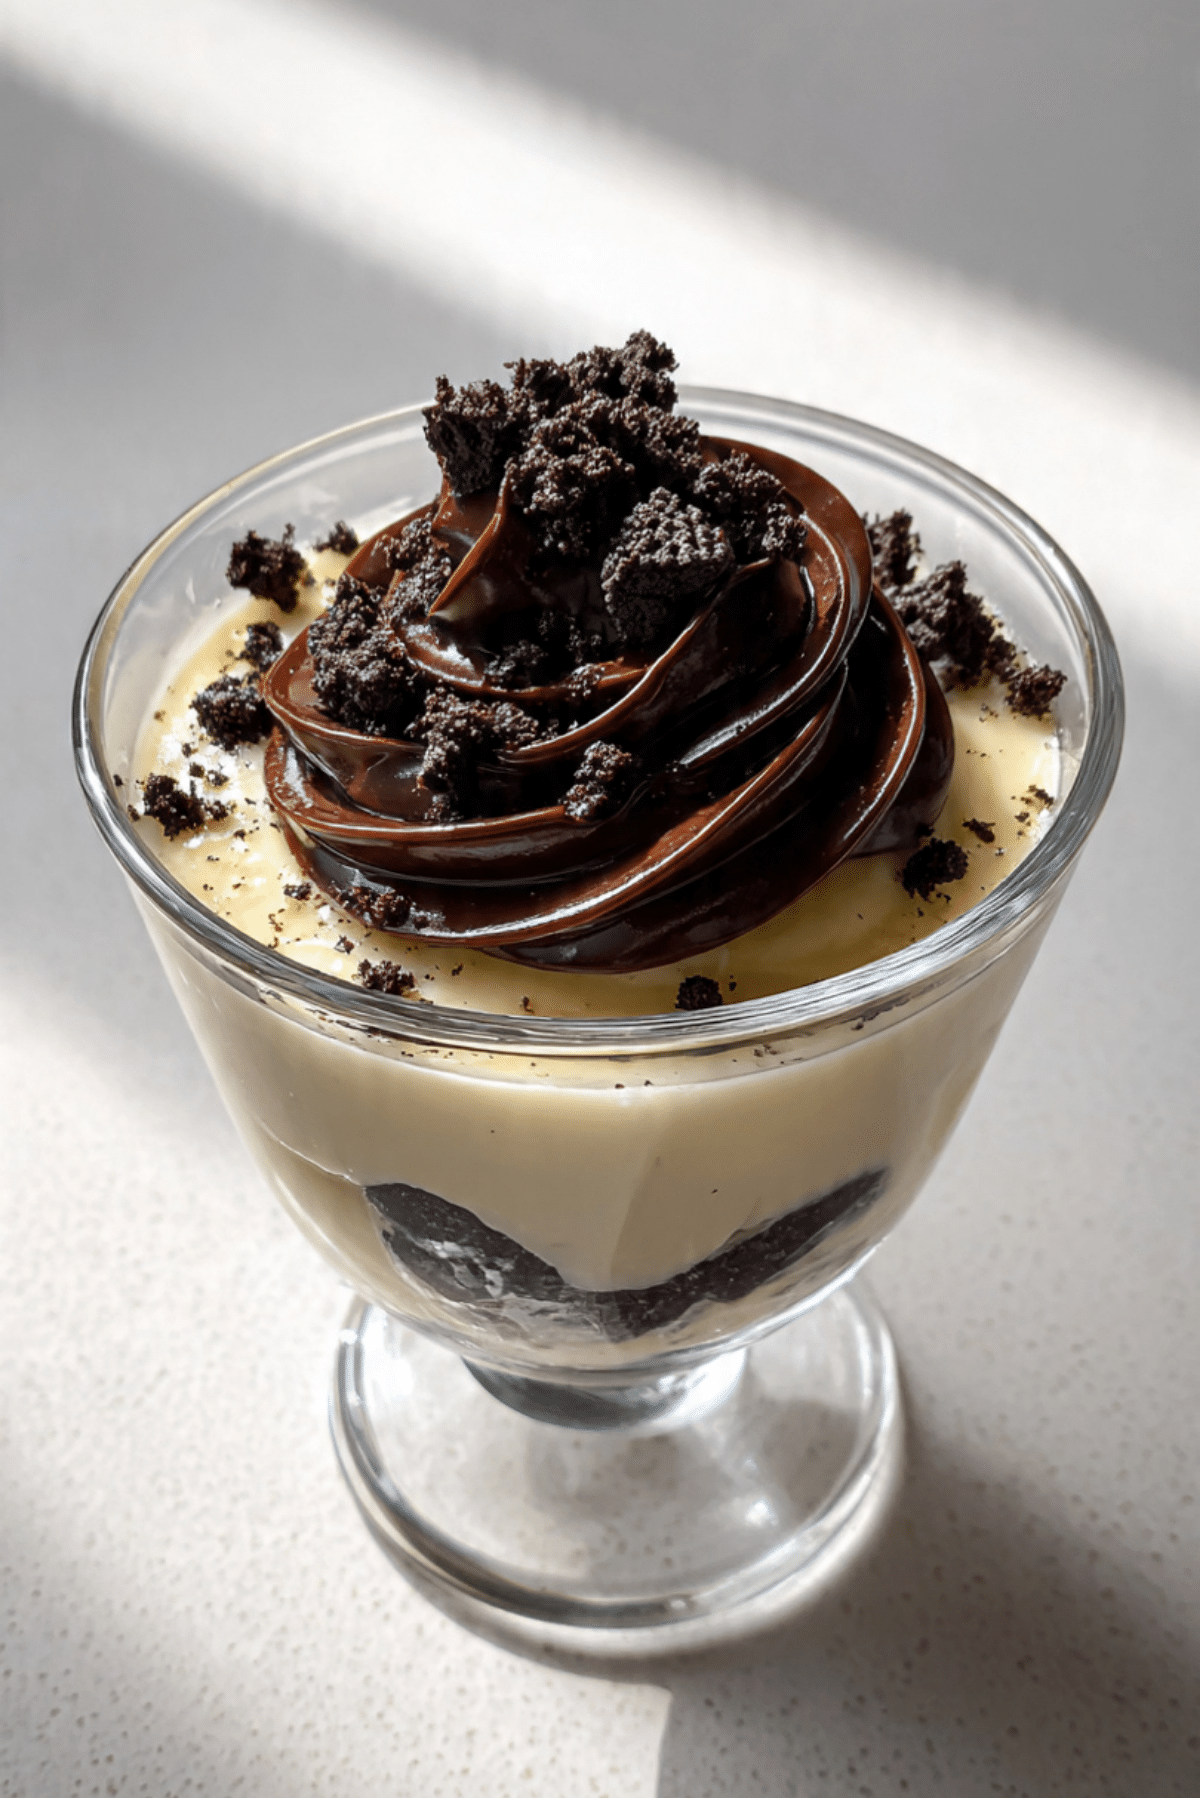
Happiness Cup
Sweet, creamy, and layered with love, the Happiness Cup is one of those desserts that brings a little sunshine to every bite. Picture a soft vanilla pudding base, rich swirls of melted chocolate, and a gentle crunch of crushed cookies to finish it off. It’s comforting, it’s indulgent, and it’s surprisingly easy to make.
Behind the Recipe
The idea for the Happiness Cup came from a rainy afternoon, a craving for something sweet, and whatever was left in the pantry. A little bit of pudding, a touch of chocolate, and some leftover cookies later, and this layered delight was born. It quickly became a family favorite, especially with the kids, who love helping with the layering.
Recipe Origin or Trivia
Layered dessert cups like this one are common across many cultures. From English trifles to Middle Eastern muhallabieh, people everywhere love the comfort of sweet layers. The Happiness Cup draws inspiration from simple refrigerator desserts, turning everyday ingredients into something special.
Why You’ll Love Happiness Cup
This treat isn’t just adorable in a cup. It’s a total mood-lifter. Here’s why:
Versatile: You can switch the flavors, add fruits, or drizzle in caramel depending on your cravings.
Budget-Friendly: Made from pantry basics like milk, sugar, and cookies, this dessert won’t break the bank.
Quick and Easy: Whip it up in under 30 minutes, with no baking involved.
Customizable: Make it in shot glasses for parties or mason jars for gifts.
Crowd-Pleasing: Everyone from toddlers to grandparents will be reaching for seconds.
Make-Ahead Friendly: You can prepare it the night before and chill it until serving time.
Great for Leftovers: Use any leftover pudding or cookies from other recipes.
Chef’s Pro Tips for Perfect Results
To take your Happiness Cup from good to unforgettable, keep these in mind:
- Use high-quality chocolate for the top layer to get that deep, rich flavor.
- Let the pudding cool slightly before assembling to prevent a soggy cookie layer.
- Chill for at least 2 hours so the layers set beautifully.
- Crush the cookies just before serving to keep their crunch.
- Pipe the final layer for a clean, café-style finish.
Kitchen Tools You’ll Need
Simple tools. Big flavor.
Mixing Bowls: For preparing your pudding and chocolate layers.
Whisk: Helps achieve a smooth, lump-free pudding.
Spatula: For scraping every last bit of goodness from your bowl.
Spoons or Piping Bag: To layer your dessert neatly.
Serving Cups or Glasses: Choose clear ones to show off those gorgeous layers.
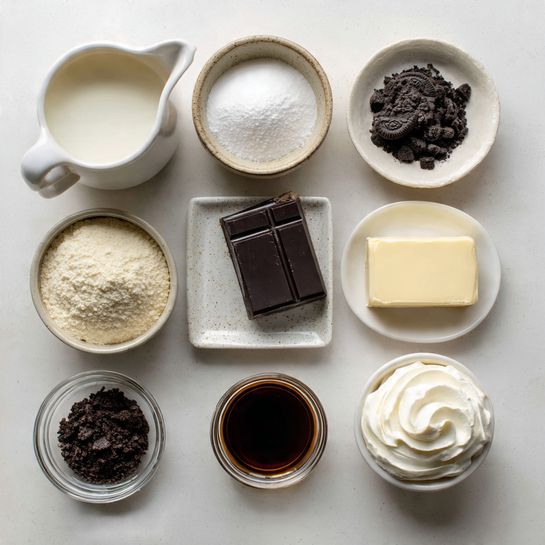
Ingredients in Happiness Cup
Each layer brings something different to the table. Together, they’re pure magic.
- Milk: 2 cups. Forms the creamy base for the vanilla pudding.
- Sugar: 1/2 cup. Adds just the right amount of sweetness.
- Cornstarch: 3 tablespoons. Thickens the pudding naturally without eggs.
- Vanilla Extract: 1 teaspoon. Brings warmth and depth to the flavor.
- Dark Chocolate: 100 grams, melted. Rich and glossy topping.
- Butter: 1 tablespoon. Adds silkiness to the melted chocolate.
- Crushed Chocolate Cookies: 1/2 cup. For texture and a bit of crunch.
- Whipped Cream (optional): For garnish and extra fluff.
Ingredient Substitutions
Don’t have something on hand? No worries.
Milk: Almond or oat milk.
Sugar: Maple syrup or honey.
Cornstarch: Arrowroot powder.
Dark Chocolate: Milk chocolate or semi-sweet chips.
Crushed Cookies: Graham crackers or vanilla wafers.
Butter: Coconut oil.
Ingredient Spotlight
Dark Chocolate: Brings richness and that perfect bittersweet finish.
Cornstarch: A pantry hero that thickens without affecting flavor.
Instructions for Making Happiness Cup
Now let’s get layering. Here are the steps you’re going to follow:
- Preheat Your Equipment:
No oven needed here, but set out your mixing bowls, whisk, and serving glasses. - Combine Ingredients:
In a saucepan, whisk together milk, sugar, and cornstarch. Stir constantly over medium heat until it thickens. Remove from heat and stir in vanilla extract. - Prepare Your Cooking Vessel:
Pour the vanilla pudding into a bowl and let it cool for a few minutes. Meanwhile, melt chocolate with butter in a separate bowl until smooth. - Assemble the Dish:
Start layering in clear dessert cups. Begin with a scoop of pudding, then crushed cookies, followed by melted chocolate. Repeat layers as desired. - Cook to Perfection:
No baking needed, but the dessert benefits from chill time. Cover and refrigerate for at least 2 hours. - Finishing Touches:
Just before serving, add a swirl of whipped cream or a sprinkle of extra cookie crumbs on top. - Serve and Enjoy:
Grab a spoon, dig in, and savor every creamy, chocolatey bite.
Texture & Flavor Secrets
What makes this cup a winner? It’s all about balance. The pudding is velvety and mildly sweet. The melted chocolate adds depth and richness, while the crushed cookies bring just the right amount of crunch to contrast that creaminess. Every spoonful has a bit of everything.
Cooking Tips & Tricks
Here are a few little tips that make a big difference:
- Let each pudding layer cool before adding chocolate to prevent melting.
- Use clear cups to show off the layers — it’s part of the fun.
- If prepping for a party, assemble in small plastic cups for easy serving.
What to Avoid
Here’s how to sidestep common mistakes:
- Don’t overheat the pudding or it will become too thick and clumpy.
- Avoid watery cookies. Use crunchy ones to keep the texture lively.
- Don’t skip the chilling step. It helps the flavors set and mingle.
Nutrition Facts
Servings: 4
Calories per serving: 320
Note: These are approximate values.
Preparation Time
Prep Time: 10 minutes
Cook Time: 10 minutes
Total Time: 2 hours 20 minutes (includes chilling)
Make-Ahead and Storage Tips
The Happiness Cup is a dream for busy schedules. You can make it a day ahead and store it in the fridge. Just wait to add whipped cream until serving. It keeps well for up to 3 days. Freezing isn’t recommended since the pudding texture can break.
How to Serve Happiness Cup
Serve it cold, straight from the fridge, in glass dessert cups or mini jars. Top with fresh berries, mint leaves, or extra chocolate shavings for a fancy finish. Pair with coffee or a warm chai latte for a cozy treat.
Creative Leftover Transformations
If you happen to have leftovers, here are some fun ways to reuse them:
- Spoon over waffles or pancakes for a dessert brunch.
- Layer into a trifle with berries and sponge cake.
- Freeze in popsicle molds for pudding pops.
Additional Tips
- Try using different flavored pudding for a twist.
- Add a layer of caramel or Nutella for extra indulgence.
- Chill your dessert cups before assembling for a cleaner look.
Make It a Showstopper
Presentation makes it extra special. Use clear glassware, top with a dusting of cocoa or a drizzle of chocolate, and serve on a small saucer with a gold spoon for that café-style moment.
Variations to Try
- Strawberry Bliss Cup: Add fresh chopped strawberries between the layers.
- Peanut Butter Twist: Stir a tablespoon of peanut butter into the pudding.
- Mint Chocolate Delight: Add peppermint extract and top with mint leaves.
- S’mores Cup: Use graham crackers and mini marshmallows.
- Tropical Version: Add shredded coconut and mango slices.
FAQ’s
Q1: Can I make this dairy-free?
Yes, just use plant-based milk and coconut oil instead of butter.
Q2: Can I use instant pudding?
Absolutely, it speeds things up and still tastes great.
Q3: What kind of cookies work best?
Chocolate cookies or Oreos work perfectly, but you can experiment.
Q4: Can I make it sugar-free?
Yes, try stevia or monk fruit sweetener.
Q5: How long can it stay in the fridge?
Up to 3 days, covered tightly.
Q6: Can I freeze it?
Not recommended. The texture may change.
Q7: Can I make a big batch for a party?
Definitely. Use a large trifle bowl or mini cups.
Q8: Is it kid-friendly?
Very! Kids love the layering and flavor.
Q9: Can I layer in a jar?
Yes, mason jars work beautifully and are portable.
Q10: What if my pudding gets lumpy?
Strain it through a sieve or blend briefly to smooth it out.
Conclusion
The Happiness Cup lives up to its name with every spoonful. It’s comforting, easy, and full of joy. Whether you make it for a weeknight treat or a party showstopper, this dessert is bound to leave everyone smiling. Trust me, it’s worth every bite.
PrintHappiness Cup
Creamy vanilla pudding layered with rich melted chocolate and crushed cookies, the Happiness Cup is a no-bake dessert that’s as comforting as it is delightful.
Ingredients
- 2 cups milk
- 1/2 cup sugar
- 3 tablespoons cornstarch
- 1 teaspoon vanilla extract
- 100 grams dark chocolate, melted
- 1 tablespoon butter
- 1/2 cup crushed chocolate cookies
- Whipped cream (optional, for garnish)
Instructions
- In a saucepan, whisk together milk, sugar, and cornstarch over medium heat until thickened.
- Remove from heat and stir in the vanilla extract. Let cool slightly.
- In a separate bowl, melt dark chocolate with butter until smooth.
- Start layering in dessert cups: pudding, crushed cookies, and chocolate. Repeat if desired.
- Refrigerate for at least 2 hours to set.
- Top with whipped cream or extra cookie crumbs before serving.
Notes
- Use high-quality chocolate for richer flavor.
- Chill dessert cups before layering for a cleaner presentation.
- Crush cookies just before serving to retain crunch.