Greek Yogurt brownies
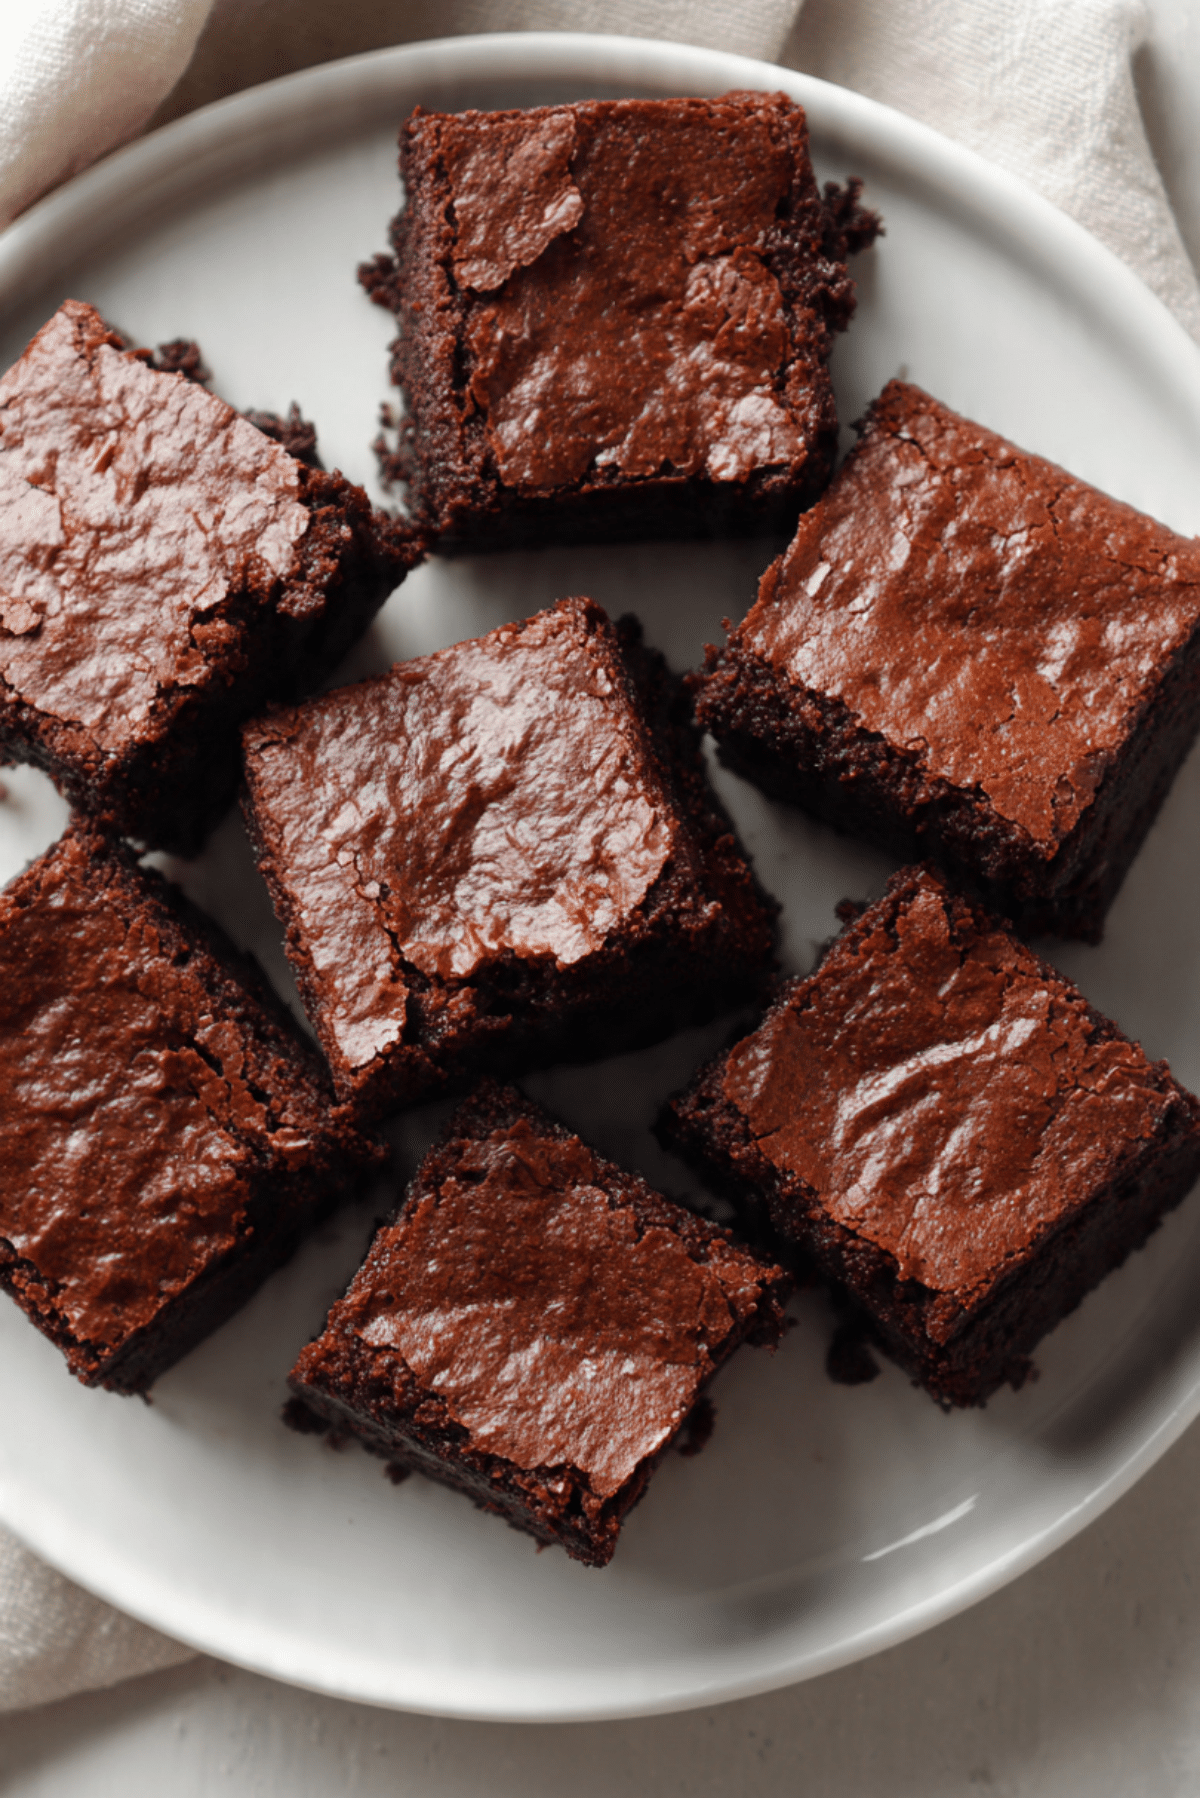
There is something extra satisfying about pulling a pan of chocolate brownies from the oven when you know they are going to be rich, soft, and deeply fudgy, but with one smart little twist that makes them feel even more special. These brownie squares bake up with shiny tops, tender centers, and that intense cocoa flavor that lingers in the best way. Trust me, you’re going to love this, because every bite feels decadent while still being wonderfully simple to make.
Why These Brownies Deserve a Spot in Your Baking Rotation
Some desserts are made for fancy occasions, and some are the ones you come back to again and again because they just work. This one belongs in the second category, and now let’s dive right into why it keeps winning people over. The yogurt brings moisture and a gentle tang, the chocolate keeps everything deeply satisfying, and the final texture lands right in that sweet spot between dense and soft. This one’s a total game-changer when you want something homemade without turning your kitchen upside down.
A Little Backstory Behind This Chocolatey Favorite
Brownies have a long history in American home baking, and part of their charm is how flexible they are. Over time, home cooks started tweaking classic formulas with pantry-friendly swaps to make them softer, lighter, or even a bit tangier in flavor. That is where Greek yogurt slips in so naturally. It adds richness and tenderness while fitting right into the tradition of adapting beloved bakes to suit modern kitchens. Let me tell you, it’s worth every bite, especially when old-school comfort meets a smart little update.
What Makes This Recipe So Reliable and So Good
Before we get to the mixing bowl, it helps to know exactly why this recipe is worth hanging on to. It is the kind of bake that feels dependable from the first stir to the final slice.
Versatile: These brownies fit just about any moment, from an after-school snack to a casual dinner dessert. You can serve them plain, add a dusting of cocoa, or pair them with fruit for something a little extra.
Budget-Friendly: Most of the ingredients are simple baking staples, which means you do not need a specialty shopping trip. That makes this an easy craving to satisfy without spending much.
Quick and Easy: The batter comes together in a straightforward way, and the baking time is very manageable. Even on a busy day, this feels realistic.
Customizable: You can fold in extra chocolate chips, a pinch of espresso powder, or chopped walnuts if that is your thing. The base is strong enough to welcome small changes.
Crowd-Pleasing: Chocolate desserts rarely need much convincing, and these disappear fast. They have that familiar comfort people reach for almost automatically.
Make-Ahead Friendly: You can bake them earlier in the day or even the day before. In fact, the texture gets even nicer once they have had time to settle.
Great for Leftovers: They stay tender for days, which means you get a treat waiting for you whenever the craving hits. A quick warm-up makes them taste freshly baked all over again.
Insider Secrets for Better Texture Every Time
A good brownie does not happen by accident, and a few small choices make all the difference here. These tips help you get that glossy top and soft center without guesswork.
- Use room temperature yogurt and eggs: This helps the batter mix smoothly and evenly, which means a more uniform crumb.
- Melt the butter and part of the chocolate gently: You want everything silky, not scorched. Low heat keeps the chocolate flavor clean and deep.
- Do not overmix once the flour goes in: Stir just until the dry streaks disappear so the texture stays tender.
- Bake until the center is just set: A few moist crumbs on a tester are exactly what you want. Overbaking is the fastest way to lose that fudgy finish.
- Cool completely before slicing: It is tempting to cut early, but patience gives you cleaner squares and a better final texture.
Kitchen Tools That Make the Process Smooth
Once the method starts coming together in your mind, the right tools make everything feel even easier. Nothing fancy is required, which is part of the beauty of this bake.
Mixing bowl: You will need one large bowl for combining the batter comfortably.
Small heatproof bowl or saucepan: This is for melting the butter and chocolate gently without burning them.
Whisk: Perfect for blending the wet ingredients until smooth and glossy.
Rubber spatula: Helpful for folding the batter without overworking it and for scraping every last bit into the pan.
8-inch square baking pan: This gives the brownies the ideal thickness for a fudgy center.
Parchment paper: Makes lifting and slicing much easier once the pan has cooled.
The Ingredients That Build All That Richness
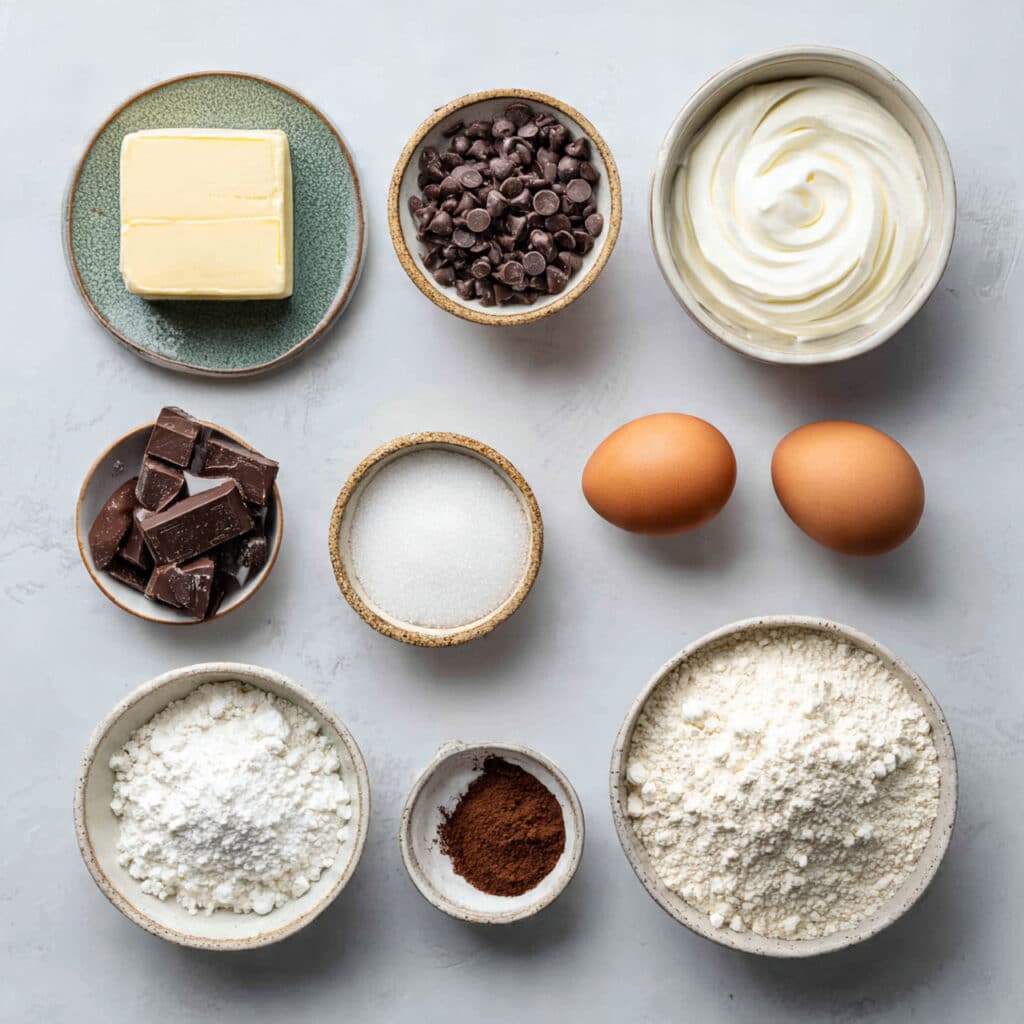
And now let’s get into the good part, because every ingredient here has a job to do. The balance is simple, but each piece helps create that soft, chocolatey bite that makes the whole tray so hard to resist.
- Unsalted butter: 1/2 cup, melted. This brings richness and helps create a smooth, indulgent texture.
- Semi-sweet chocolate chips: 1 cup, divided. Melting part of it deepens the chocolate base, while the rest adds little pockets of melty goodness.
- Granulated sugar: 3/4 cup. This sweetens the batter and helps form that delicate shiny top.
- Plain full-fat Greek yogurt: 3/4 cup. This adds moisture, a subtle tang, and a beautifully tender crumb.
- Large eggs: 2. They bind everything together and help the brownies set properly.
- Vanilla extract: 1 teaspoon. A small splash, but it rounds out the chocolate flavor in a lovely way.
- Unsweetened cocoa powder: 1/2 cup. This gives the brownies their dark, concentrated cocoa depth.
- All-purpose flour: 1/2 cup. Just enough to provide structure while keeping the center soft.
- Baking powder: 1/2 teaspoon. A little lift keeps the texture from feeling too heavy.
- Salt: 1/4 teaspoon. This sharpens the chocolate flavor and balances the sweetness.
Easy Swaps When You Need Flexibility
Sometimes you are halfway through baking and realize you need a backup plan. That is part of real home cooking, and these substitutions keep things practical without sacrificing the final result.
Unsalted butter: Use the same amount of salted butter, then reduce the added salt slightly.
Semi-sweet chocolate chips: Use chopped dark chocolate for a deeper, more intense flavor.
Granulated sugar: Use light brown sugar for a slightly softer texture and a hint of caramel warmth.
Plain full-fat Greek yogurt: Use plain regular yogurt, but strain it briefly if it seems very loose.
All-purpose flour: Use a measure-for-measure gluten-free flour blend if needed.
The Ingredients That Quietly Do the Heavy Lifting
A few ingredients deserve extra attention because they shape the personality of the whole pan. These are the ones doing the behind-the-scenes magic.
Greek yogurt: It gives the brownies a moist, tender bite and a subtle tang that makes the chocolate taste even richer rather than overly sweet.
Cocoa powder: This is where the deep, dark flavor starts. It brings that familiar brownie intensity and helps create the kind of aroma that fills the kitchen before the timer even goes off.
Let’s Bake These Step by Step
This is the part where everything starts to smell amazing, and honestly, it is one of the best parts of the whole experience. Here are the steps you’re going to follow so the batter comes together smoothly and the final squares bake up just right.
- Preheat Your Equipment: Preheat your oven to 350°F, 175°C. Line an 8-inch square baking pan with parchment paper, leaving a little overhang for easy lifting later.
- Combine Ingredients: Melt the butter with 3/4 cup of the chocolate chips in a small heatproof bowl or saucepan over low heat. Stir until smooth, then let it cool for a few minutes. In a large bowl, whisk together the sugar, Greek yogurt, eggs, and vanilla extract until glossy. Pour in the melted chocolate mixture and whisk until fully combined. Add the cocoa powder, flour, baking powder, and salt, then fold gently with a spatula until no dry streaks remain. Stir in the remaining 1/4 cup chocolate chips.
- Prepare Your Cooking Vessel: Transfer the batter into the lined pan and spread it evenly into the corners. Tap the pan lightly on the counter to settle the batter.
- Assemble the Dish: Smooth the top with a spatula so the surface bakes evenly. If you like, press a few extra chocolate chips from the batter near the top for a more bakery-style finish.
- Cook to Perfection: Bake for 22 to 26 minutes, until the edges are set and a toothpick inserted in the center comes out with a few moist crumbs. The center should not look wet, but it should still feel slightly soft.
- Finishing Touches: Let the pan cool completely on a rack. This gives the brownies time to firm up and develop their full fudgy texture.
- Serve and Enjoy: Lift them from the pan using the parchment, slice into 12 squares, and serve as they are or with a spoonful of yogurt or fresh berries on the side.
How the Texture and Flavor Come Together
One of the nicest things about this recipe is how layered the final bite feels. The edges turn slightly firmer and almost chewy, while the center stays soft, dense, and moist. The cocoa powder builds that classic brownie depth, the melted chocolate makes the crumb richer, and the yogurt quietly keeps everything tender. The result is balanced, chocolate-forward, and just tangy enough to make the sweetness feel lively instead of heavy.
Smart Little Tricks for the Best Batch
Once you have baked these once, you will probably start noticing little ways to make them even more suited to your kitchen. These quick tips help keep the process easy and rewarding.
- Line the pan well: This makes lifting and slicing much neater, especially with a fudgy batter.
- Let the melted chocolate cool slightly: If it is too hot, it can affect how smoothly the wet ingredients blend.
- Use a sharp knife for slicing: Wipe it clean between cuts for tidy squares.
- Chill for firmer slices: If you love a denser brownie, a short rest in the fridge works beautifully.
Common Mistakes to Skip for a Better Pan
Even easy recipes have a few spots where things can go off track, so it helps to know what to watch for. The good news is that the fixes are simple.
- Overbaking: Pull them out when the center still looks just slightly soft. They continue setting as they cool.
- Overmixing the batter: Stirring too much after adding flour can make the texture less tender.
- Cutting too early: Warm brownies are delicious, but slicing before they cool can lead to messy pieces.
- Using very cold ingredients: This can make the batter harder to combine smoothly and evenly.
A Quick Look at the Nutrition
Before the last crumb disappears, here is a helpful snapshot of what each serving roughly looks like. These numbers are approximate, but they give a good general idea.
Servings: 12
Calories per serving: 190
Note: These are approximate values.
Timing So You Can Plan It Easily
This is one of those desserts that feels very manageable from start to finish, which is always a win. Here is the timing breakdown.
Prep Time: 15 minutes
Cook Time: 25 minutes
Total Time: 40 minutes
How to Prep Ahead and Store Them Well
If you like baking on your own schedule, this recipe works beautifully ahead of time. You can mix the dry ingredients earlier in the day and keep them ready to go, then finish the batter when you are ready to bake. Once baked and cooled, store the brownies in an airtight container at room temperature for up to 3 days, or in the refrigerator for up to 1 week for a firmer texture. They also freeze well for up to 2 months. Wrap individual squares tightly, then thaw at room temperature or warm briefly in the microwave for a softer bite.
Favorite Ways to Serve Them
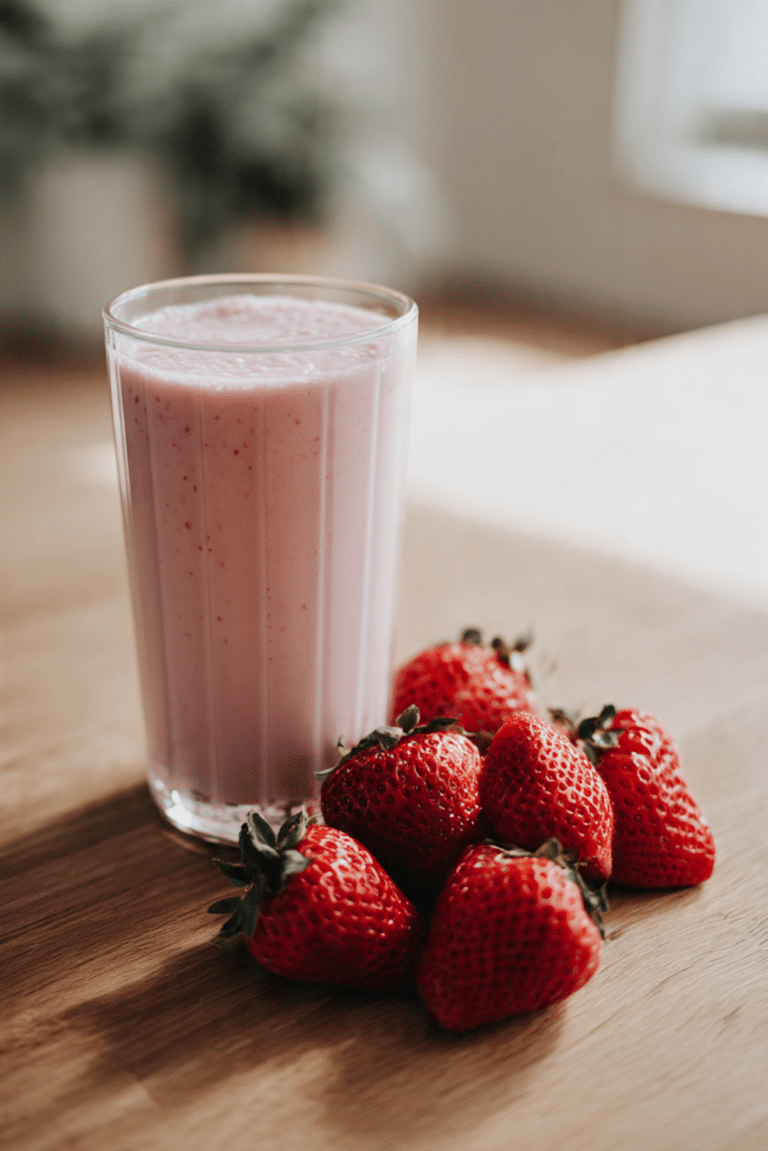
Serving can be as simple or as dressed up as you like, which is part of the fun. These squares are lovely on their own with coffee or milk, but they also pair beautifully with fresh strawberries, raspberries, or a spoonful of plain yogurt for a lightly tangy contrast. For dessert, serve them slightly warm with a scoop of vanilla ice cream and a few extra chocolate shavings on top.
Fun Ideas for Leftovers That Feel Brand New
If you happen to have leftovers, and that is a big if, there are some delicious ways to give them a second life. Crumble a square over yogurt for a chocolatey breakfast-style treat. Tuck pieces into a dessert parfait with whipped cream and berries. You can also warm one and turn it into the base for a quick brownie sundae, which honestly feels like a reward for planning ahead.
Extra Advice for Flavor, Ease, and Freshness
Sometimes it is the small details that make a recipe go from good to unforgettable. A tiny pinch of instant espresso powder can deepen the chocolate flavor without making the brownies taste like coffee. Using high-quality cocoa powder also gives the final pan a more intense, rounded finish. And if your kitchen runs warm, letting the batter sit for just 2 minutes before baking can help the surface settle nicely for a prettier top.
Make Them Look Bakery-Worthy
Presentation does not need to be complicated to feel special. Slice the cooled brownies into even squares, wipe the knife between cuts, and arrange them on a simple plate so the dark chocolate color really stands out. A light dusting of cocoa powder can make them look extra polished, and a few fresh berries on the side add contrast without distracting from the dessert itself.
Variations Worth Trying Next Time
Once you have the base down, it is easy to have a little fun with it. Here are a few simple ways to change things up.
- Walnut version: Fold in 1/2 cup chopped walnuts for crunch and a slightly nutty finish.
- Espresso twist: Add 1 teaspoon instant espresso powder to intensify the chocolate flavor.
- Double chocolate style: Use dark chocolate chips instead of semi-sweet and add an extra 2 tablespoons to the top before baking.
- Berry finish: Press a few raspberries gently onto the surface before baking for a tart contrast.
- Sea salt topping: Sprinkle a tiny pinch of flaky salt over the top after baking for a sweet-salty balance.
FAQ’s
1. Can I use low-fat yogurt instead of full-fat?
Yes, you can, but the brownies may be a little less rich and slightly less tender. Full-fat yogurt gives the best texture.
2. How do I know when they are done?
Look for set edges and a center that still feels a little soft. A toothpick should come out with moist crumbs, not wet batter.
3. Can I make them ahead of time?
Absolutely. They actually slice even better after they have cooled fully and rested for a few hours.
4. Can I freeze them?
Yes. Wrap each square well and freeze for up to 2 months. Thaw at room temperature before serving.
5. What kind of chocolate works best?
Semi-sweet chocolate chips are a great balance, but chopped dark chocolate also works beautifully for a deeper taste.
6. Can I add nuts?
Yes, chopped walnuts or pecans are lovely here. Stir in about 1/2 cup with the final chocolate chips.
7. Why did my brownies turn out cakey?
This usually happens from overbaking or overmixing. For a fudgier result, mix gently and pull them out on time.
8. Can I bake this in a different pan?
You can use a 9-inch square pan, but the brownies will be thinner and may bake a bit faster.
9. Do I need to refrigerate them?
Not right away. They keep well at room temperature for a few days, but refrigeration helps them last longer and makes them firmer.
10. Can I serve them warm?
Yes, and they are especially good that way. Just let them cool enough to set first, then warm individual squares before serving.
Conclusion
There is a lot to love about a dessert that feels comforting, chocolatey, and easy enough to make without overthinking it. These brownies deliver all the richness you want, with a soft texture and deep cocoa flavor that make them hard to forget. Whether you bake them for family, friends, or just yourself on a cozy afternoon, this recipe has a way of becoming a repeat favorite. Trust me, once you try it, you will want to keep it close.
PrintGreek Yogurt brownies
Rich, fudgy chocolate brownies made extra moist with Greek yogurt. These easy homemade bars have deep cocoa flavor, a tender center, and just the right amount of sweetness.
- Prep Time: 15 minutes
- Cook Time: 25 minutes
- Total Time: 40 minutes
- Yield: 12 brownies
- Category: Dessert
- Method: Baking
- Cuisine: American
- Diet: Vegetarian
Ingredients
- 1/2 cup unsalted butter, melted
- 1 cup semi-sweet chocolate chips, divided
- 3/4 cup granulated sugar
- 3/4 cup plain full-fat Greek yogurt
- 2 large eggs
- 1 teaspoon vanilla extract
- 1/2 cup unsweetened cocoa powder
- 1/2 cup all-purpose flour
- 1/2 teaspoon baking powder
- 1/4 teaspoon salt
Instructions
- Preheat the oven to 350°F (175°C). Line an 8-inch square baking pan with parchment paper.
- Melt the butter with 3/4 cup of the chocolate chips over low heat, stirring until smooth. Let cool slightly.
- In a large bowl, whisk together the sugar, Greek yogurt, eggs, and vanilla extract until smooth and glossy.
- Whisk the melted chocolate mixture into the wet ingredients until fully combined.
- Add the cocoa powder, flour, baking powder, and salt. Fold gently until no dry streaks remain.
- Stir in the remaining 1/4 cup chocolate chips.
- Spread the batter evenly into the prepared pan.
- Bake for 22 to 26 minutes, until the edges are set and a toothpick inserted in the center comes out with a few moist crumbs.
- Cool completely in the pan, then lift out and slice into 12 squares.
Notes
- Do not overmix the batter after adding the flour, or the texture may become less fudgy.
- For clean slices, let the brownies cool completely and wipe the knife between cuts.
- Store in an airtight container at room temperature for up to 3 days, or refrigerate for up to 1 week.
- Freeze individual squares for up to 2 months.
Nutrition
- Serving Size: 1 brownie
- Calories: 190
- Sugar: 15g
- Sodium: 75mg
- Fat: 10g
- Saturated Fat: 6g
- Unsaturated Fat: 3g
- Trans Fat: 0g
- Carbohydrates: 24g
- Fiber: 2g
- Protein: 4g
- Cholesterol: 42mg