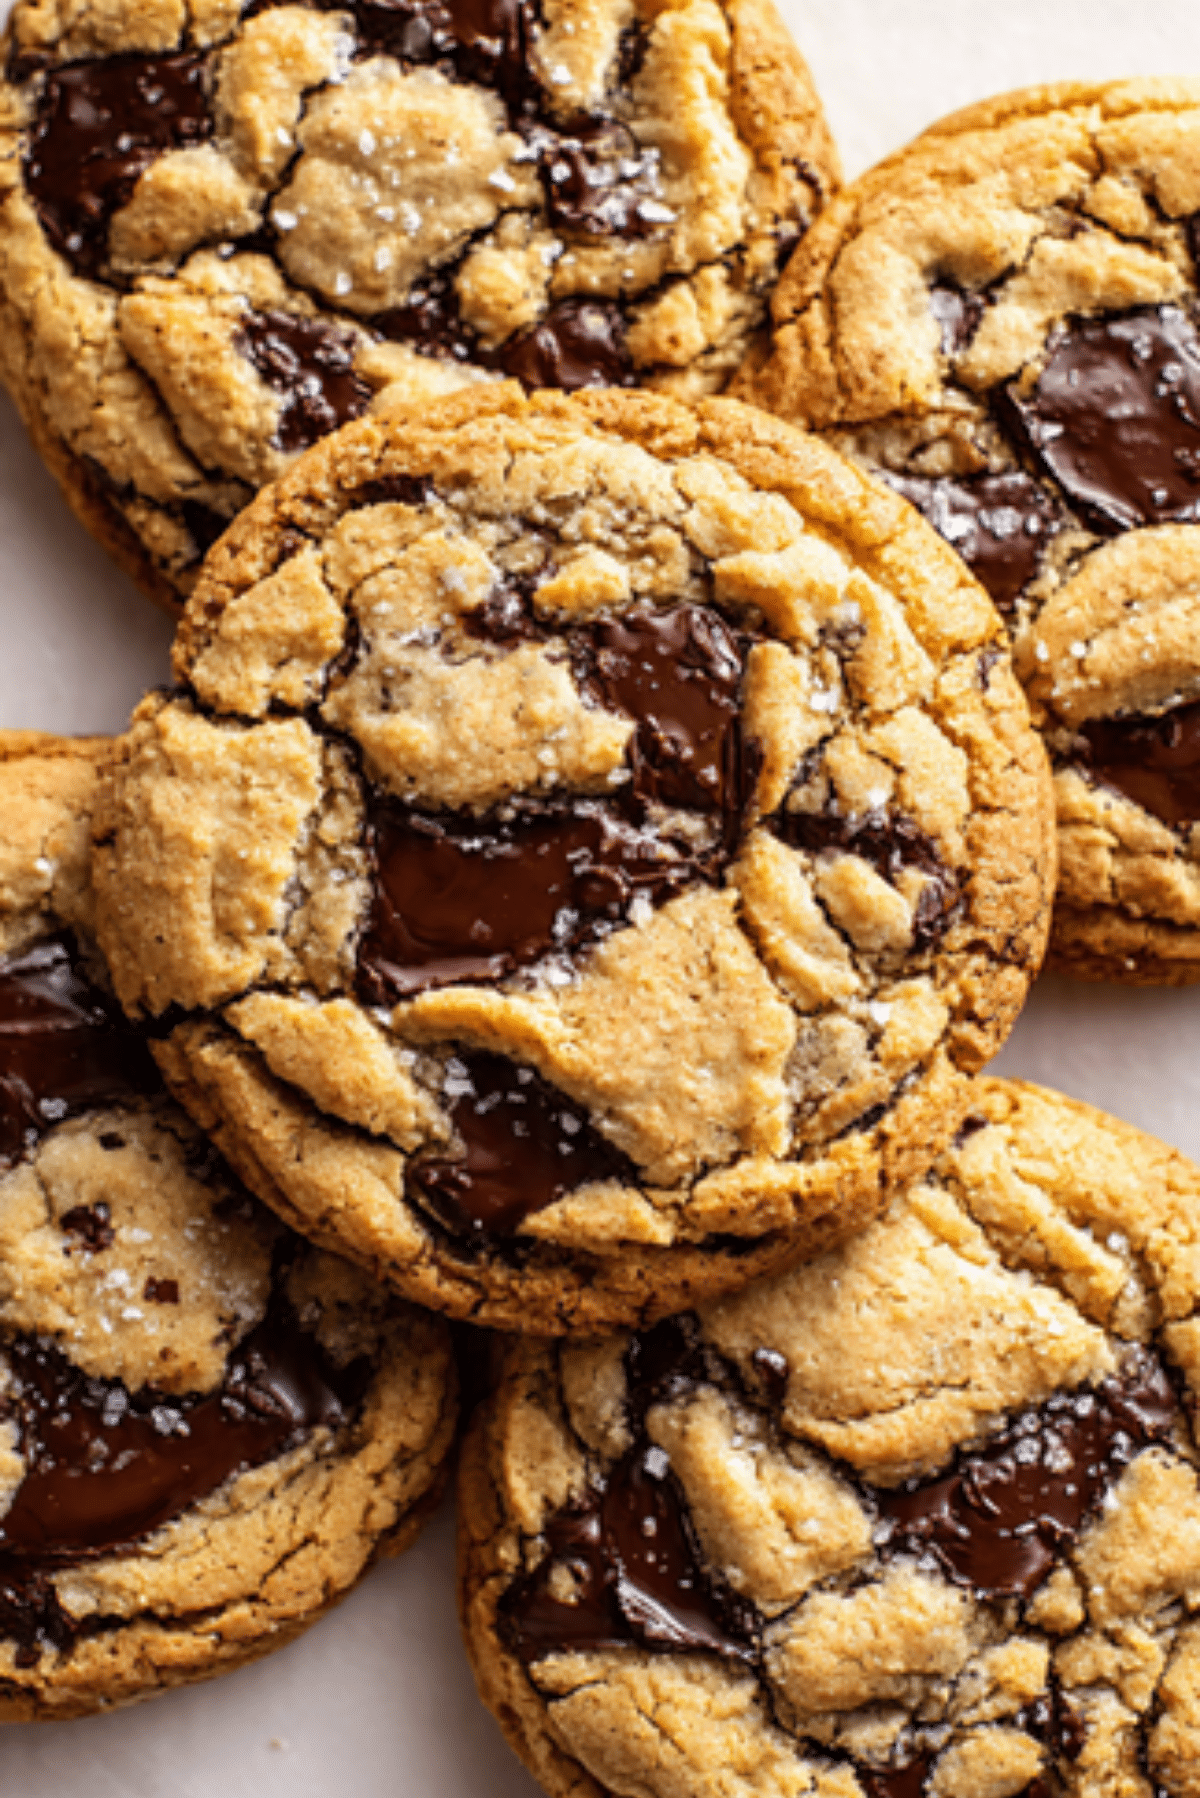
Giant Crinkled Chocolate Chip Cookies
There is something truly mesmerizing about a cookie that looks like a work of art with its dramatic ripples and golden edges. These Giant Crinkled Chocolate Chip Cookies are a total departure from your average bakery treat because they prioritize texture above everything else. Between the ultra crisp outer rings and the soft, almost doughy center, every single bite offers a contrast that is hard to find in a standard recipe. Trust me, you’re going to love this, especially when you see those beautiful chocolate pools glistening under the kitchen lights.
The Science of the Perfect Ripple
When we talk about the ultimate cookie experience, it usually comes down to that signature “pan banging” technique that creates the iconic crinkles. This method involves lifting and dropping the baking sheet during the cooking process, which causes the cookie to collapse and push the dough outward into thin, crispy ridges. You have the richness of high quality butter and the deep, complex sweetness of brown sugar working together to create a flavor profile that is mature and deeply satisfying. It is the kind of treat that proves a few simple movements in the kitchen can completely transform a classic.
A Modern Twist on a Classic Comfort
While the chocolate chip cookie has been a staple in homes for nearly a century, the crinkled “pan banged” version took the internet by storm only recently. It was born out of a desire to maximize the surface area of the crispy bits while keeping the heart of the cookie tender and rich. By making them giant in size, you allow enough space for multiple ripples to form, creating a target-like appearance that is as visually stunning as it is delicious. It is a beautiful way to bring a bit of architectural flair to your baking tray while honoring the timeless combination of salt, sugar, and chocolate.
Why You Will Fall in Love with This Recipe
Creating a showstopper dessert is all about the details, and this particular cookie recipe is designed to impress even the toughest critics. Let me tell you, it’s worth every bite, and here is exactly why these giant treats are a total game-changer for your baking repertoire.
Versatile: These are sophisticated enough for a dinner party dessert but simple enough to enjoy with a cold glass of milk on a Friday night.
Budget-Friendly: You likely already have most of these ingredients in your pantry, like flour, sugar, and baking soda.
Quick and Easy: While the technique is specific, it is not difficult to master and requires no special equipment other than a standard baking sheet.
Customizable: You can experiment with different types of chocolate or add a sprinkle of sea salt on top to adjust the flavor to your liking.
Crowd-Pleasing: Their massive size and unique shape make them an instant conversation starter at any gathering.
Make-Ahead Friendly: The dough benefits from a short chill in the fridge, so you can prep it in advance and bake when you are ready.
Great for Leftovers: Because of their high moisture content in the center, they stay soft and chewy for several days after baking.
Pro Secrets for the Ultimate Cookie Ripple
The secret to achieving those deep, dramatic crinkles is all about the timing of the “bang.” Wait until the cookies have puffed up in the oven, usually around the ten minute mark, before you start the lifting and dropping process. This ensures the structure is set enough to ripple but still soft enough to spread. Additionally, using cold butter that you cream thoroughly with the sugar helps control the spread, preventing the cookies from becoming one giant sheet on the pan and keeping them as individual, perfectly round masterpieces.
Essential Tools for Your Kitchen
Having the right tools is essential for executing the pan banging technique safely and effectively. These items will help you get those professional, rippled results every time.
Large Rimmed Baking Sheet: You need plenty of space for these cookies to spread without touching each other.
Parchment Paper: This is non negotiable to ensure your giant cookies don’t stick to the pan during the rippling process.
Large Cookie Scoop: Helps you get consistent, oversized portions of dough so they all finish baking at the same time.
Wire Cooling Rack: Essential for letting air circulate around the thin edges so they stay crisp as the cookie cools.
Oven Mitts: Since you will be handling the pan frequently to create the ripples, a good pair of mitts is a safety must.
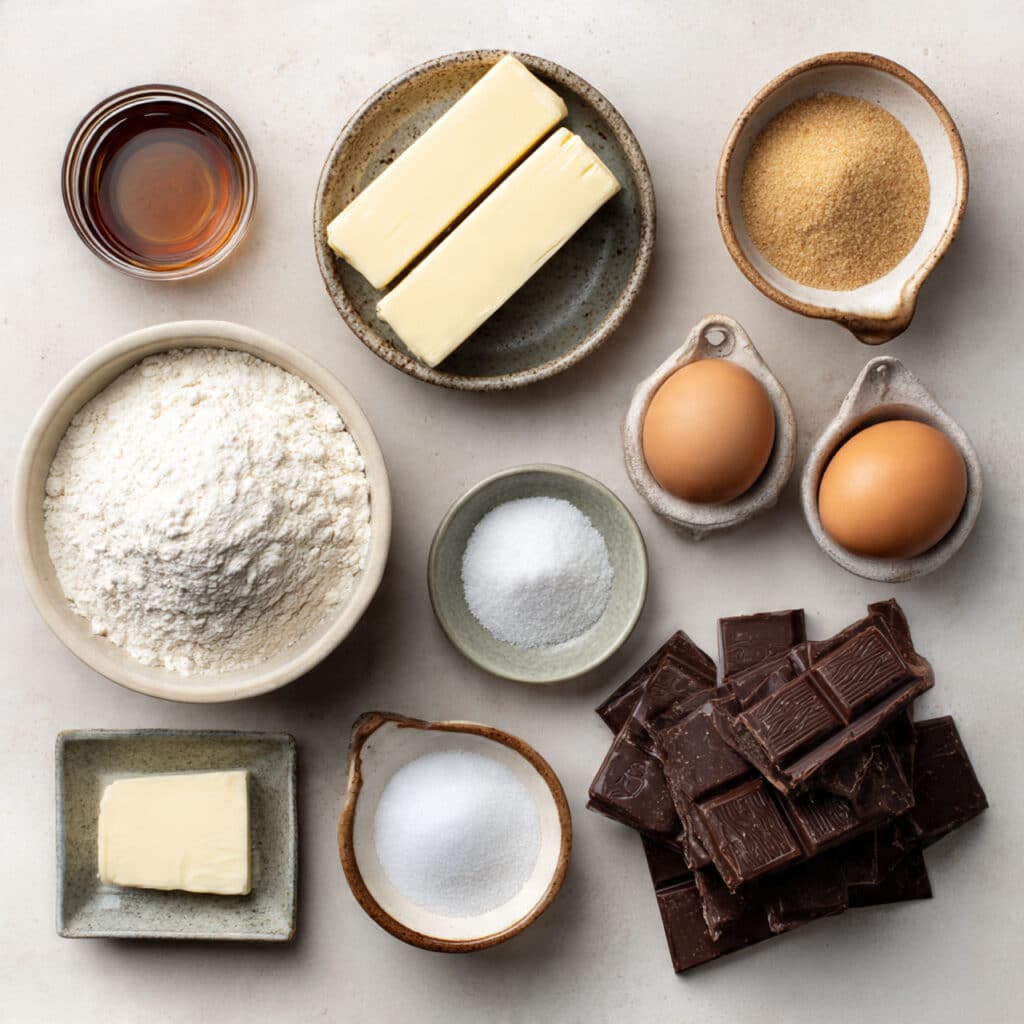
Ingredients You Will Need For These Iconic Cookies
The success of this recipe lies in the quality of the fats and the chocolate, so choose a butter with high fat content and real chocolate bars rather than chips. This one’s a total game-changer when those chocolate chunks melt into pools.
- All Purpose Flour: 2 cups. Provides the necessary structure to support the large size and thin edges.
- Unsalted Butter: 1 cup. Softened just enough to cream but still cool to the touch.
- Granulated Sugar: 1 cup. Helps create those crisp, caramelized edges we all crave.
- Light Brown Sugar: 3/4 cup. Packed tightly to provide moisture and a hint of molasses flavor.
- Large Egg: 1 whole. Acts as the binder and adds richness to the dough.
- Vanilla Extract: 1 tablespoon. A generous amount to provide that classic bakery aroma.
- Baking Soda: 1/2 teaspoon. Essential for the puff and collapse cycle that creates the ripples.
- Kosher Salt: 3/4 teaspoon. Balances the sweetness and enhances the chocolate notes.
- Dark Chocolate Bar: 6 ounces. Roughly chopped into uneven chunks to create variety in every bite.
Flexible Ingredient Substitutions
If you find yourself short on a specific ingredient, these swaps will keep your cookie project moving forward without a hitch.
Dark Chocolate: Milk chocolate or semi sweet chunks if you prefer a sweeter profile.
Unsalted Butter: Salted butter (just reduce the added salt by half).
Light Brown Sugar: Dark brown sugar for a deeper, more intense toffee flavor.
All Purpose Flour: A 1:1 gluten free flour blend if you have a dietary restriction.
Vanilla Extract: Almond extract for a unique, nutty twist.
Spotlight on Key Ingredients
Dark Chocolate Bar: Chopping a bar instead of using chips is the secret to those “pools” of chocolate because chips contain stabilizers that prevent them from melting completely.
Brown Sugar: This is what gives the center its chewy, fudge-like texture that contrasts so beautifully with the crisp edges.
Let’s Get Cooking Together
Walking into the kitchen to bake these cookies is an exciting process because of the interactive nature of the technique. Follow these steps, and you will have a tray of stunning cookies ready to enjoy.
- Preheat Your Equipment: Set your oven to 350 degrees and line two large baking sheets with parchment paper.
- Combine Ingredients: In a medium bowl, whisk together the flour, baking soda, and salt.
- Prepare Your Cooking Vessel: In a large bowl, cream the butter and both sugars until light and fluffy, then beat in the egg and vanilla.
- Assemble the Dish: Gradually add the dry ingredients to the wet, then gently fold in the chopped dark chocolate chunks.
- Cook to Perfection: Scoop 1/3 cup portions of dough onto the sheets and bake for 10 minutes, then lift and drop the pan every 2 minutes until the edges are golden and rippled.
- Finishing Touches: Sprinkle a tiny bit of extra sea salt over the warm cookies if you like a savory edge.
- Serve and Enjoy: Let the cookies cool on the pan for 10 minutes to firm up before moving them to a wire rack.
Mastering the Texture and Flavor
The real magic happens during those last few minutes in the oven. As you bang the pan, you are literally freezing the dough’s movement into those beautiful ridges. The result is a cookie that is multi textural: crunchy on the very outside, chewy in the middle ring, and soft and gooey in the dead center. It is a flavor journey that changes with every single bite you take.
Helpful Cooking Tips and Tricks
- Freeze the dough balls for 15 minutes before baking to ensure they don’t spread too fast, which helps the ripples form more clearly.
- Use a high quality dark chocolate with at least 60% cocoa for the best flavor balance against the sweet dough.
- If the cookies are losing their round shape, use a large circular cutter to “scoot” them back into a perfect circle right after they come out of the oven.
What to Avoid for Best Results
- Don’t crowd the pan; these cookies spread significantly, so only bake 4 per sheet to give them the room they need.
- Avoid using an oven that hasn’t been fully preheated, as the initial puff is crucial for the ripple effect.
- Never use a flat cookie sheet without rims, as the “banging” technique is much harder to execute safely.
Nutritional Information
Servings: 10 giant cookies
Calories per serving: 420
Note: These are approximate values.
Time Estimates
Prep Time: 20 minutes
Cook Time: 18 minutes
Total Time: 38 minutes
Make-Ahead and Storage Tips
You can scoop the dough and keep the balls in an airtight container in the freezer for up to three months. When you are ready to bake, just add two minutes to the cooking time. Baked cookies stay fresh in a sealed container at room temperature for up to 4 days, or you can freeze the baked cookies for a quick treat later.
Creative Serving Suggestions
These cookies are so large they are almost a meal in themselves! Serve them slightly warm with a scoop of vanilla bean ice cream right in the center for an incredible “cookie sundae” experience.
Creative Leftover Transformations
If you have a cookie that has gone a bit stale, crumble it over yogurt or use the pieces as a base for a decadent homemade cheesecake crust.
Additional Tips for Success
For the most professional look, save a few chunks of chocolate to press into the top of the dough balls right before they go into the oven.
Make It a Showstopper
When the cookies are cooling, the chocolate will still be melted. Use a small spoon to gently swirl the chocolate pools into the ripples for a marbled, gourmet look that looks like it came from a high end pastry shop.
Variations to Try
- White Chocolate Macadamia: Swap the dark chocolate for white chunks and add toasted nuts.
- Espresso Ripple: Add a teaspoon of instant espresso powder to the dough for a mocha flavored treat.
- Toffee Crunch: Fold in some toffee bits along with the chocolate for extra caramelized flavor.
FAQ’s
- Q: Why didn’t my cookies ripple?
A: You might not have banged the pan hard enough, or the dough was too warm when it hit the oven. - Q: Can I use regular chocolate chips?
A: You can, but you won’t get those large, dramatic pools of melted chocolate. - Q: How many cookies does this make?
A: About 10 to 12 giant cookies depending on your scoop size. - Q: Is the pan banging loud?
A: Yes, it makes a bit of noise, but the results are worth the racket! - Q: Can I make these smaller?
A: You can, but the ripple effect is much less dramatic on smaller cookies. - Q: Why is my center too doughy?
A: These cookies are designed to be slightly underbaked in the middle for that soft texture. - Q: Do I need to use a specific type of flour?
A: All purpose flour is best for the necessary protein content and structure. - Q: Can I bake two sheets at once?
A: It is better to do one at a time so you can focus on the timing of the pan banging. - Q: What kind of butter is best?
A: European style butter with a higher fat content will yield a richer flavor. - Q: Can I add nuts?
A: Absolutely, chopped walnuts or pecans add a great extra texture.
Conclusion
These Giant Crinkled Chocolate Chip Cookies are the ultimate reward for any baker looking to try something new. The combination of the interactive baking process and the incredible multi textural result makes them a recipe you will return to time and time again. Trust me, once you hear that first “bang” and see those ripples start to form, you will be just as hooked as I am!
PrintGiant Crinkled Chocolate Chip Cookies
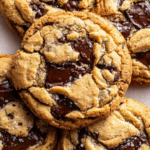
Oversized, ultra-thin cookies featuring dramatic rippled edges, a chewy center, and pools of melted dark chocolate created using the signature pan-banging technique.
Ingredients
- 2 cups all-purpose flour
- 1 cup unsalted butter, softened
- 1 cup granulated sugar
- 3/4 cup light brown sugar, packed
- 1 large egg
- 1 tablespoon vanilla extract
- 1/2 teaspoon baking soda
- 3/4 teaspoon kosher salt
- 6 ounces dark chocolate bar, roughly chopped
Instructions
- Preheat oven to 350 degrees and line baking sheets with parchment paper.
- Whisk together flour, baking soda, and salt in a medium bowl.
- Cream butter and sugars until fluffy, then beat in the egg and vanilla.
- Gradually mix in dry ingredients and fold in the chopped dark chocolate.
- Scoop 1/3 cup portions of dough onto the pans, leaving plenty of space.
- Bake for 10 minutes, then lift and drop the pan every 2 minutes until cookies are golden and rippled.
- Cool on the pan for 10 minutes before moving to a wire rack.
Notes
- Use a real chocolate bar rather than chips for the best melting pools.
- Don’t be afraid to bang the pan firmly to create the ripples.
- Freeze dough balls for 15 minutes before baking to control the spread.