Funfetti Oreo Bars
Imagine the ultimate childhood dream captured in a single, buttery square. These Funfetti Oreo Bars are a vibrant explosion of color and nostalgia, combining the birthday cake flavor we all crave with the iconic crunch of chocolate sandwich cookies. Trust me, you’re going to love this recipe because it brings a massive smile to everyone’s face before they even take their first bite.
A Whimsical Fusion of Two Classics
When you pull these out of the oven, the aroma of vanilla and toasted butter fills the air, promising something truly special. Each bar is dense and chewy, acting as a perfect canvas for the bright rainbow sprinkles and the deep, cocoa-rich chunks of Oreo hidden throughout. Let me tell you, it’s worth every bite, especially when you hit those pockets of melted white chocolate and crunchy cookie bits.
The Evolution of the Party Blondie
The concept of the “funfetti” flavor profile took the world by storm in the late 1980s, originally starting as a simple cake mix. Since then, it has become a symbol of celebration and joy in American baking culture. By merging this festive aesthetic with the beloved Oreo cookie, which has been a pantry staple since 1912, we create a modern dessert mashup that feels both fresh and comforting. It is a playful twist on the traditional blondie that elevates it to “party status” instantly.
Why This Recipe is a Total Game-Changer
This recipe is designed to be your go-to for birthdays, school events, or whenever you need a little extra spark of happiness in your day.
Versatile: You can use any seasonal Oreo flavor or different sprinkle shapes to match any holiday theme perfectly.
Budget-Friendly: Most of the bulk comes from basic pantry items like flour, sugar, and oil, making it an affordable treat for large groups.
Quick and Easy: This is a simple stir and bake recipe that requires no fancy equipment or complicated chilling times.
Customizable: Add a layer of chocolate ganache on top or mix in some shredded coconut for a tropical twist.
Crowd-Pleasing: Kids love the sprinkles, and adults love the sophisticated balance of the buttery dough and dark cookies.
Make-Ahead Friendly: These actually taste even better the second day once the flavors have had time to fully settle and the texture becomes extra fudgy.
Great for Leftovers: They stay incredibly moist for days and can be easily packed into lunchboxes without crumbling.
Secrets for the Perfect Chewy Texture
To ensure your bars remain fudgy rather than cakey, be very careful not to overbeat the eggs once they are added to the butter and sugar. Also, always line your pan with parchment paper with a bit of an overhang. This allows you to lift the entire block out once cooled, which is the only way to get those clean, professional-looking squares every single time.
Essential Tools for Baking Success
Using the right equipment ensures that your bars bake evenly and are easy to handle from oven to table.
9×9 Square Baking Pan: The ideal size to ensure the bars have that thick, indulgent height.
Parchment Paper: Essential for easy removal and preventing the bottom from sticking to the pan.
Large Mixing Bowl: You need plenty of room to fold in those heavy cookie chunks without making a mess.
Rubber Spatula: Perfect for folding in the sprinkles gently so they don’t bleed their colors into the batter.
Sharp Chef’s Knife: A clean, sharp blade is necessary to slice through the crunchy Oreo pieces without squashing the soft bar.
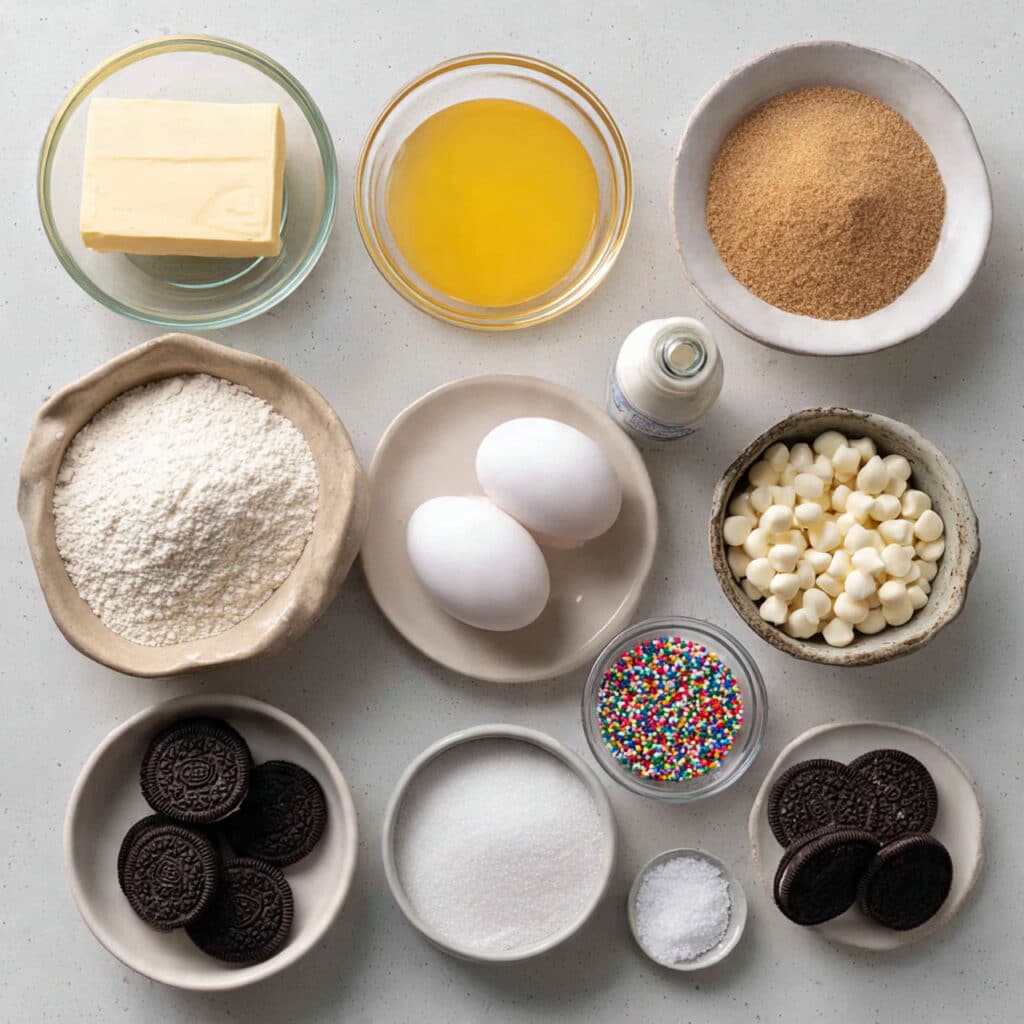
Ingredients You Will Need For Funfetti Oreo Bars
The quality of these simple ingredients is what makes the final result so decadent and professional.
- Unsalted Butter: 1 cup melted and slightly cooled to provide a rich, golden base for the bars.
- Light Brown Sugar: 1 cup packed to add a deep caramel note and ensure a soft, chewy texture.
- Granulated White Sugar: 0.5 cups to help the edges get that slightly crisp and sugary finish.
- Large Eggs: 2 whole eggs at room temperature to provide structure and richness.
- Vanilla Extract: 1 tablespoon for that quintessential “birthday cake” aroma and flavor.
- All-Purpose Flour: 2.25 cups to give the bars enough body to hold all the heavy mix-ins.
- Rainbow Sprinkles: 0.5 cups of the long “jimmies” style for the best color distribution without melting.
- Oreo Cookies: 15 cookies coarsely chopped into large, satisfying chunks.
- White Chocolate Chips: 0.5 cups to add creamy pockets of sweetness throughout the dough.
- Salt: 0.5 teaspoons to balance all the sugars and make the vanilla flavor stand out.
Smart Ingredient Substitutions
If you are missing something, these alternatives will still result in a delicious and festive treat.
Light Brown Sugar: Dark brown sugar can be used for an even more intense molasses flavor.
Oreo Cookies: Any chocolate sandwich cookie will work, or you can use mini chocolate chips if you prefer.
Unsalted Butter: Coconut oil can be substituted for a slightly different fat profile and a hint of coconut.
Rainbow Sprinkles: You can use chocolate sprinkles or even crushed hard candies for a different texture.
Spotlight on Key Ingredients
Oreo Cookies: These provide the necessary cocoa contrast to the sweet vanilla dough, offering both flavor and a much-needed crunch.
Rainbow Sprinkles: Beyond just looking pretty, these add tiny pops of sugar that contribute to the festive “Funfetti” identity of the bars.
Step-by-Step Culinary Journey
Follow these instructions to create a batch of bars that look just as good as they taste.
- Preheat Your Equipment: Get your oven to 350 degrees Fahrenheit and line your square baking pan with parchment paper, leaving a little excess on the sides.
- Combine Ingredients: In your large bowl, whisk together the melted butter and both sugars until the mixture looks smooth and glossy.
- Prepare Your Cooking Vessel: Add the eggs and vanilla to the sugar mixture, beating well, then gently fold in the flour and salt until just combined.
- Assemble the Dish: Fold in about three quarters of the chopped Oreos and sprinkles, then spread the thick batter evenly into your prepared pan.
- Cook to Perfection: Press the remaining cookie chunks and sprinkles onto the top and bake for 25 to 30 minutes until the center is set but still slightly soft.
- Finishing Touches: Let the bars cool completely in the pan before lifting them out by the parchment paper handles to a cutting board.
- Serve and Enjoy: Slice them into squares and watch them disappear as your friends and family dive in.
Texture and Flavor Development
As these bake, the edges become caramelized and chewy while the center remains soft and fudge-like. The chocolate from the Oreos softens slightly but keeps its distinct “snap,” creating a wonderful play against the tender blondie. The salt works behind the scenes to ensure the sweetness is addictive rather than overwhelming.
Pro Tips and Tricks
- Use “jimmies” sprinkles rather than “nonpareils” because the tiny balls tend to bleed and turn the batter gray.
- Chop your Oreos by hand rather than using a food processor so you get those nice big, chunky pieces.
- For the cleanest cuts, wipe your knife with a warm, damp cloth between every single slice.
What to Avoid for Best Results
- Do not overbake these bars, they should look slightly underdone in the center when you pull them out as they continue to firm up while cooling.
- Avoid using cold eggs, as they can cause the melted butter to seize and result in a greasy texture.
- Do not cut them while they are still warm, or they will crumble and lose their beautiful defined layers.
Nutritional Information
Servings: 16 bars
Calories per serving: 280 calories
Note: These are approximate values.
Preparation Time
Prep Time: 15 minutes
Cook Time: 30 minutes
Total Time: 45 minutes
Storage and Freshness Tips
These bars stay fresh and chewy for up to 4 days when kept in an airtight container at room temperature. If you want to keep them longer, wrap individual squares in plastic wrap and freeze them for up to 2 months, then just thaw at room temperature for an hour before eating.
How to Serve
For an over-the-top dessert, serve a warm bar with a scoop of cookies and cream ice cream and a drizzle of chocolate sauce. They are also fantastic on their own with a tall glass of cold milk to wash down all that buttery goodness.
Creative Leftover Transformations
If you have a few bars left over, you can crumble them up and use them as a topping for yogurt or mix them into a vanilla milkshake. You can even sandwich a scoop of frosting between two thin slices for a “blondie sandwich.”
Additional Tips for Success
If you want an even more intense birthday cake flavor, you can add half a teaspoon of almond extract along with the vanilla. This gives it that specific bakery-style scent that everyone loves.
Make It a Showstopper
To make these look truly professional, save the largest, most recognizable Oreo pieces for the very top. Press them in gently right before the pan goes into the oven so they remain visible and iconic on the finished crust.
Variations to Try
- Golden Oreo Bars: Use Golden Oreos instead of chocolate ones for a “Double Vanilla” version.
- Minty Funfetti: Use Mint Oreos and green sprinkles for a refreshing, colorful treat.
- Peanut Butter Twist: Swirl in a few tablespoons of melted peanut butter before baking for extra richness.
- Chocolate Base: Replace 1/4 cup of flour with cocoa powder to make these a “Double Chocolate Funfetti” bar.
FAQ’s
- Can I make these in a 9×13 pan?
Yes, but the bars will be much thinner and the bake time will be reduced to about 18 to 22 minutes. - Why are my bars greasy?
This usually happens if the butter was too hot when the eggs were added or if the batter was overmixed. - Can I use frozen Oreos?
Yes, but it is not necessary and might slightly increase the bake time. - Do I have to use white chocolate chips?
No, they are optional but they add a lovely creamy texture that complements the funfetti theme. - My sprinkles melted into the batter, what happened?
You likely used “nonpareils” or overmixed the batter after adding them. - Can I make these gluten-free?
Yes, use a 1:1 gluten-free flour blend and ensure your cookies and sprinkles are certified gluten-free. - How do I know when they are done?
The edges should be golden brown and pulling away slightly from the sides of the pan. - Can I add frosting to the top?
Absolutely, a simple vanilla buttercream would be delicious, but wait until they are completely cold. - Is it okay to use margarine?
Butter provides the best flavor and texture, but a baking margarine stick will work in a pinch. - Can I add nuts to this recipe?
Yes, chopped walnuts or macadamias would add a nice earthy crunch to the sweet bars.
Conclusion
The Funfetti Oreo Bar is more than just a dessert, it is a celebration in edible form. Whether you are baking for a crowd or just looking to brighten your own afternoon, these bars deliver a perfect balance of chewy, crunchy, and colorful satisfaction. Now, go grab your sprinkles and get baking, because this one’s a total game-changer for your dessert rotation!
PrintFunfetti Oreo Bars
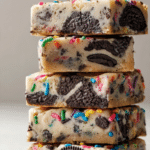
A thick, chewy, and festive blondie-style bar loaded with colorful rainbow sprinkles, white chocolate chips, and chunky pieces of chocolate sandwich cookies.
Ingredients
- 1 cup Unsalted Butter, melted and cooled
- 1 cup Light Brown Sugar, packed
- 0.5 cups Granulated White Sugar
- 2 Large Eggs, room temperature
- 1 tablespoon Vanilla Extract
- 2.25 cups All-Purpose Flour
- 0.5 cups Rainbow Sprinkles (jimmies)
- 15 Oreo Cookies, coarsely chopped
- 0.5 cups White Chocolate Chips
- 0.5 teaspoons Salt
Instructions
- Preheat your oven to 350°F (175°C) and line a 9×9 inch square baking pan with parchment paper.
- In a large mixing bowl, whisk together the melted butter, brown sugar, and granulated sugar until well combined and smooth.
- Add the eggs and vanilla extract to the butter mixture and whisk until fully incorporated.
- Gently fold in the flour and salt until just combined, being careful not to overmix.
- Fold in 3/4 of the chopped Oreo cookies, 3/4 of the rainbow sprinkles, and all of the white chocolate chips.
- Spread the batter evenly into the prepared baking pan.
- Press the remaining Oreo chunks and sprinkles onto the top of the batter.
- Bake for 25 to 30 minutes, or until the edges are golden and the center is set.
- Allow the bars to cool completely in the pan before lifting them out using the parchment paper.
- Slice into squares and serve.
Notes
- Ensure eggs are at room temperature to prevent the melted butter from seizing.
- Do not overbake; the center should remain slightly soft for a fudgy texture.
- Using ‘jimmies’ instead of ‘nonpareils’ prevents the colors from bleeding into the dough.