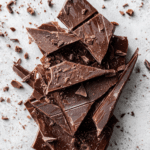
Easter Chocolate Bark
If you are looking for a stunning, no-bake holiday treat that looks like it came straight from a professional chocolatier, trust me, you’re going to love this. This Easter Chocolate Bark is a vibrant explosion of pastel colors and rich cocoa, featuring a marbled base of dark and white chocolate topped with festive candies. Let me tell you, it’s worth every bite because it is incredibly simple to make but always manages to steal the show on a dessert platter.
The Art of Marbling and Seasonal Sweets
There is something deeply satisfying about watching two types of chocolate swirl together to create a unique pattern. This recipe is all about creativity and fun, making it a total game-changer for your spring celebrations or as a handmade gift for friends and family.
A Modern Twist on a Classic Confection
Chocolate bark has long been a favorite for holiday gifting due to its versatility and beautiful appearance. For Easter, we transform this classic into a seasonal masterpiece by using a palette of spring colors, miniature eggs, and whimsical sprinkles that represent the joy of the new season.
Why This Recipe is a Total Game-Changer
This bark stands out because it requires zero baking time and offers a perfect balance of creamy chocolate and crunchy toppings.
Versatile: You can serve this as a standalone snack, use it to decorate an Easter cake, or package it in cellophane bags as a charming party favor.
Budget-Friendly: By using standard chocolate bars or chips and your favorite leftover holiday candies, you can create a high-end look on a budget.
Quick and Easy: The active prep time is minimal, leaving the refrigerator to do all the hard work while you enjoy your day.
Customizable: You can experiment with different chocolate bases, such as milk or even strawberry-flavored pink chocolate, to suit your taste.
Crowd-Pleasing: Everyone loves the ability to snap off a piece of their preferred size, making it a great communal dessert for large gatherings.
Make-Ahead Friendly: This bark can be prepared several days in advance and stays perfectly crisp and delicious until you are ready to serve.
Great for Leftovers: Any extra shards can be chopped up and stirred into cookie dough or used as a decadent topping for morning pancakes.
Insider Secrets for a Perfect Snap
To get that professional finish, the secret is in how you melt and set your chocolate. Using high-quality chocolate with a good cocoa butter content will ensure a smooth melt and a glossy finish that snaps cleanly when broken into shards.
Essential Tools for Chocolate Making
Having a few basic items ready will make your chocolate crafting experience smooth and mess-free.
Baking Sheet: A large flat tray provides the perfect surface for spreading your chocolate to the ideal thickness.
Parchment Paper: This is non-negotiable for ensuring your bark lifts away effortlessly once it has hardened.
Offset Spatula: A flat spatula is the best tool for spreading the chocolate evenly and creating those beautiful, thin edges.
Toothpick or Skewer: This simple tool is all you need to create the intricate marble swirls between the dark and white chocolate layers.
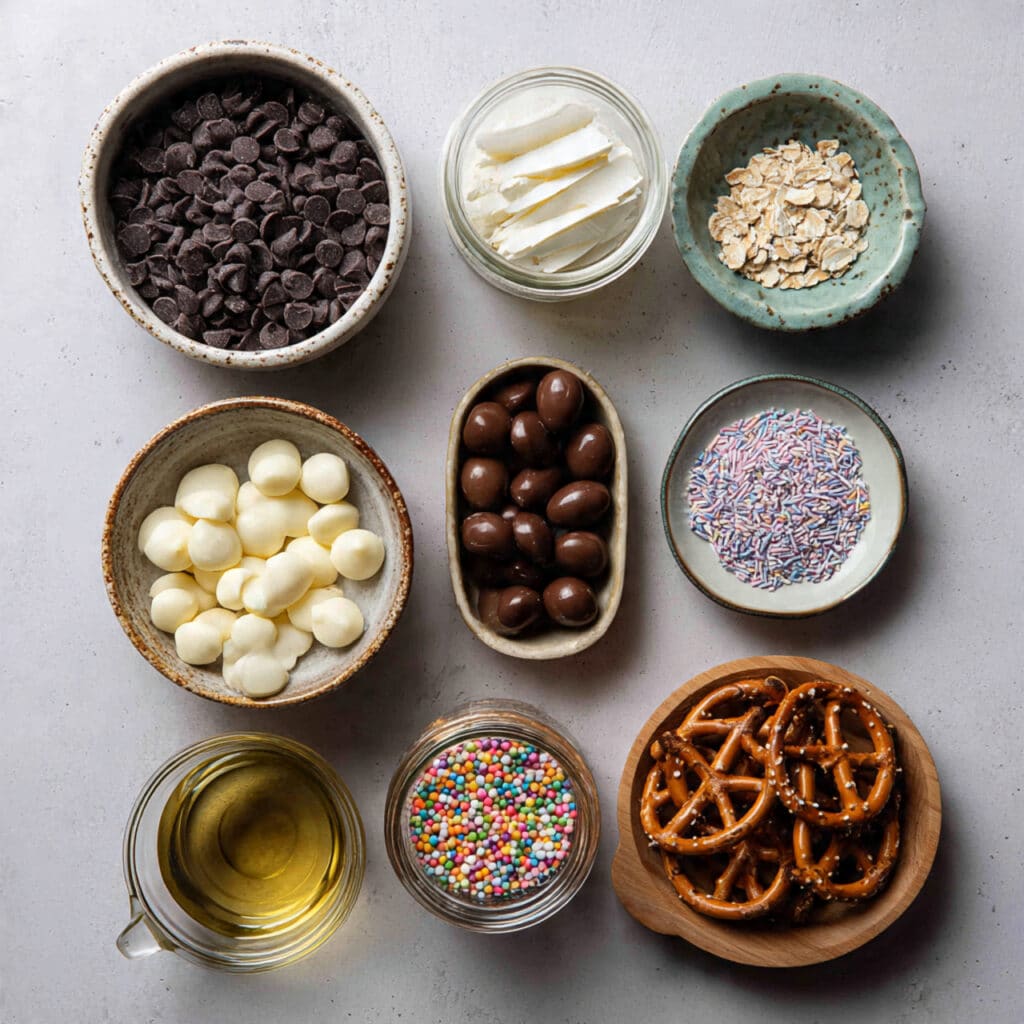
Ingredients You Will Need For This Festive Treat
The combination of these simple ingredients creates a beautiful and delicious treat that captures the essence of spring.
- Dark Chocolate Chips: 12 ounces of high-quality dark or semi-sweet chocolate to provide a rich, sophisticated base.
- White Chocolate Chips: 6 ounces of creamy white chocolate to create the beautiful marbled contrast and pastel look.
- Chocolate Mini Eggs: 1 cup of candy-coated chocolate eggs, roughly chopped to expose their bright centers.
- Pastel Sprinkles: 2 tablespoons of spring-themed sprinkles to add a pop of color and extra texture.
- Pretzels: 1/2 cup of crushed salted pretzels to provide a savory crunch that balances the sweetness.
- Coconut Oil: 1 teaspoon to help the chocolate melt smoothly and give it a beautiful glossy sheen.
Flexible Ingredient Substitutions
You can easily adapt this recipe based on what you have in your pantry or your personal preferences.
Dark Chocolate Chips: Milk chocolate can be used if you prefer a sweeter, creamier base for your bark.
Chocolate Mini Eggs: Any seasonal candy, such as jelly beans or chopped chocolate bunnies, will work perfectly.
Pretzels: Salted peanuts or toasted almonds are excellent alternatives if you want a nut-filled crunch.
Pastel Sprinkles: If you prefer a more natural look, dried rose petals or crushed freeze-dried strawberries add beautiful color.
Spotlight on Key Ingredients
White Chocolate: This acts as the highlight of the bark, allowing you to create artistic swirls and providing a sweet, vanilla-forward flavor.
Crushed Pretzels: The addition of salt is crucial here, as it cuts through the richness of the chocolate and makes the bark incredibly addictive.
Let’s Create Your Chocolate Masterpiece
The process of making bark is almost as relaxing as eating it. Let’s get started on this colorful project.
- Preheat Your Equipment: Prepare a large baking sheet by lining it completely with a piece of parchment paper.
- Combine Ingredients: Melt the dark chocolate chips with a half-teaspoon of coconut oil in a microwave-safe bowl in 30-second bursts.
- Prepare Your Cooking Vessel: Repeat the melting process with the white chocolate chips and the remaining coconut oil until smooth.
- Assemble the Dish: Pour the dark chocolate onto the parchment and spread it into a rectangle, then drop spoonfuls of white chocolate on top.
- Cook to Perfection: Use a toothpick to swirl the colors together, then immediately press the mini eggs, pretzels, and sprinkles into the wet chocolate.
- Finishing Touches: Place the tray in the refrigerator for at least one hour until the chocolate is completely firm and set.
- Serve and Enjoy: Once hardened, use your hands to snap the bark into irregular, rustic shards and arrange them on a serving plate.
A Harmony of Sweet and Salty
With every bite, you first experience the smooth, melting sensation of the dual chocolates. This is quickly followed by the distinct crunch of the candy shells and the salty snap of the pretzels, creating a complex flavor profile that is absolutely irresistible.
Pro Cooking Tips and Tricks
- Avoid getting any water in your chocolate while melting, as even a single drop can cause it to seize and become grainy.
- For the best marbling, make sure both types of chocolate are roughly the same temperature when you start swirling.
- If you want a more vibrant look, you can add a drop of oil-based food coloring to the white chocolate before swirling.
What to Avoid in Your Chocolate Crafting
- Overheating the chocolate: Melt it slowly to prevent it from burning or losing its glossy finish.
- Thin layers: Don’t spread the chocolate too thin, or the bark will be too fragile to hold the heavy toppings.
- Waiting too long to top: Add your candies and pretzels while the chocolate is still very wet so they stick properly.
Nutrition Facts
Servings: 10
Calories per serving: 280
Note: These are approximate values.
Preparation and Setting Time
Prep Time: 15 minutes
Cook Time: 0 minutes (No-Bake)
Total Time: 1 hour 15 minutes (including chilling)
Make-Ahead and Storage Tips
This Easter Chocolate Bark is the perfect make-ahead treat as it keeps beautifully in an airtight container for up to two weeks. If your kitchen is warm, it is best to store it in the refrigerator to prevent the chocolate from softening or the colors from blooming.
Creative Serving and Pairing Suggestions
Present these shards in a rustic wooden bowl or a glass jar tied with a pastel ribbon. They are a wonderful accompaniment to a fruit platter or can be served alongside a glass of cold sparkling cider for a festive touch.
Creative Leftover Transformations
Leftover bark can be roughly chopped and used as a decadent topping for frozen yogurt or even stirred into a warm bowl of oatmeal for a special holiday breakfast. You can also melt the shards down and use them as a dip for fresh strawberries.
Additional Tips for Success
Using a combination of different textures — like the soft chocolate, hard candy shells, and crunchy pretzels — is what makes this bark so successful. Always make sure your toppings are ready to go before you melt the chocolate, as it can set faster than you think.
Make It a Showstopper
To take your bark to the next level, use a gold luster dust or edible silver leaf to add a touch of sparkle to the finished shards. This adds a luxurious feel that makes the simple treat look incredibly expensive and artisanal.
Creative Variations to Try
- Tropical Easter Bark: Use white chocolate with dried mango, shredded coconut, and macadamia nuts.
- Berry Blast Bark: Mix dark chocolate with freeze-dried raspberries and white chocolate swirls.
- Cookies and Cream Bark: Use white chocolate mixed with crushed chocolate sandwich cookies and topped with mini eggs.
FAQ’s
- Why didn’t my toppings stick?
The chocolate likely started to set before you added them; try to work quickly once the chocolate is spread. - Can I use a microwave to melt the chocolate?
Yes, just use short intervals and stir frequently to ensure even heating. - How do I get the best swirls?
Don’t over-swirl, or the colors will just blend into a light brown rather than staying distinct. - Can I use chocolate bars instead of chips?
Absolutely, just chop them into small, even pieces so they melt consistently. - Is coconut oil necessary?
It isn’t strictly required, but it helps with the shine and makes the chocolate easier to pour. - How long does it take to set at room temperature?
It can take several hours depending on the temperature of your home, so the fridge is much faster. - Can I freeze the bark?
Yes, it freezes well for up to three months in an airtight container. - Why is my chocolate cloudy?
This is called “bloom” and happens if the chocolate gets too warm or is stored in a humid place; it’s still safe to eat. - Can I make this dairy-free?
Yes, use dairy-free dark chocolate and a vegan white chocolate alternative. - What is the best way to break the bark?
Using your hands creates the most natural, rustic shards, but you can use a knife for cleaner triangles.
Conclusion
This Easter Chocolate Bark is a delightful way to bring some color and sweetness to your holiday table without spending hours in the kitchen. Its beautiful marbled appearance and addictive crunch make it a favorite for all ages. Gather your favorite candies and start swirling — you are going to love the results.
PrintEaster Chocolate Bark
A beautiful and easy no-bake Easter treat featuring marbled dark and white chocolate topped with crunchy pretzels, mini eggs, and festive sprinkles.
Ingredients
- 12 oz dark chocolate chips
- 6 oz white chocolate chips
- 1 cup chocolate mini eggs, roughly chopped
- 2 tbsp pastel sprinkles
- 1/2 cup pretzels, crushed
- 1 tsp coconut oil
Instructions
- Line a large baking sheet with parchment paper.
- Melt dark chocolate with 1/2 tsp coconut oil in 30-second intervals until smooth.
- Melt white chocolate with the remaining coconut oil until smooth.
- Spread dark chocolate onto the parchment, then drop spoonfuls of white chocolate on top.
- Swirl with a toothpick, then immediately press in the mini eggs, pretzels, and sprinkles.
- Refrigerate for at least 1 hour until firm, then snap into shards.
Notes
- Work quickly so the toppings stick before the chocolate sets.
- Use a toothpick for the best marbling effect without over-mixing.
- Store in a cool place to prevent the chocolate from melting or blooming.