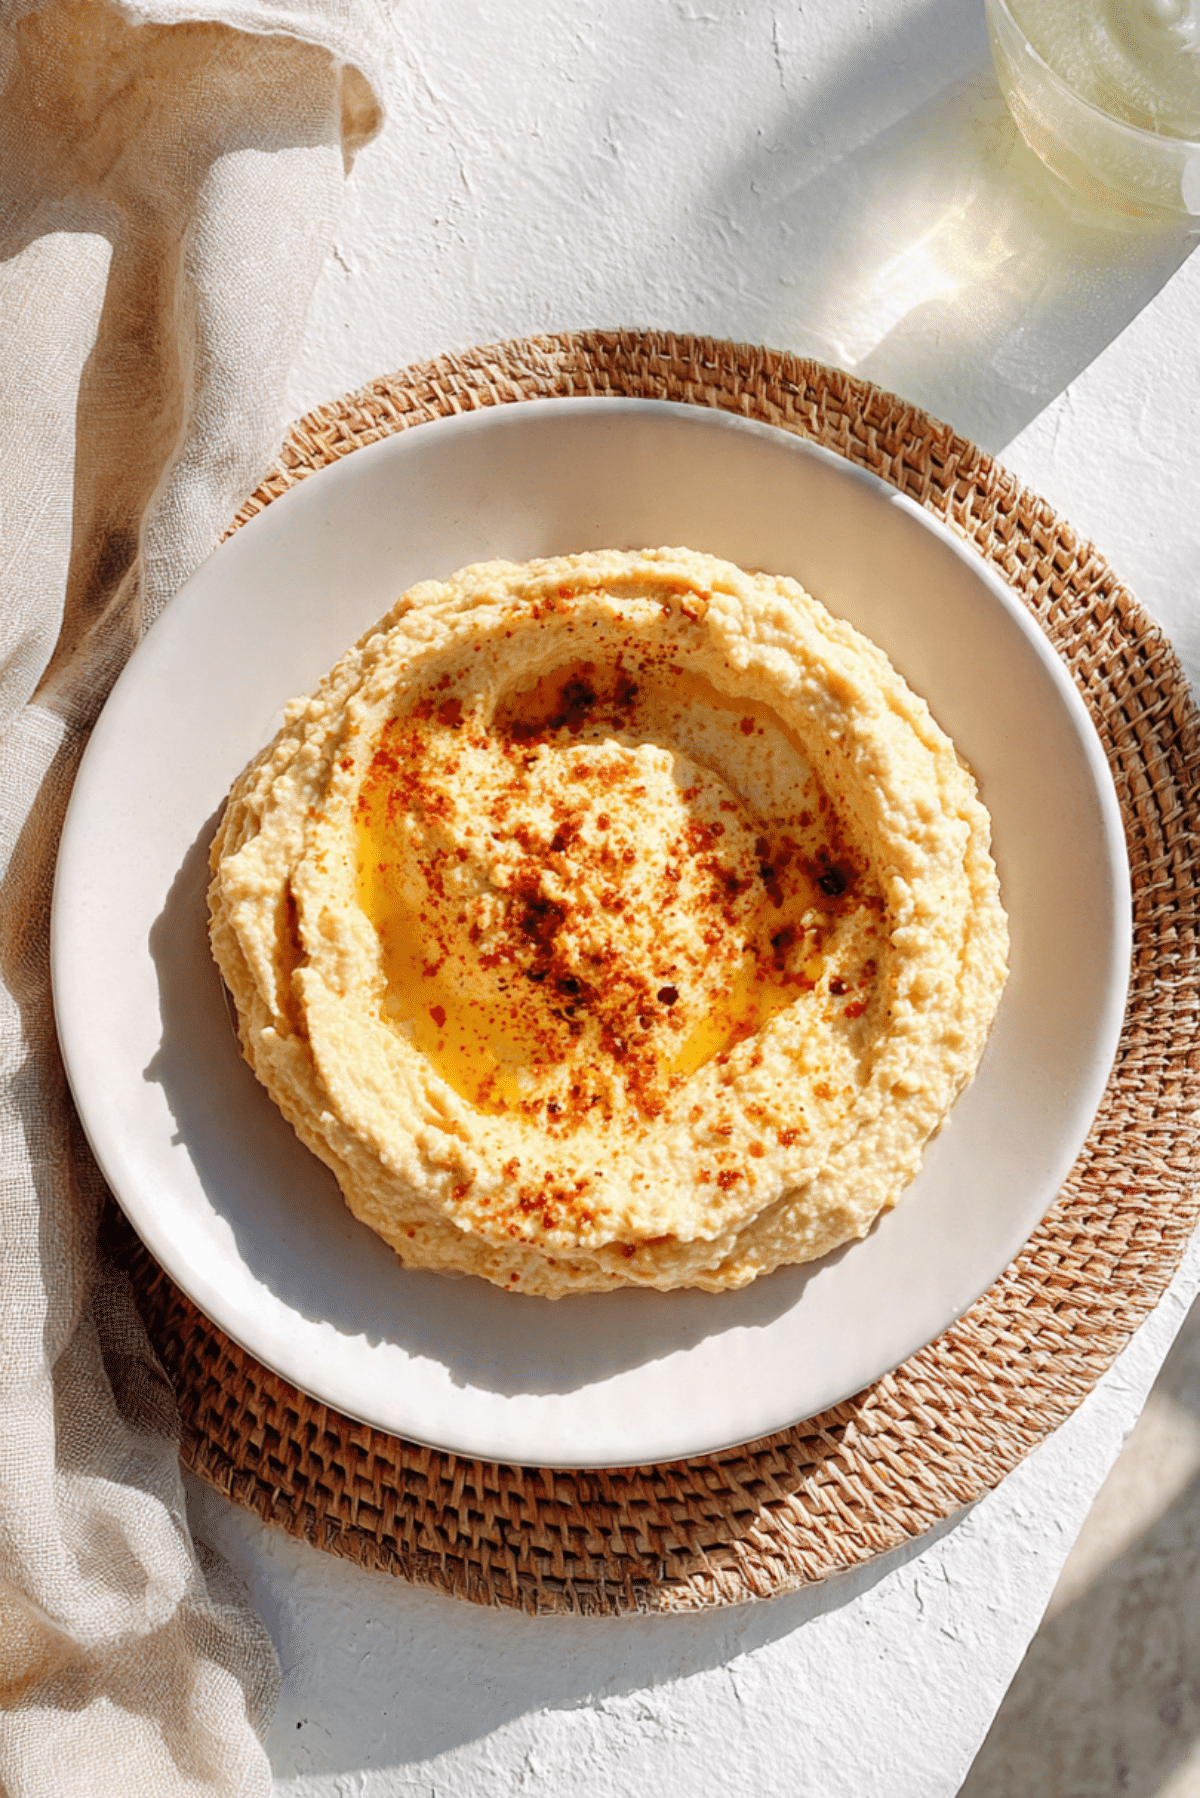
Crispy Roasted Cauliflower Hummus
This recipe is honestly a game changer for anyone who loves a good dip but wants to try something with a little more depth and character. When you take the earthy, nutty flavor of traditional chickpeas and marry it with the caramelized, smoky notes of oven roasted cauliflower, you get a result that is incredibly velvety and satisfying. Trust me, you’re going to love this because it brings a completely new dimension to your snack board or appetizer spread.
The Magic of Roasting Vegetables for Dips
There is something almost poetic about the way a blast of heat transforms a humble head of cauliflower into something so flavorful and sweet. By roasting the florets until they develop those signature charred edges, you are essentially concentrating the sugars and adding a layer of complexity that raw or steamed vegetables just cannot provide. This cultural tradition of roasting brassicas has been celebrated in Mediterranean kitchens for generations, and bringing that technique into a hummus base is a brilliant way to honor those deep, rustic flavors.
Why This Hummus Will Be Your New Favorite
I have made many dips in my time, but this one stands out for its sheer reliability and the way it disappears minutes after being placed on the table. It is worth every bite because it balances health with pure indulgence in a way that feels totally effortless.
Versatile: This dip works perfectly as a spread for sandwiches, a base for a Mediterranean bowl, or simply as a landing spot for warm pita bread.
Budget-Friendly: You only need a few pantry staples and a single head of cauliflower to create a massive batch that feeds a crowd.
Quick and Easy: Once the roasting is done, the food processor does all the heavy lifting, making this a low-stress addition to your meal prep.
Customizable: You can easily dial up the garlic, add a splash of lemon, or toss in some cumin to match your personal palate.
Crowd-Pleasing: Even people who claim they don’t like cauliflower find themselves reaching for seconds once they taste this creamy blend.
Make-Ahead Friendly: The flavors actually develop and deepen if you let it sit in the fridge for a few hours or even overnight.
Great for Leftovers: It stays fresh and delicious for days, making it the perfect healthy snack to have on hand during a busy week.
Insider Secrets for the Creamiest Texture
If you want to achieve that professional, restaurant-quality silkiness, make sure you don’t rush the blending process. Adding a couple of ice cubes to the food processor while it’s running can actually aerate the tahini and create a lighter, fluffier consistency that feels like a cloud. Also, ensure your cauliflower is roasted until very soft, almost falling apart, so it incorporates seamlessly into the chickpea base without leaving any grainy bits behind.
Essential Tools for Your Kitchen
Before we get started, let us make sure you have everything you need to succeed in the kitchen today. Having the right gear makes the whole process much more enjoyable and efficient.
Baking Sheet: You will need a large, sturdy pan to spread out the cauliflower so it roasts evenly rather than steaming.
Parchment Paper: This is key for easy cleanup and preventing those delicious crispy bits from sticking to the tray.
Food Processor: A high powered blender or food processor is essential for achieving that perfectly smooth and creamy hummus texture.
Rubber Spatula: This helps you scrape down the sides of the bowl to ensure every last bit of ingredient is fully incorporated.
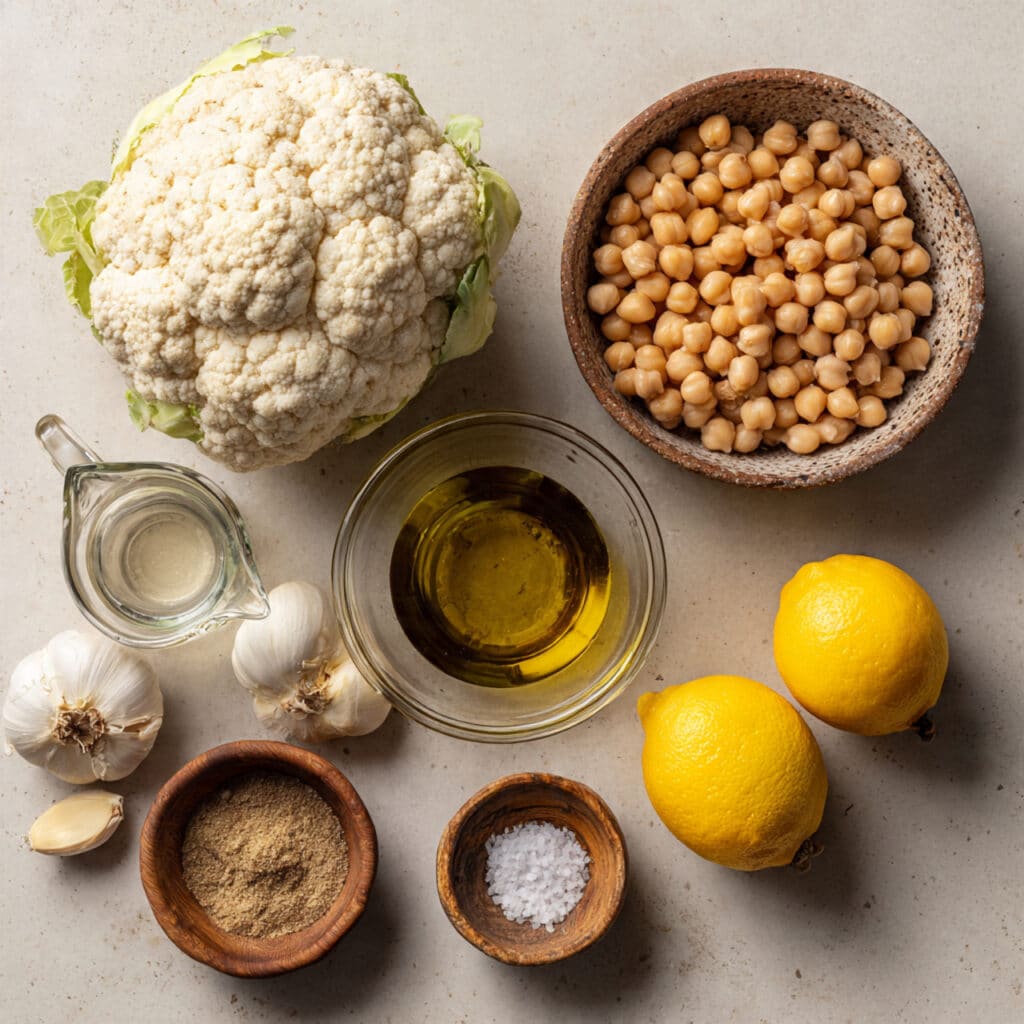
Ingredients You Will Need For This Recipe
The harmony of these ingredients is what makes the dish so special, as each one plays a vital role in the final flavor profile.
- Cauliflower: 1 large head, cut into small florets to provide the smoky, roasted base.
- Chickpeas: 1 can (15 ounces), drained and rinsed to give the dip its classic structure and protein.
- Tahini: 1/3 cup of creamy sesame paste for that essential nutty richness.
- Lemon Juice: 3 tablespoons of fresh citrus to brighten the heavy flavors and add tang.
- Garlic: 3 cloves, peeled and smashed to provide a sharp, aromatic punch.
- Olive Oil: 1/4 cup of extra virgin oil for a luxurious mouthfeel and healthy fats.
- Cumin: 1 teaspoon of ground spice to enhance the earthy notes of the roasted veg.
- Salt: 1/2 teaspoon or more to taste to make all the other flavors pop.
- Water: 2 to 3 tablespoons of cold water to adjust the thickness to your liking.
Flexible Ingredient Substitutions
Don’t worry if you are missing an item or two, because this recipe is very forgiving and easy to adapt.
Tahini: Sunflower seed butter or even a mild almond butter can work in a pinch if you have a sesame allergy.
Chickpeas: White beans like Cannellini or Great Northern beans offer an even creamier texture if you want a change.
Lemon Juice: Lime juice provides a different but equally delicious zing, or a splash of apple cider vinegar can work for acidity.
Cumin: Smoked paprika is a fantastic alternative if you want to lean into the smoky vibes of the dish.
Spotlight on Key Ingredients
Tahini: This paste made from toasted sesame seeds is the heart of any good hummus, providing a creamy bitterness that balances the lemon.
Roasted Cauliflower: This is the star of the show, bringing a natural sweetness and a depth of flavor that sets this recipe apart from the traditional version.
Step Into the Cooking Process
Let’s head into the kitchen and start crafting this masterpiece together, as it’s a total game changer for your appetizer game.
- Preheat Your Equipment: Set your oven to 400°F (200°C) and line a large baking sheet with parchment paper so nothing sticks.
- Combine Ingredients: Toss the cauliflower florets with a drizzle of oil and a pinch of salt on the prepared tray until they are well coated.
- Prepare Your Cooking Vessel: Ensure the florets are spread out in a single layer so they have enough room to get crispy and golden.
- Assemble the Dish: While the cauliflower roasts, place the chickpeas, tahini, lemon juice, garlic, and cumin into the bowl of your food processor.
- Cook to Perfection: Roast the cauliflower for about 25 to 30 minutes, turning halfway through, until they are tender and charred on the edges.
- Finishing Touches: Add most of the roasted cauliflower to the processor, reserving a few crispy bits for garnish, and blend on high until smooth, adding water as needed for consistency.
- Serve and Enjoy: Spread the hummus into a shallow bowl, top with the reserved cauliflower and an extra drizzle of oil, and serve with your favorite dippers.
Developing Deep Flavor and Texture
The beauty of this dish lies in the contrast between the silky, whipped base and the occasional bite of a deeply caramelized cauliflower floret. As the ingredients blend, the garlic mellows into the tahini, creating a savory foundation that allows the sweetness of the roasted vegetable to truly shine through.
Pro Tips for the Best Results
- Use fresh lemon juice instead of the bottled kind, as the bright acidity is much more vibrant and natural.
- If you have the time, peel the skins off your chickpeas for an even more luxurious and professional finish.
- Don’t be afraid of the char on the cauliflower, as those dark spots are where all the flavor lives.
Mistakes to Avoid
- Do not crowd the baking sheet, as the cauliflower will release moisture and steam instead of becoming crispy.
- Avoid using too much water at once, as you want to maintain a thick, dippable consistency rather than a runny one.
Nutritional Breakdown
Servings: 6
Calories per serving: 185
Note: These are approximate values.
Timing Your Creation
Prep Time: 15 minutes
Cook Time: 30 minutes
Total Time: 45 minutes
Storage and Make Ahead Advice
You can definitely roast the cauliflower a day in advance and keep it in the fridge until you are ready to blend. The finished hummus stays perfect in an airtight container for up to five days, though you might need to give it a quick stir before serving to redistribute the oils.
Creative Ways to Serve
Try serving this with a variety of colorful raw vegetables like radishes, cucumbers, and bell peppers for a fresh crunch. It also pairs beautifully with warm, toasted za’atar flatbread or even as a creamy layer inside a veggie wrap.
Using Your Leftovers
If you have any left, use it as a substitute for mayo on a turkey sandwich or thin it out with a little extra oil and lemon to make a decadent salad dressing. It is also great dolloped on top of a warm grain bowl with roasted sweet potatoes.
Additional Expert Advice
To keep the hummus looking fresh and vibrant, store it with a thin layer of olive oil on top to prevent the surface from drying out. If you want a bit of heat, a pinch of red pepper flakes mixed in at the end adds a wonderful kick.
Visual Presentation and Garnish
For a showstopping look, use the back of a spoon to create deep swirls in the top of the hummus. Fill those grooves with extra virgin olive oil, sprinkle with some toasted pine nuts, and add a dusting of smoked paprika for a pop of color.
Variations to Try
- Spicy Roasted Cauliflower: Add a tablespoon of harissa paste to the food processor for a North African twist.
- Roasted Garlic Version: Roast the garlic cloves in their skins alongside the cauliflower for a much mellower, sweeter garlic flavor.
- Herb Infused: Blend in a handful of fresh parsley or cilantro for a bright green color and a fresh herbal finish.
FAQ’s
- Can I use frozen cauliflower?
Yes, but make sure to thaw it and pat it completely dry before roasting so it still gets those crispy edges. - Is this recipe vegan?
Absolutely, all the ingredients are plant based and naturally dairy free. - Can I freeze hummus?
You can, but the texture might change slightly upon thawing, so a quick re-blend might be necessary. - What if my hummus is too thick?
Simply add cold water or more lemon juice one tablespoon at a time while the processor is running. - How do I make it saltier without adding salt?
A few chopped olives or a teaspoon of capers blended in can add a wonderful briny saltiness. - Can I use a blender instead?
Yes, but you may need to stop and scrape the sides more frequently than with a food processor. - Is tahini necessary?
It provides the classic flavor, but you can omit it if you really don’t like it, though the texture will be less creamy. - Why is my hummus grainy?
This usually happens if the cauliflower wasn’t roasted long enough or if the chickpeas weren’t blended for a full 2 to 3 minutes. - Can I add other vegetables?
Roasted carrots or red peppers make excellent additions to this base. - What oil is best?
A high quality extra virgin olive oil will give you the best flavor for finishing and blending.
Conclusion
This Crispy Roasted Cauliflower Hummus is a beautiful testament to how a little bit of oven time can transform simple ingredients into something extraordinary. Let me tell you, it’s worth every bite, and I can’t wait for you to experience that perfect balance of smoke and creaminess in your own home.
PrintCrispy Roasted Cauliflower Hummus

A velvety and smoky twist on traditional hummus featuring caramelized roasted cauliflower and creamy tahini.
Ingredients
- 1 large head Cauliflower, cut into florets
- 1 can (15 ounces) Chickpeas, drained and rinsed
- 1/3 cup Tahini
- 3 tablespoons fresh Lemon Juice
- 3 cloves Garlic, smashed
- 1/4 cup Extra Virgin Olive Oil
- 1 teaspoon ground Cumin
- 1/2 teaspoon Salt
- 2–3 tablespoons cold Water
Instructions
- Preheat oven to 400°F (200°C) and line a baking sheet with parchment paper.
- Toss cauliflower florets with oil and salt, spreading them in a single layer on the tray.
- Roast for 25-30 minutes until tender and charred at the edges.
- In a food processor, combine chickpeas, tahini, lemon juice, garlic, and cumin.
- Add most of the roasted cauliflower (reserve some for garnish) and blend until smooth.
- Slowly add cold water while blending to reach your desired consistency.
- Transfer to a bowl, top with reserved cauliflower and olive oil, and serve.
Notes
- Add ice cubes during blending for a fluffier texture.
- Peel chickpea skins for ultimate smoothness.
- Store with a layer of oil on top to keep it fresh.