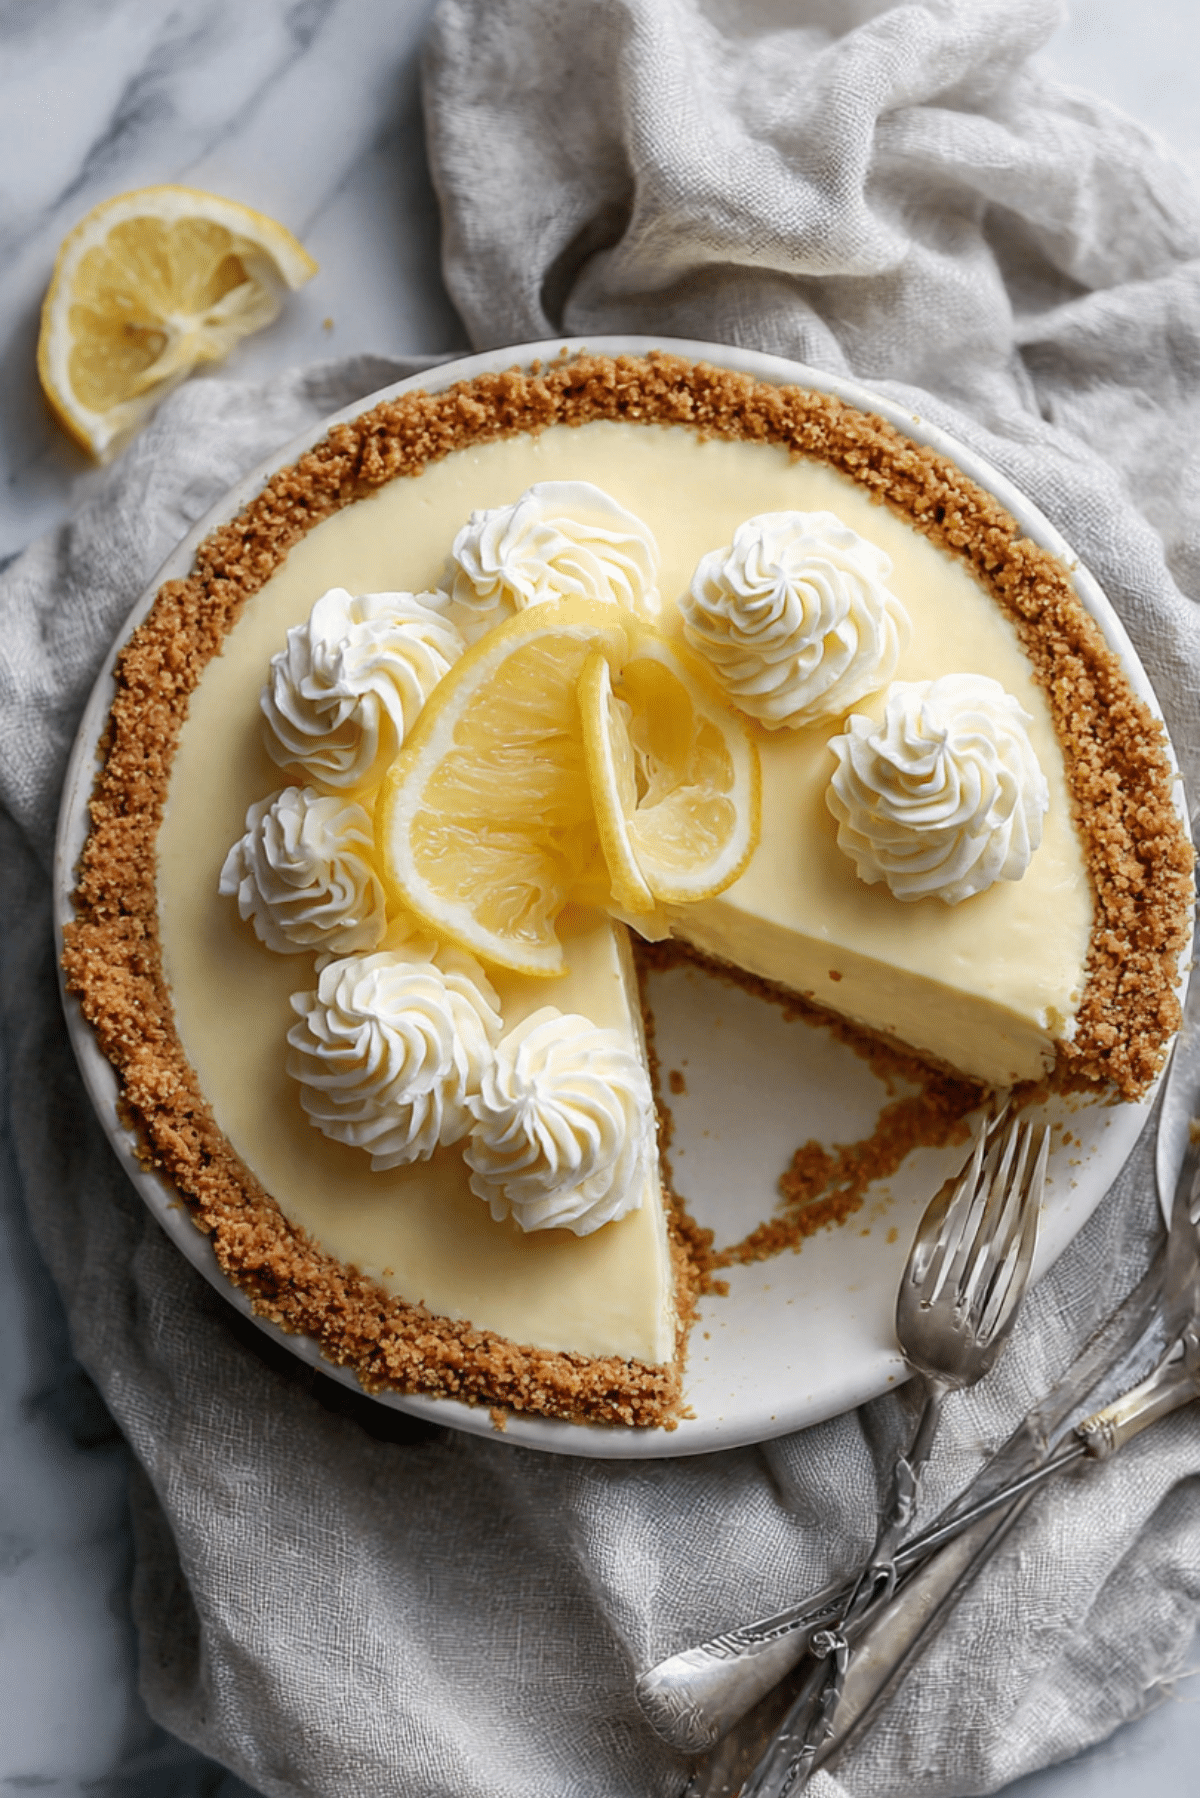
Cream Cheese Lemonade Pie
There’s something magical about slicing into a chilled cream cheese lemonade pie on a warm day. The creamy, tangy filling sits perfectly inside a crumbly graham cracker crust, and every bite melts on your tongue with a mix of citrus brightness and silky richness. This pie is summer comfort in dessert form, made with just a few pantry staples but full of flavor that tastes like it took hours to create.
Behind the Recipe
This pie recipe was born from lazy summer afternoons spent on grandma’s porch, sipping lemonade and waiting for dessert to be served. It’s one of those treats that feels like home. Creamy, cool, and lightly zesty, it’s the kind of dessert that always brings people back for seconds. Whether it was a backyard barbecue or a Sunday lunch, this pie was the centerpiece of summer gatherings.
Recipe Origin or Trivia
Cream cheese lemonade pie first gained popularity in the southern United States, where no-bake desserts thrive in the heat. This pie blends the love for classic cheesecake with the nostalgic taste of lemonade stands. It’s a close cousin of icebox pies, which were traditionally kept in “iceboxes” before electric refrigerators were common. This no-bake twist became a hit in vintage cookbooks, and it’s still loved today for its simplicity and refreshing flavor.
Why You’ll Love Cream Cheese Lemonade Pie
This pie has a lot going for it, and here’s exactly why you’ll keep coming back to it:
Versatile: Whether for a casual get-together or a formal dinner party, this pie fits right in. Dress it up with fresh berries or keep it simple.
Budget-Friendly: Made from everyday ingredients you probably already have in your kitchen, it delivers luxury on a dime.
Quick and Easy: No baking needed. Just mix, chill, and enjoy. Perfect for last-minute cravings or unexpected guests.
Customizable: Add a fruit topping, swirl in some raspberry jam, or change up the crust. There are so many ways to make it your own.
Crowd-Pleasing: The sweet-tart combo is a universal favorite. It’s hard to find someone who won’t go for a second slice.
Make-Ahead Friendly: Prepare it the day before and let it chill overnight. It actually tastes even better the next day.
Great for Leftovers: Store it in the fridge and enjoy a slice as a midweek treat without lifting a finger.
Chef’s Pro Tips for Perfect Results
To get that creamy texture and zingy lemon flavor just right, keep these little tips in mind:
- Soften the Cream Cheese: Let your cream cheese come to room temperature before mixing. It blends more smoothly and prevents lumps.
- Chill for at Least 4 Hours: Don’t rush the chilling time. The pie needs time to set properly and develop that silky texture.
- Use Fresh Lemon Zest: It gives the pie that extra citrusy aroma and depth. A little zest goes a long way.
- Don’t Overmix: Once all the ingredients are combined, stop mixing. Overmixing can make the filling too airy and unstable.
- Try Homemade Crust: If you have a little extra time, crush some graham crackers and press them into a pie dish with butter and sugar for even more flavor.
Kitchen Tools You’ll Need
You don’t need much to make this dreamy pie. Just a few kitchen basics:
Electric Mixer: Helps whip the filling until it’s ultra smooth and fluffy.
Mixing Bowl: A large one is best so you can combine everything easily.
Spatula: Perfect for scraping down the sides of your bowl and smoothing the filling into the crust.
Zester or Grater: To get that bright, fragrant lemon zest.
Pie Dish: If you’re using a homemade crust or transferring from a store-bought shell.
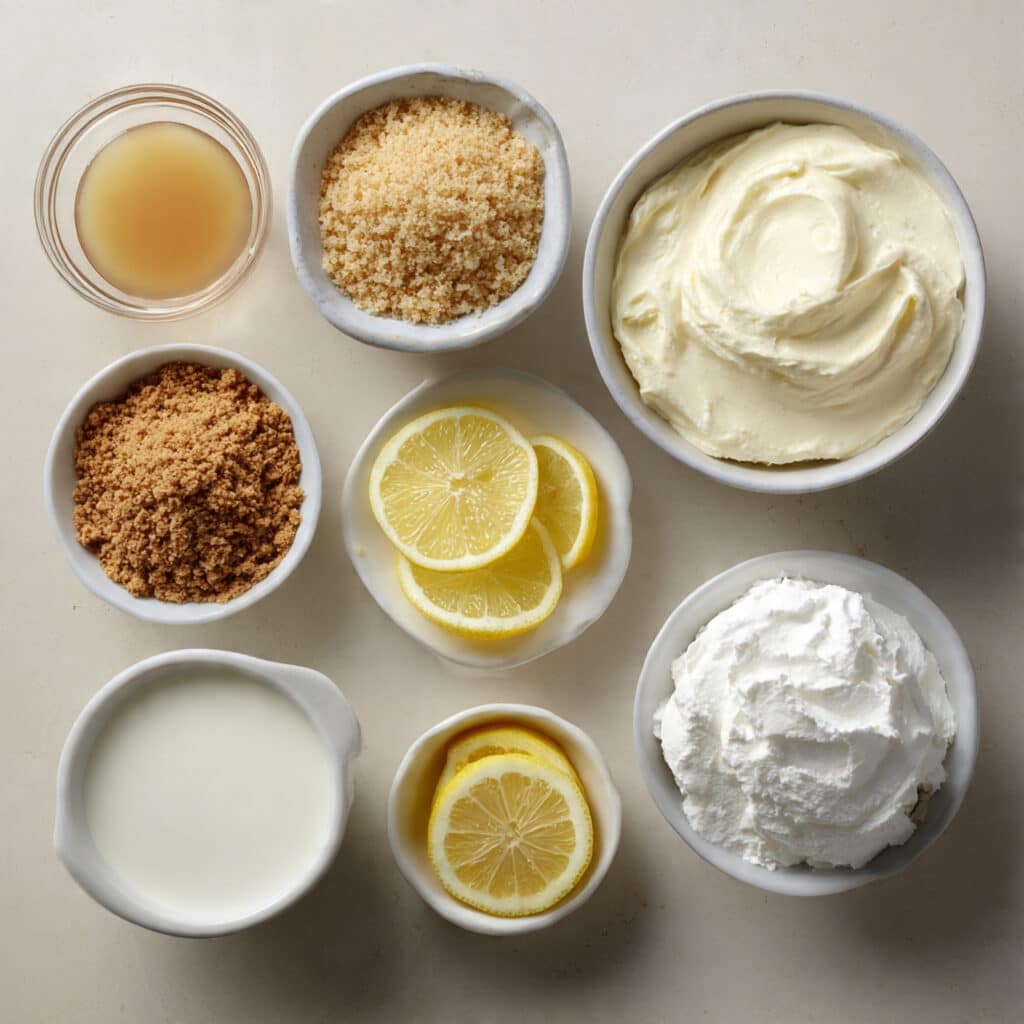
Ingredients in Cream Cheese Lemonade Pie
This pie comes together with just a few ingredients, each playing a key role in the flavor and texture.
- Sweetened Condensed Milk: 1 can (14 ounces) This adds the signature sweetness and creamy consistency to the pie.
- Cream Cheese: 1 package (8 ounces), softened Provides richness and a smooth, cheesecake-like base.
- Frozen Lemonade Concentrate: 1/2 cup, thawed Delivers that punchy, tart lemon flavor with minimal effort.
- Whipped Topping: 1 tub (8 ounces), thawed Lightens up the filling and makes it airy without needing heavy cream.
- Graham Cracker Crust: 1 (9-inch) prepared crust A buttery, slightly sweet base that complements the creamy filling.
- Lemon Zest: 1 teaspoon Adds brightness and a lovely citrus aroma.
- Fresh Lemon Slices: for garnish (optional) Just a few slices make a big visual impact when serving.
Ingredient Substitutions
Not everything has to be exact. Here’s how you can switch things up:
Sweetened Condensed Milk: Use a dairy-free version if you need a lactose-free option.
Cream Cheese: Try a plant-based cream cheese for a vegan twist.
Whipped Topping: Substitute with homemade whipped cream for a richer texture.
Lemonade Concentrate: Fresh lemon juice and sugar can be used, but you’ll need to adjust to taste.
Graham Cracker Crust: Use a vanilla wafer or shortbread crust for a twist.
Ingredient Spotlight
Frozen Lemonade Concentrate: This is the secret weapon of the pie. It brings bold lemon flavor without watering down the filling or making it too sour. Since it’s already sweetened, it balances beautifully with the cream cheese and condensed milk.
Cream Cheese: It’s what gives the pie its luscious, creamy texture and that slight tang that balances out the sweetness of the condensed milk.
Instructions for Making Cream Cheese Lemonade Pie
Ready to whip up a pie that’ll wow everyone? Here are the steps you’ll follow:
- Preheat Your Equipment:
No oven needed, but make sure your cream cheese is fully softened and your lemonade concentrate is thawed. - Combine Ingredients:
In a large mixing bowl, beat the cream cheese until smooth. Add the sweetened condensed milk and frozen lemonade concentrate. Mix until fully combined. - Prepare Your Cooking Vessel:
Place your graham cracker crust on a flat surface, ready to be filled. - Assemble the Dish:
Gently fold in the whipped topping until smooth and airy. Pour the filling into the crust and smooth the top with a spatula. - Cook to Perfection:
Technically no cooking, but now the pie needs to chill. Cover and refrigerate for at least 4 hours or overnight for best results. - Finishing Touches:
Once set, garnish with fresh lemon slices and a bit of extra lemon zest for a pop of color. - Serve and Enjoy:
Slice and serve cold. Trust me, it’s worth every bite.
Texture & Flavor Secrets
This pie is all about contrast. The silky, creamy filling melts on your tongue, while the buttery graham cracker crust adds a subtle crunch. The lemon flavor is zesty but smooth, never sharp, thanks to the balance between the sweet condensed milk and the tart concentrate. The whipped topping keeps it all light and dreamy.
Cooking Tips & Tricks
Let’s make this pie-making journey even smoother with a few more helpful tips:
- Use a handheld mixer for easier cleanup and control over texture.
- Line your pie dish with parchment if using a homemade crust for easier removal.
- Chill your mixing bowl and whipped topping before folding for a firmer filling.
What to Avoid
Little hiccups can mess with the final result, so here’s what to steer clear of:
- Overmixing the filling, which can cause it to become runny.
- Using warm ingredients, which might prevent the pie from setting.
- Skipping the chill time. The pie needs those hours in the fridge to hold its shape.
Nutrition Facts
Servings: 8
Calories per serving: 340
Note: These are approximate values.
Preparation Time
Prep Time: 10 minutes
Cook Time: 0 minutes
Total Time: 4 hours 10 minutes
Make-Ahead and Storage Tips
You can absolutely make this pie ahead of time. In fact, it’s better that way. Prepare the pie the night before and let it chill overnight for the best flavor and texture. Store leftovers in the fridge, covered with plastic wrap or in an airtight container, for up to 4 days. Avoid freezing, as the texture may change.
How to Serve Cream Cheese Lemonade Pie
This pie shines brightest when served cold, right from the fridge. Pair it with a glass of iced tea or lemonade for the ultimate summer vibe. For a more elegant twist, top each slice with a dollop of whipped cream and a thin lemon curl.
Creative Leftover Transformations
If you somehow end up with leftovers, here are fun ways to enjoy them:
- Spoon into parfait glasses with crushed cookies and berries.
- Use as a sweet layer in a lemon trifle.
- Freeze small scoops for mini frozen pie bites.
Additional Tips
- Let the pie sit out for 10 minutes before slicing for easier serving.
- Wipe your knife between cuts to keep the slices clean.
- Add a drop of yellow food coloring for a bolder visual if desired.
Make It a Showstopper
Presentation can make a huge difference. Garnish with whipped cream swirls and thin lemon slices arranged in a spiral. Use a patterned pie plate or vintage cake stand to bring it to life. A few mint leaves also add a fresh, photogenic touch.
Variations to Try
- Berry Lemonade Pie: Swirl in a few spoonfuls of blueberry or raspberry jam before chilling.
- Coconut Lemonade Pie: Mix shredded coconut into the filling or sprinkle on top.
- Lime Version: Swap lemonade concentrate with limeade for a citrus twist.
- Gluten-Free Option: Use a gluten-free graham cracker crust.
- Mini Pies: Make individual servings in muffin tins lined with paper cups.
FAQ’s
Q1: Can I freeze this pie?
A1: It’s best served chilled from the fridge. Freezing may alter the texture and make it grainy once thawed.
Q2: Is it okay to use low-fat cream cheese?
A2: Yes, but it may slightly affect the richness and texture.
Q3: How do I know when it’s fully set?
A3: It should be firm to the touch in the center and not jiggle too much when moved.
Q4: Can I use fresh lemon juice instead of concentrate?
A4: You can, but you’ll need to add sugar to balance the tartness.
Q5: How long can I store leftovers?
A5: Up to 4 days in the fridge, covered.
Q6: Can I make this in a springform pan?
A6: Yes, it works beautifully for a cheesecake-style presentation.
Q7: What if my filling is too runny?
A7: Try chilling it longer. If that doesn’t help, ensure your cream cheese wasn’t too soft or overmixed.
Q8: Is there a dairy-free version?
A8: Yes, use dairy-free cream cheese and coconut whipped topping.
Q9: What toppings work well with this pie?
A9: Berries, whipped cream, mint leaves, or even a drizzle of raspberry sauce.
Q10: Can I double the recipe?
A10: Absolutely. Just use a larger pan or make two pies.
Conclusion
This Cream Cheese Lemonade Pie is one of those recipes that looks fancy but comes together in minutes. It’s creamy, cool, and just the right amount of tangy. Whether it’s your first time making it or your fiftieth, it never fails to impress. Give it a try and let this sweet slice of sunshine bring a little joy to your day.
PrintCream Cheese Lemonade Pie

A silky, no-bake pie bursting with lemon flavor and a creamy, cheesecake-like texture. This Cream Cheese Lemonade Pie is a refreshing and easy dessert perfect for summer gatherings.
Ingredients
- 1 can (14 ounces) sweetened condensed milk
- 1 package (8 ounces) cream cheese, softened
- 1/2 cup frozen lemonade concentrate, thawed
- 1 tub (8 ounces) whipped topping, thawed
- 1 (9-inch) graham cracker crust
- 1 teaspoon lemon zest
- Fresh lemon slices for garnish (optional)
Instructions
- In a large mixing bowl, beat the softened cream cheese until smooth and creamy.
- Add the sweetened condensed milk and lemonade concentrate. Mix until fully combined and smooth.
- Gently fold in the whipped topping until the mixture is airy and even.
- Pour the filling into the graham cracker crust and smooth the top with a spatula.
- Cover and refrigerate for at least 4 hours or overnight to set.
- Garnish with fresh lemon slices and extra zest if desired before serving.
Notes
- For best results, let the pie chill overnight to fully set.
- Wipe your knife clean between slices for neat servings.
- Use fresh lemon zest for extra fragrance and flavor.
- A homemade crust can elevate the flavor even more.