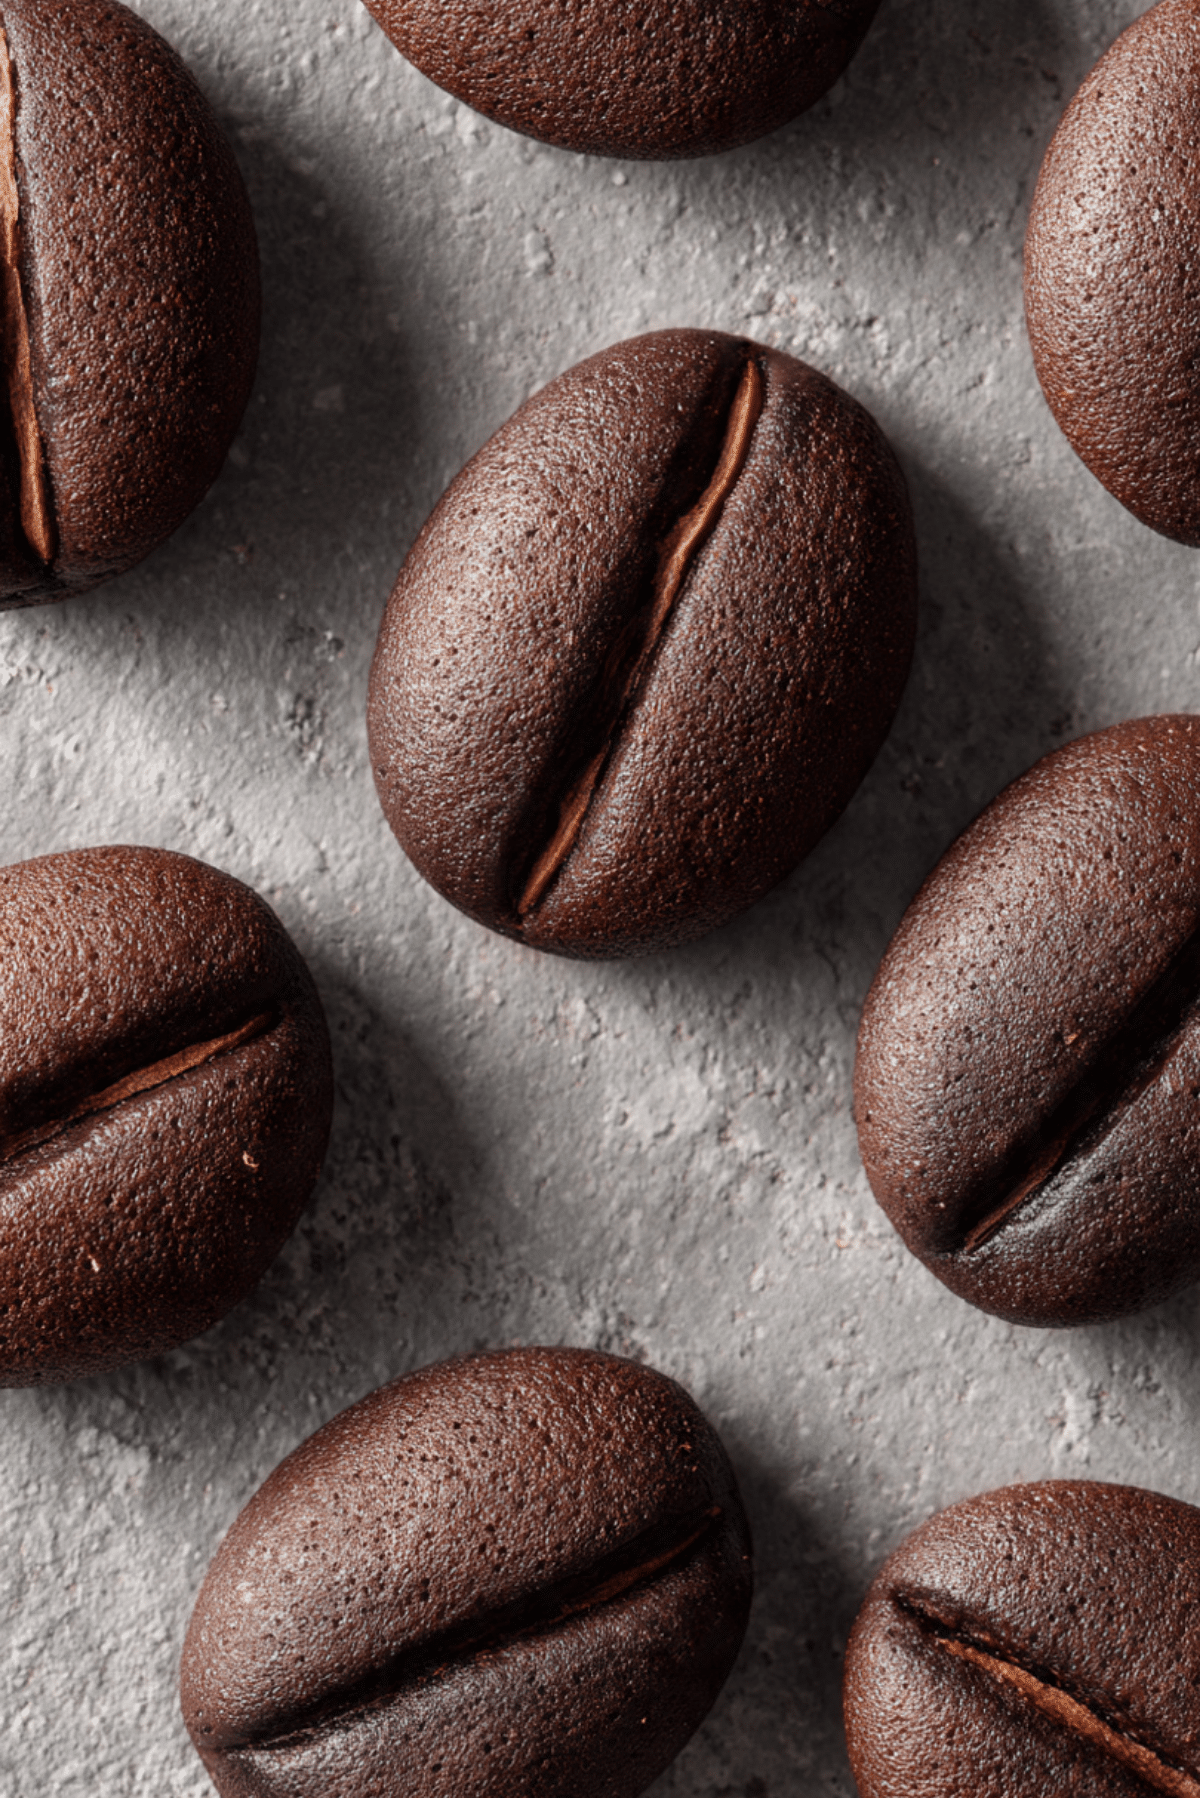
Coffee Beans Cookies
Shaped like little roasted beans and infused with rich cocoa and a hint of espresso, these Coffee Beans Cookies are as charming to look at as they are irresistible to eat. Crisp on the outside, tender in the center, and packed with mocha flavor, they’re the perfect bite-sized treat for coffee lovers and cookie fans alike.
Behind the Recipe
This recipe was inspired by an afternoon coffee break that needed a little something extra. I had cocoa, espresso powder, and butter on hand, and the idea sparked — why not bake cookies that not only taste like coffee but also look just like the beans themselves? A few tests later, these perfectly sculpted bites were born. Now, they’re my go-to gift for friends or a sweet addition to my morning brew.
Recipe Origin or Trivia
Coffee-flavored treats have long been a part of European baking, especially in Italian and French pastries. The coffee bean shape, however, is a more modern twist — combining playful aesthetics with robust flavors. These cookies are now trending across social media and patisseries for their eye-catching form and bold flavor.
Why You’ll Love Coffee Beans Cookies
Beyond their cute shape, these cookies are a flavor bomb in every bite. Here’s why they’ll win your heart:
Versatile: Pair them with coffee, tea, or even serve as edible garnishes for cakes and drinks.
Budget-Friendly: Uses basic pantry staples and a spoonful of instant coffee.
Quick and Easy: The dough comes together fast, and shaping them is simple and fun.
Customizable: You can adjust the coffee intensity or swap the cocoa for vanilla.
Crowd-Pleasing: They’re tiny, adorable, and loved by all ages.
Make-Ahead Friendly: Store the dough in the fridge or freeze for later use.
Great for Leftovers: Crumble leftovers into ice cream or layer in parfaits.
Chef’s Pro Tips for Perfect Results
Mastering the texture and shape is all about the details. Here’s how to get the best results:
- Use softened butter, not melted, for the right dough consistency.
- Chill the dough before shaping to make handling easier.
- Use a toothpick or knife to create the classic coffee bean line.
- Don’t overbake. They should remain soft in the center.
- Cool on the tray for a few minutes to firm up before moving.
Kitchen Tools You’ll Need
Minimal tools. Maximum joy.
Mixing Bowl: For creaming and combining the dough.
Whisk and Spatula: To blend the ingredients until smooth.
Baking Sheet: Lined with parchment paper for easy release.
Sifter: Helps create a smooth, lump-free cocoa blend.
Toothpick or Knife: For adding the signature line on top.
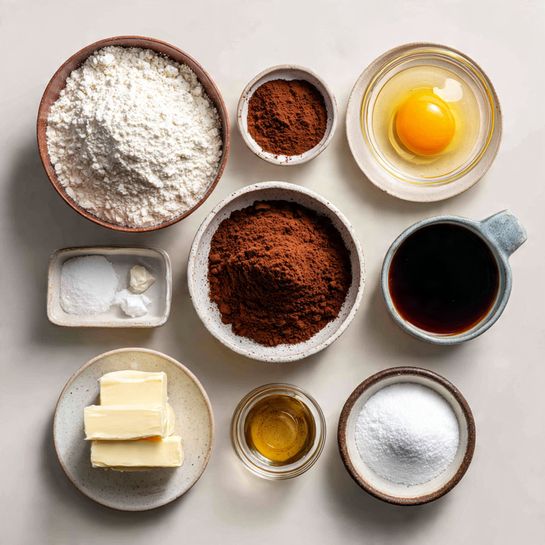
Ingredients in Coffee Beans Cookies
These cookies are full of bold coffee flavor and buttery texture. Here’s what you’ll need:
- All-Purpose Flour: 1 and 1/4 cups. Forms the structure of the cookie.
- Unsweetened Cocoa Powder: 1/4 cup. Adds deep chocolate flavor and color.
- Instant Coffee or Espresso Powder: 2 teaspoons. Infuses the cookie with that rich coffee aroma.
- Butter: 1/2 cup (softened). Provides richness and tender crumb.
- Powdered Sugar: 1/2 cup. Dissolves easily into the dough for a smooth finish.
- Egg Yolk: 1. Binds the dough without making it cakey.
- Vanilla Extract: 1 teaspoon. Balances the cocoa and coffee flavors.
- Salt: A pinch. Enhances overall flavor.
Ingredient Substitutions
No stress if you’re missing something. Here are easy swaps:
Butter: Use margarine or plant-based butter.
Cocoa Powder: Carob powder for a natural alternative.
Instant Coffee: Decaf instant coffee or espresso granules.
Powdered Sugar: Blend granulated sugar until fine.
Egg Yolk: Use 2 tablespoons of milk or plant milk for an egg-free option.
Ingredient Spotlight
Instant Coffee: Gives the cookies their signature mocha flavor without overpowering.
Cocoa Powder: Brings depth and color that mimics the real look of roasted beans.
Instructions for Making Coffee Beans Cookies
Let’s make these irresistible little cookies. Here’s how it goes:
- Preheat Your Equipment:
Preheat your oven to 160°C (320°F) and line a baking sheet with parchment paper. - Combine Ingredients:
In a bowl, whisk together softened butter and powdered sugar until light and fluffy. Add egg yolk, vanilla extract, and instant coffee. Mix until smooth. - Prepare Your Cooking Vessel:
Sift in cocoa powder and flour. Add a pinch of salt. Mix with a spatula until a soft dough forms. Chill for 15–20 minutes for easier shaping. - Assemble the Dish:
Scoop small portions of dough and roll into oval bean shapes. Place on the tray and gently press a line through the center using a knife or toothpick. - Cook to Perfection:
Bake for 12–15 minutes or until set but still soft. Don’t overbake or they’ll lose their melt-in-your-mouth texture. - Finishing Touches:
Let them cool on the tray for 5 minutes, then transfer to a wire rack. Dust lightly with cocoa powder if desired. - Serve and Enjoy:
Enjoy with a cup of espresso or wrap them up as edible gifts for friends.
Texture & Flavor Secrets
These cookies strike a delicious balance. The outside has a delicate snap, while the center remains soft and slightly chewy. The instant coffee gives a bold, roasted flavor that pairs perfectly with the bitter cocoa, and the buttery base holds it all together in a melt-in-your-mouth finish.
Cooking Tips & Tricks
Here are a few ways to make your cookies even better:
- Use dark cocoa for a richer, deeper color.
- Chill shaped cookies before baking to hold shape better.
- For a glossy finish, brush lightly with brewed coffee after baking.
What to Avoid
Avoid these simple mistakes for flawless cookies:
- Don’t use melted butter — it will make the dough too soft.
- Avoid skipping the chilling step or the cookies may spread.
- Don’t overbake. They should stay slightly soft in the middle.
Nutrition Facts
Servings: 20 cookies
Calories per serving: 85
Note: Nutritional values are approximate.
Preparation Time
Prep Time: 15 minutes
Cook Time: 15 minutes
Total Time: 30 minutes
Make-Ahead and Storage Tips
These cookies are perfect for prepping ahead. Store the dough in the fridge for up to 3 days or freeze the shaped dough balls. Baked cookies stay fresh in an airtight container for up to a week and can be frozen for up to a month.
How to Serve Coffee Beans Cookies
Serve with espresso, cappuccino, or as a crunchy topper on creamy desserts like mousse or panna cotta. They also make a lovely edible gift when packed in a tin with parchment paper.
Creative Leftover Transformations
Don’t toss them — transform them:
- Crush and layer into a coffee parfait.
- Blend into milkshakes or ice cream.
- Use as a crust base for mini cheesecakes.
Additional Tips
- Add a bit of cinnamon or nutmeg for extra warmth.
- Sprinkle flaky sea salt before baking for a flavor punch.
- Let kids shape them — it’s fun and creative.
Make It a Showstopper
Arrange them in a coffee cup saucer or on a small wooden board beside a hot drink. Dust with powdered sugar or drizzle with dark chocolate for an elegant finish. A little packaging and ribbon make them a perfect holiday or thank-you gift.
Variations to Try
- Hazelnut Mocha Cookies: Add chopped hazelnuts or hazelnut extract.
- White Mocha Beans: Use white chocolate and vanilla instead of cocoa.
- Spiced Espresso: Add ground cinnamon and cardamom for a chai twist.
- Vegan Version: Use dairy-free butter and plant milk instead of egg.
- Double Chocolate: Mix in mini chocolate chips for added indulgence.
FAQ’s
Q1: Can I use brewed coffee instead of instant powder?
Not recommended. Brewed coffee adds liquid and changes the dough texture.
Q2: Are these cookies kid-friendly?
Yes, but use decaf coffee powder if preferred.
Q3: Can I freeze the dough?
Absolutely. Shape, freeze, and bake directly from frozen (add 2–3 minutes).
Q4: Why are my cookies spreading too much?
Likely due to warm dough or melted butter. Chill before baking.
Q5: Can I make them gluten-free?
Yes, use a gluten-free flour blend.
Q6: Can I double the recipe?
Yes, easily doubled or tripled for large batches.
Q7: How do I make the coffee bean shape?
Roll into ovals and press a center line using a toothpick or knife.
Q8: Do I need to sift the cocoa?
Yes, to avoid lumps and get a smooth dough.
Q9: What type of cocoa is best?
Use unsweetened Dutch-process for deep color and flavor.
Q10: Can I add chocolate drizzle?
Yes, melted dark or white chocolate makes a great finishing touch.
Conclusion
Coffee Beans Cookies aren’t just a treat — they’re a conversation starter, a gift, a coffee companion, and an edible piece of art. With their bold flavor and cute shape, they bring joy with every bite. Whether you bake them for yourself or share them with others, trust me, they’re worth every moment in the kitchen.
PrintCoffee Beans Cookies
These adorable Coffee Beans Cookies are crisp on the outside, tender inside, and packed with bold coffee and cocoa flavor — the perfect treat for coffee lovers.
Ingredients
- 1 and 1/4 cups all-purpose flour
- 1/4 cup unsweetened cocoa powder
- 2 teaspoons instant coffee or espresso powder
- 1/2 cup butter, softened
- 1/2 cup powdered sugar
- 1 egg yolk
- 1 teaspoon vanilla extract
- Pinch of salt
Instructions
- Preheat oven to 160°C (320°F) and line a baking sheet with parchment paper.
- Cream together softened butter and powdered sugar until light and fluffy.
- Add egg yolk, vanilla extract, and instant coffee. Mix until well combined.
- Sift in cocoa powder and flour, add a pinch of salt, and mix until a soft dough forms.
- Chill dough for 15–20 minutes.
- Roll dough into small ovals. Use a knife or toothpick to press a line down the center to resemble coffee beans.
- Place on the baking sheet and bake for 12–15 minutes.
- Cool on the tray for 5 minutes before transferring to a wire rack.
Notes
- Chilling the dough helps maintain the bean shape during baking.
- Use high-quality instant coffee for the boldest flavor.
- Lightly dust with cocoa powder after baking for extra intensity.