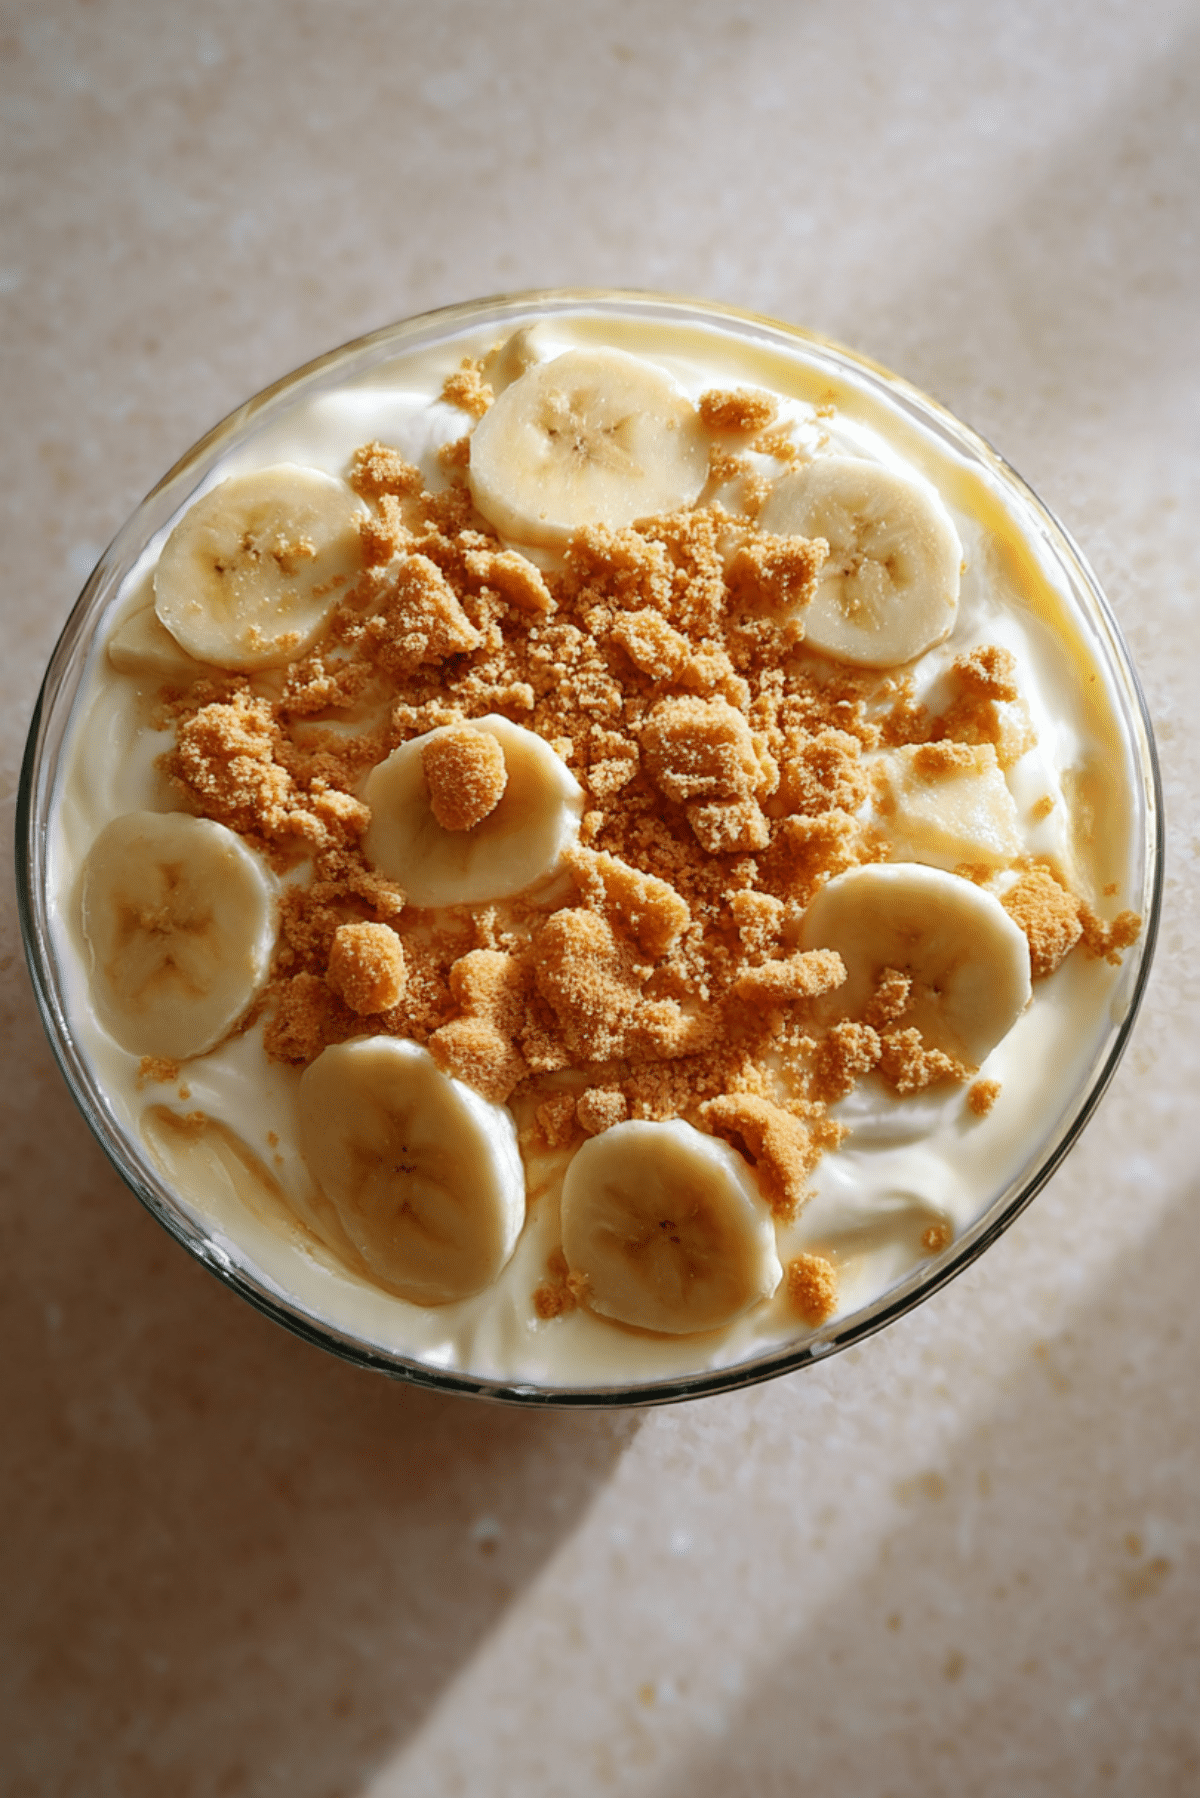
Classic Banana Pudding
There’s something about banana pudding that just feels like home. It’s the kind of dessert that shows up at Sunday dinners, holiday potlucks, and backyard barbecues—comforting, nostalgic, and always gone by the end of the night. With layers of creamy pudding, soft bananas, and vanilla cookies, it’s simple, cozy, and hits all the right notes.
Behind the Recipe
This is one of those desserts that takes me back to childhood. I remember my grandmother making banana pudding in a big glass dish, layering it with care, then letting it chill until the flavors came together just right. It wasn’t fancy, but it was always the first thing to disappear. Over time, I started playing with the classic—sometimes adding whipped cream, sometimes using homemade pudding—but no matter what, it never lost that heartwarming charm.
Recipe Origin or Trivia
Banana pudding might feel like it’s straight from the South—and you’d be right. While it originally gained popularity in Southern kitchens in the early 20th century, it was Nabisco’s Nilla Wafers in the 1940s that really made it iconic. Their box even printed the classic recipe! It’s since become a staple of American comfort food, and every family seems to have their own little twist.
Why You’ll Love This Banana Pudding
There’s more to this humble dish than meets the eye:
No Bake Required: A fridge does all the work.
Crowd Favorite: Kids and adults alike love it.
Make-Ahead Friendly: Tastes even better after chilling.
Budget-Friendly: Uses everyday ingredients.
Customizable: Go classic, or add caramel, Nutella, or whipped cream.
Perfect Texture Mix: Soft bananas, creamy pudding, and a little cookie crunch.
Great for Leftovers: It stays delicious for days.
Chef’s Pro Tips for Perfect Results
Want to nail this every time? Keep these in mind:
- Use ripe but firm bananas for the perfect texture and flavor.
- Chill for at least 4 hours to let the layers meld beautifully.
- Layer the bananas between pudding, not on top, to prevent browning.
- Use cold milk for instant pudding to thicken quickly.
- Fold whipped cream into the pudding for a lighter texture, if you like.
Kitchen Tools You’ll Need
This dessert is as low-tech as it gets:
Mixing Bowl: For whipping up the pudding base.
Whisk or Electric Mixer: To ensure smooth, lump-free pudding.
Spatula: For even layering.
Glass Dish or Trifle Bowl: For a pretty, layered presentation.
Knife & Cutting Board: For slicing bananas.
Plastic Wrap: To cover while chilling.
Ingredients in Banana Pudding
Here’s what goes into this creamy, dreamy dessert:
- Instant Vanilla Pudding Mix: 2 small boxes (or 1 large)
- Cold Milk: 3 cups (for mixing the pudding)
- Sweetened Condensed Milk: 1 can (14 oz)
- Cream Cheese: 8 oz, softened (optional, for richness)
- Heavy Whipping Cream: 1 cup, whipped (or use whipped topping)
- Vanilla Wafers: about 45–50 cookies
- Bananas: 4 ripe but firm, sliced
- Vanilla Extract: 1 teaspoon (optional)
Ingredient Substitutions
Don’t worry if your pantry is missing a few things:
Vanilla Pudding: Try banana pudding for extra flavor.
Whipping Cream: Use store-bought whipped topping like Cool Whip.
Cream Cheese: Skip it for a lighter version, or sub with Greek yogurt.
Vanilla Wafers: Graham crackers or shortbread cookies work great too.
Sweetened Condensed Milk: Add a touch of sugar and more milk to compensate.
Ingredient Spotlight
Bananas: Go for yellow bananas with a few spots—they’re sweet and soft, but not mushy. Avoid green or overly ripe ones unless you like it really soft.
Vanilla Wafers: These give the pudding its structure and that soft, cakey bite after soaking. Letting them chill is key to the magic.

Instructions for Making Banana Pudding
Here’s how it all comes together:
1. Preheat Your Equipment:
No need—this is a chill-only recipe. Just get your dish and bowls ready.
2. Combine Ingredients:
In a large bowl, whisk together instant pudding mix and cold milk until thickened (about 2 minutes). Stir in the sweetened condensed milk and softened cream cheese until smooth. Fold in the whipped cream or topping.
3. Prepare Your Cooking Vessel:
Layer vanilla wafers on the bottom of your dish, slightly overlapping.
4. Assemble the Dish:
Add a layer of sliced bananas, then pour a layer of pudding on top. Repeat the layers—cookies, bananas, pudding—until your dish is full.
5. Cook to Perfection:
No cooking needed—just smooth the top with a spatula and add crushed cookies for garnish.
6. Finishing Touches:
Cover with plastic wrap and refrigerate for at least 4 hours, preferably overnight.
7. Serve and Enjoy:
Scoop into bowls or serve with a spoon straight from the dish. Pure comfort.
Texture & Flavor Secrets
This dessert is all about contrast: the cool, creamy pudding, the slight bite of the bananas, and those vanilla wafers that soften just enough. The flavors are mellow, sweet, and gently fruity, with a little vanilla warmth in every bite.
Cooking Tips & Tricks
- Make it the night before for the best flavor.
- Don’t slice bananas too thin—they’ll disappear into the pudding.
- Crushed cookies on top right before serving add a nice crunch.
- Want it lighter? Skip cream cheese and use light whipped topping.
What to Avoid
A few things to skip to keep it just right:
- Overripe bananas: They’ll get mushy and brown fast.
- Too much milk: It’ll make the pudding runny.
- Layering bananas on top: They’ll brown and dry out.
- Serving too soon: It needs time to chill and set properly.
Nutrition Facts
Servings: 10–12
Calories per serving: approx. 280
(Numbers will vary depending on pudding, milk, and toppings used.)
Preparation Time
Prep Time: 20 minutes
Chill Time: 4 hours (or overnight)
Total Time: 4 hours 20 minutes
Make-Ahead and Storage Tips
Banana pudding is even better the next day. Store tightly covered in the fridge for up to 4 days. Avoid freezing—it affects the texture of the bananas and pudding.
How to Serve Banana Pudding
Serve chilled in bowls, jars, or even individual cups. For fancier presentation, garnish with fresh whipped cream and a full vanilla wafer on top. For potlucks, take it straight from the fridge in the same dish—it’s low-effort, high-reward.
Creative Leftover Transformations
If you’ve got some extra:
- Freeze into popsicle molds for banana pudding pops.
- Layer in mason jars for lunchbox treats.
- Turn into banana pudding milkshakes with a splash of milk.
- Use as a filling in a layer cake.
Additional Tips
- Add a drizzle of caramel or chocolate sauce before serving.
- A pinch of cinnamon in the pudding adds a cozy twist.
- Want crunch? Mix in toffee bits or chopped nuts.
Make It a Showstopper
Want to impress at a holiday table? Use a trifle dish and make clean, visible layers. Garnish with piped whipped cream, banana chips, and a sprinkle of crushed cookies. Add a little dusting of cocoa powder or cinnamon on top for flair.
Variations to Try
- Banana Pudding Cheesecake: Use this as a no-bake cheesecake filling.
- Chocolate Banana Pudding: Add cocoa powder or use chocolate pudding.
- Strawberry Banana: Layer in fresh strawberries for a fruity twist.
- Nutella Banana Pudding: Add a swirl of Nutella between layers.
- Mini Jar Puddings: Perfect for parties or picnics!
FAQ’s
Q1: Can I use fresh whipped cream instead of Cool Whip?
A1: Yes, just make sure it’s whipped to stiff peaks before folding in.
Q2: Can I make it dairy-free?
A2: Use dairy-free pudding, almond milk, and vegan whipped topping.
Q3: How long does it last in the fridge?
A3: About 4 days, but it’s best eaten within 2 days for texture.
Q4: Can I freeze banana pudding?
A4: It’s not recommended—the texture of the bananas and pudding changes too much.
Q5: Can I make it with homemade pudding?
A5: Definitely! It’s just a little extra work, but totally worth it.
Q6: Can I use other cookies?
A6: Yes! Try shortbread, graham crackers, or Biscoff for a twist.
Q7: Can I use non-instant pudding?
A7: Yes, just allow time to cook and chill it before layering.
Q8: Can I make it in individual cups?
A8: Absolutely! They’re perfect for parties or picnics.
Q9: Can I add whipped cream on top?
A9: Yes, and it’s highly recommended for extra fluff and visual appeal.
Q10: Can I add extra bananas?
A10: Yes, but space them between pudding layers so they don’t brown.
Conclusion
Banana pudding isn’t just a dessert—it’s a memory in the making. Whether you’re whipping it up for a holiday gathering or just craving something cool and comforting, this layered classic never disappoints. It’s humble, it’s homey, and honestly, it just makes people happy.
PrintClassic Banana Pudding
Creamy and comforting, this classic banana pudding is layered with sliced bananas, vanilla wafers, and smooth vanilla pudding. Chilled to perfection, it’s the ultimate no-bake dessert for any occasion—from potlucks to weeknight cravings.
- Prep Time: 20 minutes
- Cook Time: undefined
- Total Time: 4 hours 20 minutes
- Yield: 10–12 servings
- Category: Dessert
- Method: No-Bake
- Cuisine: American
- Diet: Vegetarian
Ingredients
- 2 small boxes instant vanilla pudding mix
- 3 cups cold milk
- 1 can (14 oz) sweetened condensed milk
- 8 oz cream cheese, softened (optional)
- 1 cup heavy whipping cream (or 1 tub whipped topping)
- 4 ripe but firm bananas, sliced
- 45–50 vanilla wafers
- 1 teaspoon vanilla extract (optional)
Instructions
- In a mixing bowl, whisk together pudding mix and cold milk for 2 minutes until thick.
- Add condensed milk and softened cream cheese (if using). Mix until smooth and creamy.
- Fold in whipped cream or whipped topping gently to lighten the texture.
- In a 9×13 dish or trifle bowl, layer vanilla wafers across the bottom.
- Add a layer of sliced bananas over the wafers.
- Spoon a layer of the pudding mixture over the bananas. Repeat layers until the dish is full, ending with pudding on top.
- Sprinkle crushed vanilla wafers over the top as garnish.
- Cover and refrigerate for at least 4 hours or overnight. Serve chilled.
Notes
- Use ripe bananas with no bruises for best flavor and texture.
- Layer bananas inside the pudding, not on top, to prevent browning.
- Make the night before for the best flavor meld and softer cookies.
- Swap vanilla wafers with graham crackers, shortbread, or Biscoff for a twist.
Nutrition
- Serving Size: 1 cup
- Calories: 280
- Sugar: 24g
- Sodium: 180mg
- Fat: 12g
- Saturated Fat: 7g
- Unsaturated Fat: 3g
- Trans Fat: 0g
- Carbohydrates: 36g
- Fiber: 1g
- Protein: 4g
- Cholesterol: 35mg