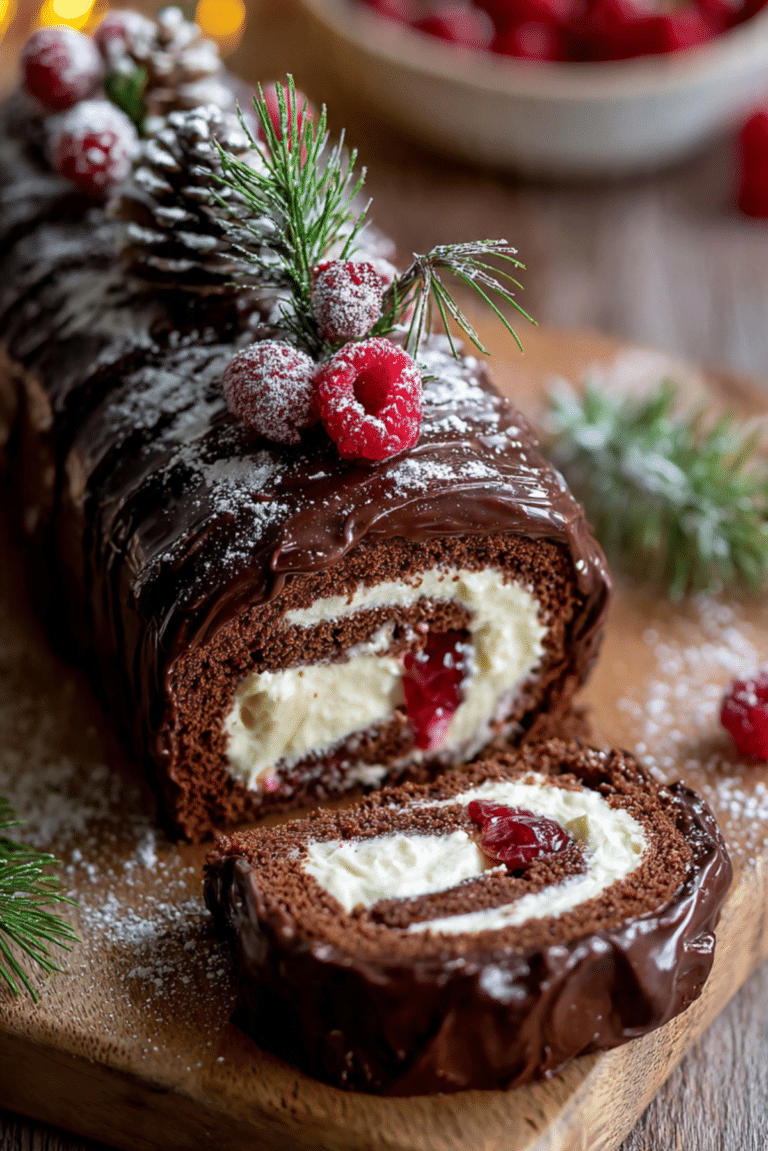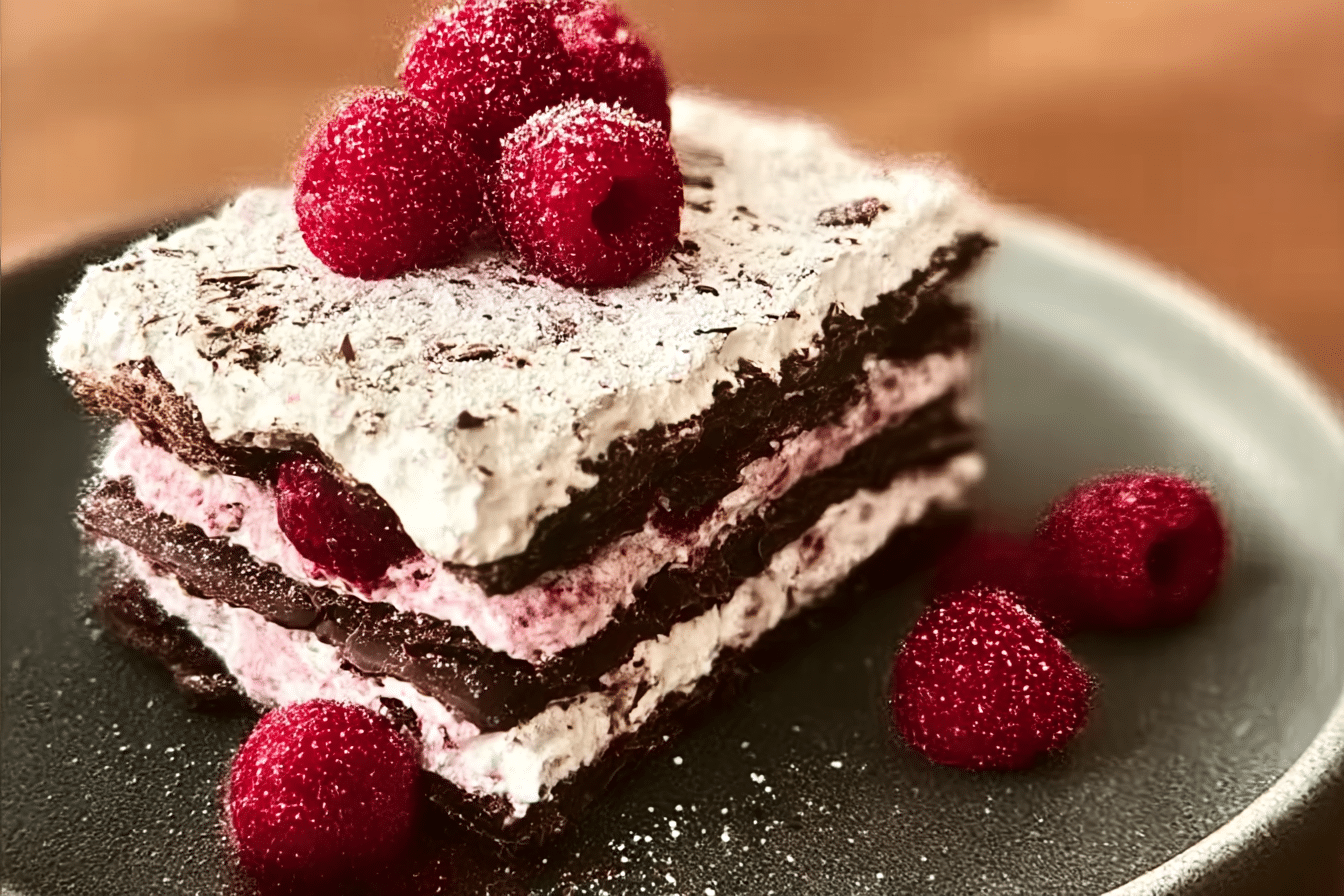
Chocolate-Raspberry Icebox Cake
There’s something undeniably magical about a dessert that comes together without even turning on the oven. The Chocolate-Raspberry Icebox Cake is exactly that kind of indulgent magic. Layer after layer of chocolate cookies, whipped cream, and juicy raspberries meld together into a cool, creamy dream. Each bite offers a soft, mousse-like texture with bursts of tart berry and rich cocoa. Whether it’s a summer treat or a cozy winter delight, this no-bake beauty brings a sense of elegance with zero fuss.
Behind the Recipe
Growing up, icebox cakes were the go-to treat in our household—especially during holidays and family gatherings. My grandmother had a special way of preparing them the night before, letting the flavors soak and settle into something extraordinary by the next day. This version, the Chocolate-Raspberry twist, became a family favorite one Valentine’s Day when raspberries were on sale and a box of chocolate wafers sat waiting to be transformed.
Recipe Origin or Trivia
The icebox cake dates back to the early 20th century, born out of the rise of refrigeration. These “icebox” desserts were originally promoted by brands like Nabisco to encourage the use of their cookies and the new electric iceboxes. Over time, different regions added their spins—fruit in the South, coffee in Europe, and tropical flavors in the Caribbean. This chocolate and raspberry version leans into the European love affair with rich cocoa and tart berries.
Why You’ll Love Chocolate-Raspberry Icebox Cake
This cake is more than just a pretty dessert—it’s practical, adaptable, and flat-out delicious.
Versatile: Works as a weekday dessert or centerpiece for special events.
Budget-Friendly: Requires only a handful of accessible ingredients.
Quick and Easy: No oven, no fuss—just layer and chill.
Customizable: Swap berries or cookies to match your craving.
Crowd-Pleasing: A guaranteed hit with kids and adults alike.
Make-Ahead Friendly: Best when chilled overnight, freeing up your day-of prep.
Great for Leftovers: Tastes even better the next day as the flavors deepen.
Chocolate-Raspberry Icebox Cake
This no-bake Chocolate-Raspberry Icebox Cake combines layers of whipped cream, crisp chocolate wafers, and fresh raspberries into a chilled, mousse-like dessert that’s as elegant as it is effortless.
- Prep Time: 20 minutes
- Cook Time: 0 minutes
- Total Time: 6 hours 20 minutes
- Yield: 10 servings
- Category: Dessert
- Method: No-Bake
- Cuisine: American
- Diet: Vegetarian
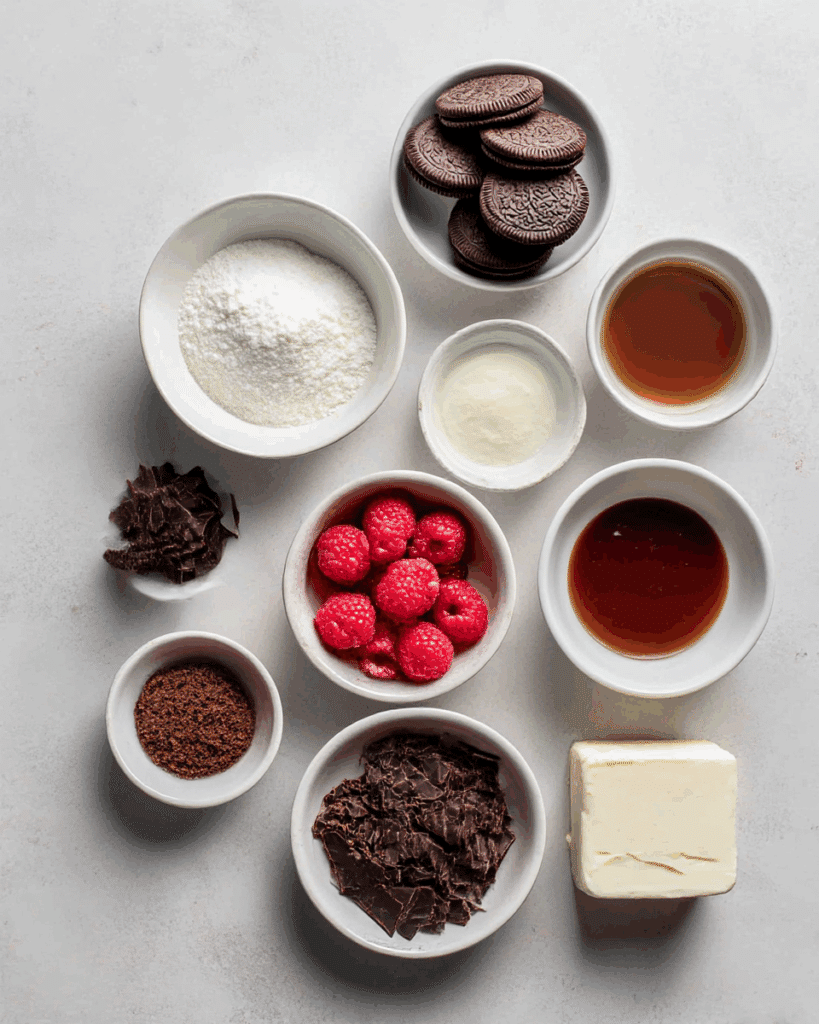
Ingredients
- Heavy Whipping Cream: 3 cups – Whipped into soft peaks, this forms the base of the filling.
- Powdered Sugar: ½ cup – Gently sweetens the cream without grittiness.
- Vanilla Extract: 1½ teaspoons – Adds a warm, aromatic depth.
- Chocolate Wafer Cookies: 2 sleeves (about 50 wafers) – Provides structure and chocolate richness.
- Fresh Raspberries: 2½ cups – Juicy and tart, they balance the sweetness.
- Dark Chocolate Shavings (optional): For garnish – Adds elegance and extra indulgence.
Instructions
- Preheat Your Equipment: No need to preheat an oven, but make sure your mixing bowl and beaters are chilled in the fridge for at least 15 minutes.
- Combine Ingredients: In the chilled bowl, whip heavy cream, powdered sugar, and vanilla extract until soft peaks form.
- Prepare Your Cooking Vessel: Line your loaf pan with plastic wrap, allowing extra to hang over the sides. This makes it easier to lift the cake later.
- Assemble the Dish: Spread a thin layer of whipped cream at the bottom, followed by a single layer of cookies. Add more whipped cream, a sprinkle of raspberries, and repeat until everything is used up—finishing with a layer of cream on top.
- Cook to Perfection: Cover with the plastic wrap overhang and refrigerate for at least 6 hours, ideally overnight.
- Finishing Touches: Unwrap the cake, transfer to a serving plate, and top with chocolate shavings and extra raspberries.
- Serve and Enjoy: Slice with a warm serrated knife and serve chilled.
Notes
- Note: Chill your cream and bowl ahead of time for best results.
- Note: Let the cake sit out 10 minutes before slicing for easier cutting.
- Note: Garnish right before serving to keep everything looking fresh.
Nutrition
- Serving Size: 1 slice
- Calories: 330
- Sugar: 16g
- Sodium: 150mg
- Fat: 24g
- Saturated Fat: 15g
- Unsaturated Fat: 8g
- Trans Fat: 0g
- Carbohydrates: 28g
- Fiber: 3g
- Protein: 3g
- Cholesterol: 65mg
Chef’s Pro Tips for Perfect Results
To get the most luscious, sliceable, flavor-packed cake, keep these in mind:
- Use cold cream and a chilled bowl for whipping—it makes fluffier whipped cream.
- Don’t skimp on layering—make sure the cookies are fully covered each time.
- Add a touch of vanilla or almond extract to the cream for a flavor boost.
- Let it chill overnight for best texture and flavor melding.
- Use a serrated knife dipped in hot water for clean slices.
Kitchen Tools You’ll Need
Before we get our hands messy (in the best way), here’s what you’ll need:
Mixing Bowls: For whipping cream and prepping berries.
Electric Mixer: Makes quick work of turning cream into fluffy clouds.
Rubber Spatula: Essential for smooth layering.
Loaf Pan or Springform Pan: Helps shape and mold the cake.
Plastic Wrap: Keeps everything sealed while chilling.
Serrated Knife: Best for slicing through the tender layers.
Ingredients in Chocolate-Raspberry Icebox Cake
There’s a beautiful harmony in this recipe—the bittersweet notes of chocolate, the creamy lightness, and the zing of fresh raspberries.
- Heavy Whipping Cream: 3 cups – Whipped into soft peaks, this forms the base of the filling.
- Powdered Sugar: ½ cup – Gently sweetens the cream without grittiness.
- Vanilla Extract: 1½ teaspoons – Adds a warm, aromatic depth.
- Chocolate Wafer Cookies: 2 sleeves (about 50 wafers) – Provides structure and chocolate richness.
- Fresh Raspberries: 2½ cups – Juicy and tart, they balance the sweetness.
- Dark Chocolate Shavings (optional): For garnish – Adds elegance and extra indulgence.
Ingredient Substitutions
If you’re missing something or want to make a twist, here are easy swaps:
Heavy Whipping Cream: Coconut cream.
Powdered Sugar: Honey or maple syrup (adjust to taste).
Vanilla Extract: Almond or raspberry extract.
Chocolate Wafer Cookies: Graham crackers or digestive biscuits.
Fresh Raspberries: Strawberries or cherries.
Ingredient Spotlight
Chocolate Wafer Cookies: Thin and crisp, they absorb moisture beautifully, transforming into soft, cake-like layers.
Raspberries: Their tartness cuts through the richness, offering freshness and vibrant color.
Instructions for Making Chocolate-Raspberry Icebox Cake
Get ready for some layering magic. Here’s how to bring this stunner to life:
- Preheat Your Equipment:
No need to preheat an oven, but make sure your mixing bowl and beaters are chilled in the fridge for at least 15 minutes. - Combine Ingredients:
In the chilled bowl, whip heavy cream, powdered sugar, and vanilla extract until soft peaks form. - Prepare Your Cooking Vessel:
Line your loaf pan with plastic wrap, allowing extra to hang over the sides. This makes it easier to lift the cake later. - Assemble the Dish:
Spread a thin layer of whipped cream at the bottom, followed by a single layer of cookies. Add more whipped cream, a sprinkle of raspberries, and repeat until everything is used up—finishing with a layer of cream on top. - Cook to Perfection:
Cover with the plastic wrap overhang and refrigerate for at least 6 hours, ideally overnight. - Finishing Touches:
Unwrap the cake, transfer to a serving plate, and top with chocolate shavings and extra raspberries. - Serve and Enjoy:
Slice with a warm serrated knife and serve chilled. Trust me, you’re going to love this.
Texture & Flavor Secrets
What makes this cake a total game-changer is the way the crisp cookies soften into luscious, cake-like layers. The whipped cream turns into a silky mousse, and the raspberries add a juicy pop in every bite. It’s a dance of textures—soft, creamy, and slightly chewy—with a flavor story of deep chocolate, sweet cream, and bright berry.
Cooking Tips & Tricks
- Chill your cream and bowl ahead of time.
- Let the cake sit out 10 minutes before slicing for easier cutting.
- Add a thin layer of raspberry jam between layers for extra berry punch.
- Garnish right before serving to keep everything looking fresh.
What to Avoid
- Skipping the overnight chill—your cake won’t set properly.
- Over-whipping the cream—it’ll turn grainy or buttery.
- Using frozen raspberries—they release too much moisture.
- Uneven layering—it affects both texture and look.
Nutrition Facts
Servings: 10
Calories per serving: 330
Note: These are approximate values.
Preparation Time
Prep Time: 20 minutes
Cook Time: 0 minutes
Total Time: 6 hours 20 minutes (including chilling)
Make-Ahead and Storage Tips
This cake is practically made for making ahead. Prepare it the night before and let it chill overnight. Store leftovers in an airtight container in the fridge for up to 3 days. You can also freeze individual slices for up to 1 month—just wrap well and thaw in the fridge overnight.
How to Serve Chocolate-Raspberry Icebox Cake
Serve this stunner chilled, sliced thick, with extra raspberries or a drizzle of raspberry coulis. Pair it with a shot of espresso, a glass of cold milk, or even a floral tea to balance the richness.
Creative Leftover Transformations
If you’re lucky enough to have leftovers, here are some fun ways to reinvent them:
- Layer into parfaits with yogurt and granola.
- Crumble into bowls and top with hot fudge for a deconstructed sundae.
- Freeze into popsicle molds with extra cream for frozen treats.
Additional Tips
- Add chopped toasted nuts for crunch.
- Swap in flavored whipped cream for creative twists.
- Use a clear dish to show off the beautiful layers.
Make It a Showstopper
Presentation matters—dust with cocoa powder, top with gold leaf, or use a ring mold for individual mini cakes. Serve on a white plate to make those berries pop and always garnish with fresh mint for a final flourish.
Variations to Try
- Tropical Twist: Use mango slices and coconut cream.
- Cookies & Cream: Replace wafers with chocolate sandwich cookies.
- Mocha Delight: Add espresso powder to the whipped cream.
- Berry Medley: Mix raspberries with blueberries and blackberries.
- Nutty Chocolate: Layer in chopped hazelnuts or pistachios.
FAQ’s
Q1: Can I make this cake gluten-free?
Yes, just use gluten-free chocolate cookies.
Q2: How far in advance can I make it?
Up to 2 days ahead, just keep it well covered in the fridge.
Q3: Can I use frozen raspberries?
Fresh is best. Frozen ones release too much water and make the cake soggy.
Q4: What if I don’t have a loaf pan?
Use a springform pan or even a square baking dish.
Q5: How do I know when the cake is ready?
It should feel firm and slice cleanly—at least 6 hours of chilling is key.
Q6: Can I add chocolate chips?
Absolutely. Sprinkle them between layers for crunch.
Q7: What can I use instead of whipped cream?
Coconut whipped cream or mascarpone mixed with cream works well.
Q8: Is it kid-friendly?
Very! It’s sweet, soft, and fun to assemble—let them help!
Q9: Can I reduce the sugar?
Yes, you can cut the sugar in the cream by half or use a sugar substitute.
Q10: How long does it last?
3 days in the fridge, or up to 1 month in the freezer.
Conclusion
There’s something so satisfying about slicing into a chilled, layered cake and revealing the marbled beauty inside. The Chocolate-Raspberry Icebox Cake is effortless elegance, with bold flavor and creamy comfort in every bite. Whether you’re hosting a party or just treating yourself, this one’s worth every bite.