Chocolate Pudding Recipe
There is something undeniably nostalgic about a bowl of homemade chocolate pudding that instantly transports you back to childhood afternoons. Imagine a dessert so velvety and rich that it coats the back of your spoon like liquid silk, carrying the deep, intense aroma of high-quality cocoa and warm vanilla. I remember the first time I made this on a rainy Sunday, watching the mixture transform from a simple liquid into a thick, glossy masterpiece right before my eyes. Let me tell you, it’s worth every bite, and it is worlds away from anything you would ever find in a plastic cup at the grocery store.
A Silky Classic That Redefines Comfort
While many people associate pudding with instant mixes, the real magic happens when you whisk together simple, wholesome ingredients on your own stovetop. This recipe focuses on achieving that perfect, wobbly yet firm consistency that defines a gourmet custard without any of the artificial aftertaste. It is the ultimate “anytime” dessert, sophisticated enough for a dinner party but simple enough to satisfy a late-night craving. Trust me, you’re going to love this because it proves that sometimes the most basic treats are the ones that leave the lasting impression.
The Timeless Heritage of Stovetop Custards
The history of pudding is long and varied, evolving from ancient savory porridges into the sweet, creamy confections we adore today. Stovetop chocolate pudding as we know it gained massive popularity in the early 20th century, becoming a staple of American home cooking because it required no oven and used affordable pantry staples. By mastering this traditional method, you are connecting with generations of home cooks who knew that a little bit of patience and a steady whisk were the keys to a perfect end to any meal.
Why This Pudding is a Total Crowd-Pleaser
This recipe is designed to be your reliable back-pocket dessert for whenever you need a quick win that feels like a luxury.
Versatile: You can serve this warm for a cozy winter treat or chilled until set for a refreshing summer snack.
Budget-Friendly: Made with milk, sugar, and cocoa, this is one of the most cost-effective ways to create a high-impact dessert.
Quick and Easy: The entire cooking process takes less than fifteen minutes, meaning you are never far away from chocolate bliss.
Customizable: You can easily stir in a handful of chocolate chips at the end or top it with everything from crushed cookies to fresh berries.
Crowd-Pleasing: From toddlers to grandparents, everyone finds comfort in a smooth bowl of chocolate cream.
Make-Ahead Friendly: This pudding stores beautifully in the fridge, actually developing a deeper flavor as it sits overnight.
Great for Leftovers: If you have extra, it makes a fantastic filling for a pre-baked pie crust or a layer in a festive trifle.
Expert Secrets for the Smoothest Texture
To achieve that signature mirror-like glaze and lump-free consistency, you have to respect the process of the stovetop.
The most important secret is to whisk your dry ingredients together thoroughly before adding any liquid to prevent cocoa clumps from forming later. When you begin adding the milk, do so in a very slow, steady stream while whisking constantly to create a smooth paste first. Also, do not walk away from the stove, as the cornstarch can settle and burn on the bottom of the pan in just a few seconds. Finally, for the ultimate professional finish, pass the finished pudding through a fine-mesh sieve to catch any tiny imperfections before it sets.
Essential Tools for Your Dessert Success
Having the right tools ensures your pudding cooks evenly and reaches the perfect thickness without scorching.
Heavy-Bottomed Saucepan: This is crucial for even heat distribution, preventing the milk and sugar from burning at the edges.
Fine-Mesh Whisk: A sturdy whisk is your best friend here, ensuring the cornstarch is perfectly incorporated for a silky finish.
Silicone Spatula: Use this to scrape the corners of the pan where a whisk might miss, ensuring every drop is cooked through.
Glass Mixing Bowls: These are perfect for portioning out the pudding so it cools evenly and looks beautiful for serving.
Fine-Mesh Sieve: An optional but highly recommended tool for straining the pudding to ensure a completely smooth texture.
Ingredients You Will Need For The Pudding
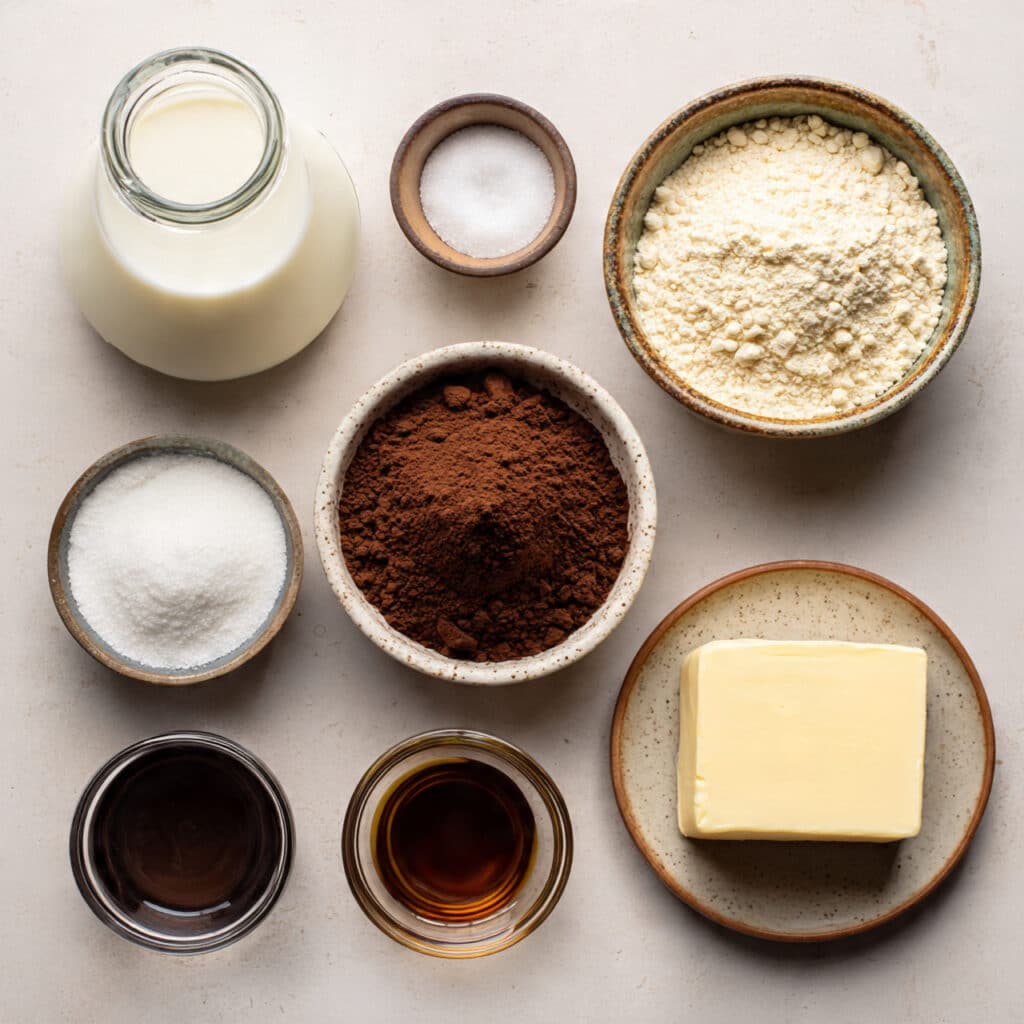
The harmony of these simple ingredients creates a complex and deeply satisfying chocolate experience.
- Whole Milk: 3 cups which provides the creamy, rich base necessary for a classic custard texture.
- Granulated Sugar: 3/4 cup to sweeten the cocoa and help the pudding achieve its glossy sheen.
- Unsweetened Cocoa Powder: 1/2 cup preferably Dutch-processed for a darker color and smoother chocolate flavor.
- Cornstarch: 1/4 cup acting as the thickening agent that gives the pudding its structure and wobble.
- Salt: 1/4 teaspoon to balance the sweetness and intensify the chocolate notes.
- Vanilla Extract: 2 teaspoons added at the end to provide a warm, aromatic finish.
- Unsalted Butter: 2 tablespoons stirred in while hot to create a luxurious mouthfeel and extra shine.
Flexible Ingredient Substitutions
If you find yourself missing an item, these alternatives will keep your dessert plans on track.
Whole Milk: You can use 2% milk or even a creamy oat milk for a slightly different but still delicious profile.
Cornstarch: If you are out, you can use arrowroot powder as a 1:1 substitute, though the texture may be slightly more delicate.
Granulated Sugar: Light brown sugar can be used for a deeper, more caramel-like sweetness.
Unsweetened Cocoa Powder: If you only have natural cocoa powder, the pudding will be slightly lighter and have a more tangy chocolate bite.
Spotlight on Key Ingredients
Dutch-Processed Cocoa: This cocoa has been treated to reduce acidity, resulting in a much darker, richer pudding that looks like it came from a professional pastry shop.
Unsalted Butter: Adding a bit of butter at the very end is the “chef’s secret” that transforms a simple pudding into a rich, decadent cream with a professional finish.
Step-by-Step Chocolate Pudding Instructions
Follow these steps carefully to ensure your pudding is thick, smooth, and absolutely perfect.
- Preheat Your Equipment: Place your saucepan on the stove over medium-low heat to ensure it is ready for the ingredients.
- Combine Ingredients: In the cold saucepan, whisk together the sugar, cocoa powder, cornstarch, and salt until no large lumps remain.
- Prepare Your Cooking Vessel: Gradually whisk in the milk, starting with a small amount to make a smooth paste before adding the rest of the liquid.
- Assemble the Dish: Continue to whisk over medium heat, making sure to reach into the corners of the pan as the mixture begins to warm.
- Cook to Perfection: Bring the mixture to a gentle boil, whisking constantly for about 1 to 2 minutes until it thickens enough to coat the back of a spoon.
- Finishing Touches: Remove from heat and immediately stir in the vanilla extract and the butter until the butter is completely melted and the pudding is glossy.
- Serve and Enjoy: Pour into individual bowls and serve warm, or press plastic wrap directly onto the surface and chill for at least 2 hours for a firm set.
A Contrast of Rich and Silky Textures
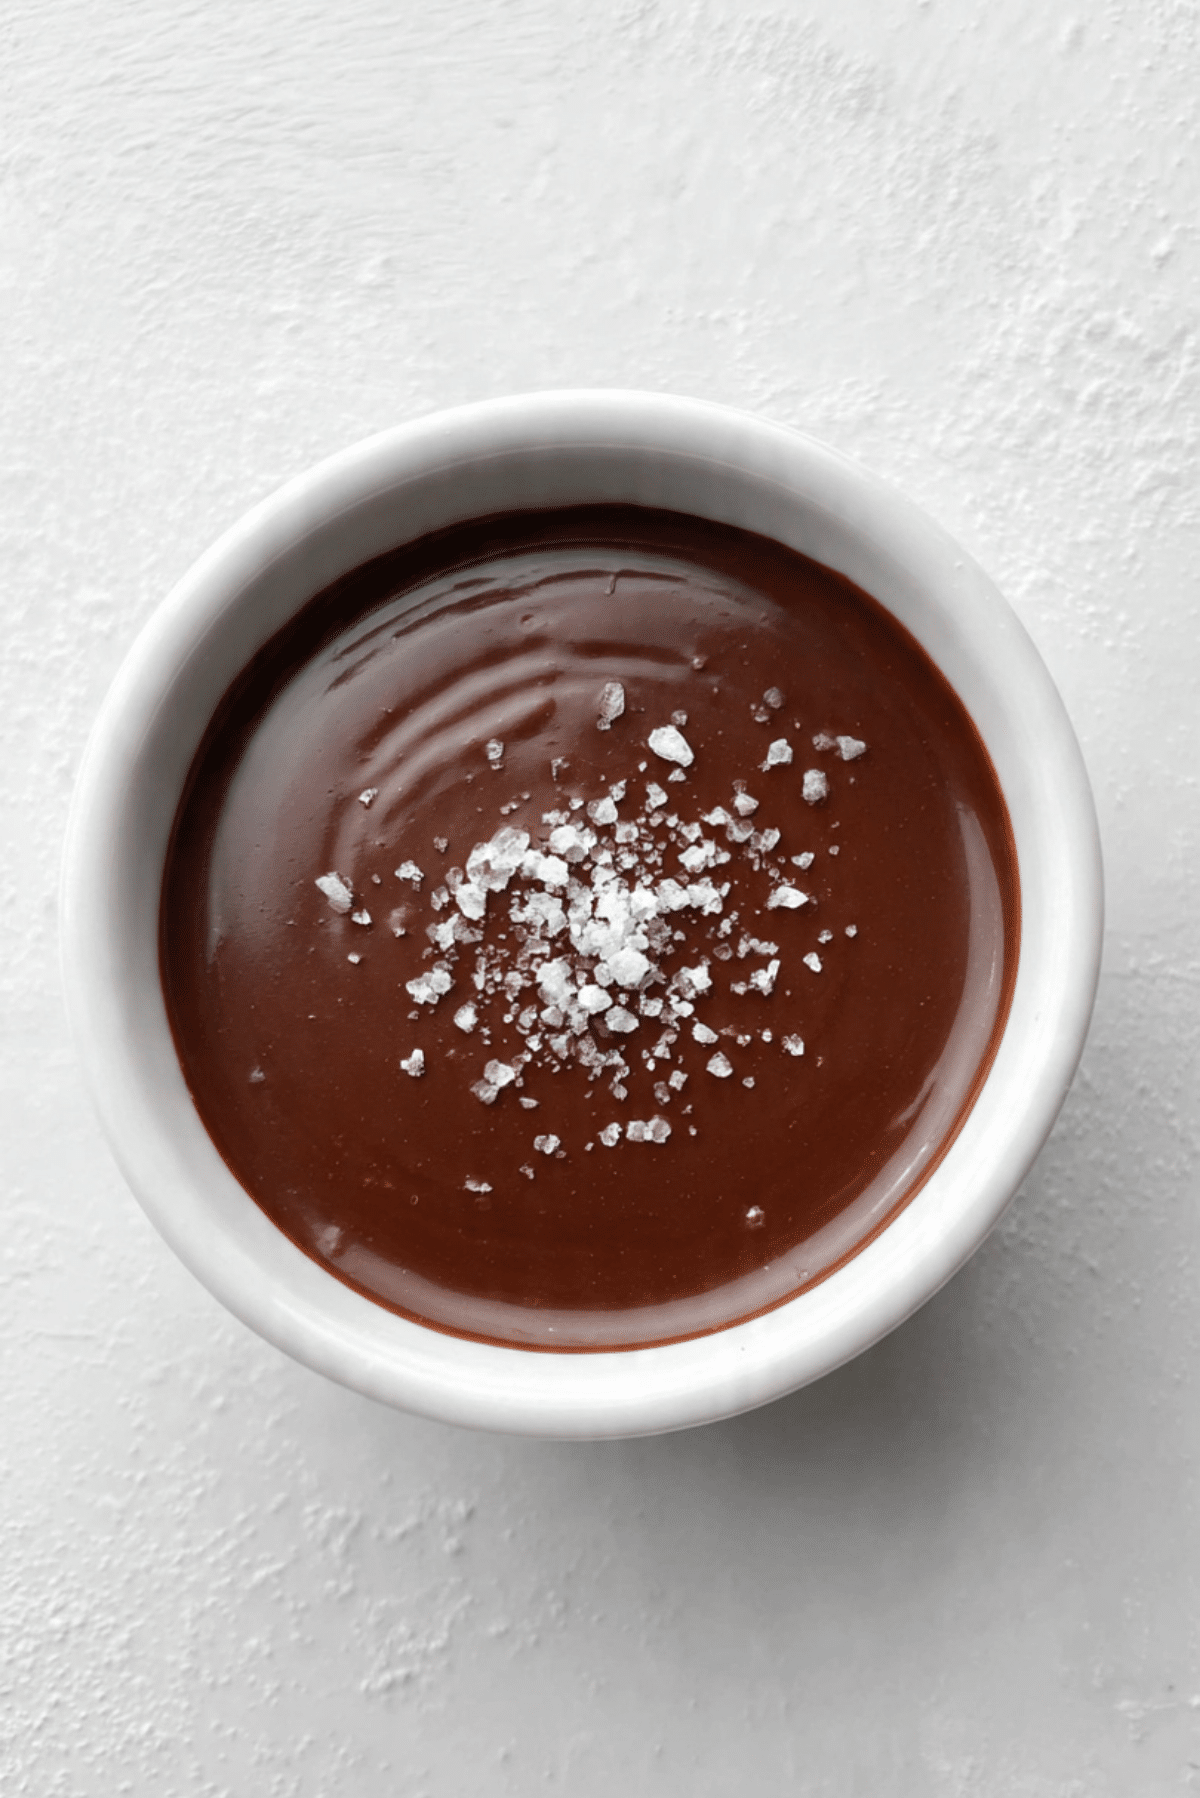
When you take a bite of this pudding, you’ll experience a wonderful sensory journey. The texture is incredibly dense and silky, offering a cool and refreshing sensation if served chilled. As it melts on your tongue, the flavor of the dark cocoa blooms, followed by the subtle warmth of the vanilla and the richness of the butter. If you top it with a pinch of sea salt, the contrast between the sharp salt and the sweet chocolate creates a sophisticated flavor profile that is truly addictive.
Pro Tips for Cooking Success
- Whisk Constantly: This is the most important rule to prevent lumps and scorching on the bottom of the pan.
- Control the Heat: Do not try to rush the process by turning the heat to high, as the milk can easily curdle.
- Prevent the Skin: If you do not like the “skin” that forms on top of pudding, press plastic wrap directly onto the surface while it is still hot.
- Sieve for Perfection: If you see even the smallest lumps, pour the hot pudding through a strainer into your serving bowls.
Mistakes to Watch For
- Expired Cornstarch: If your thickening agent is old, the pudding may stay liquid and never reach that signature set.
- Boiling Too Long: Once the pudding thickens, only boil it for a minute or two; overcooking can actually break down the cornstarch and make it thin again.
- Walking Away: Pudding can go from perfect to burnt in seconds, so stay with the pan until the very end.
Nutrition Facts
Servings: 4
Calories per serving: 320
Note: These are approximate values.
Preparation Time
Prep Time: 5 minutes
Cook Time: 10 minutes
Total Time: 15 minutes
Make-Ahead and Storage Tips
This pudding is a champion of the refrigerator. It can be made up to 3 days in advance and kept in an airtight container. If you are storing it, make sure it has cooled completely before sealing the lid to prevent condensation. If the pudding becomes too firm in the fridge, you can give it a vigorous whisk before serving to restore some of its creamy movement.
How to Serve
For a classic presentation, serve in small glass jars with a dollop of fresh whipped cream on top. For a more modern look, serve in shallow bowls with a sprinkle of toasted hazelnuts or a few raspberries for a pop of color. It is also delightful served with a side of shortbread cookies for dipping.
Creative Leftover Transformations
If you have leftovers, try using the pudding as a dip for fresh fruit like bananas or strawberries. You can also layer it with granola and yogurt for a decadent breakfast parfait, or freeze it in popsicle molds for a homemade fudge pop that the kids will absolutely love.
Additional Tips
For an even richer flavor, you can replace half a cup of the milk with heavy cream. If you like a bit of spice, a tiny pinch of espresso powder added to the dry ingredients will make the chocolate flavor taste even more intense without adding a coffee taste.
Make It a Showstopper
To make this a true showstopper, grate some high-quality dark chocolate over the top right before serving. The fine shavings will catch the light and add a beautiful texture. You can also serve it in a martini glass with a single mint leaf for an elegant, dinner-party-ready aesthetic.
Variations to Try
- Salted Caramel Chocolate: Stir in a tablespoon of caramel sauce at the end along with the butter.
- Peanut Butter Swirl: Dollop a teaspoon of warm peanut butter into the bowl and swirl it in with a toothpick.
- Spicy Mayan Chocolate: Add a tiny pinch of cinnamon and a whisper of cayenne pepper to the dry ingredients.
- Mocha Pudding: Replace 1/2 cup of the milk with strong brewed coffee for a sophisticated pick-me-up.
FAQ’s
Q1: Can I make this pudding vegan?
A1: Yes, you can use a full-fat coconut milk or almond milk, although the flavor will change slightly and it may be less creamy.
Q2: Why is my pudding watery?
A2: This usually happens if the cornstarch wasn’t boiled long enough to activate its thickening powers or if the measurements were slightly off.
Q3: How do I get rid of lumps?
A3: If lumps form, you can use an immersion blender for a few seconds or push the mixture through a fine-mesh sieve.
Q4: Can I use this for a pie filling?
A4: Absolutely, this pudding is thick enough to hold its shape in a pre-baked pie shell once it has chilled completely.
Q5: Is it okay to use skim milk?
A5: You can, but the pudding will be much thinner and less rich than if you used whole milk.
Q6: Can I use honey instead of sugar?
A6: Honey is a liquid and will interfere with the thickening process, so it is better to stick with a granulated sweetener.
Q7: Why did my pudding burn?
A7: The heat was likely too high or you didn’t whisk enough in the corners of the pan where the mixture sits still.
Q8: Does the butter make it taste greasy?
A8: Not at all, it simply adds a professional richness and a beautiful shine to the finished product.
Q9: Can I eat this warm?
A9: Yes, many people prefer it warm right off the stove, though it will be a bit thinner than when it is chilled.
Q10: How do I prevent a film on top?
A10: Press a piece of plastic wrap or wax paper directly onto the surface of the pudding while it is still hot.
Conclusion
Homemade chocolate pudding is a simple pleasure that reminds us that the best things in life often come from the most basic ingredients. Whether you are sharing a bowl with your family or treating yourself to a quiet moment of indulgence, this recipe is guaranteed to satisfy your deepest chocolate cravings. This one’s a total game-changer for your dessert routine, and I can’t wait for you to experience that first velvety spoonful. Trust me, you’re going to love this, it’s worth every bite!
PrintChocolate Pudding Recipe
A rich, velvety stovetop chocolate pudding made from scratch with simple pantry staples for a gourmet, nostalgic treat.
Ingredients
- Whole Milk: 3 cups
- Granulated Sugar: 3/4 cup
- Unsweetened Cocoa Powder: 1/2 cup
- Cornstarch: 1/4 cup
- Salt: 1/4 teaspoon
- Vanilla Extract: 2 teaspoons
- Unsalted Butter: 2 tablespoons
Instructions
- In a medium saucepan, whisk together sugar, cocoa powder, cornstarch, and salt until well combined.
- Gradually whisk in the milk, starting with a small amount to form a smooth paste before adding the rest.
- Place over medium heat and whisk constantly until the mixture comes to a gentle boil.
- Continue whisking for 1 to 2 minutes as the mixture thickens.
- Remove from heat and stir in the vanilla extract and butter until fully melted and glossy.
- Pour into individual serving dishes.
- Serve warm, or press plastic wrap onto the surface and chill for at least 2 hours.
Notes
- Note: Whisking constantly is essential to prevent lumps and scorching on the bottom of the pan.
- For a deeper flavor, use Dutch-processed cocoa powder.
- To avoid a skin forming on top, ensure the plastic wrap touches the surface of the pudding while cooling.