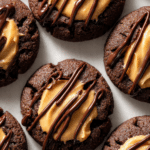
Chocolate Peanut Butter Thumbprint Cookies
There is something truly magical about the way rich, dark chocolate dances with smooth, salty peanut butter. These cookies are more than just a snack, they are a tiny masterpiece of texture and flavor that will have your kitchen smelling like a dream. If you are a fan of that classic duo, let me tell you, it’s worth every bite.
The Ultimate Sweet and Salty Indulgence
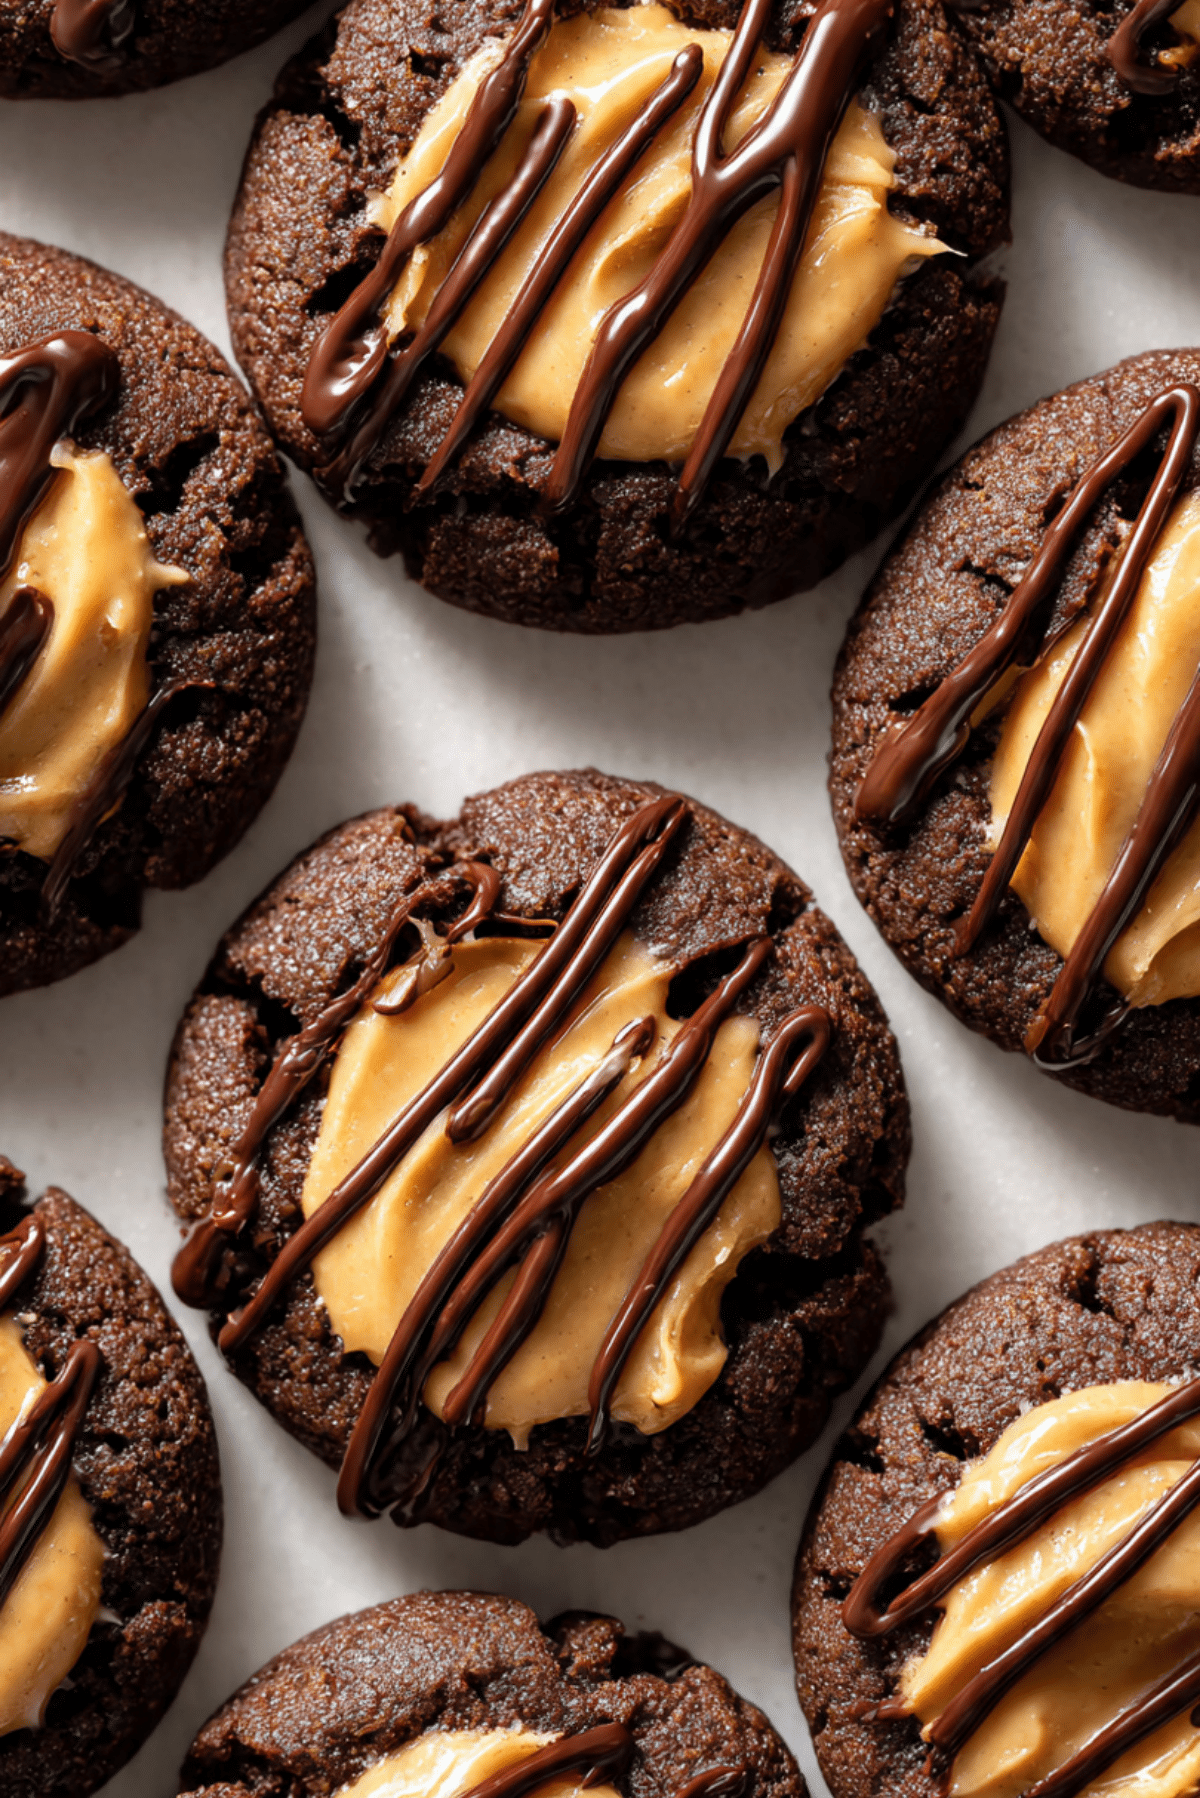
When you take a bite of these, you first hit the soft, cocoa-infused cookie base which is almost like a brownie in its density. Then, your taste buds are greeted by the silky peanut butter frosting nestled right in the center, followed by a final drizzle of chocolate that ties everything together. Trust me, you’re going to love this recipe because it balances that deep sweetness with just the right amount of savory peanut notes.
The History of the Humble Thumbprint
While thumbprint cookies actually originated in Sweden as Hallongrotta, which translates to raspberry cave, they have evolved into a global favorite for holidays and bake sales. Traditionally filled with jam, the modern American twist often swaps fruit for decadent fillings like chocolate ganache or, in this case, a fluffy peanut butter cream. It is a timeless technique that makes every single cookie look like a handcrafted gift.
Why You Will Fall in Love With This Recipe
This recipe is designed to be a reliable staple in your baking repertoire, offering a perfect result every single time you preheat the oven.
Versatile: You can easily swap the dark cocoa for milk chocolate or use crunchy peanut butter if you prefer more texture.
Budget-Friendly: Most of the ingredients are simple pantry staples like flour, sugar, and peanut butter that you likely already have.
Quick and Easy: The dough comes together in one bowl and the thumbprint method is fun and fast to execute.
Customizable: Feel free to top them with sea salt, chopped peanuts, or even a white chocolate drizzle for a different look.
Crowd-Pleasing: I have never met a person who can turn down the combination of chocolate and peanut butter.
Make-Ahead Friendly: You can bake the cookies in advance and fill them right before serving to keep them extra fresh.
Great for Leftovers: These stay soft and delicious for days, making them the perfect companion for your morning coffee.
Secrets from a Professional Baker
To get that perfect indent without the cookie cracking too much, use the back of a rounded measuring spoon instead of your actual thumb while the cookies are still warm. Also, make sure your butter is truly at room temperature, not melted, to ensure the cookies hold their shape and do not spread too thin on the baking sheet.
Essential Tools for Cookie Success
Having the right gear makes the process so much smoother and ensures consistent results for every batch.
Baking Sheet: A heavy-duty rimmed baking sheet ensures even heat distribution so the bottoms do not burn.
Parchment Paper: This prevents sticking and makes cleanup a total breeze without needing extra grease.
Electric Hand Mixer: Essential for creaming the butter and sugar until they are light and fluffy.
Small Cookie Scoop: This helps you get perfectly uniform cookies so they all finish baking at the exact same time.
Wire Cooling Rack: Allowing air to circulate under the cookies prevents them from getting soggy as they cool.
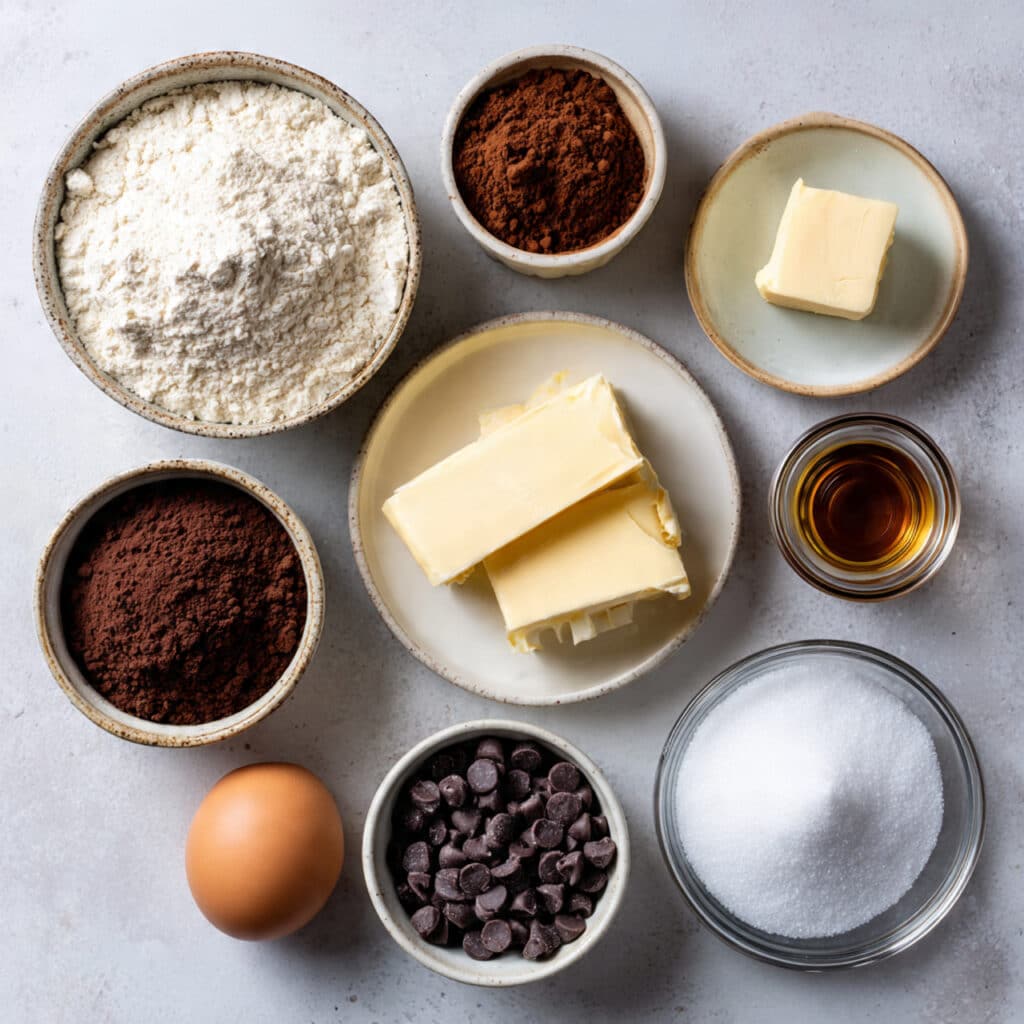
Ingredients You Will Need For Chocolate Peanut Butter Thumbprint Cookies
The harmony of these ingredients creates a professional-quality treat right in your home kitchen.
- All-Purpose Flour: 1.5 cups to provide the essential structure and soft crumb for the cookie base.
- Unsweetened Cocoa Powder: 0.5 cups for that intense, dark chocolate flavor and deep mahogany color.
- Unsalted Butter: 0.5 cups softened to create a rich and buttery texture that melts in your mouth.
- Granulated Sugar: 0.75 cups to sweeten the dough and help create those slightly crisp edges.
- Large Egg: 1 whole egg to bind the ingredients together and provide a bit of lift.
- Vanilla Extract: 1 teaspoon to enhance the chocolate notes and add a classic floral aroma.
- Creamy Peanut Butter: 0.5 cups for the smooth and salty filling that sits in the center.
- Powdered Sugar: 0.5 cups to thicken the peanut butter filling into a pipeable frosting.
- Semi-Sweet Chocolate Chips: 0.25 cups melted for the final decorative drizzle on top.
- Salt: 0.25 teaspoons to balance the sugars and make the chocolate flavor pop.
Smart Ingredient Substitutions
If you find yourself missing an item, these swaps work beautifully without compromising the integrity of the dish.
Granulated Sugar: Coconut sugar can be used for a more caramel-like flavor.
Creamy Peanut Butter: Almond butter or sunflower seed butter works perfectly for those with different preferences.
All-Purpose Flour: A 1:1 gluten-free baking flour blend is an easy substitute for a wheat-free version.
Semi-Sweet Chocolate Chips: Dark chocolate chunks or even a drizzle of caramel would be fantastic.
Spotlight on Key Ingredients
Unsweetened Cocoa Powder: This is the heart of the cookie, providing the antioxidant-rich bitterness that makes the sugar taste even better.
Creamy Peanut Butter: The protein and healthy fats in the peanut butter create a satisfying, dense filling that keeps the cookies moist.
Step-by-Step Culinary Journey
Baking is a process of patience and precision, and following these steps will lead you to cookie perfection.
- Preheat Your Equipment: Set your oven to 350 degrees Fahrenheit and line two large baking sheets with parchment paper so they are ready to go.
- Combine Ingredients: In a medium bowl, whisk together the flour, cocoa powder, and salt, then in a separate large bowl, cream the butter and sugar until pale and fluffy before adding the egg and vanilla.
- Prepare Your Cooking Vessel: Gradually mix the dry ingredients into the wet ones until a soft dough forms, ensuring no streaks of flour remain.
- Assemble the Dish: Roll the dough into small balls about one inch in diameter and place them two inches apart on the prepared baking sheets.
- Cook to Perfection: Bake for about 10 minutes until the edges are set, then immediately use a spoon to press a deep well into the center of each hot cookie.
- Finishing Touches: Whisk the peanut butter and powdered sugar together until smooth, then spoon or pipe the mixture into the cooled cookie centers and finish with a chocolate drizzle.
- Serve and Enjoy: Allow the chocolate to set completely before stacking them on a beautiful platter for your guests.
Texture and Flavor Harmony
The genius of this recipe lies in the contrast between the slightly crumbly, earthy chocolate exterior and the luscious, creamy peanut butter heart. As you chew, the chocolate drizzle melts onto your tongue, creating a decadent coating that brings all the elements together in a single, harmonious bite.
Pro Tips and Tricks
- Always sift your cocoa powder to avoid any bitter lumps in your dough.
- If the dough is too soft to roll, chill it in the fridge for 20 minutes before shaping.
- Use a piping bag for the peanut butter filling to get that professional, clean look.
What to Avoid for the Best Results
- Do not overbake the cookies, as cocoa-based doughs can become very dry and brittle if left in the oven too long.
- Avoid filling the cookies while they are still piping hot, or the peanut butter frosting may melt and run over the sides.
- Do not skip the salt in the dough, as it is crucial for cutting through the richness of the chocolate.
Nutritional Information
Servings: 24 cookies
Calories per serving: 145 calories
Note: These are approximate values.
Timing Guide
Prep Time: 20 minutes
Cook Time: 10 minutes
Total Time: 30 minutes
Storage and Freshness Tips
These cookies store exceptionally well in an airtight container at room temperature for up to 5 days. If you want to keep them longer, they freeze beautifully for up to 3 months, just make sure to place parchment paper between layers to prevent the chocolate drizzles from sticking together.
Creative Serving Ideas
Serve these alongside a cold glass of milk or a hot espresso to contrast the rich flavors. For a party, you can arrange them on a wooden board with fresh strawberries and dark chocolate squares for a sophisticated dessert spread.
Repurposing Your Leftovers
If you happen to have a few left over, crumble them over vanilla bean ice cream for an instant cookie-dough sundae. You can also pulse them in a blender to create a decadent crust for a peanut butter pie.
Final Flavor Enhancements
A tiny pinch of flaky sea salt on top of the peanut butter filling right before the chocolate sets can elevate these from simple cookies to gourmet treats. This one’s a total game-changer for those who love a sophisticated edge to their sweets.
Make It a Showstopper
To make these look like they came from a high-end bakery, use a star tip to pipe the peanut butter filling in a swirl. Drizzle the chocolate in very thin, fast motions to create elegant lines across the top of the entire tray at once.
Creative Variations to Try
- White Chocolate PB: Use white chocolate chips for the drizzle and the filling for a sweeter, creamier profile.
- Double Peanut: Roll the dough balls in crushed roasted peanuts before baking for extra crunch.
- Nutella Center: Swap the peanut butter filling for a hazelnut spread for a completely different flavor profile.
- Mocha Cookies: Add a teaspoon of espresso powder to the dough to intensify the chocolate flavor.
FAQ’s
- Can I use natural peanut butter?
It is best to use processed creamy peanut butter as natural versions tend to separate and can make the filling too oily. - Why did my cookies crack?
Some cracking is normal, but if they crack excessively, the dough might be too cold or you might be pressing the centers too late. - Can I make the dough in advance?
Yes, you can keep the dough in the fridge for up to 2 days before rolling and baking. - Do I need to refrigerate these?
No, they are perfectly shelf-stable at room temperature. - Can I use a different nut butter?
Absolutely, cashew butter or almond butter are great alternatives. - What if I don’t have a piping bag?
A simple plastic storage bag with the corner snipped off works just as well. - Can I add chocolate chips to the dough?
Yes, mini chocolate chips would be a great addition for extra texture. - How do I melt the chocolate for the drizzle?
Microwave in 30-second intervals, stirring in between until completely smooth. - My filling is too runny, what do I do?
Add a little more powdered sugar until it reaches a thicker, frosting-like consistency. - Can I make these vegan?
Yes, use a flax egg and vegan butter/chocolate for a plant-based version.
Conclusion
These Chocolate Peanut Butter Thumbprint Cookies are the ultimate comfort food, bringing together two of the best flavors on earth in a beautiful, bite-sized package. Whether you are baking for a special occasion or just treating yourself on a Tuesday, these are sure to bring a smile to everyone’s face. Now, grab your apron and get started, because your new favorite cookie is just a few steps away!
PrintChocolate Peanut Butter Thumbprint Cookies
A decadent and soft chocolate cookie base filled with a creamy, sweet and salty peanut butter frosting and finished with a rich chocolate drizzle.
Ingredients
- 1.5 cups All-Purpose Flour
- 0.5 cups Unsweetened Cocoa Powder
- 0.5 cups Unsalted Butter, softened
- 0.75 cups Granulated Sugar
- 1 Large Egg
- 1 teaspoon Vanilla Extract
- 0.5 cups Creamy Peanut Butter
- 0.5 cups Powdered Sugar
- 0.25 cups Semi-Sweet Chocolate Chips
- 0.25 teaspoons Salt
Instructions
- Preheat your oven to 350°F (175°C) and line baking sheets with parchment paper.
- In a medium bowl, whisk together flour, cocoa powder, and salt.
- In a large bowl, cream the softened butter and granulated sugar until light and fluffy. Beat in the egg and vanilla extract.
- Gradually add the dry ingredients to the wet ingredients, mixing until a soft dough forms.
- Roll the dough into 1-inch balls and place them 2 inches apart on the baking sheets.
- Bake for 10 minutes until edges are set.
- Immediately after removing from the oven, use the back of a small spoon to press an indentation into the center of each cookie. Let cool completely.
- Whisk together peanut butter and powdered sugar until smooth. Spoon or pipe the mixture into the centers of the cooled cookies.
- Melt the chocolate chips and drizzle over the top of the cookies.
- Allow the drizzle to set before serving.
Notes
- Use room temperature butter for the best cookie texture.
- Sift the cocoa powder to ensure no bitter lumps.
- If the dough is too sticky to roll, chill it for 20 minutes.
- Store in an airtight container for up to 5 days.