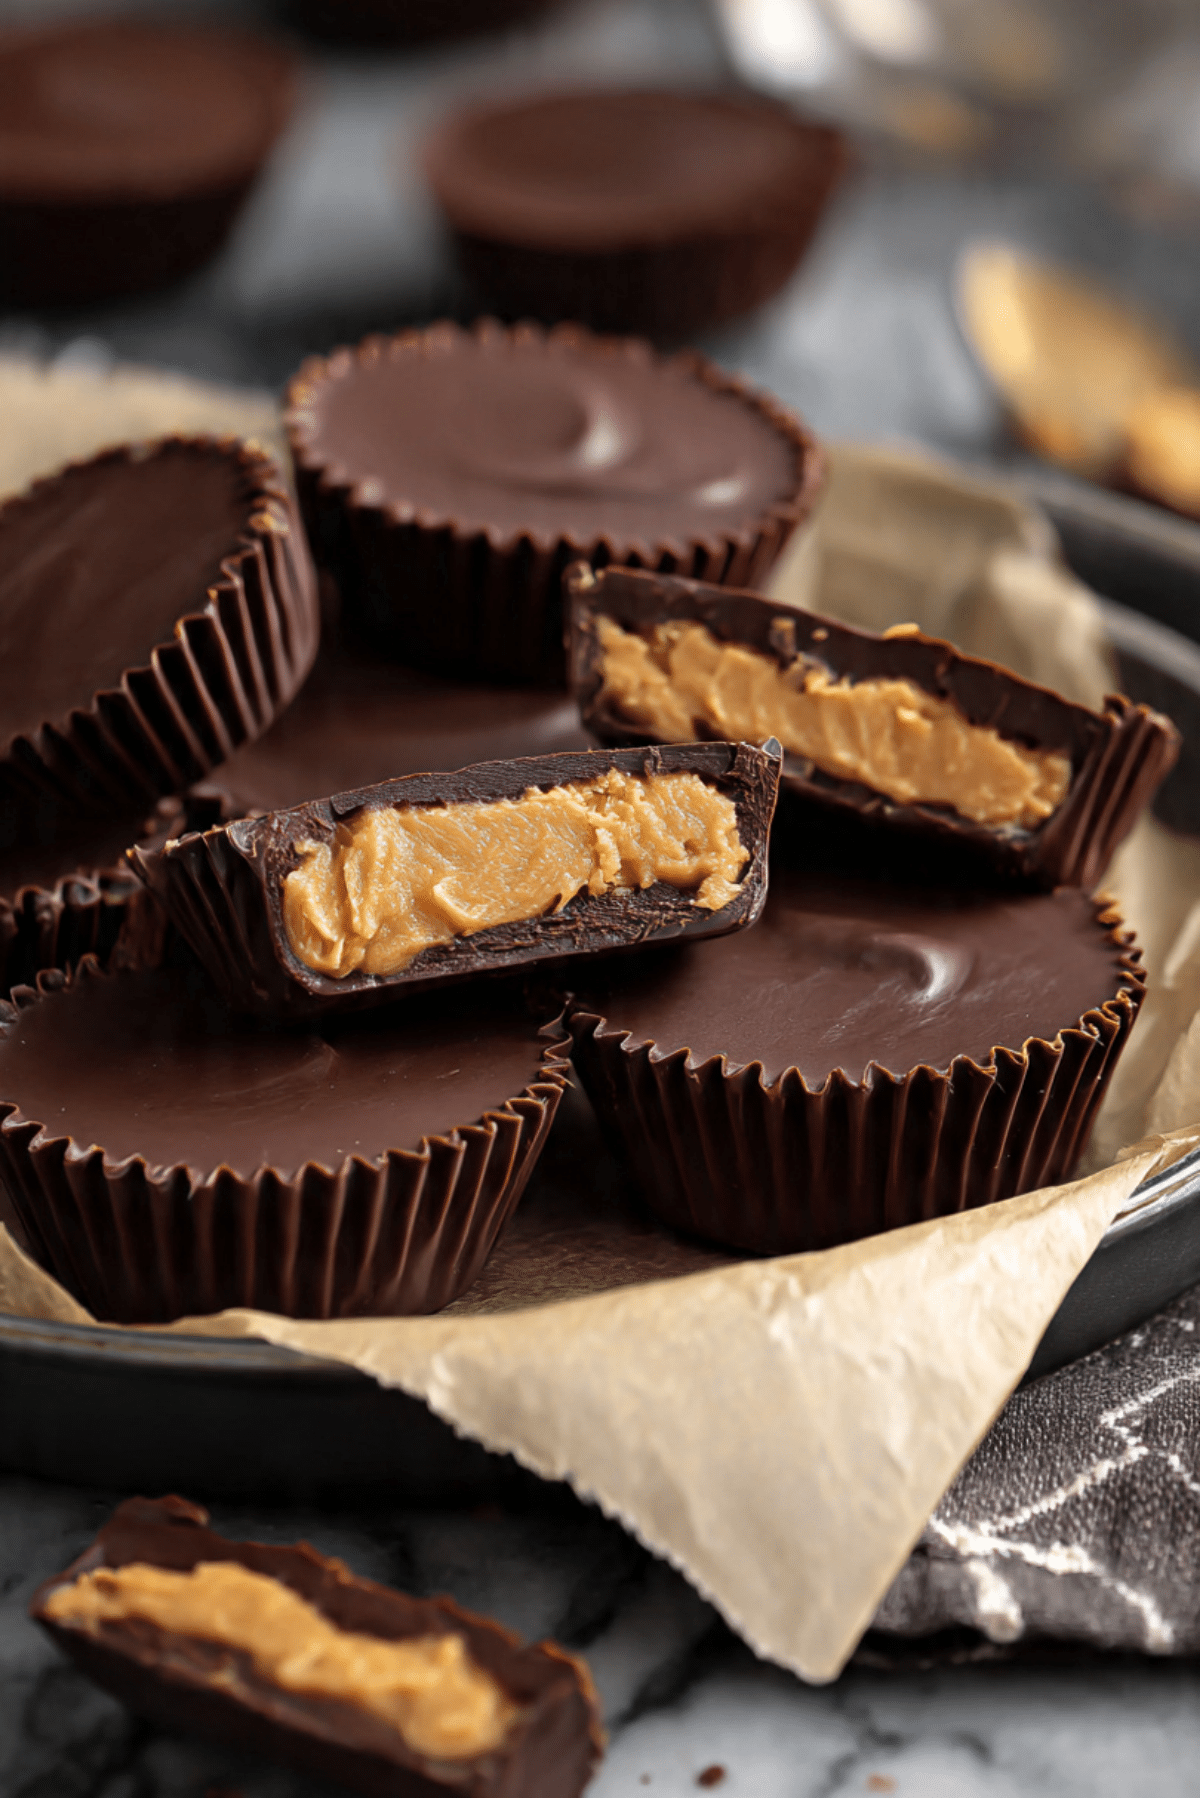
Chocolate Peanut Butter Cups
Few treats strike the perfect balance of rich and creamy like Chocolate Peanut Butter Cups. Whether you grew up pulling them from your lunchbox or treat bag, this homemade version brings that same nostalgic joy — only better. With smooth chocolate, a velvety peanut butter center, and just the right touch of sweetness, they’re dangerously easy to love.
Behind the Recipe
This recipe came from a deep craving for that classic store-bought peanut butter cup — you know the one. But I wanted a version with cleaner ingredients and more peanut butter in every bite. After a few tries in the kitchen, I found the magic ratio, and let me tell you, these are even better than the packaged kind.
Recipe Origin or Trivia
The original peanut butter cup dates back to the 1920s, thanks to H.B. Reese, a former Hershey employee who made candy in his basement. His combo of salty peanut butter and milk chocolate became a sensation, and it’s been a favorite ever since. Homemade versions have since taken over the internet, and for good reason — you control the quality, texture, and flavor.
Why You’ll Love Chocolate Peanut Butter Cups
This sweet treat is everything you love about the original but elevated for today’s kitchen.
Versatile: Use dark, milk, or white chocolate. You can even make them mini.
Budget-Friendly: Only a handful of ingredients and no special equipment.
Quick and Easy: Just melt, mix, pour, and chill. No baking required.
Customizable: Add sea salt, use crunchy peanut butter, or mix in extras.
Crowd-Pleasing: Perfect for parties, gift bags, or snacking straight from the fridge.
Make-Ahead Friendly: They store beautifully and taste even better after a day.
Great for Leftovers: If you somehow don’t eat them all, they freeze like a dream.
Chef’s Pro Tips for Perfect Results
These tips will give you flawless peanut butter cups every time:
- Use high-quality chocolate for the smoothest melt and best flavor.
- Chill the bottom chocolate layer before adding the filling to keep layers defined.
- Don’t overfill the cups — leave room for the top chocolate layer.
- Tap the pan gently to smooth the top layer and release air bubbles.
- Sprinkle a bit of flaky salt on top before chilling for a gourmet touch.
Kitchen Tools You’ll Need
All you need is a few basic tools to get started:
Silicone or Paper Liners: To shape and hold each cup.
Mini Muffin Tin: Helps hold the cups upright and even.
Microwave-Safe Bowl or Double Boiler: For melting chocolate smoothly.
Small Spoon or Cookie Scoop: Makes layering the peanut butter filling neat and easy.
Rubber Spatula: For scraping bowls and getting every last bit.
Ingredients in Chocolate Peanut Butter Cups
The ingredient list is short and sweet — literally.
- Semi-Sweet or Dark Chocolate Chips: 2 cups. For the rich outer shell.
- Creamy Peanut Butter: 1 cup. Smooth and thick for the perfect filling texture.
- Powdered Sugar: 1/2 cup. Sweetens the filling without graininess.
- Unsalted Butter: 2 tablespoons, melted. Helps make the filling silky and spreadable.
- Vanilla Extract: 1/2 teaspoon. Adds warmth and depth to the peanut butter.
- Sea Salt (optional): A pinch on top adds contrast and balances sweetness.
Ingredient Substitutions
Need to adjust for what you have on hand? No problem.
Chocolate Chips: Use chopped chocolate bars or white/milk chocolate.
Peanut Butter: Try almond butter or sunflower seed butter for a twist.
Powdered Sugar: Maple syrup or honey can be used, but will change consistency.
Butter: Coconut oil works well and adds a subtle tropical note.
Ingredient Spotlight
Peanut Butter: Choose a no-stir, creamy variety for best texture and consistency. Natural peanut butters with oil separation may be too runny.
Chocolate: Using a higher quality chocolate will result in a shinier, smoother cup that melts beautifully in your mouth.

Instructions for Making Chocolate Peanut Butter Cups
This recipe is as fun to make as it is to eat. Here’s how to build them:
- Preheat Your Equipment:
Line a mini muffin tin with paper or silicone liners. - Combine Ingredients:
Melt chocolate in a microwave-safe bowl or double boiler until smooth. In another bowl, mix peanut butter, powdered sugar, melted butter, and vanilla until combined. - Prepare Your Cooking Vessel:
Spoon a small amount of melted chocolate into each liner. Tilt or tap gently so it covers the bottom. Freeze for 10 minutes. - Assemble the Dish:
Add a scoop of the peanut butter mixture on top of the set chocolate. Flatten gently with the back of a spoon. - Cook to Perfection:
Spoon more melted chocolate over the top, spreading it to seal in the filling. - Finishing Touches:
Optional: Sprinkle with flaky sea salt. Chill in the fridge or freezer until set, about 30 minutes. - Serve and Enjoy:
Peel away the liners and enjoy straight from the fridge or at room temp for a softer bite.
Texture & Flavor Secrets
These treats hit every note: a snap from the chocolate shell, a soft peanut butter center, and that salty-sweet balance that keeps you coming back. The contrast of creamy and firm textures is what makes them so craveable.
Cooking Tips & Tricks
Want next-level cups? Keep these tips in mind:
- Chill between layers to keep them distinct.
- Stir chocolate often while melting to avoid burning.
- Use silicone liners for easy release and smooth sides.
- Slightly press down the peanut butter layer to avoid gaps.
What to Avoid
A few common mistakes can lead to less-than-perfect cups:
- Don’t overheat the chocolate or it may seize and become grainy.
- Avoid overfilling liners — too much filling will overflow the chocolate shell.
- Don’t skip chilling steps or the layers may not set properly.
Nutrition Facts
Servings: 12
Calories per serving: 220
Note: These are approximate values.
Preparation Time
Prep Time: 15 minutes
Cook Time: 5 minutes
Total Time: 45 minutes (with chilling)
Make-Ahead and Storage Tips
These treats are perfect for make-ahead. Store them in the fridge for up to a week, or freeze for up to 2 months. Just let them thaw a few minutes at room temperature before serving. Great for gifting or snacking on demand.
How to Serve Chocolate Peanut Butter Cups
Serve them as a standalone dessert, pack them in lunchboxes, or display them on a tray with other bite-sized treats. For a fancy touch, drizzle with extra melted chocolate or dust with cocoa powder.
Creative Leftover Transformations
Have extras? Here’s how to repurpose them:
- Peanut Butter Cup Milkshake: Blend with ice cream and milk.
- Brownie Mix-Ins: Chop and fold into brownie batter before baking.
- Cupcake Toppers: Use them to crown frosted cupcakes.
- Trail Mix Boost: Cut into pieces and toss into a sweet trail mix.
Additional Tips
- Use tempered chocolate for a glossy finish.
- Store with parchment between layers to prevent sticking.
- Double the recipe — they disappear fast.
Make It a Showstopper
For gifting or parties, place each cup in a mini paper liner and box them up in clear packaging. Add a gold ribbon and label for a personal touch. You can even make layered versions with white chocolate on top or add crunchy toppings like chopped peanuts.
Variations to Try
- Dark Chocolate Sea Salt: Add a heavy sprinkle of flaky salt on top.
- Crunchy Peanut Butter Cups: Use crunchy peanut butter for added texture.
- Nut-Free Version: Sub in sunflower seed butter or cookie butter.
- Peppermint Chocolate Cups: Add a few drops of peppermint extract to the chocolate.
- Layered Cups: Do one layer of white chocolate on top for a two-tone effect.
FAQ’s
Q1: Can I use natural peanut butter?
Yes, but it may be runnier. You might need to add more powdered sugar to thicken.
Q2: Can I make these vegan?
Absolutely! Use dairy-free chocolate and vegan butter.
Q3: How do I keep them from sticking to the liners?
Use silicone liners or lightly spray paper ones with nonstick spray.
Q4: Can I use a regular muffin tin?
Yes, but they’ll be larger — adjust filling amounts as needed.
Q5: Can I use white chocolate?
Yes! It creates a sweeter twist and looks beautiful layered.
Q6: How long do they last in the fridge?
Up to 1 week in an airtight container.
Q7: Can I add protein powder to the filling?
Yes, but reduce powdered sugar slightly to maintain texture.
Q8: Can I melt the chocolate on the stove?
Yes, use a double boiler to gently melt it without scorching.
Q9: Can I make these keto-friendly?
Use sugar-free chocolate and a low-carb sweetener like erythritol.
Q10: Can I make mini versions?
Yes! Use mini liners and a mini muffin pan for bite-sized cups.
Conclusion
Chocolate Peanut Butter Cups are the perfect mix of creamy, rich, and satisfying. Whether you’re craving a quick treat or prepping for a party, these homemade gems deliver in every bite. Trust me, it’s worth every swirl of melted chocolate.
PrintChocolate Peanut Butter Cups
These homemade chocolate peanut butter cups are a sweet and salty dream, with a smooth, creamy peanut butter center and rich chocolate shell. They’re easy to make, freezer-friendly, and perfect for snacking or gifting.
Ingredients
- 2 cups semi-sweet or dark chocolate chips
- 1 cup creamy peanut butter
- 1/2 cup powdered sugar
- 2 tablespoons unsalted butter, melted
- 1/2 teaspoon vanilla extract
- Sea salt (optional), for sprinkling
Instructions
- Line a mini muffin tin with paper or silicone liners.
- Melt the chocolate in a microwave-safe bowl or double boiler until smooth.
- In a separate bowl, mix peanut butter, powdered sugar, melted butter, and vanilla until smooth.
- Spoon a small amount of melted chocolate into each liner and tilt or tap gently to cover the bottom. Freeze for 10 minutes.
- Add a scoop of the peanut butter mixture on top of the set chocolate and flatten gently.
- Spoon more melted chocolate over the top to seal the cups.
- Optional: sprinkle a bit of sea salt on top for contrast.
- Chill in the fridge or freezer until fully set, about 30 minutes.
- Peel away liners and enjoy chilled or at room temperature.
Notes
- Use high-quality chocolate for the smoothest results.
- Chill between each step to create neat layers.
- Store in the fridge for a firmer bite or at room temp for a softer texture.
- Double the recipe — they’re gone before you know it.