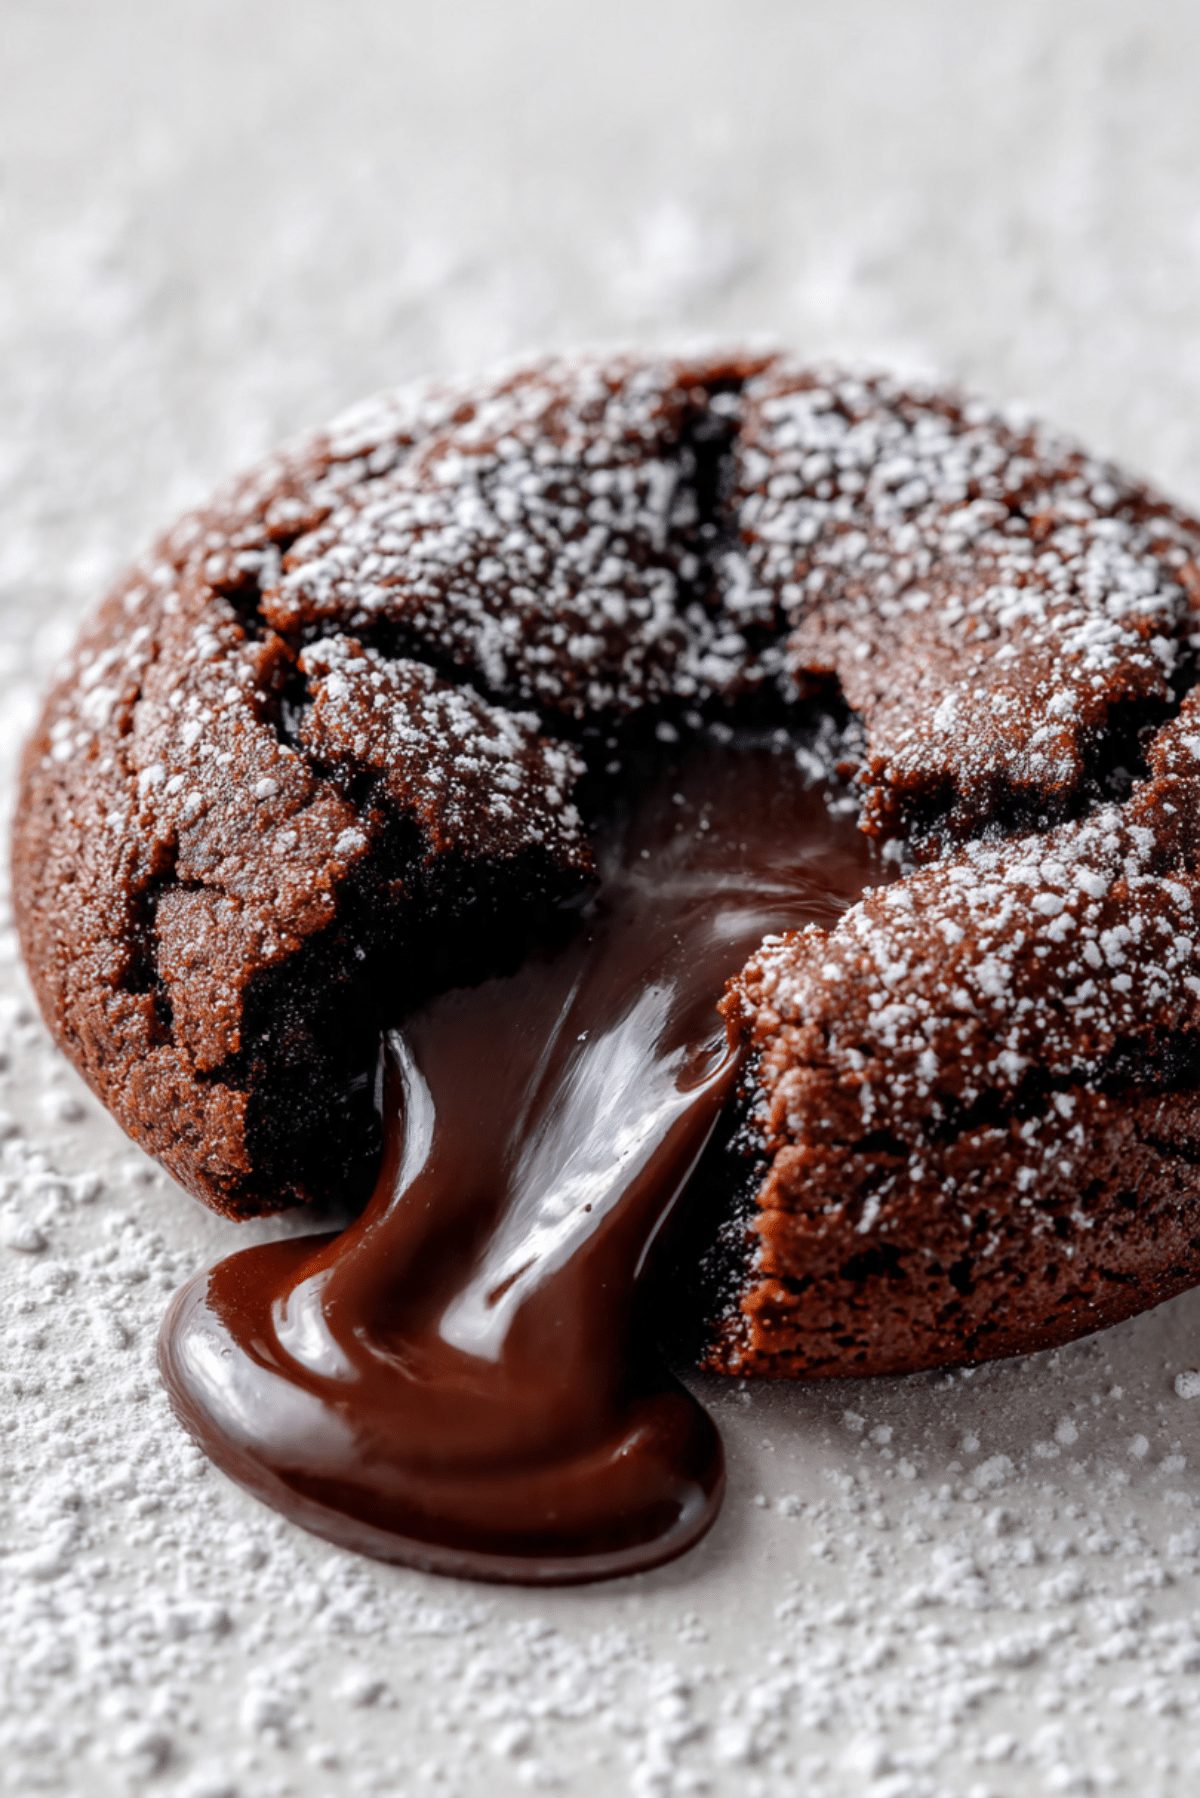
Chocolate Lava Cookies
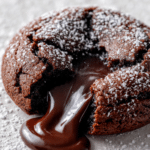
There is something truly hypnotic about a dessert that hides a secret, and these Chocolate Lava Cookies are the ultimate magic trick for your taste buds. Imagine biting into a soft, intensely dark chocolate cookie only to have a warm, velvety river of molten chocolate come rushing out to meet you. I still remember the first batch I perfected, the way the powdered sugar drifted like snow over the warm surface and that first, incredible moment the center gave way. Let me tell you, it’s worth every bite, and it’s the kind of treat that turns a regular Tuesday into a five-star experience.
A Decadent Twist on a Classic Comfort
While a standard chocolate chip cookie is always a friend, the lava cookie is a sophisticated upgrade that feels like a warm hug from a gourmet pastry chef. This recipe takes the beloved concept of a lava cake and shrinks it down into a portable, hand-held indulgence that is surprisingly easy to master. It is the perfect balance of a slightly crisp outer edge and a center so gooey it practically begs for a cold glass of milk. Trust me, you’re going to love this because it delivers a high-impact chocolate experience without requiring a culinary degree to pull off.
From Fine Dining to Your Cookie Sheet
The “molten” chocolate trend actually exploded in the late 1980s in the world of fine dining, where individual lava cakes became the must-have dessert at every high-end bistro. Chefs loved the theater of the flowing center, and it wasn’t long before home bakers wanted to bring that same drama to their own kitchens. By adapting this technique into a cookie format, we’ve created a more casual but equally impressive version of the classic. It is a modern favorite that captures the luxury of a restaurant dessert in the cozy, approachable shape of a cookie.
Why This Recipe is a Total Game-Changer
These cookies are destined to become your most-requested treat for parties, holidays, or just because you deserve a win.
Versatile: Serve them warm for the full lava effect or at room temperature for a dense, truffle-like experience.
Budget-Friendly: You likely have the flour, cocoa, and sugar in your pantry, making the only real “investment” a bar of high-quality chocolate.
Quick and Easy: The dough comes together fast, and the stuffing technique is much simpler than it looks once you get the hang of it.
Customizable: You can experiment with different fillings like peanut butter or white chocolate to keep things interesting.
Crowd-Pleasing: No one can resist the sight of that molten center, making these an instant hit at any gathering.
Make-Ahead Friendly: You can prep the dough balls and freeze them, then bake them off whenever a chocolate craving strikes.
Great for Leftovers: Even the next day, a quick ten seconds in the microwave brings that molten center right back to life.
Expert Secrets for the Molten Flow
The key to a successful lava cookie lies in the temperature and the timing of your bake.
The most important tip is to chill your chocolate ganache or filling pieces until they are rock solid before wrapping the dough around them. This ensures the filling doesn’t melt and soak into the dough before the cookie has a chance to set its structure. Also, be sure to seal the dough completely around the center with no cracks, or your “lava” might stage a premature breakout on the baking sheet. Finally, don’t overbake these, as the residual heat will continue to cook the center if you leave them in too long.
Essential Tools for Chocolate Perfection
Using the right tools will make the stuffing process much cleaner and ensure your cookies bake evenly.
Large Baking Sheets: You want plenty of space between the cookies so the heat can circulate and set the edges properly.
Cookie Scoop: Using a scoop ensures every cookie is the same size, which is vital for consistent baking times.
Parchment Paper: This prevents the delicate bottoms from sticking and makes clean-up a breeze if any lava escapes.
Wire Cooling Rack: Allowing the cookies to rest for a few minutes on a rack helps the base firm up while keeping the center warm.
Small Fine-Mesh Sieve: For that professional-looking dusting of powdered sugar right before serving.
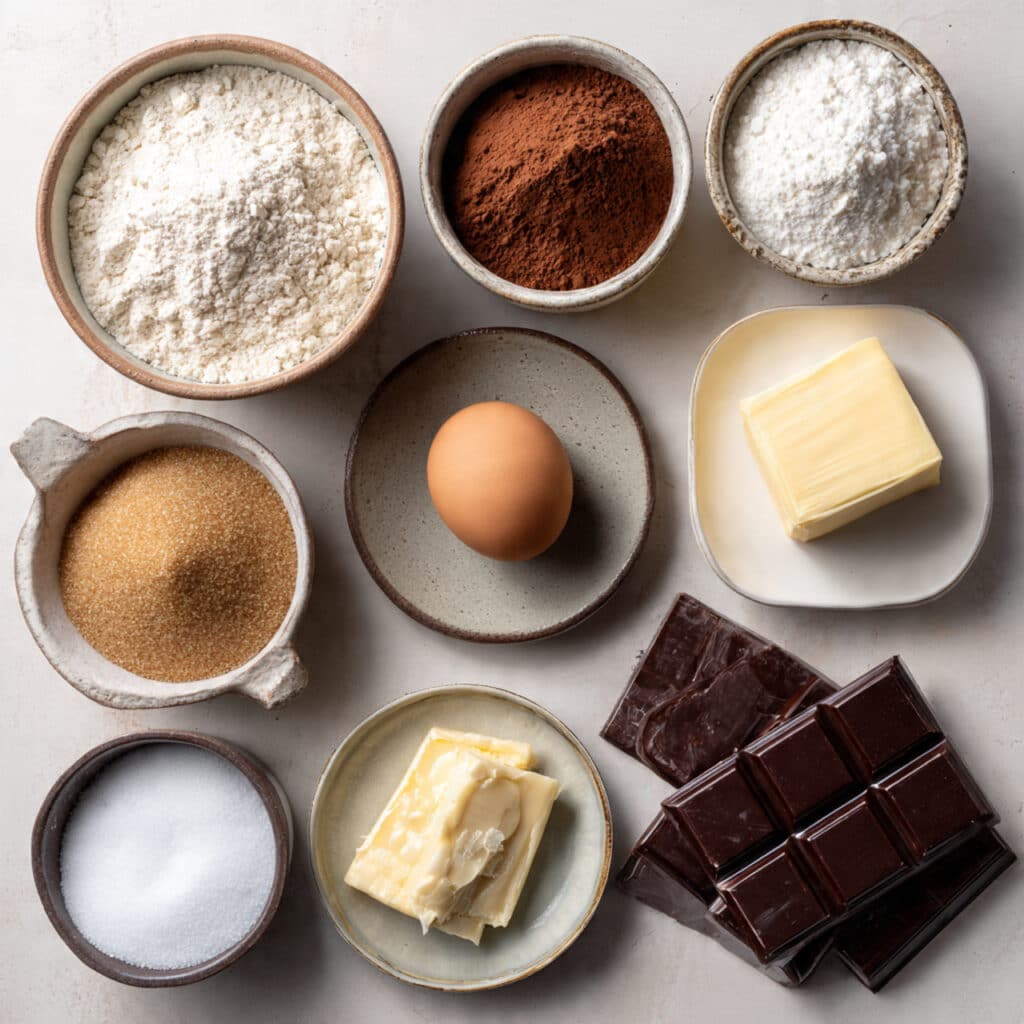
Ingredients You Will Need For The Cookies
This ingredient list is all about building layers of chocolate flavor and achieving that specific molten-to-soft texture.
- Unsalted Butter: 1/2 cup melted and cooled which adds richness and creates a slightly chewy, fudgy cookie structure.
- Granulated Sugar: 1/2 cup to provide sweetness and help the edges get that necessary slight crispness.
- Light Brown Sugar: 1/2 cup packed for moisture and a hint of molasses that deepens the cocoa flavor.
- Large Egg: 1 room temperature to bind the dough and provide the structure needed to hold the filling.
- Vanilla Extract: 1 teaspoon which acts as a flavor enhancer for the chocolate, making it taste more intense.
- All-Purpose Flour: 1.25 cups providing the foundation for the cookie dough without making it too heavy.
- Unsweetened Cocoa Powder: 1/2 cup preferably Dutch-processed for a darker color and a smoother, richer taste.
- Baking Soda: 1/2 teaspoon to give the cookies just enough lift to stay soft and plush.
- Salt: 1/4 teaspoon to sharpen the chocolate notes and balance the sugar.
- High-Quality Dark Chocolate: 4 ounces broken into small chunks or prepared as chilled ganache balls for the center.
- Powdered Sugar: 2 tablespoons for the final decorative dusting that adds a touch of extra sweetness.
Flexible Ingredient Substitutions
If you are missing an item, you can use these alternatives to keep your baking session moving forward.
Light Brown Sugar: Dark brown sugar is an excellent substitute and will make the cookies even more fudgy and dark.
All-Purpose Flour: You can use a gluten-free 1:1 baking flour blend as long as it contains xanthan gum for structure.
Unsweetened Cocoa Powder: In a pinch, natural cocoa powder works, though the cookies will be slightly lighter in color and more acidic.
Dark Chocolate Center: You can substitute with a large semi-sweet chocolate chip or even a small frozen dollop of chocolate hazelnut spread.
Spotlight on Key Ingredients
Dutch-Processed Cocoa: This specific type of cocoa has been neutralized of its acidity, resulting in a deeper, darker chocolate flavor and a beautiful mahogany color that looks professional.
High-Quality Chocolate Bar: Since the center is the star of the show, using a real chocolate bar instead of chips ensures a much smoother and more reliable molten flow.
Step-by-Step Chocolate Lava Cookie Instructions
Follow these steps carefully to ensure your cookies have that perfect, hidden molten surprise.
- Preheat Your Equipment: Set your oven to 350°F (175°C) and line two large baking sheets with parchment paper to ensure nothing sticks.
- Combine Ingredients: In a large bowl, whisk together the melted butter and both sugars until smooth, then whisk in the egg and vanilla until the mixture is glossy.
- Prepare Your Cooking Vessel: Sift the flour, cocoa powder, baking soda, and salt into the wet ingredients and fold them in gently until a thick, dark dough forms.
- Assemble the Dish: Take a tablespoon of dough, flatten it in your palm, place a chilled piece of chocolate in the center, and wrap the dough around it, rolling it into a smooth ball.
- Cook to Perfection: Place the dough balls on the baking sheets and bake for 10 to 12 minutes or until the edges are set but the centers still look slightly soft and underdone.
- Finishing Touches: Let the cookies rest on the baking sheet for at least 5 minutes to firm up, then carefully transfer them to a rack.
- Serve and Enjoy: Dust with a generous coating of powdered sugar while still warm and serve immediately for the best molten effect.
A Decadent Contrast of Textures
When you take your first bite, you’ll experience a wonderful sequence of textures that makes this cookie so addictive. The outer shell has a very thin, delicate crunch that immediately gives way to a soft, brownie-like interior. Then, almost instantly, the warm molten chocolate floods your palate, providing a smooth and silky contrast to the crumb of the cookie. The flavor is deep, dark, and sophisticated, with the powdered sugar adding a light, airy finish to the rich cocoa base.
Pro Tips for Baking Success
- Chill the Filling: Ensure your chocolate centers are very cold or even frozen before wrapping them to keep the “lava” intact.
- Don’t Overbake: These cookies look underdone when they come out, but they will firm up as they cool; overbaking will dry out the center.
- Seal the Seams: Spend an extra second rolling the balls to make sure there are no gaps where the chocolate could leak out.
- Use a Bar: Chopping a chocolate bar creates a better melt than chocolate chips, which are designed to hold their shape.
Mistakes to Watch For
- Room Temp Butter: Using butter that is too hot will make the dough greasy and hard to handle, so let it cool after melting.
- Leaking Centers: If you don’t use enough dough to cover the chocolate, it will burst through the side during baking.
- Cold Cookies: If you wait too long to eat them, the center will solidify, so reheat them briefly to bring back the lava.
Estimated Nutritional Information
Servings: 12
Calories per serving: 285
Note: These are approximate values.
Timing Your Bake
Prep Time: 25 minutes
Cook Time: 12 minutes
Total Time: 37 minutes
Storage and Freshness Tips
These cookies are best enjoyed warm, but they store well in an airtight container at room temperature for up to 3 days. To get that molten center back, simply pop a cookie in the microwave for 10 to 15 seconds. You can also freeze the unbaked dough balls for up to 2 months and bake them directly from the freezer, just add an extra 2 minutes to the baking time.
Perfect Pairings for Your Cookies
A cold glass of whole milk is the classic partner for these rich cookies, as the creaminess cuts through the intense dark chocolate. For a more grown-up pairing, serve them alongside a cup of strong espresso or a tart raspberry coulis to provide a bright, fruity contrast to the deep cocoa notes.
Repurposing Your Leftovers
If you find yourself with extra cookies, you can crumble them over a bowl of high-quality vanilla bean ice cream for a “deconstructed” lava cake sundae. You could also chop them up and fold them into a cheesecake batter for an incredible chocolate swirl effect.
Final Flourishes for Flavor
Try adding a tiny pinch of flaky sea salt on top of the powdered sugar to create a salted chocolate profile that is incredibly trendy and delicious. For a festive touch, you can add a drop of peppermint extract to the dough for a “lava thin mint” vibe.
Making a Visual Masterpiece
To make these look truly professional, wait until they are just barely warm before dusting with powdered sugar so it doesn’t melt into the cookie. You can also place a few extra shavings of chocolate on top right after they come out of the oven so they melt into beautiful, glossy swirls.
Creative Variations to Explore
- Peanut Butter Lava: Use a frozen dollop of creamy peanut butter in the center instead of chocolate.
- White Chocolate Contrast: Stuff the dark chocolate dough with a piece of high-quality white chocolate.
- Hazelnut Heaven: Use a small scoop of chilled chocolate hazelnut spread for a Nutella-style flow.
- Salted Caramel Center: Wrap the dough around a soft caramel square for a chewy, gooey surprise.
FAQ’s
Q1: Can I use cocoa powder for the center?
A1: No, the center needs actual chocolate or a ganache to create the liquid “lava” effect.
Q2: Why did my cookies flatten out so much?
A2: This usually happens if the butter was too warm when mixing or if the dough wasn’t chilled slightly before baking.
Q3: My chocolate center didn’t melt, why?
A3: You might have overbaked the cookies or used chocolate chips with stabilizers; try a high-quality baking bar next time.
Q4: Can I make these giant-sized?
A4: Yes, but you will need to increase the baking time by 3 to 5 minutes and ensure the center is adequately covered.
Q5: Is Dutch-processed cocoa mandatory?
A5: It isn’t mandatory, but it provides the best color and a less bitter flavor that really complements the molten center.
Q6: Can I freeze the baked cookies?
A6: Yes, they freeze well for a month; just reheat them in the oven or microwave before serving.
Q7: How do I know when they are done?
A7: Look for the edges to be dull and set while the very center still has a slight sheen or looks soft.
Q8: Can I use milk chocolate for the center?
A8: Absolutely, milk chocolate will be even sweeter and flow just as well as dark chocolate.
Q9: Why did the powdered sugar disappear?
A9: The cookies were likely too hot when you dusted them; wait until they are warm, not hot.
Q10: Can I add nuts to the dough?
A10: Yes, finely chopped walnuts or pecans would add a great texture to the soft cookie shell.
Conclusion
These Chocolate Lava Cookies are more than just a sweet treat, they are an experience that brings joy to everyone at the table. Whether you are making them for a special date night or a family movie marathon, the surprise of the molten center never fails to impress. This one’s a total game-changer for your baking repertoire, and I can’t wait for you to see the look on your friends’ faces when they take that first bite. Let me tell you, it’s worth every bite, and I hope you enjoy every gooey, chocolatey second of it.
PrintChocolate Lava Cookies
A decadent chocolate cookie that mimics a classic lava cake, featuring a soft, brownie-like exterior and a warm, molten dark chocolate center.
Ingredients
- Unsalted Butter: 1/2 cup melted and cooled
- Granulated Sugar: 1/2 cup
- Light Brown Sugar: 1/2 cup packed
- Large Egg: 1 room temperature
- Vanilla Extract: 1 teaspoon
- All-Purpose Flour: 1.25 cups
- Unsweetened Cocoa Powder: 1/2 cup
- Baking Soda: 1/2 teaspoon
- Salt: 1/4 teaspoon
- High-Quality Dark Chocolate: 4 ounces broken into chunks
- Powdered Sugar: 2 tablespoons for dusting
Instructions
- Preheat oven to 350°F (175°C) and line baking sheets with parchment paper.
- Whisk together melted butter and both sugars, then add the egg and vanilla extract.
- Sift in the flour, cocoa powder, baking soda, and salt, folding until a thick dough forms.
- Flatten a tablespoon of dough, place a chilled chocolate chunk in the center, and roll into a smooth ball.
- Place on baking sheets and bake for 10 to 12 minutes until edges are set.
- Let cookies rest on the sheet for 5 minutes to firm up.
- Dust with powdered sugar while still warm and serve immediately.
Notes
- Note: Chill the chocolate chunks or ganache in the freezer before stuffing to ensure a liquid center.
- Be careful to seal all seams in the dough to prevent the chocolate from leaking during baking.
- Do not overbake; the cookies should look slightly soft in the middle when removed from the oven.